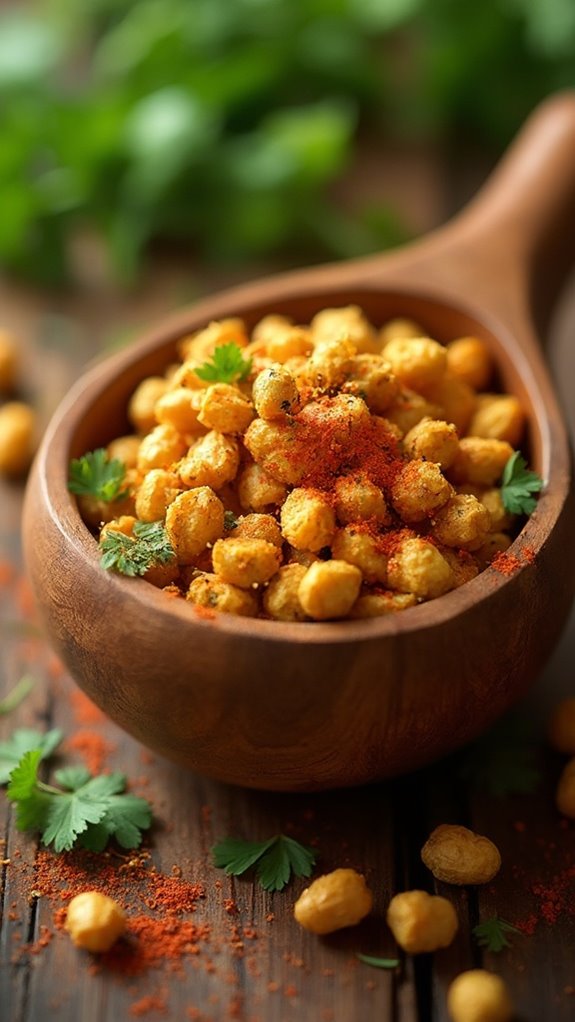
15 Air Fryer Appetizer Recipe Ideas
Looking for tasty air fryer appetizer ideas? You’ve hit the jackpot! Try crispy Buffalo cauliflower, garlic Parmesan Brussels sprouts, or stuffed mushrooms to wow your guests. Can’t forget the delightful spinach and artichoke dip bites or classic chicken wings—easy to make and even easier to eat! Want something unexpected? Whip up air fryer cheese sticks or veggie spring rolls. Feeling adventurous? How about shrimp tacos or even chocolate-covered bananas for a sweet twist? With these options, you’ll keep everyone coming back for more. Curious about how to make these dishes irresistible? There’s a treasure trove of tips waiting for you!
1.Crispy Air Fryer Buffalo Cauliflower
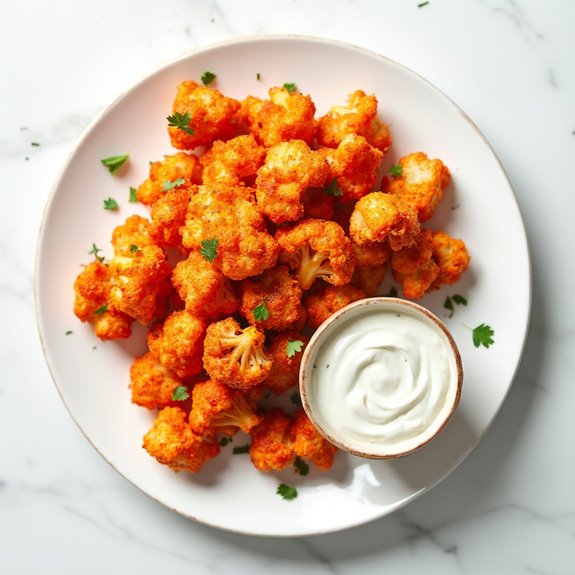
Title: Crispy Air Fryer Buffalo Cauliflower
Prep Time: 15 minutes
Cook Time: 20 minutes
Number of Servings: 4
Required Equipment List: Air fryer, mixing bowl, measuring cups, measuring spoons, spatula
Cuisine Type: American
Crispy Air Fryer Buffalo Cauliflower is a fantastic appetizer that satisfies cravings for spicy flavors while being plant-based. This dish transforms cauliflower into crunchy bites coated in a zesty buffalo sauce, making it an irresistible option for game days, parties, or a tasty snack at home.
The air fryer method guarantees that the cauliflower is perfectly crispy without the need for deep frying, making it a healthier alternative to traditional buffalo wings. The flavors of this dish are bold and exciting, thanks to the combination of hot sauce and a touch of garlic powder.
You can easily adjust the spiciness level to your liking by varying the amount of buffalo sauce used. Serve these crispy bites with a side of ranch or blue cheese dressing for dipping to elevate the experience even further. Whether you’re a vegetarian or just looking for a fun appetizer, this crispy air fryer buffalo cauliflower is sure to be a crowd-pleaser.
Ingredients:
- 1 medium head of cauliflower, cut into florets
- 1 cup all-purpose flour
- 1 teaspoon garlic powder
- 1 teaspoon paprika
- 1/2 teaspoon salt
- 1/2 teaspoon black pepper
- 1 cup water
- 1 cup buffalo sauce
- Cooking spray
Instructions:
- Begin by preparing the cauliflower florets. Wash and cut the cauliflower into bite-sized pieces, making sure they’re uniform for even cooking. Pat them dry with a paper towel to remove excess moisture, which will help them crisp up in the air fryer.
- In a mixing bowl, combine the flour, garlic powder, paprika, salt, and black pepper. Gradually add the water to the dry ingredients, whisking until you have a smooth batter. The consistency should be thick enough to coat the cauliflower but not too runny.
- Dip each cauliflower floret into the batter, making sure it’s fully coated. Allow any excess batter to drip off before placing the florets in the air fryer basket. Make sure to arrange them in a single layer for maximum crispiness.
- Preheat the air fryer to 400°F (200°C) and lightly spray the basket with cooking spray. Place the battered cauliflower in the air fryer and cook for about 15 minutes, shaking the basket halfway through to guarantee even cooking. The florets should be golden brown and crispy when done.
- Once cooked, transfer the cauliflower to a large bowl and pour the buffalo sauce over the top. Toss gently until all florets are evenly coated in the sauce. Return the cauliflower to the air fryer for an additional 5 minutes to set the sauce and enhance the crispiness.
- After the final cooking time, remove the buffalo cauliflower from the air fryer and serve immediately. Pair with your favorite dipping sauce and enjoy!
Extra Tips: For a milder version, you can use a milder hot sauce or mix in a bit of honey to balance the heat. If you want an extra crispy texture, consider double-dipping the cauliflower by re-coating them in the batter and air frying them a second time.
This dish is also versatile; feel free to experiment with different seasonings or sauces to create your own unique flavor profile. Enjoy your delicious and crispy appetizer!
2.Garlic Parmesan Air Fryer Brussels Sprouts
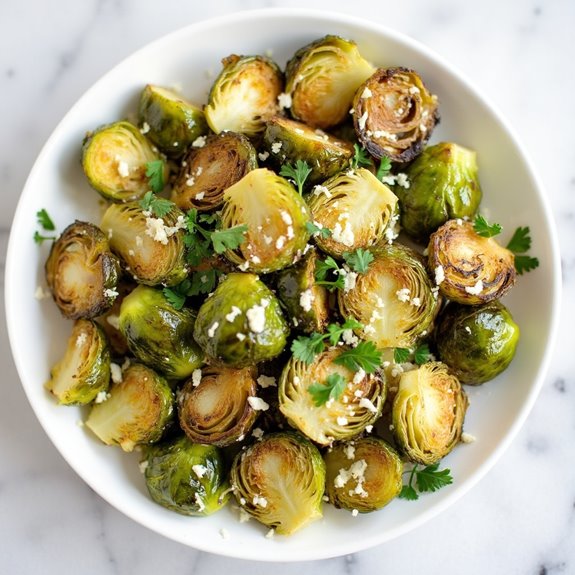
Title: Garlic Parmesan Air Fryer Brussels Sprouts
Prep Time: 10 minutes
Cook Time: 15 minutes
Number of Servings: 4
Required Equipment List: Air fryer, mixing bowl, measuring spoons
Cuisine Type: American
Garlic Parmesan Air Fryer Brussels Sprouts are a deliciously crispy and flavorful appetizer that brings the best out of this often-overlooked vegetable. The air fryer cooks the Brussels sprouts to perfection, giving them a beautiful golden-brown exterior while keeping the insides tender. Tossed with garlic, olive oil, and freshly grated Parmesan cheese, these sprouts aren’t only packed with flavor but are also an excellent healthy option for snack time or as a side dish.
This recipe is incredibly simple and quick to prepare, making it perfect for busy weeknights or entertaining guests. The combination of garlic and Parmesan creates a savory aroma that will have everyone coming back for seconds!
Plus, the air fryer guarantees that you get that satisfying crunch with less oil than traditional frying methods, making this dish a guilt-free indulgence.
Ingredients:
- 1 pound Brussels sprouts, trimmed and halved
- 2 tablespoons olive oil
- 2 cloves garlic, minced
- 1/4 cup grated Parmesan cheese
- Salt and pepper to taste
- 1/2 teaspoon paprika (optional)
- Fresh parsley, chopped (for garnish, optional)
Instructions:
- Preheat your air fryer to 375°F (190°C). This guarantees that your Brussels sprouts will cook evenly and develop that desired crispiness.
- In a mixing bowl, combine the halved Brussels sprouts, olive oil, minced garlic, salt, pepper, and paprika if using. Toss everything together until the Brussels sprouts are well coated.
- Place the seasoned Brussels sprouts in the air fryer basket in a single layer, being careful not to overcrowd them. This will allow for better air circulation and crisping.
- Cook the Brussels sprouts in the air fryer for 15 minutes, shaking the basket halfway through to guarantee even cooking. They should be golden brown and crispy when done.
- Once cooked, remove the Brussels sprouts from the air fryer and immediately toss them with the grated Parmesan cheese while they’re still hot. The heat will help the cheese melt slightly, adhering to the sprouts.
- Serve the Garlic Parmesan Brussels sprouts warm, garnished with chopped fresh parsley for a pop of color and added flavor.
Extra Tips: For extra crunch, consider adding a sprinkle of panko breadcrumbs along with the Parmesan cheese before serving. If you like a bit of heat, feel free to add some red pepper flakes to the seasoning mix.
These Brussels sprouts can also be prepared ahead of time and reheated in the air fryer for a few minutes before serving, making them a great make-ahead appetizer! Enjoy your flavorful and healthy creation!
3.Air Fryer Stuffed Mushrooms

Title: Air Fryer Stuffed Mushrooms
Prep Time: 15 minutes
Cook Time: 10 minutes
Number of Servings: 4
Required Equipment List: Air fryer, mixing bowl, spoon, measuring cups, and spoons
Cuisine Type: Italian-American
Air Fryer Stuffed Mushrooms are a delicious and easy-to-make appetizer that will impress your guests and family alike. These bite-sized treats are filled with a savory mixture of cream cheese, garlic, herbs, and breadcrumbs, delivering a rich flavor with every bite.
Cooking them in the air fryer not only makes them healthier by reducing the amount of oil needed but also achieves a perfectly crispy texture on the outside while keeping the mushrooms succulent on the inside.
This recipe is incredibly versatile; you can customize the filling by adding your favorite ingredients like crumbled sausage, spinach, or various cheeses. Preparing these stuffed mushrooms in the air fryer is quick and efficient, making them an ideal choice for parties or as a delightful addition to any meal.
Serve them warm, and watch them disappear quickly!
Ingredients:
- 16 large fresh mushrooms
- 1 cup cream cheese, softened
- 1/2 cup breadcrumbs
- 1 clove garlic, minced
- 2 tablespoons fresh parsley, chopped
- 1/4 teaspoon salt
- 1/4 teaspoon pepper
- 1/4 teaspoon Italian seasoning
- Olive oil spray
Instructions:
- Begin by preheating your air fryer to 375°F (190°C). While it’s heating, clean the mushrooms with a damp cloth and carefully remove the stems, setting them aside for later use.
- In a mixing bowl, combine the softened cream cheese, breadcrumbs, minced garlic, chopped parsley, salt, pepper, and Italian seasoning. Mix well until all ingredients are fully incorporated into a creamy filling.
- Take each mushroom cap and fill it generously with the cream cheese mixture, pressing down slightly to confirm the filling stays in place.
- Once all the mushrooms are filled, lightly spray them with olive oil on all sides to help them crisp up during cooking.
- Arrange the stuffed mushrooms in a single layer in the air fryer basket, making sure they aren’t overcrowded. You may need to cook them in batches depending on the size of your air fryer.
- Cook the stuffed mushrooms in the air fryer for about 8-10 minutes or until they’re golden brown and the filling is heated through. Keep an eye on them to prevent overcooking.
Extra Tips: For an extra flavor boost, consider adding some grated Parmesan cheese to the filling mixture. If you enjoy a bit of spice, a pinch of red pepper flakes can be added for heat.
These stuffed mushrooms can also be prepared ahead of time and stored in the refrigerator; simply air fry them right before serving for a fresh, warm appetizer. Enjoy your delicious creation!
4.Spinach and Artichoke Dip Bites

Title: Spinach and Artichoke Dip Bites
Prep Time: 15 minutes
Cook Time: 12 minutes
Number of Servings: 12
Required Equipment List: Air fryer, mixing bowl, spoon, baking sheet, parchment paper
Cuisine Type: American
These Spinach and Artichoke Dip Bites are a delightful and easy-to-make appetizer that will impress your guests at any gathering. They feature a creamy spinach and artichoke filling encased in crispy pastry shells, perfectly cooked in the air fryer for a healthier twist. The combination of flavors—rich cream cheese, tangy artichokes, and fresh spinach—makes each bite a mouthwatering experience.
Ideal for parties, game days, or holiday gatherings, these bites are sure to be a crowd-pleaser. Using store-bought phyllo or puff pastry makes the preparation quick and stress-free, while the air fryer guarantees a crunchy exterior without the need for excessive oil. Serve these delicious bites warm with a side of marinara or ranch dressing for dipping, and watch them disappear in no time.
Whether you’re hosting a party or simply want a tasty snack, Spinach and Artichoke Dip Bites will elevate your appetizer game.
Ingredients:
- 1 cup fresh spinach, chopped
- 1 cup canned artichoke hearts, drained and chopped
- 4 ounces cream cheese, softened
- 1/2 cup shredded mozzarella cheese
- 1/4 cup grated Parmesan cheese
- 1/2 teaspoon garlic powder
- Salt and pepper to taste
- 1 package of phyllo pastry or puff pastry
- Olive oil spray
Instructions:
- In a mixing bowl, combine the chopped spinach, chopped artichoke hearts, cream cheese, mozzarella cheese, Parmesan cheese, garlic powder, salt, and pepper. Mix until all ingredients are well blended and set aside.
- If using phyllo pastry, lay out a sheet and lightly brush with olive oil. Place another layer of phyllo on top and repeat until you have about 3-4 layers. If using puff pastry, roll it out on a lightly floured surface to your desired thickness.
- Cut the pastry into squares, approximately 3×3 inches in size. Place a generous spoonful of the spinach and artichoke mixture in the center of each square.
- Carefully fold the corners of the pastry over the filling to create a pocket, pinching the edges to seal them. If using phyllo, you can also create a triangle shape by folding the pastry over the filling.
- Preheat your air fryer to 375°F (190°C). Lightly spray the air fryer basket with olive oil. Place the filled pastry bites in a single layer in the basket, making sure they aren’t overcrowded.
- Cook the bites in the air fryer for 10-12 minutes, or until they’re golden brown and crispy. You may need to do this in batches depending on the size of your air fryer.
Extra Tips: For a touch of extra flavor, consider adding a squeeze of lemon juice or some chopped fresh herbs like parsley or dill to the filling. If you want a bit of heat, a pinch of red pepper flakes can also be added.
Make sure to keep any unused pastry covered with a damp cloth to prevent it from drying out while you work. These bites are best enjoyed fresh out of the air fryer but can also be reheated in the air fryer for a few minutes before serving. Enjoy your delicious bites!
5.Air Fryer Chicken Wings
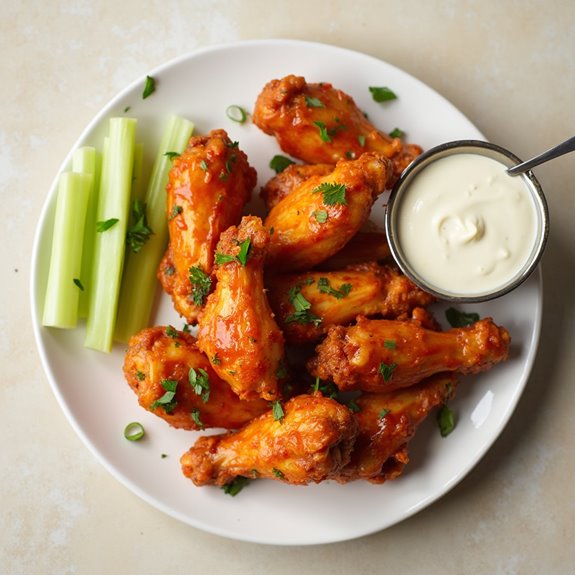
Title: Air Fryer Chicken Wings
Prep Time: 10 minutes
Cook Time: 25 minutes
Number of Servings: 4
Required Equipment List: Air fryer, mixing bowl, tongs, cooking spray
Cuisine Type: American
Air Fryer Chicken Wings are a game-changing appetizer that delivers the perfect combination of crispy skin and juicy meat without the extra oil that traditional frying requires. Using an air fryer not only makes the cooking process quicker and easier, but it also results in healthier wings that are just as delicious as their deep-fried counterparts.
These wings can be seasoned to your liking, making them versatile for various flavor profiles—from classic buffalo to sweet and sticky barbecue. In just a short amount of time, you’ll have a dish that’s ideal for game days, parties, or a cozy night in.
Pair them with your favorite dipping sauces and sides for a complete meal that everyone will love. Whether you’re entertaining guests or just treating yourself, these air fryer chicken wings are sure to impress and satisfy your cravings.
Ingredients:
- 2 pounds chicken wings
- 1 tablespoon olive oil
- 1 teaspoon garlic powder
- 1 teaspoon onion powder
- 1 teaspoon smoked paprika
- 1 teaspoon salt
- 1/2 teaspoon black pepper
- 1/2 teaspoon cayenne pepper (optional)
- Your favorite wing sauce (e.g., buffalo, barbecue, teriyaki)
Instructions:
- Start by preheating your air fryer to 400°F (200°C) for about 5 minutes. This step guarantees that the wings cook evenly and develop a nice crispy texture once they’re added.
- While the air fryer is preheating, place the chicken wings in a mixing bowl and drizzle them with olive oil. Add garlic powder, onion powder, smoked paprika, salt, black pepper, and cayenne pepper if you prefer a kick. Toss the wings until they’re well-coated with the seasoning.
- Once the air fryer is ready, arrange the seasoned chicken wings in a single layer in the fryer basket. Be sure not to overcrowd the basket to allow proper air circulation for even cooking. You may need to work in batches depending on the size of your air fryer.
- Cook the wings for 25 minutes, shaking the basket halfway through to guarantee they cook evenly. For extra crispiness, you can increase the cooking time by a few minutes, but keep a close eye on them to prevent burning.
- Once cooked, remove the wings from the air fryer and toss them in your favorite wing sauce in a clean mixing bowl. Confirm they’re well-coated before serving.
Extra Tips: For even more flavor, consider marinating the wings in the seasoning for a few hours or overnight before cooking. This will enhance the taste and tenderness of the meat.
Additionally, if you enjoy a crispy texture, try cooking the wings without sauce for the first 20 minutes, then toss in sauce and air fry for an additional 5 minutes. Serve with celery sticks and blue cheese or ranch dressing for dipping to complete your appetizer experience!
6.Mini Air Fryer Quiches

Title: Mini Air Fryer Quiches
Prep Time: 10 minutes
Cook Time: 15 minutes
Number of Servings: 6
Required Equipment List: Air fryer, mixing bowl, whisk, silicone muffin cups or ramekins
Cuisine Type: French-inspired
Mini Air Fryer Quiches are a fantastic bite-sized appetizer that’s both delicious and easy to prepare. These little quiches are perfect for brunch, parties, or even a quick snack. The air fryer cooks them to perfection, resulting in a crispy exterior while keeping the filling creamy and flavorful.
You can customize the ingredients based on what you have on hand, making them versatile for any occasion. Using an air fryer greatly reduces cooking time compared to traditional baking methods, making this recipe quick and efficient.
These mini quiches aren’t only delightful to eat but also visually appealing, making them a hit at gatherings. Serve them warm or at room temperature, and watch them disappear in no time!
Ingredients:
- 6 large eggs
- 1 cup milk
- 1 cup shredded cheese (cheddar, mozzarella, or your choice)
- 1 cup diced vegetables (bell peppers, onions, spinach, etc.)
- 1 cup cooked meat (bacon, ham, or sausage)
- Salt and pepper to taste
- Cooking spray
Instructions:
- In a mixing bowl, whisk together the eggs and milk until well combined. Season the mixture with salt and pepper according to your taste preferences. This will be the base of your quiches.
- Preheat your air fryer to 320°F (160°C). While it’s heating, prepare your silicone muffin cups or ramekins by spraying them lightly with cooking spray to prevent sticking.
- Divide the diced vegetables and cooked meat evenly among the muffin cups, filling them about halfway. This adds flavor and texture to each quiche.
- Pour the egg and milk mixture over the filling in each cup, filling them about ¾ full. Top with shredded cheese for an added cheesy goodness.
- Once the air fryer is preheated, place the filled muffin cups in the basket. Cook for about 12-15 minutes or until the quiches are puffed up and a toothpick inserted in the center comes out clean.
- Carefully remove the mini quiches from the air fryer and let them cool slightly before serving. They can be served warm or at room temperature.
Extra Tips: For a more flavorful quiche, consider sautéing your vegetables in a bit of olive oil before adding them to the mixture. This enhances their sweetness and brings out their natural flavors.
You can also experiment with different cheese varieties or herbs to tailor the quiches to your liking. If you’re preparing them ahead of time, feel free to store them in an airtight container in the refrigerator for up to three days and reheat them in the air fryer for a quick snack!
7.Sweet Potato Fries
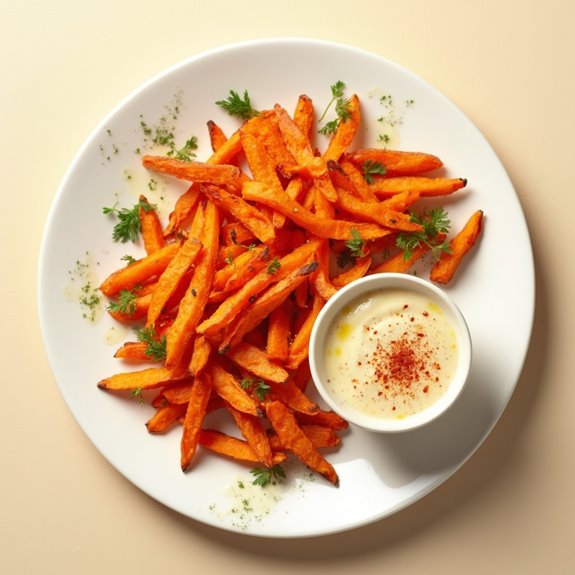
Title: Sweet Potato Fries
Prep Time: 10 minutes
Cook Time: 20 minutes
Number of Servings: 4
Required Equipment List: Air fryer, mixing bowl, cutting board, knife, peeler
Cuisine Type: American
Sweet potato fries are a delicious and healthier alternative to regular fries, offering a nutritious twist that will satisfy your cravings. These fries are naturally sweet, crispy on the outside, and tender on the inside, making them a fantastic appetizer or side dish.
With the air fryer, you can achieve that perfect crunch without the excess oil typically used for frying, allowing the natural flavors of the sweet potatoes to shine through. This recipe is incredibly simple and quick, requiring only a handful of ingredients and minimal prep work.
You can customize the seasoning to your liking, whether you prefer a classic salt and pepper combination, a touch of garlic powder, or a spicy kick with paprika. Pair these sweet potato fries with your favorite dipping sauce for a delightful snack that everyone will love.
Ingredients:
- 2 large sweet potatoes
- 2 tablespoons olive oil
- 1 teaspoon salt
- 1/2 teaspoon black pepper
- 1/2 teaspoon garlic powder
- 1/2 teaspoon paprika (optional)
Instructions:
- Begin by peeling the sweet potatoes and cutting them into even-sized fries, about 1/4 inch thick. This guarantees they cook evenly in the air fryer and achieve the desired texture.
- In a mixing bowl, combine the cut sweet potatoes with olive oil, salt, black pepper, garlic powder, and paprika (if using). Toss everything together until the sweet potato fries are evenly coated in the oil and seasonings.
- Preheat your air fryer to 400°F (200°C) for about 5 minutes. This step helps to create a crispier texture for the fries once they’re cooked.
- Place the seasoned sweet potato fries in a single layer in the air fryer basket. Depending on the size of your air fryer, you may need to cook them in batches to avoid overcrowding.
- Cook the sweet potato fries in the air fryer for about 15-20 minutes, shaking the basket halfway through the cooking time to confirm they fry evenly. Cook until they’re golden brown and crisp to your liking.
- Once done, remove the fries from the air fryer and let them cool slightly before serving. You can serve them hot with your choice of dipping sauce, such as ketchup, ranch, or a spicy aioli.
Extra Tips: To enhance the flavor, consider experimenting with different spices like cumin or chili powder for an added depth. If you’re looking for extra crispiness, soak the cut sweet potatoes in cold water for 30 minutes before drying and seasoning them. This helps to remove excess starch and contributes to a crunchier fry. Enjoy your delicious sweet potato fries!
8.Air Fryer Jalapeño Poppers
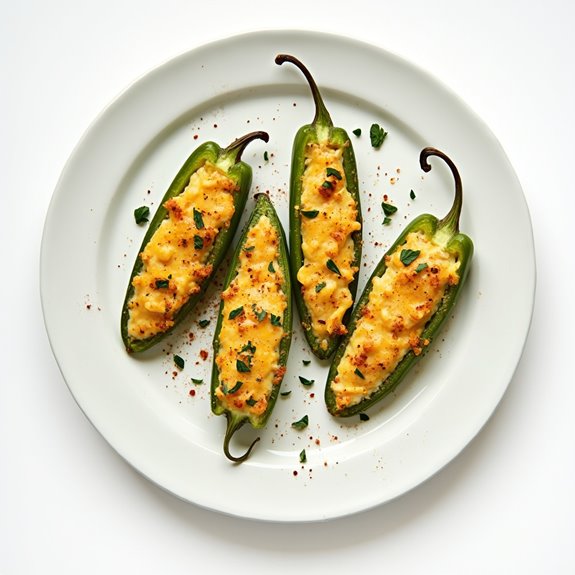
Title: Air Fryer Jalapeño Poppers
Prep Time: 15 minutes
Cook Time: 10 minutes
Number of Servings: 4
Required Equipment List: Air fryer, mixing bowl, knife, cutting board, spoon
Cuisine Type: American-Mexican
Air Fryer Jalapeño Poppers are a fantastic appetizer that delivers a perfect blend of spicy and creamy flavors. These poppers are made by stuffing fresh jalapeños with a rich mixture of cream cheese, cheddar cheese, and spices, then air frying them to perfection. The result is a crispy exterior with a gooey, flavorful filling that makes them irresistible for gatherings, game days, or simply as a satisfying snack.
Using the air fryer not only cuts down on the grease typically associated with frying but also provides a quick and easy way to achieve that crispy texture. You can customize the heat level by choosing larger or smaller jalapeños and adjusting the amount of cheese and spices. These poppers are sure to be a hit and can be served with your favorite dipping sauce for an added touch.
Ingredients:
- 8 fresh jalapeños
- 4 ounces cream cheese, softened
- 1 cup shredded cheddar cheese
- 1 teaspoon garlic powder
- 1 teaspoon onion powder
- 1/2 teaspoon smoked paprika
- Salt and pepper to taste
- Cooking spray
Instructions:
- Preheat your air fryer to 375°F (190°C). This guarantees that your jalapeño poppers will cook evenly and achieve that crispy texture.
- While the air fryer is preheating, prepare the jalapeños by cutting them in half lengthwise and removing the seeds and membranes. Be cautious and consider wearing gloves to protect your hands from the heat of the peppers.
- In a mixing bowl, combine the softened cream cheese, shredded cheddar cheese, garlic powder, onion powder, smoked paprika, salt, and pepper. Mix well until all ingredients are thoroughly incorporated.
- Using a spoon, fill each jalapeño half with the cheese mixture, packing it in evenly to prevent it from falling out during cooking.
- Lightly spray the air fryer basket with cooking spray to prevent sticking. Place the stuffed jalapeños in the basket in a single layer, ensuring they aren’t overcrowded for ideal cooking.
- Air fry the jalapeño poppers for 8-10 minutes, or until the cheese is bubbly and the jalapeños are tender. Keep an eye on them to prevent overcooking, as air fryers can vary in cooking times.
Extra Tips: For an added kick, consider mixing in some cooked and crumbled bacon or diced jalapeños into the cheese filling. If you prefer a milder popper, you can use mini sweet peppers instead of jalapeños. Additionally, serving the poppers with a side of ranch or blue cheese dressing can offer a cooling contrast to the heat. Enjoy your deliciously addictive Air Fryer Jalapeño Poppers!
9.Parmesan-Crusted Zucchini Chips
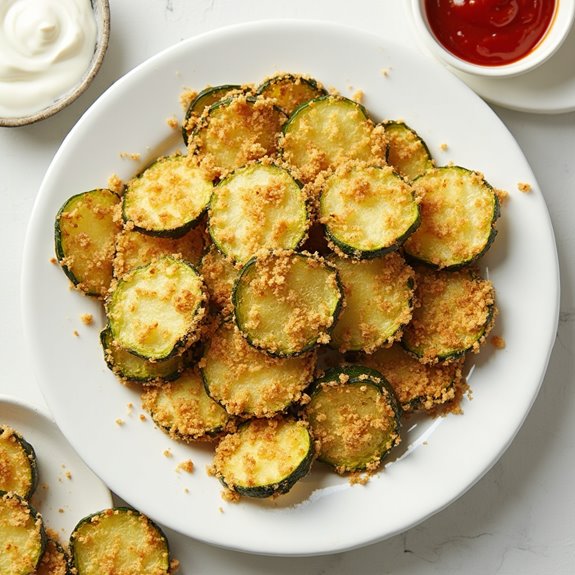
Title: Parmesan-Crusted Zucchini Chips
Prep Time: 15 minutes
Cook Time: 10 minutes
Number of Servings: 4
Required Equipment List: Air fryer, mixing bowl, cutting board, knife, measuring cups, tongs
Cuisine Type: American
Parmesan-Crusted Zucchini Chips are a delicious and healthier alternative to traditional potato chips, making them the perfect appetizer or snack. These crispy bites are coated in a flavorful mixture of Parmesan cheese and breadcrumbs, then air-fried to achieve that perfect crunch without the excess oil.
They’re incredibly easy to prepare and can be ready in less than 30 minutes, making them ideal for a quick snack or a party platter. The zucchini absorbs the flavors of the Parmesan and spices while maintaining its natural moisture, resulting in a savory and satisfying treat.
Serve them with your favorite dipping sauce, such as marinara or ranch dressing, for an extra burst of flavor. These zucchini chips aren’t only a hit among adults but also a fun way to get kids to enjoy their vegetables!
Ingredients:
- 2 medium zucchinis
- 1 cup grated Parmesan cheese
- 1 cup breadcrumbs (preferably panko for extra crunch)
- 1 teaspoon garlic powder
- 1 teaspoon Italian seasoning
- Salt and pepper to taste
- 1 large egg, beaten
Instructions:
- Begin by washing and trimming the ends of the zucchinis. Slice them into thin rounds, about 1/4 inch thick. You want them to be uniform in size for even cooking.
- In a mixing bowl, combine the grated Parmesan cheese, breadcrumbs, garlic powder, Italian seasoning, salt, and pepper. Mix until well combined. This will form the coating for your zucchini chips.
- In another bowl, beat the egg until smooth. Dip each zucchini slice into the egg, allowing any excess to drip off, then coat it generously with the Parmesan-breadcrumb mixture. Press down lightly to guarantee the coating adheres well.
- Preheat your air fryer to 400°F (200°C). Once heated, arrange the coated zucchini chips in a single layer in the air fryer basket. You may need to work in batches depending on the size of your air fryer.
- Air fry the zucchini chips for 8-10 minutes, flipping them halfway through for even cooking. They should be golden brown and crispy when done.
- Carefully remove the zucchini chips from the air fryer using tongs and let them cool for a couple of minutes before serving. Enjoy them warm with your favorite dipping sauce.
Extra Tips: For an extra kick, consider adding some cayenne pepper or crushed red pepper flakes to the breadcrumb mixture. Make sure not to overcrowd the air fryer basket; this will help the chips become crispy rather than steam.
If you have leftover chips, store them in an airtight container, but note that they may lose some crispiness over time. Reheat them in the air fryer for a few minutes to regain their crunch. Enjoy your Parmesan-Crusted Zucchini Chips!
10.Air Fryer Meatballs
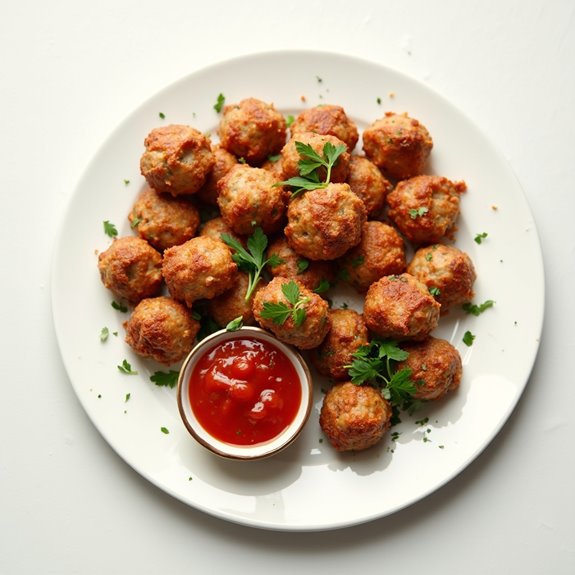
Title: Air Fryer Meatballs
Prep Time: 10 minutes
Cook Time: 15 minutes
Number of Servings: 4
Required Equipment List: Air fryer, mixing bowl, measuring cups, measuring spoons
Cuisine Type: Italian-American
Air Fryer Meatballs are a quick and delicious appetizer that are perfect for any occasion. These meatballs are packed with flavor and are cooked to perfection in the air fryer, making them a healthier alternative to traditional frying methods. With a crispy exterior and juicy interior, these meatballs are sure to be a hit at your next gathering or family dinner.
Serve them with marinara sauce for dipping or toss them in your favorite pasta dish for a satisfying meal. The beauty of this recipe is its versatility. You can easily customize the seasonings and ingredients to suit your taste preferences, whether you want to add some heat with red pepper flakes or keep it classic with Italian herbs.
Plus, these meatballs can be made ahead of time and frozen, making them a convenient option for busy weeknights or last-minute entertaining. You’ll love how easy it’s to whip up these flavorful bites in no time!
Ingredients:
- 1 pound ground beef
- 1/2 cup breadcrumbs
- 1/4 cup grated Parmesan cheese
- 1/4 cup chopped fresh parsley
- 1 egg
- 2 cloves garlic, minced
- 1 teaspoon dried oregano
- 1 teaspoon salt
- 1/2 teaspoon black pepper
- Marinara sauce (for serving, optional)
Instructions:
- In a mixing bowl, combine the ground beef, breadcrumbs, grated Parmesan cheese, chopped parsley, egg, minced garlic, dried oregano, salt, and black pepper. Mix until all ingredients are well incorporated, being careful not to overmix.
- Preheat your air fryer to 400°F (200°C) for about 3-5 minutes. While the air fryer is heating, shape the meat mixture into small meatballs, about 1 inch in diameter. You should have approximately 20-24 meatballs.
- Once the air fryer is preheated, place the meatballs in a single layer in the air fryer basket. Make sure to leave some space between each meatball for proper air circulation; you may need to cook in batches depending on the size of your air fryer.
- Cook the meatballs in the air fryer for 10-12 minutes, flipping them halfway through the cooking time to guarantee they’re evenly browned and cooked through. The internal temperature should reach 160°F (70°C).
- Once cooked, remove the meatballs from the air fryer and let them rest for a few minutes. Serve warm with marinara sauce for dipping or as part of your favorite pasta dish.
Extra Tips: For added flavor, consider mixing in some finely chopped onions or bell peppers into the meat mixture. You can also experiment with different types of meat, such as ground turkey or chicken, for a lighter option.
If you’re preparing these meatballs ahead of time, they can be frozen raw and cooked directly from frozen; just add an extra few minutes to the cooking time. Enjoy these flavorful meatballs as a crowd-pleasing appetizer or a hearty main dish!
11.Crispy Chickpeas
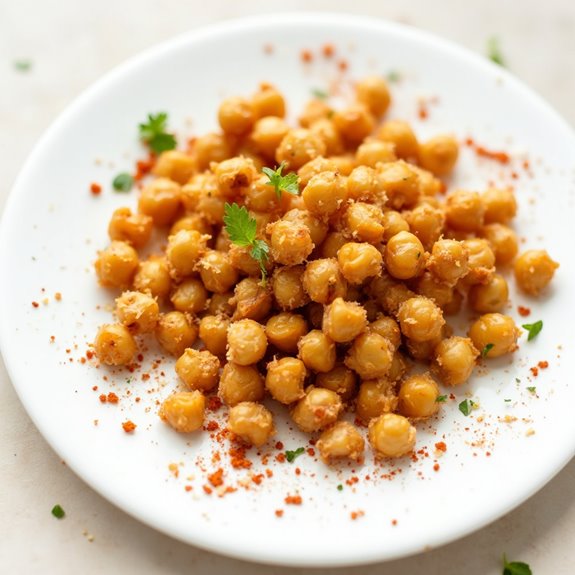
Title: Crispy Chickpeas
Prep Time: 10 minutes
Cook Time: 15 minutes
Number of Servings: 4
Required Equipment List: Air fryer, mixing bowl, measuring spoons, spatula
Cuisine Type: Mediterranean
Crispy Chickpeas are a deliciously healthy snack that’s perfect for any occasion. These little legumes are seasoned and air-fried to achieve a perfect crunch that makes them addictive.
Whether you’re looking for a nutritious snack to munch on while watching a movie or a flavorful topping for salads and grain bowls, crispy chickpeas are versatile and easy to prepare. The air fryer method makes them not only quicker to cook but also lighter and less oily than traditional frying methods.
The seasoning possibilities for crispy chickpeas are virtually endless, allowing you to customize them to fit your taste. From classic garlic and herb flavors to spicy chili and cumin blends, you can experiment with different spices to create your own perfect combination.
This recipe isn’t only simple but also packed with protein and fiber, making it a great option for those seeking healthier snack alternatives.
Ingredients:
- 1 can (15 oz) chickpeas, drained and rinsed
- 1 tablespoon olive oil
- 1 teaspoon garlic powder
- 1 teaspoon smoked paprika
- 1/2 teaspoon salt
- 1/2 teaspoon black pepper
- Optional: pinch of cayenne pepper for heat
Instructions:
- Begin by preheating your air fryer to 400°F (200°C) for about 5 minutes. This guarantees that the chickpeas will start cooking immediately when placed inside, giving them that desired crispiness.
- While the air fryer is preheating, drain and rinse the chickpeas under cold water. Pat them dry thoroughly with a clean kitchen towel or paper towels, as excess moisture will prevent them from crisping up.
- In a mixing bowl, combine the dried chickpeas with olive oil, garlic powder, smoked paprika, salt, black pepper, and cayenne pepper if using. Toss well to guarantee all the chickpeas are evenly coated with the oil and seasonings.
- Once the air fryer is preheated, spread the seasoned chickpeas in a single layer in the basket. Avoid overcrowding to allow for even cooking. You may need to cook in batches depending on the size of your air fryer.
- Air fry the chickpeas for 12-15 minutes, shaking the basket halfway through to promote even cooking. Keep an eye on them towards the end to guarantee they reach your desired level of crispiness without burning.
- Once done, remove the chickpeas from the air fryer and allow them to cool slightly. They’ll continue to crisp up as they cool. Enjoy them as a snack or sprinkle over salads or bowls for added texture.
Extra Tips: For the best results, make sure the chickpeas are completely dry before seasoning; this will help them crisp up nicely.
Feel free to experiment with different spices such as curry powder, Italian seasoning, or nutritional yeast for a cheesy flavor. Store any leftovers in an airtight container at room temperature, but they’re best enjoyed fresh, as they may lose their crunch over time.
12.Air Fryer Cheese Sticks
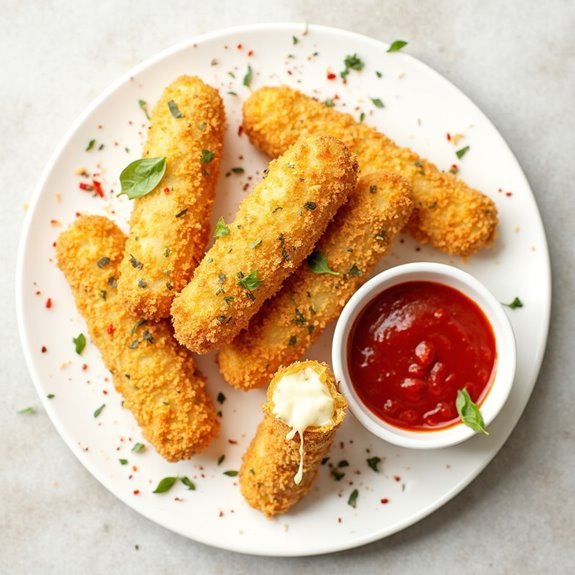
Title: Air Fryer Cheese Sticks
Prep Time: 10 minutes
Cook Time: 8 minutes
Number of Servings: 4
Required Equipment List: Air fryer, mixing bowl, baking sheet, cooking spray
Cuisine Type: American
Air Fryer Cheese Sticks are a delectable and easy-to-make appetizer that will be a hit at any gathering. With their crispy exterior and gooey, melted cheese interior, these cheese sticks provide the perfect balance of textures and flavors.
The air fryer not only makes cooking quicker but also guarantees the cheese sticks are healthier compared to traditional frying methods, without sacrificing taste. Perfect for game day snacks or a fun family treat, these cheese sticks are sure to satisfy your cravings.
These cheese sticks can be customized with your favorite types of cheese, such as mozzarella or cheddar, and can be served with marinara sauce for dipping. The combination of a crunchy breadcrumb coating and the warm, cheesy center makes them irresistible.
They come together in just a few minutes and are ready to enjoy in no time, making them an ideal choice for a quick appetizer or snack.
Ingredients:
- 8 mozzarella cheese sticks
- 1 cup all-purpose flour
- 2 large eggs, beaten
- 1 cup Italian-style breadcrumbs
- 1 teaspoon garlic powder
- 1 teaspoon Italian seasoning
- Cooking spray
- Marinara sauce (for serving)
Instructions:
- Begin by preparing your cheese sticks. Place the flour in one shallow bowl, the beaten eggs in another, and combine the breadcrumbs, garlic powder, and Italian seasoning in a third shallow bowl.
- Take each mozzarella cheese stick and first coat it in the flour, ensuring it’s fully covered. Shake off any excess flour before dipping it into the beaten eggs, making sure it’s well coated.
- After the egg wash, roll the cheese stick in the breadcrumb mixture, pressing gently to adhere the crumbs to the cheese. Repeat this process for all the cheese sticks, then place them on a baking sheet.
- Preheat your air fryer to 390°F (200°C). Once heated, lightly spray the air fryer basket with cooking spray to prevent sticking.
- Arrange the coated cheese sticks in a single layer in the air fryer basket, ensuring they aren’t overcrowded. You may need to do this in batches depending on the size of your air fryer.
- Air fry the cheese sticks for 6-8 minutes, or until they’re golden brown and the cheese begins to ooze out. Be sure to check on them halfway through cooking and shake the basket gently for even cooking.
- Once done, remove the cheese sticks from the air fryer and let them cool slightly before serving with marinara sauce for dipping.
Extra Tips: For an extra crunchy texture, you can double-dip the cheese sticks by repeating the egg and breadcrumb coating process. Additionally, if you want to spice things up, try mixing in some crushed red pepper flakes into the breadcrumb mixture.
These cheese sticks are best enjoyed fresh, but you can also reheat them in the air fryer for a few minutes if you have leftovers. Enjoy your cheesy creation!
13.Veggie Spring Rolls
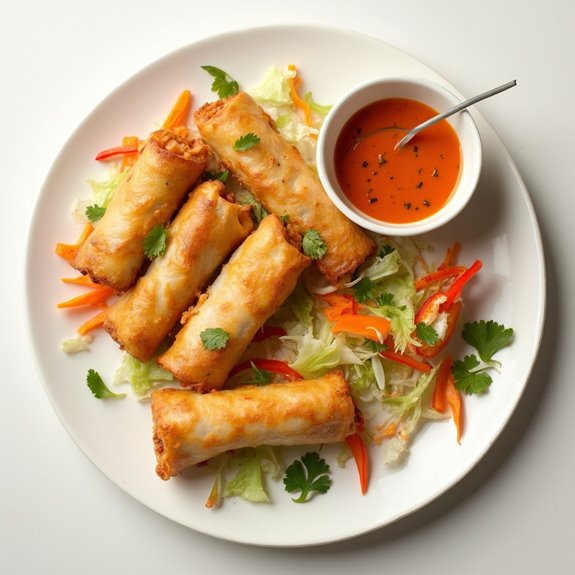
Title: Crispy Veggie Spring Rolls
Prep Time: 20 minutes
Cook Time: 15 minutes
Number of Servings: 4
Required Equipment List: Air fryer, mixing bowl, cutting board, knife, parchment paper (optional)
Cuisine Type: Asian
Crispy Veggie Spring Rolls are a delightful and healthy appetizer that brings the vibrant flavors of Asian cuisine right to your kitchen. These spring rolls are packed with fresh vegetables and herbs, wrapped in rice paper, and air-fried to crispy perfection.
They’re perfect for entertaining or as a light snack for yourself, providing a satisfying crunch with each bite. The best part is that they can be customized based on your favorite vegetables or what you have on hand, allowing you to get creative in the kitchen.
This recipe not only highlights the freshness of the vegetables but also offers a healthier alternative to traditional deep-fried spring rolls. The air fryer provides that perfect crispy texture without the excess oil, making these spring rolls a guilt-free treat.
Serve them with a dipping sauce, like sweet chili or soy sauce, and you’ll have a delicious appetizer that everyone will love.
Ingredients:
- 8 rice paper wrappers
- 1 cup shredded carrots
- 1 cup shredded cabbage
- 1 cup bean sprouts
- 1/2 cup chopped bell peppers (any color)
- 1/4 cup chopped green onions
- 1 tablespoon soy sauce
- 1 teaspoon sesame oil
- Cooking spray
Instructions:
1. In a mixing bowl, combine the shredded carrots, cabbage, bean sprouts, bell peppers, green onions, soy sauce, and sesame oil. Toss the mixture together until all the vegetables are well-coated with the sauce, guaranteeing a burst of flavor in every spring roll.
2. Fill a shallow dish or plate with warm water. Dip one rice paper wrapper into the water for about 10-15 seconds, or until it becomes soft and pliable. Carefully remove it and lay it flat on a clean surface or cutting board.
3. Place a small amount of the vegetable mixture (about 2 tablespoons) in the center of the rice paper wrapper, leaving about an inch of space on the sides. Fold the sides over the filling, then roll the wrapper tightly from the bottom to the top, creating a sealed spring roll.
Repeat this process with the remaining wrappers and filling.
4. Preheat your air fryer to 375°F (190°C). Lightly spray the basket with cooking spray to prevent sticking. Arrange the spring rolls in a single layer in the air fryer basket, leaving space between each roll for air circulation.
5. Air fry the spring rolls for about 12-15 minutes, flipping them halfway through, until they’re golden brown and crispy. If needed, you can cook them in batches depending on the size of your air fryer.
6. Once cooked, remove the spring rolls from the air fryer and let them cool slightly before serving. Enjoy them warm with your favorite dipping sauce.
Extra Tips: When making spring rolls, it’s important not to overfill them to ensure they roll up properly. If you have leftover filling, consider making a quick stir-fry for a delicious side dish.
For added flavor, feel free to incorporate herbs such as cilantro or mint into the vegetable mixture. If you want a bit of heat, add some sliced jalapeños to the filling before rolling.
14.Air Fryer Shrimp Tacos
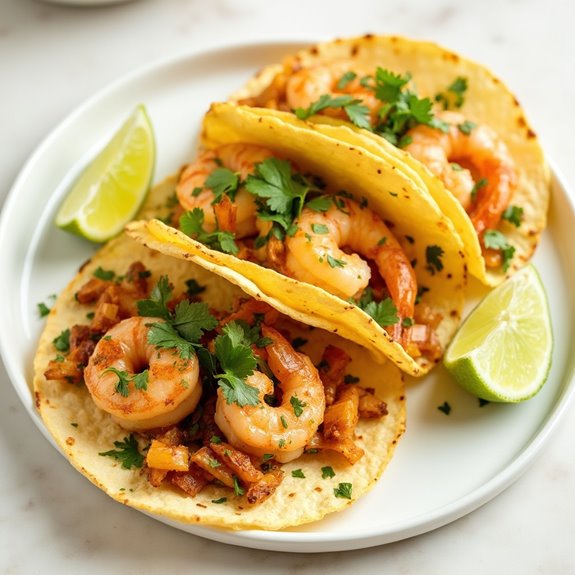
Title: Air Fryer Shrimp Tacos
Prep Time: 15 minutes
Cook Time: 10 minutes
Number of Servings: 4
Required Equipment List: Air fryer, mixing bowl, spatula, serving platter
Cuisine Type: Mexican
Air Fryer Shrimp Tacos are a delightful and healthy alternative to traditional fried tacos. By utilizing the air fryer, you can achieve perfectly cooked shrimp that are crispy on the outside while remaining juicy on the inside.
These tacos are filled with zesty flavors from fresh lime juice and spices, making them a delicious option for a quick dinner or a fun gathering with friends. Serve them with your favorite toppings such as avocado, salsa, or a drizzle of creamy sauce for an extra kick.
This dish isn’t only quick to prepare but also customizable to suit your taste preferences. You can easily swap out the shrimp for chicken or tofu, and the toppings can be adjusted based on what you have on hand.
The air fryer makes cooking these tacos a hassle-free experience, giving you more time to enjoy the meal. Whether you’re hosting a casual taco night or just craving a flavorful bite, these Air Fryer Shrimp Tacos are sure to satisfy your appetite.
Ingredients:
- 1 pound shrimp, peeled and deveined
- 1 tablespoon olive oil
- 1 teaspoon chili powder
- 1 teaspoon cumin
- 1/2 teaspoon garlic powder
- 1/2 teaspoon paprika
- Salt and pepper to taste
- 8 small corn tortillas
- Fresh cilantro, chopped (for garnish)
- Lime wedges (for serving)
Instructions:
- In a mixing bowl, combine the shrimp, olive oil, chili powder, cumin, garlic powder, paprika, salt, and pepper. Toss until the shrimp are evenly coated with the spices. Let them marinate for about 10 minutes to enhance the flavors.
- Preheat the air fryer to 400°F (200°C). This step is essential for achieving a crispy texture on the shrimp.
- Once preheated, arrange the marinated shrimp in a single layer in the air fryer basket. You may need to do this in batches depending on the size of your air fryer. Cook for 6-8 minutes, shaking the basket halfway through to guarantee even cooking.
- While the shrimp are cooking, warm the corn tortillas in a dry skillet over medium heat for about 30 seconds on each side, or until they’re pliable and slightly toasted.
- Once the shrimp are cooked through and have a nice golden color, remove them from the air fryer. Assemble the tacos by placing a few shrimp in each tortilla. Top with fresh cilantro and any additional toppings of your choice.
- Serve the shrimp tacos with lime wedges on the side for squeezing over the top, adding a burst of freshness to each bite.
Extra Tips: For added flavor and crunch, consider topping your shrimp tacos with a slaw made from shredded cabbage, carrots, and a splash of lime juice. If you enjoy a bit of heat, add sliced jalapeños or a spicy sauce.
You can also experiment with different types of tortillas, such as flour or whole wheat, depending on your preference. Enjoy your delicious air fryer shrimp tacos!
15.Chocolate-Covered Air Fryer Bananas
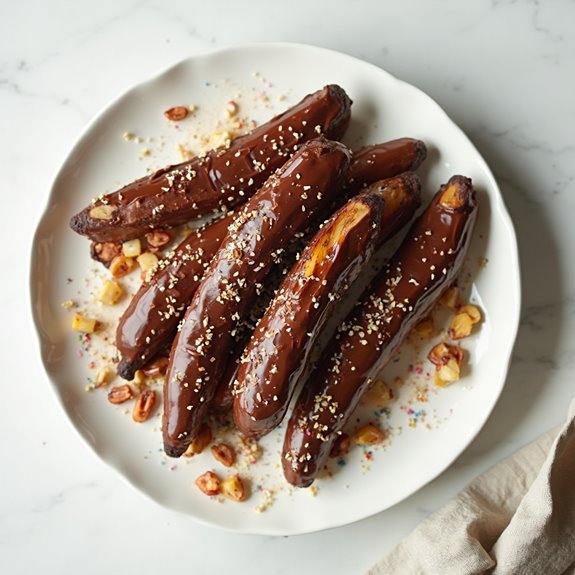
Title: Chocolate-Covered Air Fryer Bananas
Prep Time: 10 minutes
Cook Time: 8 minutes
Number of Servings: 4
Required Equipment List: Air fryer, mixing bowl, fork, parchment paper
Cuisine Type: American
Chocolate-Covered Air Fryer Bananas are a delightful treat that combines the natural sweetness of bananas with the rich indulgence of chocolate. This easy recipe is perfect for satisfying your sweet tooth without the guilt, as the air fryer allows for a healthier cooking method compared to traditional frying.
The bananas become caramelized and soft, while the melted chocolate creates a luscious coating that will have everyone coming back for more. These chocolate-covered bananas can be enjoyed as a dessert or as a quick snack, and they’re incredibly simple to prepare.
With just a few ingredients and minimal cooking time, you can whip up this delectable dish in no time. Whether you’re hosting a party or just craving something sweet, these air fryer bananas will impress your guests and leave them wanting seconds.
Ingredients:
- 2 ripe bananas
- 1 cup semi-sweet chocolate chips
- 1 tablespoon coconut oil (optional)
- Sea salt (for garnish)
- Chopped nuts or sprinkles (optional, for topping)
Instructions:
- Begin by peeling the bananas and cutting them into thick slices, about 1 inch in thickness. This will guarantee they cook evenly and are easy to coat in chocolate.
- In a mixing bowl, combine the semi-sweet chocolate chips and coconut oil (if using). Microwave the mixture in 30-second intervals, stirring in between, until the chocolate is fully melted and smooth.
- Dip each banana slice into the melted chocolate, making sure they’re fully coated. Use a fork to lift them out and let any excess chocolate drip off.
- Place the chocolate-covered banana slices on a piece of parchment paper in the air fryer basket, ensuring they aren’t touching each other for even cooking.
- Preheat your air fryer to 350°F (175°C) and cook the bananas for about 6-8 minutes, or until the chocolate is slightly set and the bananas are warm and soft. Keep an eye on them to avoid overcooking.
- Once done, remove the banana slices from the air fryer and sprinkle with sea salt, chopped nuts, or sprinkles if desired. Allow them to cool for a few minutes before serving.
Extra Tips: For an extra layer of flavor, you can add a splash of vanilla extract to the melted chocolate or sprinkle some cinnamon on top of the bananas before air frying.
If you want a more decadent treat, consider drizzling some additional melted chocolate over the finished bananas. These chocolate-covered bananas are best enjoyed fresh, but you can store any leftovers in the refrigerator for a day or two.
Just be sure to let them come to room temperature before serving for ideal taste. Enjoy your delicious creation!
Conclusion
Now that you’ve got these 15 irresistible air fryer appetizer ideas, your next gathering is bound to be a hit! Who wouldn’t want to devour crispy buffalo cauliflower or cheesy stuffed mushrooms? With minimal effort, you can whip up snacks that’ll make you feel like a culinary genius. So, why not try a few? Your friends will be begging for the recipes, and you’ll be the star chef of the evening! Happy frying!


