15 Christmas Appetizer Recipe Ideas
Christmas gatherings aren’t just about the tree and presents; appetizers play a huge role too! You can impress your guests with delicious Cranberry Brie Bites, savory Stuffed Mushrooms, or creamy Spinach Artichoke Dip. How about sweet and smoky Bacon-Wrapped Dates? For a fresh twist, try Pomegranate Guacamole or Mini Caprese Skewers. Don’t forget a classic Shrimp Cocktail and some Sweet Potato Bites to keep it exciting! Deviled Eggs with a sriracha kick or a colorful Holiday Veggie Platter will round out your spread perfectly. Want to discover even more festive flavors? Stick around!
1. Cranberry Brie Bites
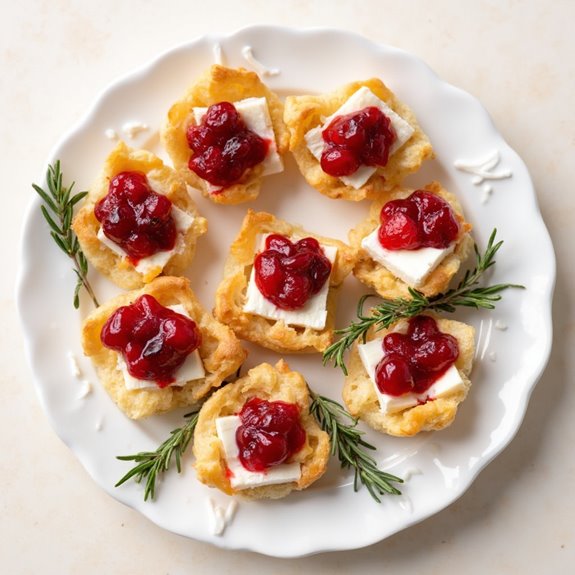
Title: Cranberry Brie Bites
Prep Time: 15 minutes
Cook Time: 15 minutes
Number of Servings: 24
Required Equipment List: Mini muffin tin, cutting board, knife, mixing bowl, pastry brush
Cuisine Type: American
Cranberry Brie Bites are a delightful and elegant appetizer that combines the creamy richness of Brie cheese with the tartness of cranberries, all wrapped in a flaky pastry. These bite-sized treats are perfect for holiday gatherings, festive parties, or any occasion where you want to impress your guests with minimal effort.
The contrast of flavors and textures makes these bites irresistible, and they can be prepared quickly, ensuring you have more time to enjoy the festivities. The beauty of this recipe lies in its simplicity and the use of store-bought puff pastry, which saves time without compromising on taste.
Each bite features a generous dollop of cranberry sauce, a slice of Brie cheese, and a sprinkle of fresh herbs, all encased in a golden-brown pastry shell. These Cranberry Brie Bites aren’t only visually appealing but also bursting with flavor, making them a perfect addition to your holiday appetizer spread.
Ingredients:
- 1 sheet puff pastry (thawed)
- 8 ounces Brie cheese
- 1 cup cranberry sauce (store-bought or homemade)
- Fresh thyme or rosemary (for garnish)
- 1 egg (beaten, for egg wash)
- Flour (for dusting)
Instructions:
- Preheat your oven to 400°F (200°C). Lightly flour your work surface and roll out the thawed puff pastry sheet to smooth out any creases. Cut the pastry into 3-inch squares, making sure you have enough squares to fill the mini muffin tin.
- Grease the mini muffin tin with a bit of cooking spray or butter to prevent sticking. Gently press each pastry square into the muffin tin cups, allowing the corners to hang over the edges. This will create a small pocket for the filling.
- Cut the Brie cheese into small pieces or slices, each about 1 inch in size. Place a piece of Brie into each pastry-lined cup, followed by a spoonful of cranberry sauce on top of the cheese.
- If desired, sprinkle a few fresh thyme or rosemary leaves over the cranberry sauce for added flavor and presentation. Carefully fold the corners of the pastry over the filling to create a little pocket, or leave them open for a more rustic look.
- Brush the tops of the pastry with the beaten egg to give them a beautiful golden color as they bake. Place the muffin tin in the preheated oven and bake for 12-15 minutes, or until the pastry is puffed and golden brown.
- Once baked, remove the Cranberry Brie Bites from the oven and let them cool slightly in the tin. Carefully transfer them to a serving platter and garnish with additional fresh herbs if desired before serving warm.
Extra Tips: For a twist, you can experiment with different types of jams or fruit preserves in place of cranberry sauce, such as apricot or raspberry. If you want a bit of crunch, consider adding chopped walnuts or pecans to the filling.
These bites are best enjoyed fresh out of the oven, but they can also be made ahead of time and reheated just before serving. Enjoy your delicious appetizer!
2. Stuffed Mushrooms
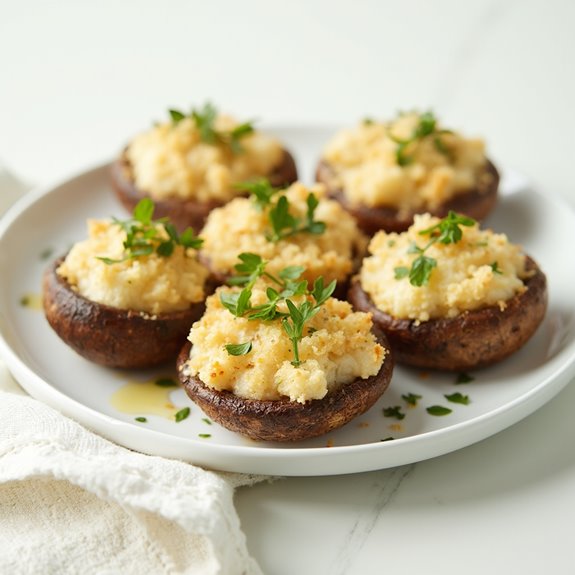
Title: Stuffed Mushrooms
Prep Time: 15 minutes
Cook Time: 20 minutes
Number of Servings: 6
Required Equipment List: Baking sheet, mixing bowl, spoon, oven
Cuisine Type: American
Stuffed mushrooms are a classic and crowd-pleasing appetizer that can elevate any holiday gathering. This recipe features plump, juicy mushrooms filled with a savory mixture of cream cheese, garlic, herbs, and breadcrumbs, creating a delightful burst of flavor in every bite. They’re easy to prepare and can be made ahead of time, making them a perfect choice for Christmas parties or family gatherings.
The beauty of stuffed mushrooms is that they’re incredibly versatile. You can customize the filling based on your preferences or dietary restrictions, adding ingredients such as cooked sausage, spinach, or different cheeses. These bite-sized treats aren’t only delicious but also a great way to showcase seasonal ingredients, making them a festive addition to your holiday table.
Ingredients:
- 1 pound large button mushrooms
- 8 ounces cream cheese, softened
- 1/2 cup grated Parmesan cheese
- 1/2 cup breadcrumbs
- 2 cloves garlic, minced
- 1 tablespoon fresh parsley, chopped
- 1 teaspoon Italian seasoning
- Salt and pepper to taste
- Olive oil for drizzling
Instructions:
- Preheat your oven to 375°F (190°C). Clean the mushrooms with a damp cloth and carefully remove the stems, making sure to keep the caps intact. Finely chop the stems and set aside for the filling.
- In a mixing bowl, combine the softened cream cheese, grated Parmesan cheese, breadcrumbs, minced garlic, chopped mushroom stems, parsley, Italian seasoning, salt, and pepper. Mix well until all ingredients are incorporated and the mixture is creamy.
- Using a spoon, generously fill each mushroom cap with the cream cheese mixture, pressing it down slightly to guarantee it’s packed in well. Place the stuffed mushrooms on a baking sheet lined with parchment paper.
- Drizzle a little olive oil over the stuffed mushrooms to help them brown during baking. This will add flavor and help achieve a beautiful golden color.
- Bake in the preheated oven for about 18-20 minutes or until the mushrooms are tender and the tops are golden brown. Remove from the oven and let them cool for a few minutes before serving.
Extra Tips: To enhance the flavor of your stuffed mushrooms, consider adding cooked sausage or crumbled bacon to the filling for a heartier option. If you like a little kick, a dash of red pepper flakes can add some heat.
These stuffed mushrooms can also be prepared ahead of time and baked just before serving, making them an excellent choice for busy hosts. Enjoy this delightful appetizer at your next festive gathering!
3. Spinach Artichoke Dip
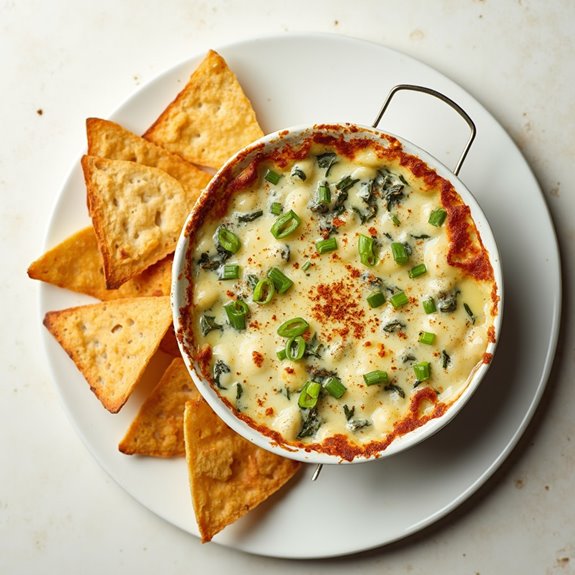
Title: Spinach Artichoke Dip
Prep Time: 15 minutes
Cook Time: 25 minutes
Number of Servings: 8
Required Equipment List: Mixing bowl, 9-inch baking dish, oven, spatula
Cuisine Type: American
Spinach Artichoke Dip is a classic appetizer that’s creamy, cheesy, and packed with flavor, making it a favorite for gatherings and parties. Combining tender spinach with savory artichokes, this dip is enriched with cream cheese, sour cream, and a blend of cheeses.
It’s perfect for scooping with tortilla chips, toasted bread, or fresh vegetables, making it a versatile choice for any occasion. This recipe isn’t only simple to prepare but can also be made ahead of time for added convenience.
With just a few ingredients and minimal effort, you can create a warm, gooey dip that’s sure to be a hit among your guests. Whether it’s for a holiday party, game day, or a cozy night in, this Spinach Artichoke Dip is bound to disappear quickly!
Ingredients:
- 1 cup frozen spinach, thawed and drained
- 1 can (14 ounces) artichoke hearts, drained and chopped
- 8 ounces cream cheese, softened
- 1/2 cup sour cream
- 1/2 cup mayonnaise
- 1 cup shredded mozzarella cheese
- 1/2 cup grated Parmesan cheese
- 1 teaspoon garlic powder
- Salt and pepper to taste
Instructions:
- Preheat your oven to 350°F (175°C) and prepare a 9-inch baking dish by lightly greasing it with cooking spray or butter to prevent sticking.
- In a large mixing bowl, combine the softened cream cheese, sour cream, and mayonnaise. Use a spatula to mix them together until smooth and creamy, ensuring there are no lumps.
- Add the chopped artichoke hearts, thawed and drained spinach, shredded mozzarella cheese, grated Parmesan cheese, garlic powder, salt, and pepper to the bowl. Stir everything together until well combined.
- Transfer the mixture into the prepared baking dish, spreading it evenly across the surface. Use the spatula to smooth out the top for an even bake.
- Bake in the preheated oven for 20-25 minutes, or until the dip is heated through and the top is lightly golden and bubbly. Keep an eye on it to prevent over-browning.
- Once done, remove the dip from the oven and allow it to cool slightly before serving. Serve warm with tortilla chips, sliced baguette, or fresh vegetables for dipping.
Extra Tips: For an extra flavor boost, consider adding some crushed red pepper flakes or chopped green onions to the dip mixture before baking.
If you want a more robust cheese flavor, try using a blend of cheeses such as cheddar or pepper jack. This dip can be prepared a day in advance; just store it in the refrigerator and bake it when ready to serve. Enjoy your delightful appetizer!
4. Bacon-Wrapped Dates
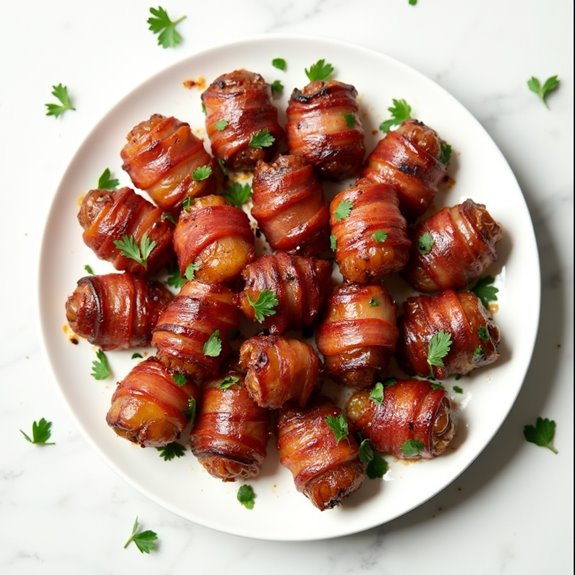
Title: Bacon-Wrapped Dates
Prep Time: 15 minutes
Cook Time: 20 minutes
Number of Servings: 12
Required Equipment List: Baking sheet, parchment paper, oven, toothpicks
Cuisine Type: American
Bacon-Wrapped Dates are a delightful appetizer that combines the sweet, chewy texture of dates with the savory crunch of crispy bacon. This mouthwatering combination is often a crowd-pleaser at holiday gatherings and parties. The natural sweetness of the dates pairs beautifully with the saltiness of the bacon, creating a perfect balance of flavors.
Additionally, the dish is easy to prepare, making it an ideal choice for both novice cooks and seasoned chefs alike. These delectable bites are versatile, allowing for various fillings such as cream cheese or almonds, depending on your preference.
The simple yet elegant presentation makes them great for entertaining, and they can be prepared ahead of time and baked just before serving. Serve them warm for the best experience, and watch as they disappear from the platter in no time!
Ingredients:
- 12 Medjool dates, pitted
- 12 slices of bacon
- 1/2 cup cream cheese (optional)
- 12 toothpicks
Instructions:
- Preheat your oven to 400°F (200°C). Line a baking sheet with parchment paper to catch any drippings from the bacon and make for an easier cleanup.
- If you choose to use cream cheese, take each pitted date and stuff it with about a teaspoon of cream cheese, using your fingers to gently press it in. This adds a creamy texture that complements the sweetness of the dates.
- Cut each slice of bacon in half. Take one piece of bacon and wrap it around each stuffed date, securing it with a toothpick. Make sure the ends of the bacon are tucked underneath to prevent unraveling during cooking.
- Arrange the bacon-wrapped dates on the prepared baking sheet, making sure they’re spaced apart to allow for even cooking.
- Bake the dates in the preheated oven for about 15-20 minutes, or until the bacon is crispy and browned. You may want to flip them halfway through for even cooking.
- Once cooked, remove the baking sheet from the oven and let the dates cool for a few minutes before serving. This will help the bacon set and make them easier to handle.
Extra Tips: For an extra layer of flavor, consider adding a sprinkle of brown sugar or a drizzle of balsamic glaze over the dates before baking for a sweet and tangy finish.
You can also experiment with different types of bacon, such as applewood-smoked or peppered, to enhance the dish’s flavor. Serve these warm and fresh out of the oven to enjoy the crispy bacon and gooey filling at their best!
5. Pomegranate Guacamole
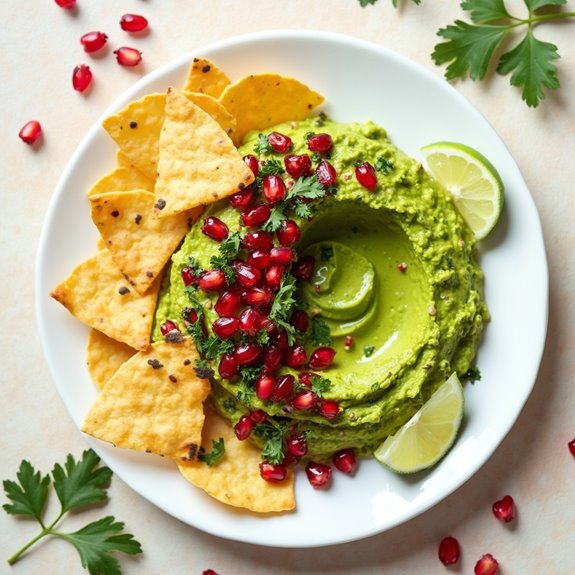
Title: Pomegranate Guacamole
Prep Time: 10 minutes
Cook Time: 0 minutes
Number of Servings: 4
Required Equipment List: Mixing bowl, fork, serving dish
Cuisine Type: Mexican-inspired
Pomegranate Guacamole is a vibrant and invigorating twist on the classic guacamole that’s perfect for holiday gatherings or any festive occasion. The creamy avocado blended with zesty lime and fresh cilantro is beautifully complemented by the juicy, tart pomegranate seeds, adding a pop of color and flavor.
This dish not only offers a delicious taste but also provides a nutritional boost with healthy fats from the avocado and antioxidants from the pomegranate. This simple and quick recipe can be whipped up in just minutes, making it an ideal appetizer for entertaining guests.
Serve it with tortilla chips, veggie sticks, or as a topping for tacos and grilled meats. The delightful combination of flavors and textures is sure to be a hit at your next party, leaving your guests craving more.
Ingredients:
- 2 ripe avocados
- 1 lime, juiced
- 1/4 cup fresh cilantro, chopped
- 1/2 teaspoon garlic powder
- Salt, to taste
- 1/2 cup pomegranate seeds
Instructions:
- Begin by cutting the avocados in half, removing the pit, and scooping the flesh into a mixing bowl. Mash the avocado with a fork to your desired level of creaminess; some may prefer a chunky texture while others may like it smooth.
- Add the freshly squeezed lime juice to the mashed avocado. This won’t only enhance the flavor but also help prevent the avocado from browning too quickly.
- Stir in the chopped cilantro and garlic powder, mixing everything together until well combined. Adjust the flavor with salt to taste, ensuring that all ingredients are balanced.
- Gently fold in the pomegranate seeds, being careful not to mash them. This will add a lovely crunch and burst of sweetness that complements the creamy guacamole perfectly.
- Transfer the Pomegranate Guacamole to a serving dish and garnish with additional pomegranate seeds and a sprinkle of cilantro if desired. Serve immediately with tortilla chips or fresh veggies for dipping.
Extra Tips: To keep your guacamole from browning too quickly, consider covering it tightly with plastic wrap, pressing the wrap directly onto the surface of the guacamole to minimize air exposure.
If you want to enhance the flavor even further, try adding diced red onion or jalapeño for a spicy kick. This guacamole can also be made a few hours in advance—just be sure to store it properly to maintain freshness!
6. Mini Caprese Skewers
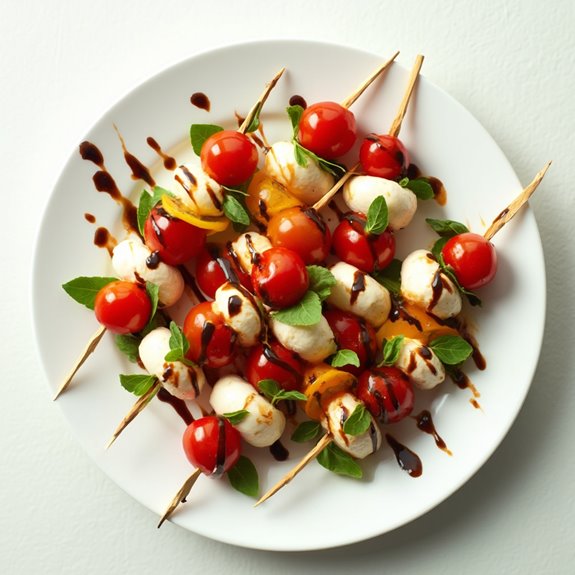
Title: Mini Caprese Skewers
Prep Time: 10 minutes
Cook Time: 0 minutes
Number of Servings: 8
Required Equipment List: Skewers, cutting board, knife
Cuisine Type: Italian
Mini Caprese Skewers are a delightful and invigorating appetizer that perfectly encapsulates the flavors of summer. With their combination of juicy cherry tomatoes, creamy mozzarella balls, and fragrant basil, these skewers offer a burst of flavor in every bite.
They’re simple to assemble and require no cooking, making them an ideal choice for holiday parties or casual gatherings. Drizzled with balsamic glaze, these bite-sized treats aren’t only delicious but also visually appealing.
These skewers are highly customizable, allowing you to adjust the ingredients based on your preferences or what you have on hand. You can even add a touch of creativity by incorporating other ingredients like prosciutto or avocado, elevating the dish even further.
With their fresh ingredients and vibrant colors, Mini Caprese Skewers are sure to impress your guests and leave them wanting more.
Ingredients:
- 1 pint cherry tomatoes
- 8 ounces fresh mozzarella balls (bocconcini)
- Fresh basil leaves
- Balsamic glaze
- Salt and pepper to taste
- Skewers (toothpick or small size)
Instructions:
- Start by washing the cherry tomatoes and basil leaves under cold water to confirm they’re clean. Pat them dry gently with a paper towel to remove excess moisture.
- On a cutting board, cut the mozzarella balls in half if they’re larger than bite-sized. This will make it easier to assemble the skewers and confirm a balanced bite.
- Begin assembling the skewers by threading a cherry tomato onto the skewer, followed by a basil leaf, and then a mozzarella ball. Repeat this process until you have filled the skewer, typically about 2-3 sets per skewer, depending on your preference.
- Once all the skewers are assembled, arrange them on a serving platter. Drizzle the balsamic glaze over the top for added flavor and visual appeal. Season with a sprinkle of salt and pepper to enhance the taste.
- Serve the Mini Caprese Skewers immediately, or refrigerate them for up to 30 minutes before serving to keep them fresh. They can be enjoyed cold or at room temperature.
Extra Tips: To elevate the flavor, consider marinating the mozzarella balls in olive oil, garlic, and herbs for a few hours before assembling the skewers. This will infuse them with extra flavor.
Additionally, feel free to experiment with different types of tomatoes or cheese, such as heirloom tomatoes or burrata, for a unique twist on this classic appetizer. Enjoy your vibrant and delicious Mini Caprese Skewers!
7. Shrimp Cocktail
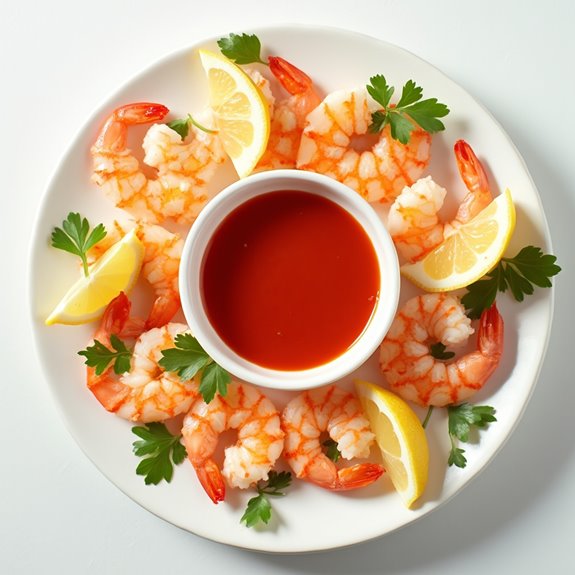
Title: Shrimp Cocktail
Prep Time: 15 minutes
Cook Time: 5 minutes
Number of Servings: 4
Required Equipment List: Large pot, ice bath, serving platter, cocktail glasses
Cuisine Type: American
Shrimp cocktail is a classic appetizer that never goes out of style. This dish features succulent shrimp cooked to perfection and served chilled with a zesty cocktail sauce, making it the ideal starter for any festive gathering or holiday celebration.
The combination of flavors and textures—from the tender shrimp to the tangy sauce—creates a delightful experience for your taste buds, providing a revitalizing contrast to richer holiday dishes.
Preparing shrimp cocktail is quick and easy, allowing you to impress your guests without spending hours in the kitchen. The key to achieving the best flavor is using fresh or high-quality frozen shrimp, and the homemade cocktail sauce adds a personal touch that elevates the dish.
With just a few simple ingredients, you can create a stunning presentation that will be the highlight of your appetizer spread.
Ingredients:
- 1 pound large shrimp, peeled and deveined
- 1 tablespoon Old Bay seasoning
- 1 cup ketchup
- 2 tablespoons horseradish
- 1 tablespoon lemon juice
- Salt and pepper to taste
- Lemon wedges (for garnish)
- Fresh parsley (for garnish)
Instructions:
- Fill a large pot with water and bring it to a boil. Add the Old Bay seasoning and stir to combine. This will infuse the shrimp with flavor while cooking.
- Once the water is boiling, add the shrimp and cook for about 2-3 minutes, or until they turn pink and opaque. Avoid overcooking the shrimp, as they can become tough.
- After the shrimp are cooked, immediately transfer them to an ice bath by placing them in a bowl filled with ice and cold water. This will stop the cooking process and help the shrimp stay firm and juicy.
- While the shrimp chill, prepare the cocktail sauce by combining the ketchup, horseradish, lemon juice, and a pinch of salt and pepper in a small bowl. Adjust the seasoning according to your taste preferences.
- Once the shrimp are completely chilled, drain them and pat them dry with paper towels. Arrange the shrimp on a serving platter or in cocktail glasses, and serve with the cocktail sauce on the side.
- Garnish the platter with lemon wedges and fresh parsley for a pop of color and added freshness. Enjoy your shrimp cocktail immediately!
Extra Tips: For the best flavor, consider using fresh shrimp from your local seafood market. If using frozen shrimp, be sure to thaw them completely before cooking.
You can also customize the cocktail sauce by adding a splash of Worcestershire sauce or a few dashes of hot sauce for an extra kick. Serve the shrimp cocktail chilled for the best experience, and feel free to get creative with your presentation by using fancy serving dishes.
8. Cheese and Charcuterie Board
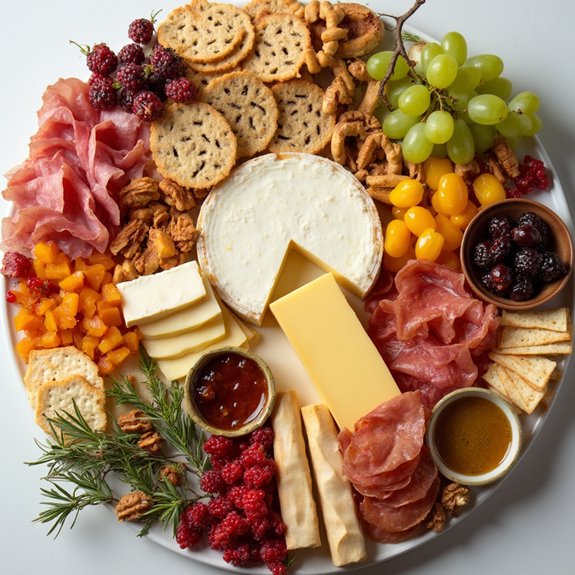
Title: Cheese and Charcuterie Board
Prep Time: 20 minutes
Cook Time: 0 minutes
Number of Servings: 8
Required Equipment List: Cutting board, cheese knife, serving platter, small bowls
Cuisine Type: French-inspired
A Cheese and Charcuterie Board is the perfect centerpiece for any gathering, combining a variety of cheeses, cured meats, and accompaniments that cater to diverse tastes. This dish allows you to showcase artisanal cheeses and gourmet charcuterie while offering a visually stunning presentation.
The beauty of a charcuterie board lies in its versatility; you can mix and match ingredients according to your preferences and seasonal availability, making it a crowd-pleaser for any occasion.
Creating a Cheese and Charcuterie Board isn’t only about flavor but also about aesthetics. Choose an assortment of colors and textures to create an eye-catching display. Pair rich, creamy cheeses with salty cured meats, crunchy nuts, and sweet fruits.
Don’t forget to include a variety of spreads and crackers, allowing your guests to explore different flavor combinations as they build their own bites. This board is perfect for holiday parties, wine tastings, or simply enjoying a cozy evening at home.
Ingredients:
- 3 types of cheese (e.g., brie, cheddar, gouda)
- 3 types of cured meats (e.g., salami, prosciutto, chorizo)
- Assorted crackers (e.g., water crackers, breadsticks, baguette slices)
- Fresh fruits (e.g., grapes, figs, apple slices)
- Dried fruits (e.g., apricots, cranberries)
- Nuts (e.g., almonds, walnuts)
- Olives (e.g., green olives, kalamata olives)
- Honey or fig jam
- Fresh herbs (e.g., rosemary, thyme) for garnish
Instructions:
- Begin by selecting a large cutting board or serving platter to arrange your cheese and charcuterie. Confirm it has enough space to accommodate all your ingredients attractively.
- Start placing the cheese on the board, spacing them out evenly. Use cheese knives for each type of cheese to prevent mingling flavors and make it easy for guests to serve themselves.
- Next, arrange the cured meats in a visually appealing manner. You can fold, roll, or fan out the slices to create height and dimension on the board.
- Fill in the spaces around the cheese and meats with crackers. You can stack or arrange them in piles for a more organized look, confirming a variety of options are available for pairing.
- Add fresh fruits and dried fruits throughout the board for pops of color and sweetness. These will contrast beautifully against the savory elements and provide invigorating bites.
- Sprinkle nuts and olives in small bowls or directly on the board, adding texture and further variety. Consider using small ramekins for dips like honey or fig jam, placing them strategically on the board.
- Finally, garnish the board with fresh herbs to add a touch of greenery and enhance the overall presentation. This last step brings everything together and elevates the aesthetic appeal.
Extra Tips: To elevate your Cheese and Charcuterie Board, consider adding unique items like pickles, mustards, or artisan spreads that can enhance the flavor profiles of the cheeses and meats.
Remember to balance strong flavors with milder options, and adjust the quantities based on the number of guests. For an added touch, include a small note card with the names of the cheeses and meats, so your guests can enjoy learning about what they’re tasting. Enjoy creating a memorable experience for your guests!
9. Holiday Veggie Platter

Title: Holiday Veggie Platter
Prep Time: 20 minutes
Cook Time: 0 minutes
Number of Servings: 8
Required Equipment List: Cutting board, knife, serving platter, small bowls (optional)
Cuisine Type: American
The Holiday Veggie Platter is a versatile and colorful appetizer that adds vibrance to any festive gathering. This no-cook dish showcases a variety of fresh vegetables that can be arranged beautifully to create an eye-catching centerpiece for your table. The crisp textures and natural flavors of the vegetables make it a healthy option that pairs perfectly with a selection of dips, such as hummus or ranch dressing.
It’s a great way to encourage guests to snack healthily during the holiday festivities. Creating a stunning veggie platter is as simple as selecting your favorite seasonal vegetables and arranging them in an appealing way. This recipe promotes creativity; you can mix and match colors, shapes, and textures to suit your taste or the theme of your celebration.
Whether you’re hosting a holiday party, a family gathering, or simply looking for a nutritious snack, this Holiday Veggie Platter delivers both style and substance.
Ingredients:
- 1 cup cherry tomatoes
- 1 cup cucumber, sliced
- 1 cup carrots, cut into sticks
- 1 cup bell peppers (red, yellow, and green), sliced
- 1 cup broccoli florets
- 1 cup cauliflower florets
- 1 cup celery sticks
- 1 cup radishes, halved
- 1 cup snap peas
- Dips of choice (hummus, ranch dressing, tzatziki, etc.)
Instructions:
- Start by washing all the fresh vegetables under cold running water. This guarantees they’re clean and ready to eat. Pat them dry with a paper towel to remove excess moisture before arranging them on the platter.
- On a cutting board, prepare the vegetables by slicing and chopping them into bite-sized pieces. For the cherry tomatoes, simply leave them whole, while cucumbers can be sliced into rounds or sticks. Carrots should be cut into sticks, and bell peppers should be sliced into strips.
- Arrange the vegetables on a large serving platter or board. Begin with a base of larger vegetables, such as broccoli and cauliflower florets, and then fill in the gaps with the smaller vegetables like cherry tomatoes and radishes. Aim for a colorful display by alternating the colors and shapes.
- If desired, place small bowls of your preferred dips in the center or around the platter for easy access. This not only adds to the visual appeal but also provides your guests with dipping options to enhance the flavors of the fresh vegetables.
- Once everything is arranged, cover the platter with plastic wrap and refrigerate until ready to serve. This helps keep the veggies crisp and fresh, assuring they’re at their best when it’s time to enjoy.
Extra Tips: To add even more variety to your veggie platter, consider incorporating seasonal vegetables such as roasted beets or artichoke hearts. You can also include some fresh herbs like dill or parsley for added flavor.
For a fun twist, try using different dips such as guacamole or a spicy salsa to give guests more options. Don’t be afraid to get creative with the arrangement; a beautiful presentation will entice everyone to indulge in this healthy appetizer!
10. Sweet Potato Bites

Title: Sweet Potato Bites
Prep Time: 20 minutes
Cook Time: 25 minutes
Number of Servings: 6
Required Equipment List: Baking sheet, parchment paper, mixing bowl, fork, oven
Cuisine Type: American
Sweet Potato Bites are a delightful and nutritious appetizer that packs a punch of flavor in each bite. These bite-sized snacks are made from roasted sweet potatoes, which are naturally sweet and creamy, making them a perfect base for various toppings.
This recipe highlights the versatility of sweet potatoes, combining them with toppings like feta cheese, herbs, and a drizzle of balsamic glaze to create a perfect balance of sweet and savory. They aren’t only visually appealing but also perfect for holiday gatherings or casual get-togethers.
The preparation is simple, and the sweet potatoes can be roasted ahead of time, making this dish a great option for entertaining. These bites can be customized with your favorite toppings, so feel free to get creative with flavors that suit your palate.
Whether served warm or at room temperature, Sweet Potato Bites are sure to be a hit among your guests, making them an essential addition to your holiday appetizer spread.
Ingredients:
- 2 large sweet potatoes
- 1 tablespoon olive oil
- Salt and pepper to taste
- 1/2 cup crumbled feta cheese
- 1/4 cup chopped fresh parsley
- 2 tablespoons balsamic glaze
- Optional: chopped walnuts or pecans for added crunch
Instructions:
- Preheat your oven to 400°F (200°C). Line a baking sheet with parchment paper to prevent sticking and make cleanup easier. This will help achieve a nice roasted texture on the sweet potatoes.
- Peel the sweet potatoes and cut them into 1-inch cubes. In a mixing bowl, toss the sweet potato cubes with olive oil, salt, and pepper until well coated. Spread them evenly on the prepared baking sheet.
- Roast the sweet potatoes in the preheated oven for 20-25 minutes, or until they’re fork-tender and lightly caramelized. Be sure to stir them halfway through for even cooking.
- Once roasted, remove the sweet potatoes from the oven and let them cool slightly. Use a fork to mash them gently, but leave them chunky for added texture.
- Arrange the sweet potato bites on a serving platter. Top each bite with crumbled feta cheese, a sprinkle of chopped parsley, and a drizzle of balsamic glaze. If desired, add chopped walnuts or pecans for an extra crunch.
Extra Tips: To enhance the flavor of your Sweet Potato Bites, consider adding spices such as paprika or cumin to the sweet potatoes before roasting. You can also experiment with different cheeses, like goat cheese or cheddar, to customize the taste.
If you’re making these ahead of time, roast the sweet potatoes in advance and assemble them just before serving to keep them fresh and vibrant. Enjoy your delicious and healthy appetizer!
11. Deviled Eggs With a Twist
Title: Deviled Eggs With a Twist
Prep Time: 15 minutes
Cook Time: 10 minutes
Number of Servings: 12
Required Equipment List: Pot, mixing bowl, whisk or fork, piping bag (optional), serving platter
Cuisine Type: American
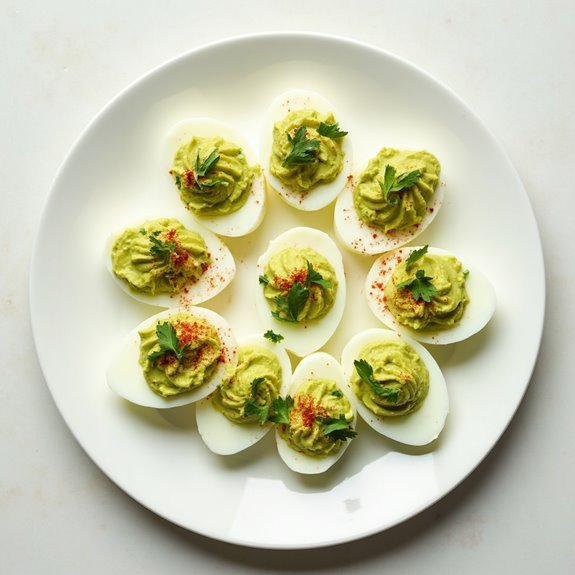
Deviled Eggs With a Twist are a delightful and creative take on the classic appetizer, perfect for holiday gatherings and festive occasions. By adding unique ingredients like avocado and sriracha, these deviled eggs bring a creamy texture and a spicy kick that will surprise and delight your guests.
The vibrant green filling not only looks appealing but also offers a healthier alternative that doesn’t compromise on flavor. This recipe is simple yet impressive, making it a great choice for both novice cooks and seasoned chefs.
You can easily customize the filling to suit your taste preferences or dietary needs, and they can be prepared ahead of time for convenience. Serve them on a beautiful platter, and watch them disappear at your next holiday party!
Ingredients:
- 6 large eggs
- 1 ripe avocado
- 2 tablespoons mayonnaise
- 1 teaspoon Dijon mustard
- 1 teaspoon sriracha (or more to taste)
- Salt and pepper to taste
- Chopped fresh cilantro (for garnish)
- Paprika (for garnish)
Instructions:
- Begin by placing the eggs in a pot and covering them with cold water. Bring the water to a rolling boil over medium-high heat. Once boiling, cover the pot with a lid and remove it from the heat. Let the eggs sit for 10-12 minutes to harden the yolks.
- After the resting period, transfer the eggs to an ice bath or run them under cold water to stop the cooking process. Once cooled, gently crack the shells and peel the eggs. Cut each egg in half lengthwise and carefully remove the yolks, placing them in a mixing bowl.
- To the mixing bowl with the yolks, add the ripe avocado, mayonnaise, Dijon mustard, sriracha, salt, and pepper. Use a whisk or fork to mash and mix until the ingredients are well combined and the mixture is creamy. Taste and adjust the seasoning as needed.
- If you have a piping bag, transfer the filling mixture into it for a more polished presentation. If not, you can simply spoon the filling back into the egg whites. Fill each egg white half generously with the yolk mixture, creating a lovely mound.
- For the finishing touch, garnish the deviled eggs with a sprinkle of paprika and chopped fresh cilantro. Arrange them on a serving platter and serve immediately, or refrigerate until ready to serve.
Extra Tips: For an extra twist, consider adding finely chopped jalapeños or pickled onions to the filling for added flavor and texture.
These deviled eggs can be made a few hours in advance; just keep them covered in the refrigerator until serving. Feel free to experiment with different toppings, such as crumbled bacon or feta cheese, to personalize your deviled eggs even further! Enjoy this delightful appetizer at your next holiday gathering!
12. Smoked Salmon Canapés

Title: Smoked Salmon Canapés
Prep Time: 10 minutes
Cook Time: 0 minutes
Number of Servings: 12 canapés
Required Equipment List: Cutting board, knife, serving platter, mixing bowl
Cuisine Type: Scandinavian
Smoked Salmon Canapés are a delightful and elegant appetizer that captures the essence of festive gatherings. These bite-sized treats feature a creamy spread of cream cheese mixed with fresh herbs atop a crisp base, adorned with rich, smoky salmon. They aren’t only visually appealing but also packed with flavor, making them a perfect addition to any holiday celebration or special occasion.
This recipe is incredibly versatile, allowing you to customize the toppings to suit your palate. The combination of the creamy spread, the saltiness of the smoked salmon, and the crunch of the base creates a harmonious blend of textures and tastes. Whether you serve them at a cocktail party, a family gathering, or simply as a treat for yourself, these canapés are sure to impress your guests and leave them wanting more.
Ingredients:
- 6 ounces smoked salmon, thinly sliced
- 4 ounces cream cheese, softened
- 2 tablespoons fresh dill, chopped
- 1 tablespoon capers, rinsed and chopped
- 1 tablespoon lemon juice
- 12 bread rounds or crackers
- Fresh dill sprigs (for garnish)
- Lemon wedges (for serving)
Instructions:
- In a mixing bowl, combine the softened cream cheese, chopped dill, capers, and lemon juice. Mix until well blended and creamy. This flavorful spread will serve as the base for your smoked salmon canapés, enhancing the overall taste.
- Take your bread rounds or crackers and lay them out on a serving platter. If you’re using bread, you may choose to toast them lightly for extra crunch. The base is key to holding all the delicious toppings together.
- Spread a generous layer of the cream cheese mixture over each bread round or cracker. Ascertain that you cover the entire surface for a balanced flavor in every bite.
- Carefully place a slice of smoked salmon on top of each canapé, allowing the edges to drape slightly for an elegant presentation. You can use as much or as little salmon as desired based on your preference.
- For a finishing touch, garnish each canapé with a small sprig of fresh dill. This not only adds visual appeal but also enhances the flavor profile of the dish.
- Serve the canapés immediately, accompanied by lemon wedges for guests to squeeze on top if they desire. Enjoy your creation as a sophisticated appetizer!
Extra Tips: To elevate your canapés further, consider adding thin slices of cucumber or radish under the salmon for an added crunch and freshness. You can also experiment with different spreads, such as a horseradish cream or a flavored cream cheese, to create varied flavor profiles.
These canapés are best enjoyed fresh, but if you need to prepare them in advance, assemble the cream cheese base and salmon separately and combine them just before serving to maintain crispness.
13. Parmesan Crisps

Title: Parmesan Crisps
Prep Time: 10 minutes
Cook Time: 15 minutes
Number of Servings: 6
Required Equipment List: Baking sheet, parchment paper, oven, grater, measuring cups, spatula
Cuisine Type: Italian
Parmesan crisps are a delightful and easy-to-make appetizer that adds a crunchy and savory element to any holiday spread. Made with just one main ingredient, these cheese wafers are incredibly versatile and can be served on their own or as a garnish for soups and salads. The rich, nutty flavor of aged Parmesan cheese shines through, making these crisps a favorite among cheese lovers.
They’re perfect for snacking, entertaining, or adding a gourmet touch to your holiday gatherings. Making Parmesan crisps isn’t only simple but also quick, taking only about 15 minutes from start to finish. The process involves grating the cheese, baking it until golden, and letting it cool to achieve the perfect crispiness.
These crisps can be made ahead of time and stored in an airtight container, making them an excellent choice for meal prep or last-minute entertaining. Pair them with your favorite dips or a glass of wine for a delightful treat.
Ingredients:
- 1 cup grated Parmesan cheese
- Optional: spices (such as paprika or black pepper) for seasoning
Instructions:
- Preheat your oven to 400°F (200°C). Line a baking sheet with parchment paper to prevent the cheese from sticking and guarantee easy removal after baking.
- In a bowl, measure out 1 cup of grated Parmesan cheese. If desired, mix in any additional spices for flavor, such as paprika or freshly cracked black pepper.
- Using a tablespoon, scoop out portions of the cheese mixture and place them on the prepared baking sheet, leaving space between each scoop to allow for spreading.
- Bake the cheese in the preheated oven for 5-7 minutes, or until the edges are golden brown and the crisps are bubbling. Keep a close eye on them, as they can burn quickly.
- Once baked, remove the baking sheet from the oven and allow the crisps to cool for a few minutes. They’ll harden as they cool, making them crispy and ready to enjoy.
- Carefully lift the cooled crisps off the parchment paper using a spatula and serve immediately or store in an airtight container for later use.
Extra Tips: For a variation in flavor, try mixing in different herbs like dried oregano or thyme into the cheese before baking. You can also experiment with cheese blends; a combination of Parmesan and aged cheddar can provide a unique twist.
Make sure to use finely grated cheese for peak melting and crisping. If you want to create shapes, consider using cookie cutters on the parchment paper before adding the cheese. Enjoy your delicious Parmesan crisps as a delightful addition to any holiday appetizer spread!
14. Holiday Meatballs
Title: Holiday Meatballs
Prep Time: 15 minutes
Cook Time: 25 minutes
Number of Servings: 6
Required Equipment List: Mixing bowl, baking sheet, oven, skillet, meat thermometer
Cuisine Type: American
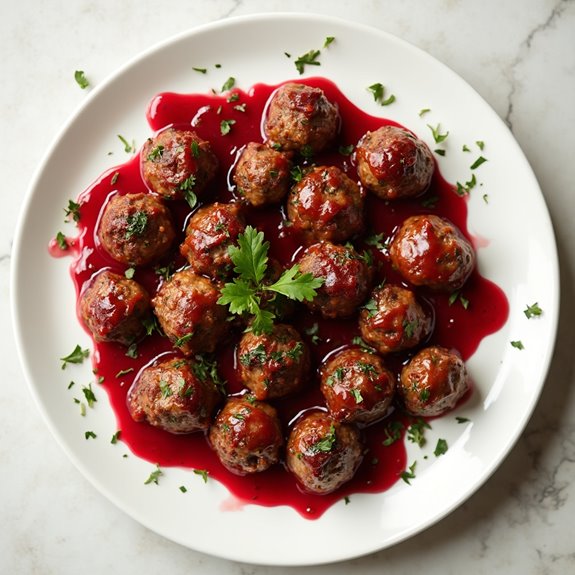
These Holiday Meatballs are the perfect festive appetizer to serve during your holiday gatherings. Juicy and flavorful, these meatballs are made with a blend of ground beef and pork, seasoned with aromatic herbs and spices. Baked to perfection and served with a sweet and tangy cranberry sauce, they offer a delightful combination of savory and sweet that will leave your guests wanting more.
They’re easy to prepare and can be made ahead of time, making them an ideal choice for busy holiday hosts. The beauty of these meatballs lies in their versatility; they can be served on their own, with toothpicks for easy snacking, or as part of a larger spread. The cranberry sauce not only adds a pop of color to your platter but also complements the rich flavors of the meatballs beautifully.
Whether you’re hosting a big holiday party or enjoying an intimate family dinner, these meatballs are sure to be a hit.
Ingredients:
- 1 pound ground beef
- 1 pound ground pork
- 1 cup breadcrumbs
- 1/2 cup grated Parmesan cheese
- 1/4 cup chopped fresh parsley
- 2 cloves garlic, minced
- 1 teaspoon onion powder
- 1 teaspoon salt
- 1/2 teaspoon black pepper
- 1/2 teaspoon dried oregano
- 1/2 teaspoon dried thyme
- 1 egg, beaten
- 1 cup cranberry sauce (store-bought or homemade)
Instructions:
- Preheat your oven to 400°F (200°C). Line a baking sheet with parchment paper to prevent sticking and make cleanup easier.
- In a large mixing bowl, combine the ground beef, ground pork, breadcrumbs, Parmesan cheese, parsley, garlic, onion powder, salt, black pepper, oregano, thyme, and beaten egg. Mix everything together until just combined, being careful not to overmix, which can make the meatballs tough.
- Using your hands, shape the mixture into meatballs about 1 inch in diameter and place them on the prepared baking sheet, spacing them evenly apart.
- Bake the meatballs in the preheated oven for 20-25 minutes, or until they’re browned and cooked through, reaching an internal temperature of 165°F (74°C).
- While the meatballs are baking, heat the cranberry sauce in a small skillet over medium heat until warmed through. You can add a splash of water if the sauce is too thick.
- Once the meatballs are done, remove them from the oven and transfer them to a serving platter. Drizzle the warm cranberry sauce over the meatballs or serve it on the side for dipping.
Extra Tips: For a spicy kick, consider adding a pinch of red pepper flakes to the meat mixture. You can also make the meatballs ahead of time; just store them in the refrigerator after baking and reheat them in the oven before serving.
If you want to try a different flavor profile, experiment with different herbs like basil or rosemary, or use a different type of sauce, such as barbecue or teriyaki. Enjoy your festive appetizer!
15. Chocolate-Dipped Pretzels

Title: Chocolate-Dipped Pretzels
Prep Time: 15 minutes
Cook Time: 10 minutes
Number of Servings: 12
Required Equipment List: Baking sheet, parchment paper, microwave-safe bowl, fork, cooling rack
Cuisine Type: American
Chocolate-Dipped Pretzels are a delightful combination of sweet and salty that make for an irresistible holiday treat or snack. The crunchy pretzel rods are dipped in rich, melted chocolate and then decorated with festive sprinkles or crushed nuts, creating a perfect balance of flavors and textures.
These treats aren’t only simple to make but also enjoyable to personalize, making them a fun activity for families or a great addition to any holiday gathering. These chocolate-dipped snacks can be prepared in less than half an hour and are perfect for sharing.
The versatility of this recipe allows you to use different types of chocolate—dark, milk, or white—depending on your preference. Additionally, you can customize the toppings to fit the occasion, whether it be colorful sprinkles for Christmas or a more sophisticated finish with crushed pistachios for a classy touch.
Ingredients:
- 12 pretzel rods
- 1 cup chocolate chips (milk, dark, or white)
- 1 tablespoon coconut oil (optional, for smoother chocolate)
- Sprinkles or crushed nuts for decoration
Instructions:
- Begin by preparing your workspace. Line a baking sheet with parchment paper to prevent the pretzels from sticking as they cool. This will also make for easy cleanup once you’re done.
- In a microwave-safe bowl, combine the chocolate chips and coconut oil (if using). Heat in the microwave in 30-second intervals, stirring between each interval until the chocolate is completely melted and smooth.
- Once the chocolate is melted, take each pretzel rod and dip it into the chocolate, covering about 2/3 of the pretzel. Allow any excess chocolate to drip off before placing the dipped pretzel on the prepared baking sheet.
- While the chocolate is still wet, sprinkle your choice of decorations—such as colorful sprinkles or crushed nuts—over the chocolate-coated pretzel. This is the perfect time to get creative with your toppings!
- After dipping all the pretzels, place the baking sheet in the refrigerator for about 10 minutes, or until the chocolate has fully hardened.
- Once the chocolate has set, you can serve the pretzels immediately or store them in an airtight container at room temperature for up to a week.
Extra Tips: For an extra layer of flavor, consider adding a splash of vanilla extract to the melted chocolate. You can also experiment with drizzling a contrasting chocolate over the dipped pretzels for a decorative touch.
If you’re making these treats for a party, feel free to package them in festive bags or boxes for a charming gift that everyone will appreciate!
Conclusion
So there you have it—15 delicious appetizer ideas to wow your guests this Christmas! Remember, “the best things in life are meant to be shared.” Whether you whip up Cranberry Brie Bites or Chocolate-Dipped Pretzels, your holiday gathering will be a hit. Why not mix and match these tasty treats to create your own festive platter? Get ready to enjoy good food, laughter, and memories with loved ones. Happy cooking, and even happier feasting!


