19 Christmas Side Dish Recipe Ideas
If you’re looking to impress at your holiday gathering, consider these 19 Christmas side dish ideas! From creamy garlic mashed potatoes, which pair perfectly with roasts, to honey glazed carrots that add a sweet touch, there’s something for everyone. Don’t forget the crispy roasted Brussels sprouts—they’ll satisfy even the pickiest eaters. How about a cheesy broccoli casserole or a vibrant cranberry orange salad to jazz up the table? With a mix of flavors and colors, your feast won’t just taste good; it will look stunning too. Want to discover even more delicious options? Keep going for more inspiration!
1.Creamy Garlic Mashed Potatoes
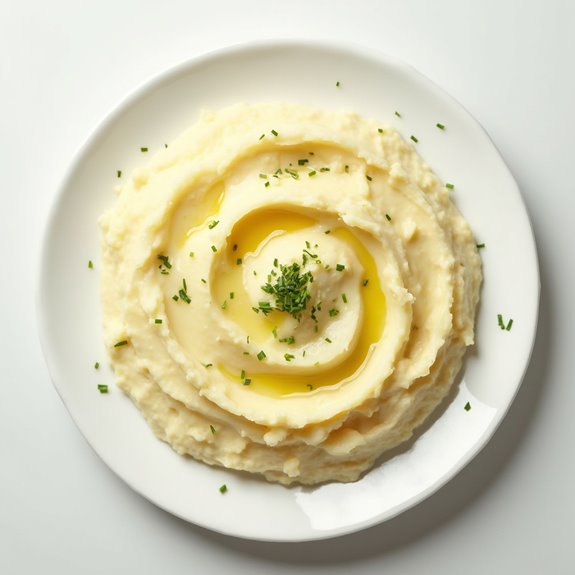
Title: Creamy Garlic Mashed Potatoes
Prep Time: 15 minutes
Cook Time: 20 minutes
Number of Servings: 4
Required Equipment List: Large pot, potato masher, mixing bowl, measuring cups, garlic press
Cuisine Type: American
Creamy Garlic Mashed Potatoes are a classic side dish that elevates any meal, especially during the festive season. The combination of fluffy potatoes, rich butter, and roasted garlic creates a velvety texture that’s simply irresistible. This recipe is perfect for family gatherings or holiday dinners, providing a comforting and satisfying accompaniment to your main dishes.
The roasted garlic infuses the potatoes with a mellow, sweet flavor that beautifully complements the creaminess, making it a beloved favorite at any table. Making these mashed potatoes isn’t only easy but also allows for customization according to your taste preferences. You can adjust the amount of garlic for more or less intensity and choose to add other ingredients like sour cream or cream cheese for an even richer flavor.
Whether served alongside a juicy roast or a vegetarian main, these creamy garlic mashed potatoes are sure to become a staple in your holiday repertoire.
Ingredients:
- 2 pounds russet potatoes, peeled and cubed
- 1 head of garlic
- 1/2 cup unsalted butter
- 1/2 cup heavy cream
- Salt and pepper to taste
- Fresh chives or parsley for garnish (optional)
Instructions:
- Begin by preheating your oven to 400°F (200°C). Cut the top off the head of garlic, drizzle with olive oil, and wrap it in aluminum foil. Roast the garlic in the oven for about 30-35 minutes until soft and caramelized.
- While the garlic is roasting, place the cubed potatoes in a large pot and cover them with cold water. Add a generous pinch of salt to the water and bring it to a boil over high heat. Once boiling, reduce the heat and let it simmer until the potatoes are tender, about 15-20 minutes.
- Once the potatoes are cooked, drain them well and return them to the pot. Squeeze the roasted garlic cloves out of their skins into the pot with the potatoes. Add the butter and heavy cream, then mash the mixture with a potato masher until smooth and creamy.
- Season the mashed potatoes with salt and pepper to taste, adjusting to your preference. If desired, you can also fold in additional ingredients like sour cream or cream cheese for extra creaminess.
- Serve the creamy garlic mashed potatoes warm, garnished with chopped fresh chives or parsley for a pop of color and flavor. Enjoy alongside your favorite holiday dishes!
Extra Tips: For a more intense garlic flavor, consider adding a couple of minced cloves of fresh garlic to the potatoes while mashing. If you prefer a lighter version, you can substitute half of the heavy cream with chicken or vegetable broth. Always taste and adjust the seasoning before serving, as the salt and pepper can greatly enhance the overall flavor of the dish.
2.Honey Glazed Carrots

Title: Honey Glazed Carrots
Prep Time: 10 minutes
Cook Time: 20 minutes
Number of Servings: 4
Required Equipment List: Medium saucepan, measuring cups, spatula, serving dish
Cuisine Type: American
Honey Glazed Carrots are a simple yet elegant side dish that can elevate any holiday meal or weeknight dinner. The natural sweetness of the carrots is enhanced by the addition of honey and butter, creating a glossy coating that makes them irresistibly delicious.
This dish not only looks beautiful on the plate but also brings a burst of color and sweetness that complements savory mains perfectly. This recipe is incredibly easy to prepare and takes just a few ingredients to make. The carrots are cooked until tender and then glazed with a mixture of honey, butter, and a hint of salt, making them a crowd-pleaser for both kids and adults.
Whether served during the festive season or any time of year, these honey glazed carrots will surely become a family favorite.
Ingredients:
- 1 pound baby carrots
- 2 tablespoons honey
- 2 tablespoons unsalted butter
- 1/2 teaspoon salt
- 1/4 teaspoon black pepper
- Fresh parsley (for garnish, optional)
Instructions:
- Begin by washing the baby carrots thoroughly under cold water. If you’re using whole carrots, peel and slice them into uniform pieces to guarantee even cooking.
- In a medium saucepan, bring about 2 cups of water to a boil. Add the carrots and a pinch of salt, then cover and reduce the heat to medium. Cook the carrots for about 10 minutes, or until they’re tender but still crisp.
- Once the carrots are cooked, drain any excess water from the saucepan. Return the carrots to the pan and add the butter, honey, salt, and black pepper. Stir gently to combine and coat the carrots evenly.
- Continue to cook the carrots over low heat for another 5-7 minutes, allowing the honey and butter to create a glaze that clings to the carrots. Stir occasionally to prevent sticking.
- Once the carrots are nicely glazed and heated through, remove them from the heat. Transfer the honey glazed carrots to a serving dish and garnish with fresh parsley if desired.
Extra Tips: For a gourmet touch, consider adding a sprinkle of cinnamon or a squeeze of fresh lemon juice for brightness. If you want to make this dish ahead of time, you can prepare the carrots and glaze, then reheat gently on the stovetop just before serving.
This dish pairs wonderfully with roasted meats or as part of a holiday feast, making it versatile for any occasion. Enjoy your delicious honey glazed carrots!
3.Roasted Brussels Sprouts
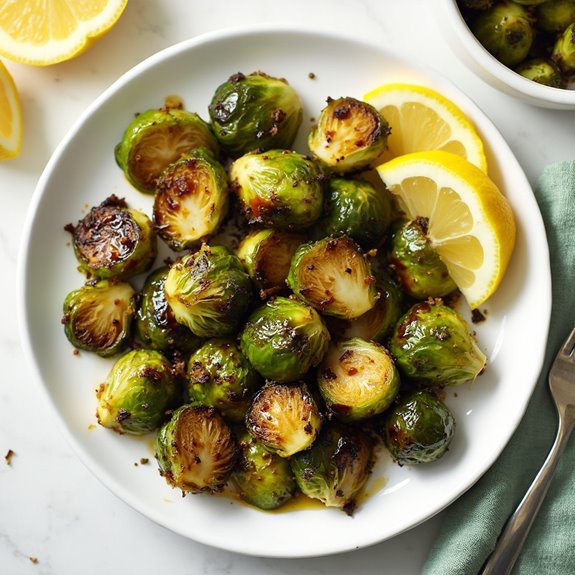
Title: Roasted Brussels Sprouts
Prep Time: 10 minutes
Cook Time: 25 minutes
Number of Servings: 4
Required Equipment List: Baking sheet, mixing bowl, oven, spatula
Cuisine Type: American
Roasted Brussels Sprouts are a simple yet delicious side dish that brings out the natural sweetness of these nutrient-packed vegetables. When roasted, Brussels sprouts develop a crispy exterior while maintaining a tender inside, creating a delightful texture that pairs well with various main courses. This recipe is perfect for holiday gatherings or a cozy family dinner, making it a versatile addition to your culinary repertoire.
The process of roasting Brussels sprouts is straightforward, requiring minimal ingredients to let their flavor shine. A drizzle of olive oil and a sprinkle of salt and pepper is all they need to transform into a savory side that will have everyone coming back for more. Feel free to customize this recipe by adding your favorite seasonings, garlic, or even a splash of balsamic vinegar for an extra zing.
Ingredients:
- 1 pound Brussels sprouts, trimmed and halved
- 2 tablespoons olive oil
- Salt and pepper to taste
- 1 teaspoon garlic powder (optional)
- 1 tablespoon balsamic vinegar (optional)
- Fresh lemon juice (for serving, optional)
Instructions:
- Preheat your oven to 425°F (220°C). This high temperature is crucial for getting those crispy, caramelized edges on the Brussels sprouts that everyone loves.
- In a mixing bowl, combine the halved Brussels sprouts with olive oil, salt, pepper, and any optional seasonings you prefer, such as garlic powder. Toss the sprouts until they’re evenly coated with the oil and seasonings.
- Spread the Brussels sprouts in a single layer on a baking sheet. Make sure they aren’t overcrowded, as this will prevent them from roasting properly and achieving that desired crispiness.
- Roast in the preheated oven for 20-25 minutes, stirring halfway through to guarantee even cooking. The Brussels sprouts should be golden brown and tender when finished.
- Remove from the oven and drizzle with balsamic vinegar and a squeeze of fresh lemon juice, if desired. This step adds a lovely tang and brightness to the dish.
- Serve warm as a delicious side dish to complement your favorite entrees. Enjoy the flavorful and nutritious addition to your holiday table!
Extra Tips: For added flavor and texture, you can toss in some chopped bacon or pancetta before roasting. The rendered fat will enhance the sprouts’ natural sweetness while adding a savory element.
Additionally, try experimenting with different seasonings, such as smoked paprika or grated Parmesan cheese, to create unique flavor profiles. Roasted Brussels sprouts can also be made ahead of time and reheated in the oven for a quick side dish!
4.Cheesy Broccoli Casserole
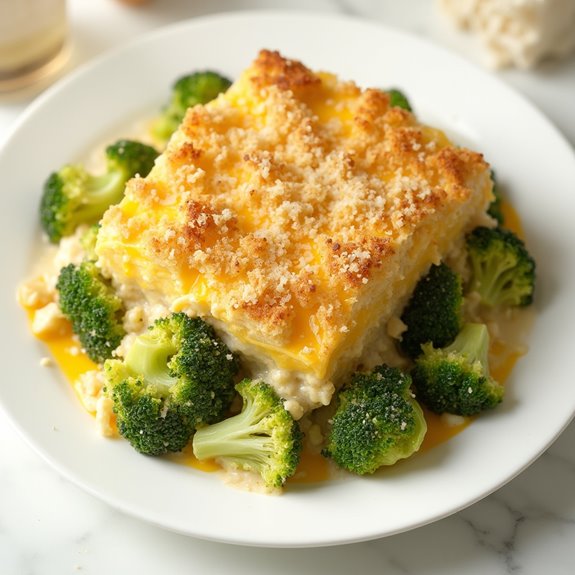
Title: Cheesy Broccoli Casserole
Prep Time: 15 minutes
Cook Time: 30 minutes
Number of Servings: 6
Required Equipment List: 3-quart baking dish, mixing bowl, saucepan, whisk, oven
Cuisine Type: American
Cheesy Broccoli Casserole is a comforting and hearty side dish that brings together tender broccoli florets and a rich, creamy cheese sauce, making it a perfect complement to any holiday meal. The combination of broccoli and cheese isn’t only delicious but also adds a pop of color to your dinner table.
This casserole can be prepared ahead of time, allowing you to enjoy more time with family and friends during the festive season. The cheese sauce is made from scratch, using a blend of sharp cheddar and cream cheese for a smooth and velvety texture. Topped with crispy breadcrumbs, this dish is sure to be a hit with both kids and adults alike.
It’s an excellent way to incorporate vegetables into your holiday feast while still keeping everything indulgent and satisfying.
Ingredients:
- 4 cups fresh broccoli florets
- 1 cup sharp cheddar cheese, shredded
- 4 ounces cream cheese, softened
- 1 cup milk
- 1/4 cup butter
- 1/4 cup all-purpose flour
- 1/2 teaspoon garlic powder
- 1/2 teaspoon onion powder
- Salt and pepper to taste
- 1 cup breadcrumbs
- 1/4 cup grated Parmesan cheese
Instructions:
- Preheat your oven to 350°F (175°C). Grease a 3-quart baking dish with cooking spray or butter to prevent sticking.
- In a saucepan over medium heat, melt the butter. Once melted, whisk in the flour to create a roux, cooking for about 2 minutes until lightly golden. Gradually add the milk while whisking continuously to avoid lumps.
- Continue cooking the mixture until it thickens, around 5-7 minutes. Stir in the softened cream cheese, sharp cheddar cheese, garlic powder, onion powder, salt, and pepper. Mix until the cheese is fully melted and the sauce is smooth.
- In a large mixing bowl, combine the fresh broccoli florets with the cheese sauce, ensuring the broccoli is well coated. Transfer the mixture to the prepared baking dish.
- In a separate bowl, mix the breadcrumbs with the grated Parmesan cheese. Sprinkle this mixture evenly over the broccoli and cheese layer in the baking dish.
- Bake in the preheated oven for 25-30 minutes or until the top is golden brown and the casserole is bubbling. Remove from the oven and let it cool for a few minutes before serving.
Extra Tips: For added flavor, consider mixing in some cooked chicken or bacon for a heartier dish. You can also use frozen broccoli instead of fresh; just make sure to thaw and drain it well before mixing with the cheese sauce.
If you’re looking for a spicier kick, add a pinch of cayenne pepper or some chopped jalapeños to the cheese sauce. Enjoy your cheesy creation!
5.Cranberry Orange Salad
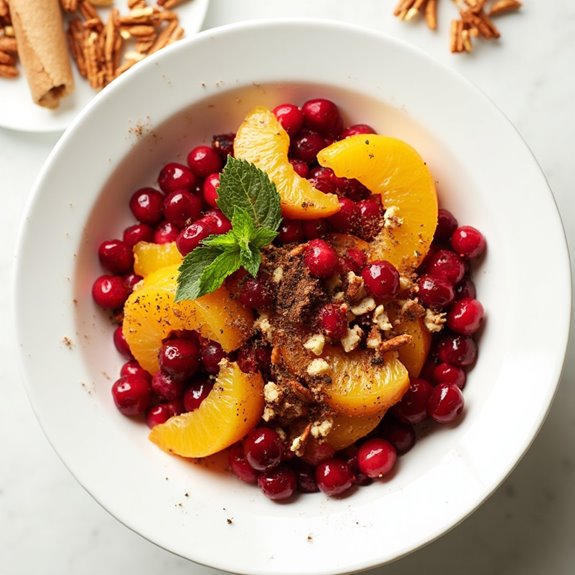
Title: Cranberry Orange Salad
Prep Time: 15 minutes
Cook Time: 0 minutes
Number of Servings: 6
Required Equipment List: Mixing bowl, whisk, serving dish
Cuisine Type: American
Cranberry Orange Salad is a revitalizing and vibrant dish that perfectly complements any holiday meal. This salad brings together the tartness of fresh cranberries and the zesty sweetness of oranges, creating a delightful balance of flavors.
The addition of crunchy pecans and a hint of cinnamon adds texture and warmth, making it a festive side dish that’s both visually appealing and delicious. This no-cook recipe is a breeze to prepare, allowing you to focus on the main course while still impressing your guests with a stunning salad.
This salad isn’t only beautiful but also packed with nutrients, making it a wholesome addition to your holiday spread. The combination of fresh fruits and nuts provides a burst of color and flavor, while the light dressing enhances the natural sweetness of the ingredients.
Serve this Cranberry Orange Salad at your next gathering, and watch it become a favorite among family and friends.
Ingredients:
- 2 cups fresh cranberries
- 2 large oranges, segmented
- 1/2 cup pecans, chopped
- 1/4 cup sugar
- 1/4 cup orange juice
- 1/2 teaspoon ground cinnamon
- 1 tablespoon fresh mint, chopped (for garnish)
Instructions:
- Rinse the fresh cranberries under cold water and remove any stems or blemished berries. Pat them dry with a paper towel to verify they’re ready for mixing.
- In a large mixing bowl, combine the cleaned cranberries and orange segments. Gently toss to combine the fruits without breaking the orange segments.
- In a separate small bowl, whisk together the sugar, orange juice, and ground cinnamon until the sugar is dissolved. This will create a light dressing that enhances the flavors of the salad.
- Pour the dressing over the cranberry and orange mixture, stirring gently to coat all the fruits evenly. Be careful not to mash the cranberries or oranges.
- Add the chopped pecans to the salad and give it one last gentle toss to incorporate all the ingredients. Transfer the salad to a serving dish and garnish with fresh mint before serving.
Extra Tips: For an extra layer of flavor, consider adding a splash of vanilla extract to the dressing. If you prefer a less tart salad, you can increase the sugar to taste.
This salad can be prepared ahead of time and stored in the refrigerator for a few hours before serving, allowing the flavors to meld beautifully. Enjoy this festive Cranberry Orange Salad as a bright and revitalizing addition to your holiday table!
6.Garlic Butter Green Beans
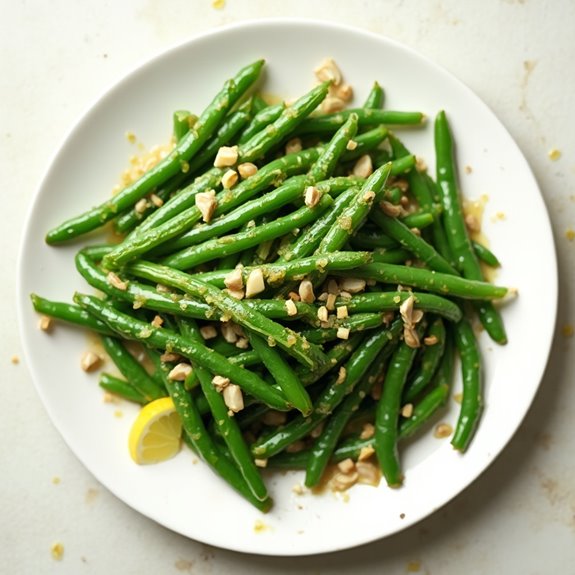
Title: Garlic Butter Green Beans
Prep Time: 10 minutes
Cook Time: 15 minutes
Number of Servings: 4
Required Equipment List: Large skillet, measuring spoons, spatula, serving dish
Cuisine Type: American
Garlic Butter Green Beans are a simple yet elegant side dish that celebrates the fresh, vibrant flavors of green beans while elevating them with the rich taste of garlic and butter. This dish is perfect for holiday gatherings, family dinners, or any occasion where you want to impress your guests without spending hours in the kitchen.
The combination of sautéed garlic and tender green beans creates a delightful experience that perfectly complements a variety of main courses, from roasted meats to vegetarian options. This recipe isn’t only quick to prepare but also allows for easy customization. You can add a splash of lemon juice for brightness, sprinkle with red pepper flakes for a slight kick, or even toss in some toasted almonds for added crunch.
In just under 30 minutes, you can have a gorgeous, flavorful side dish that adds color and taste to your table.
Ingredients:
- 1 pound fresh green beans, trimmed
- 3 tablespoons unsalted butter
- 4 cloves garlic, minced
- Salt, to taste
- Black pepper, to taste
- Lemon juice (optional, for serving)
Instructions:
- Begin by washing the fresh green beans under cold running water. Trim the ends of the beans to remove any tough bits. This step guarantees that you have clean, tender green beans ready for cooking.
- In a large skillet, melt the unsalted butter over medium heat. Once the butter is melted and bubbly, add the minced garlic to the skillet. Sauté the garlic for about 1-2 minutes until it becomes fragrant and starts to turn a light golden color. Be careful not to burn the garlic, as this can impart a bitter taste.
- Add the trimmed green beans to the skillet and stir to coat them well with the garlic butter. Season the mixture with salt and black pepper to taste. Cook the green beans for about 5-7 minutes, stirring occasionally, until they’re bright green and tender-crisp.
- Once the green beans are cooked to your liking, taste and adjust the seasoning if necessary. If you’d like to add a touch of brightness, drizzle a little lemon juice over the beans just before serving.
- Transfer the garlic butter green beans to a serving dish and enjoy immediately. The dish is best served warm, allowing the flavors to shine through.
Extra Tips: For a more robust flavor, consider adding freshly grated Parmesan cheese on top just before serving. You can also enhance the dish with slivered almonds or pine nuts for added texture.
If you prefer a spicier kick, add a pinch of crushed red pepper flakes while sautéing the garlic. This dish pairs beautifully with roasted meats, grilled seafood, or even as a standalone vegetarian option. Enjoy your garlic butter green beans!
7.Sweet Potato Casserole
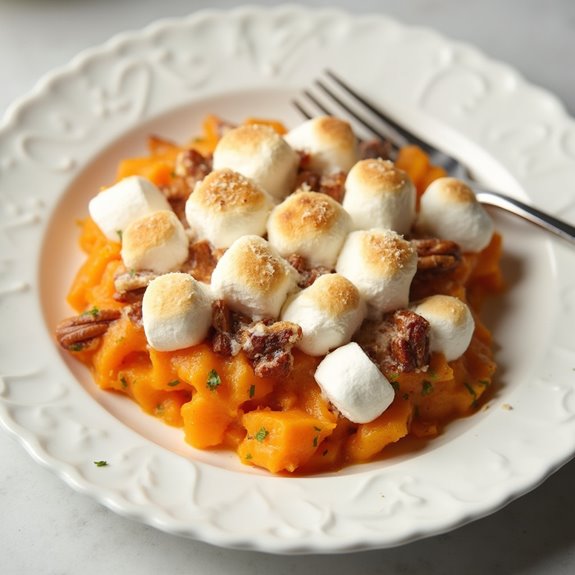
Title: Sweet Potato Casserole
Prep Time: 20 minutes
Cook Time: 45 minutes
Number of Servings: 8
Required Equipment List: Baking dish, mixing bowl, whisk, oven, spoon
Cuisine Type: American
Sweet Potato Casserole is a classic holiday side dish that combines the natural sweetness of sweet potatoes with a crunchy, buttery topping, making it a crowd-pleaser at festive gatherings. This dish isn’t only delicious but also packed with nutrients, making it a comforting addition to your holiday table.
The creamy texture of the sweet potatoes, blended with warm spices like cinnamon and nutmeg, creates a delightful flavor that perfectly complements savory main courses. This recipe offers a wonderful balance of flavors and textures, with a sweet and crunchy topping made from brown sugar, pecans, and marshmallows.
It’s an easy-to-make dish that can be prepared ahead of time, allowing you to focus on other aspects of your holiday meal. Whether it’s Thanksgiving, Christmas, or any family gathering, Sweet Potato Casserole is sure to become a cherished favorite.
Ingredients:
- 4 cups mashed sweet potatoes (about 4 medium sweet potatoes)
- 1/2 cup granulated sugar
- 1/2 cup brown sugar
- 1/2 cup milk
- 1/4 cup unsalted butter, melted
- 2 large eggs
- 1 teaspoon vanilla extract
- 1 teaspoon ground cinnamon
- 1/2 teaspoon ground nutmeg
- 1/2 teaspoon salt
- 1 cup mini marshmallows
- 1 cup chopped pecans
Instructions:
- Preheat your oven to 350°F (175°C). Begin by peeling and dicing the sweet potatoes into chunks, then boil them in a large pot of salted water until tender, about 15-20 minutes. Drain and let them cool slightly before mashing.
- In a large mixing bowl, combine the mashed sweet potatoes with granulated sugar, brown sugar, milk, melted butter, eggs, vanilla extract, cinnamon, nutmeg, and salt. Whisk together until the mixture is smooth and well combined.
- Transfer the sweet potato mixture into a greased baking dish and spread it evenly. This will serve as the base for your casserole.
- In a separate bowl, mix together the mini marshmallows and chopped pecans. Sprinkle this mixture evenly over the top of the sweet potato base, creating a crunchy topping.
- Bake the casserole in the preheated oven for 30-35 minutes, or until the topping is golden brown and the casserole is heated through. If desired, you can broil it for an additional 1-2 minutes to achieve a more toasted topping, but watch closely to prevent burning.
- Once done, remove the casserole from the oven and let it cool for a few minutes before serving. This will allow the flavors to meld together and make it easier to scoop out portions.
Extra Tips: For an even richer flavor, consider adding a splash of orange juice or zest to the sweet potato mixture. You can also mix in a handful of dried cranberries or raisins for a touch of tartness.
If you prefer a less sweet casserole, reduce the amount of sugar to taste. This dish can be made ahead of time; simply prepare it and refrigerate it before baking. When ready to serve, just pop it in the oven and enjoy!
8.Holiday Stuffing
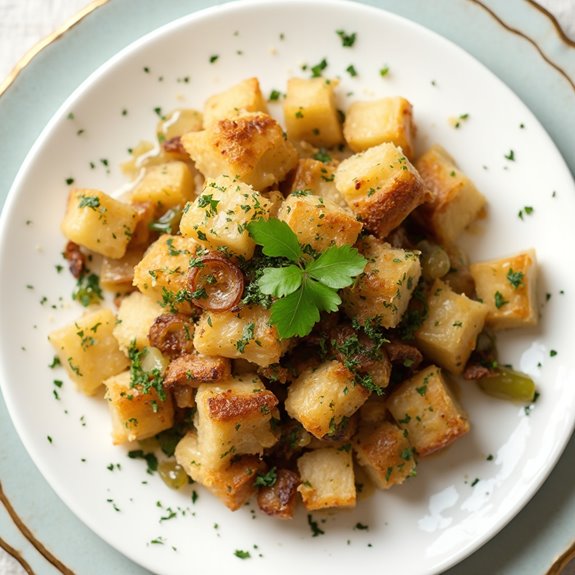
Title: Holiday Stuffing
Prep Time: 20 minutes
Cook Time: 30 minutes
Number of Servings: 8
Required Equipment List: Large mixing bowl, skillet, baking dish, spoon, measuring cups and spoons
Cuisine Type: American
This Holiday Stuffing recipe is a classic side dish that brings warmth and comfort to your festive table. Made with a rich blend of bread, herbs, and aromatic vegetables, it’s the perfect accompaniment to your holiday turkey or roast. The combination of sage, thyme, and rosemary creates a fragrant base, while the addition of sautéed onions and celery adds depth and texture.
Whether you’re serving it during Thanksgiving, Christmas, or any special occasion, this stuffing is sure to become a beloved tradition. The beauty of this stuffing lies in its versatility. Feel free to customize it by adding your favorite ingredients, such as nuts, dried fruits, or sausage, to elevate the flavors even further.
This dish can be prepared ahead of time and baked just before serving, making it a convenient option for holiday gatherings. With each bite, you’ll enjoy the comforting flavors that embody the spirit of the season.
Ingredients:
- 1 loaf of day-old bread, cubed
- 1/2 cup unsalted butter
- 1 cup onion, diced
- 1 cup celery, diced
- 2 cloves garlic, minced
- 1 teaspoon dried sage
- 1 teaspoon dried thyme
- 1 teaspoon dried rosemary
- 1/2 teaspoon salt
- 1/4 teaspoon black pepper
- 2 cups low-sodium chicken or vegetable broth
- 2 large eggs, beaten
- Fresh parsley, chopped (for garnish)
Instructions:
- Preheat your oven to 350°F (175°C). Prepare a baking dish by greasing it lightly with butter or cooking spray. This will prevent the stuffing from sticking and guarantee easy serving.
- In a large skillet, melt the butter over medium heat. Add the diced onions and celery, cooking until they’re softened, about 5-7 minutes. Stir in the minced garlic and cook for an additional minute until fragrant.
- In a large mixing bowl, combine the cubed bread, sautéed vegetables, dried herbs (sage, thyme, rosemary), salt, and pepper. Toss everything together until the bread is well-coated with the herb mixture.
- Pour in the chicken or vegetable broth gradually, mixing gently to confirm the bread absorbs the liquid without becoming too mushy. Add the beaten eggs and mix until everything is evenly combined.
- Transfer the stuffing mixture into the prepared baking dish, spreading it out evenly. Cover the dish with aluminum foil and bake in the preheated oven for 20 minutes. Remove the foil and bake for an additional 10 minutes, or until the top is golden brown and crispy.
- Once baked, remove the stuffing from the oven and let it cool for a few minutes. Garnish with chopped fresh parsley before serving to add a pop of color and freshness.
Extra Tips: For added flavor, consider sautéing some cooked sausage or adding chopped apples or cranberries to the stuffing mix. If you prefer a drier stuffing, use less broth, or for a moister stuffing, add a bit more liquid.
You can also make this stuffing ahead of time; simply prepare it up to the baking step, cover, and refrigerate overnight. When ready to serve, let it come to room temperature before baking. Enjoy your holiday feast!
9.Maple Roasted Parsnips
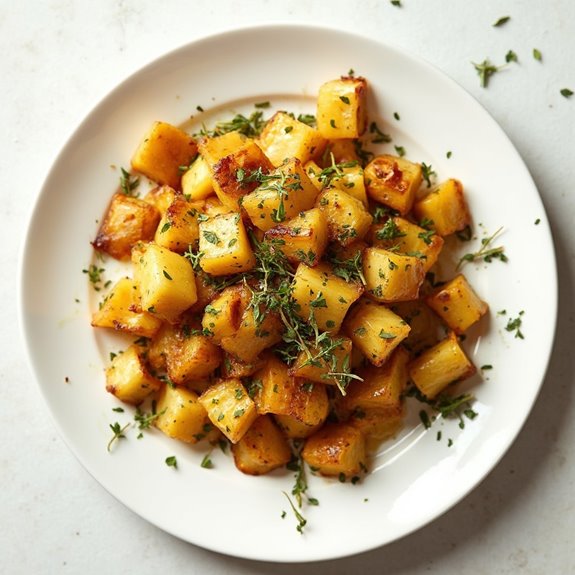
Title: Maple Roasted Parsnips
Prep Time: 10 minutes
Cook Time: 30 minutes
Number of Servings: 4
Required Equipment List: Baking sheet, parchment paper, mixing bowl, knife, cutting board
Cuisine Type: American
Maple Roasted Parsnips are a delightful side dish that showcases the natural sweetness of parsnips enhanced by the rich flavor of maple syrup. This dish is simple to make and offers a wonderful caramelized texture, making it a perfect accompaniment to any holiday meal or a cozy dinner.
The earthy flavor of parsnips combined with maple syrup creates a delicious contrast that will impress your guests and family alike. This recipe isn’t only easy to prepare but also versatile. The parsnips can be seasoned with various herbs and spices according to your preference, allowing you to customize the dish to suit your taste.
Roasting them brings out their inherent sweetness and creates a tender yet slightly crisp texture. Serve these roasted parsnips alongside your favorite proteins for a comforting and satisfying meal.
Ingredients:
- 1 pound parsnips, peeled and cut into 1-inch pieces
- 2 tablespoons olive oil
- 3 tablespoons maple syrup
- Salt and pepper to taste
- 1 teaspoon fresh thyme leaves (optional)
- 1 tablespoon chopped fresh parsley (for garnish)
Instructions:
- Preheat your oven to 400°F (200°C). Line a baking sheet with parchment paper to prevent sticking and facilitate easy cleanup.
- In a mixing bowl, combine the peeled and cut parsnips with olive oil, maple syrup, salt, and pepper. If desired, add fresh thyme leaves for an extra layer of flavor. Toss until the parsnips are evenly coated.
- Spread the coated parsnips in a single layer on the prepared baking sheet, ensuring they aren’t overcrowded to allow for even roasting.
- Roast the parsnips in the preheated oven for about 25-30 minutes, turning them halfway through the cooking time. They should be golden brown and tender when done.
- Once roasted, remove the parsnips from the oven and transfer them to a serving dish. Garnish with chopped fresh parsley for a pop of color before serving.
Extra Tips: For an added depth of flavor, consider sprinkling the parsnips with a pinch of cinnamon or nutmeg before roasting. You can also experiment with different types of sweeteners, such as honey or agave syrup, if you prefer.
These roasted parsnips make a fantastic side dish for holiday gatherings and pair wonderfully with roasted meats or as part of a vegetarian feast. Enjoy your delicious creation!
10.Spinach and Artichoke Dip
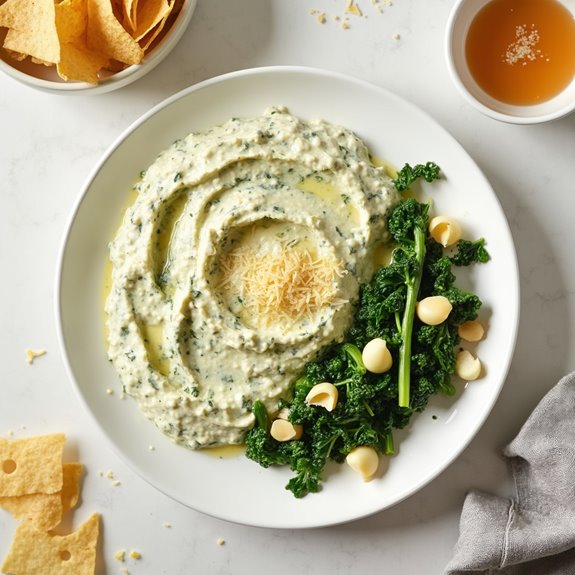
Title: Spinach and Artichoke Dip
Prep Time: 10 minutes
Cook Time: 30 minutes
Number of Servings: 8
Required Equipment List: Mixing bowl, baking dish, oven, spoon, measuring cups and spoons
Cuisine Type: American
Spinach and Artichoke Dip is a classic appetizer that brings a creamy, savory flavor to your holiday gatherings. This dip combines tender spinach, tangy artichokes, and a blend of cheeses that melt together to create a rich and satisfying dish. Perfect for dipping with tortilla chips, crackers, or sliced vegetables, this recipe is always a crowd-pleaser and can be prepared in advance to save time on busy occasions.
The beauty of this dip lies in its simplicity and versatility. It’s an excellent addition to any festive table and pairs wonderfully with a variety of beverages. Whether you’re hosting a Christmas party or just enjoying a cozy night in, this Spinach and Artichoke Dip is sure to be a hit, inviting guests to come back for seconds.
Ingredients:
- 1 cup frozen spinach, thawed and drained
- 1 can (14 oz) artichoke hearts, drained and chopped
- 1 cup cream cheese, softened
- 1/2 cup sour cream
- 1/2 cup mayonnaise
- 1 cup shredded mozzarella cheese
- 1/2 cup grated Parmesan cheese
- 2 cloves garlic, minced
- Salt and pepper to taste
- Tortilla chips or sliced vegetables for serving
Instructions:
- Preheat your oven to 350°F (175°C). This temperature guarantees the dip will cook evenly and become bubbly and golden on top.
- In a mixing bowl, combine the softened cream cheese, sour cream, and mayonnaise. Use a spoon or spatula to mix until smooth and well combined, which will form the base of your dip.
- Add the drained spinach and chopped artichoke hearts to the cream cheese mixture. Then, stir in the shredded mozzarella cheese, grated Parmesan cheese, minced garlic, and season with salt and pepper to taste. Mix everything together until the ingredients are evenly distributed.
- Transfer the dip mixture into a baking dish and spread it out evenly. This helps it to bake uniformly, guaranteeing every bite is delicious.
- Bake in the preheated oven for about 25-30 minutes or until the dip is hot and bubbly, and the top is slightly golden. You might want to stir it halfway through to promote even cooking.
- Once baked, remove the dip from the oven and let it cool for a few minutes before serving. Serve warm with tortilla chips or fresh vegetables for dipping.
Extra Tips: For an extra layer of flavor, consider adding some chopped jalapeños for a spicy kick or a sprinkle of red pepper flakes on top before baking. If you want a crispier top, broil the dip for an additional 2-3 minutes after baking. This dip can also be made ahead of time and refrigerated before baking; just add a few extra minutes to the baking time if starting from cold. Enjoy your delicious Spinach and Artichoke Dip!
11.Balsamic Roasted Vegetables
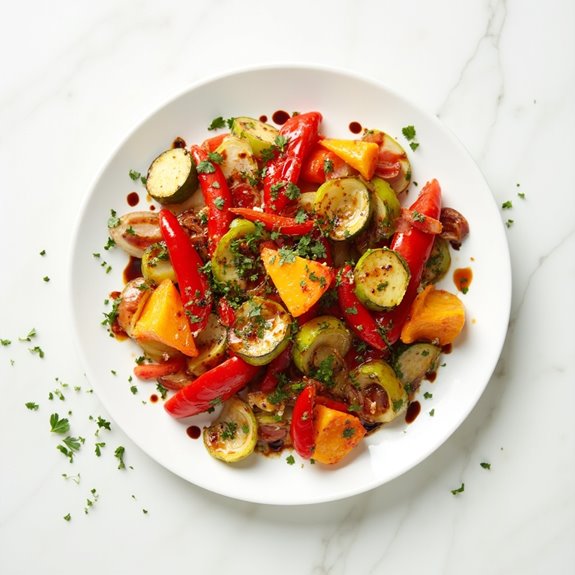
Title: Balsamic Roasted Vegetables
Prep Time: 15 minutes
Cook Time: 25 minutes
Number of Servings: 6
Required Equipment List: Baking sheet, parchment paper, mixing bowl, spatula, oven
Cuisine Type: American
Balsamic Roasted Vegetables are a delicious and vibrant side dish that embodies the flavors of the season. This recipe features a mix of colorful vegetables such as bell peppers, zucchini, carrots, and red onions, all roasted to perfection with a drizzle of balsamic vinegar.
The roasting process caramelizes the vegetables, enhancing their natural sweetness while the balsamic adds a tangy depth that balances the flavors beautifully. This dish isn’t only easy to prepare but also adds a stunning visual appeal to your holiday table.
Perfect for holiday gatherings or family dinners, Balsamic Roasted Vegetables can complement a wide range of main courses, from meats to plant-based options. The versatility of this dish allows for substitutions based on seasonal vegetables or personal preferences, making it a go-to recipe for any occasion.
Serve it warm or at room temperature, and watch as it becomes a favorite among your guests.
Ingredients:
- 1 red bell pepper, chopped
- 1 yellow bell pepper, chopped
- 1 zucchini, sliced
- 1 carrot, sliced
- 1 red onion, cut into wedges
- 3 tablespoons olive oil
- 3 tablespoons balsamic vinegar
- 1 teaspoon dried oregano
- 1 teaspoon garlic powder
- Salt and pepper to taste
- Fresh parsley for garnish (optional)
Instructions:
- Preheat your oven to 425°F (220°C). Line a baking sheet with parchment paper to prevent the vegetables from sticking and guarantee an easy cleanup.
- In a large mixing bowl, combine the chopped bell peppers, zucchini, carrot, and red onion. Add the olive oil, balsamic vinegar, oregano, garlic powder, salt, and pepper. Toss the vegetables until they’re evenly coated with the seasoning mixture.
- Spread the seasoned vegetables in a single layer on the prepared baking sheet. Make sure the vegetables aren’t overcrowded, as this will help them roast evenly and achieve a nice caramelization.
- Roast the vegetables in the preheated oven for about 25 minutes, stirring halfway through the cooking time. The vegetables should be tender and slightly charred at the edges when finished.
- Once roasted, remove the baking sheet from the oven and let the vegetables cool slightly. Transfer them to a serving dish and garnish with fresh parsley before serving.
Extra Tips: For added flavor, consider marinating the vegetables in the balsamic vinegar and olive oil for about 30 minutes before roasting. This will enhance the taste even further.
Feel free to mix and match vegetables based on what you have on hand, such as Brussels sprouts, asparagus, or sweet potatoes. If you like a bit of heat, adding a pinch of red pepper flakes before roasting can give the dish a nice kick. Enjoy your colorful and flavorful Balsamic Roasted Vegetables!
12.Stuffed Acorn Squash
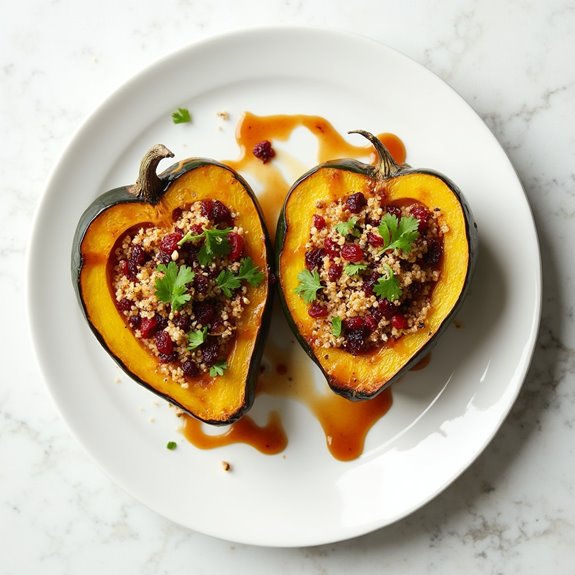
Title: Stuffed Acorn Squash
Prep Time: 15 minutes
Cook Time: 45 minutes
Number of Servings: 4
Required Equipment List: Baking sheet, knife, spoon, mixing bowl, oven
Cuisine Type: American
Stuffed Acorn Squash is a warm and hearty dish that makes for a perfect side or main course during the holiday season. The sweet, nutty flavor of the roasted acorn squash pairs beautifully with a savory filling, often made with ingredients such as quinoa, nuts, cranberries, and spices.
Not only is this dish visually appealing, with its vibrant colors and rustic presentation, but it also embodies the essence of comfort food, bringing warmth to your holiday table. This versatile recipe can be adjusted to suit various dietary preferences, making it a great option for gatherings with friends and family.
Whether you choose to keep it vegetarian or add some protein such as sausage or ground turkey, the stuffed acorn squash is sure to impress. With its beautiful presentation and delightful flavors, this dish will become a cherished part of your holiday traditions.
Ingredients:
- 2 acorn squashes, halved and seeds removed
- 1 cup cooked quinoa
- 1/2 cup chopped walnuts
- 1/2 cup dried cranberries
- 1/2 teaspoon ground cinnamon
- 1/4 teaspoon nutmeg
- 1/4 teaspoon salt
- 1/4 teaspoon black pepper
- 2 tablespoons maple syrup
- 2 tablespoons olive oil
- Fresh parsley for garnish (optional)
Instructions:
- Preheat your oven to 400°F (200°C). Line a baking sheet with parchment paper to make cleanup easier and to prevent the squash from sticking.
- Cut the acorn squashes in half and scoop out the seeds. Drizzle the insides with olive oil and sprinkle with salt and pepper. Place the squashes cut-side down on the prepared baking sheet and roast in the preheated oven for 25-30 minutes, or until they’re tender when pierced with a fork.
- While the squash is roasting, prepare the filling. In a mixing bowl, combine the cooked quinoa, chopped walnuts, dried cranberries, ground cinnamon, nutmeg, salt, and black pepper. Mix well until all ingredients are evenly distributed.
- Once the squash is tender, carefully remove it from the oven and flip the halves over. Fill each acorn squash half generously with the quinoa mixture. Drizzle a bit of maple syrup on top of each filled squash for added sweetness.
- Return the stuffed squash to the oven and bake for an additional 15 minutes, allowing the filling to heat through and the flavors to meld.
- Remove the squash from the oven and let them cool slightly before serving. Garnish with fresh parsley if desired for a pop of color.
Extra Tips: If you’d like to add more protein to the dish, consider mixing in cooked ground turkey or sausage with the quinoa filling. Feel free to get creative with the filling ingredients by adding vegetables like sautéed spinach or mushrooms for extra texture and flavor.
This dish can also be made ahead of time; simply prepare the stuffed squash and refrigerate them, then bake right before serving. Enjoy the warm, comforting flavors of this festive side dish!
13.Sausage and Herb Stuffing
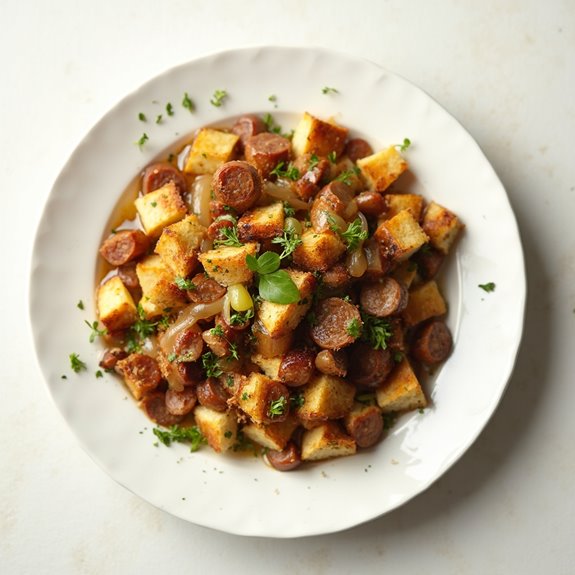
Title: Sausage and Herb Stuffing
Prep Time: 20 minutes
Cook Time: 30 minutes
Number of Servings: 8
Required Equipment List: Large skillet, mixing bowl, baking dish, spoon, measuring cups, measuring spoons
Cuisine Type: American
Sausage and Herb Stuffing is a classic side dish that brings warmth and comfort to any holiday gathering. This savory stuffing combines the rich flavors of sausage with a medley of fresh herbs and toasted bread, creating a delightful blend of textures and tastes. Perfect for Thanksgiving or Christmas, this dish can be prepared ahead of time and baked just before serving, allowing you to enjoy the festivities without feeling rushed.
The combination of Italian sausage, onions, celery, and a variety of herbs provides a robust flavor that pairs wonderfully with turkey or ham. Additionally, the stuffing mixture can easily be adapted to include your favorite ingredients, such as nuts or dried fruits, making it a versatile dish that can suit any palate. With its aromatic scent and comforting taste, this Sausage and Herb Stuffing is sure to be a hit at your holiday table.
Ingredients:
- 1 pound Italian sausage, casings removed
- 1 medium onion, diced
- 2 celery stalks, diced
- 3 cloves garlic, minced
- 1 teaspoon dried thyme
- 1 teaspoon dried sage
- 1/2 teaspoon black pepper
- 8 cups cubed day-old bread
- 1 cup chicken broth
- 1/4 cup fresh parsley, chopped
- 2 large eggs, beaten
Instructions:
- In a large skillet over medium heat, cook the Italian sausage until browned and cooked through, breaking it apart with a spoon as it cooks. Once cooked, transfer the sausage to a mixing bowl, leaving the rendered fat in the skillet.
- In the same skillet, add the diced onion and celery. Sauté the vegetables in the sausage fat until they’re softened and translucent, about 5-7 minutes. Add the minced garlic, thyme, sage, and black pepper, cooking for an additional minute until fragrant.
- In the mixing bowl with the cooked sausage, add the sautéed vegetables, cubed bread, and chopped parsley. Pour in the chicken broth and beaten eggs, mixing everything together until the bread is well-coated and the ingredients are evenly distributed.
- Preheat your oven to 350°F (175°C). Transfer the stuffing mixture into a greased baking dish, spreading it out evenly. Cover the dish with aluminum foil and bake for 20 minutes. Remove the foil and bake for an additional 10 minutes to allow the top to crisp up.
- Once baked, remove the stuffing from the oven and let it cool slightly before serving. Serve warm as a delicious side dish alongside your holiday main courses.
Extra Tips: For a richer flavor, consider using a combination of sausage types, such as sweet and spicy. You can also enhance the stuffing by adding ingredients like chopped apples, cranberries, or nuts for added texture and sweetness. If you’re preparing this dish ahead of time, assemble the stuffing and refrigerate it overnight; just be sure to adjust the baking time if it’s going into the oven cold. Enjoy this comforting side dish with your holiday feast!
14.Classic Coleslaw
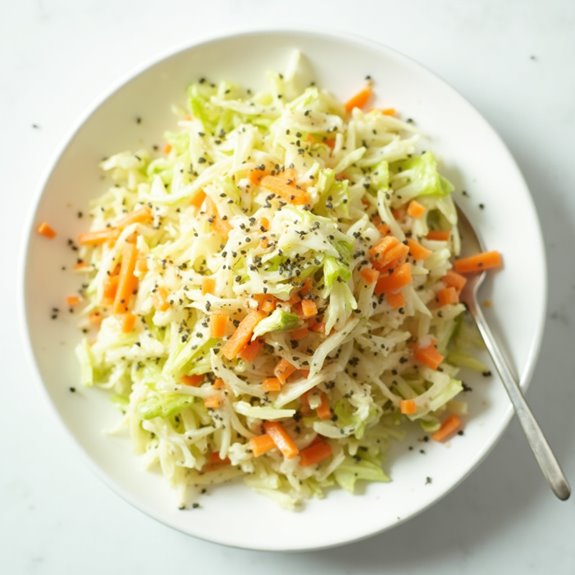
Title: Classic Coleslaw
Prep Time: 15 minutes
Cook Time: 0 minutes
Number of Servings: 6
Required Equipment List: Mixing bowl, whisk, knife, cutting board, serving dish
Cuisine Type: American
Classic coleslaw is a timeless side dish that adds a revitalizing crunch to any meal, especially during festive occasions like Christmas. This creamy and tangy salad combines finely shredded cabbage and carrots with a rich dressing, creating a delightful balance of flavors and textures.
Perfect for barbecues, potlucks, or holiday dinners, coleslaw is easy to prepare and can be made ahead of time, allowing the flavors to meld beautifully. This recipe highlights the simplicity of coleslaw while allowing for variations to suit your taste.
While the traditional version features a mayonnaise-based dressing, you can easily customize it with additional ingredients like apples, raisins, or even a splash of vinegar for an extra kick. Whether you serve it on the side or as a topping for sandwiches, this classic coleslaw is sure to be a crowd-pleaser.
Ingredients:
- 4 cups green cabbage, finely shredded
- 1 cup carrots, grated
- 1/2 cup mayonnaise
- 2 tablespoons apple cider vinegar
- 1 tablespoon sugar
- 1 teaspoon celery seeds
- Salt and pepper to taste
Instructions:
- In a large mixing bowl, combine the finely shredded green cabbage and grated carrots. Use a sharp knife or a mandoline to get consistent shreds for the best texture.
- In a separate small bowl, whisk together the mayonnaise, apple cider vinegar, sugar, celery seeds, salt, and pepper until well combined. This will create the creamy dressing for your coleslaw.
- Pour the dressing over the cabbage and carrots in the large mixing bowl. Gently toss the mixture with tongs or a spatula, ensuring that all the vegetables are evenly coated with the dressing.
- Taste the coleslaw and adjust the seasoning, adding more salt, pepper, or sugar if needed to suit your personal preference.
- Cover the bowl with plastic wrap or a lid and refrigerate the coleslaw for at least 30 minutes before serving. This chilling time allows the flavors to develop and the cabbage to soften slightly.
Extra Tips: For a twist on the classic recipe, consider adding diced apples or raisins for a touch of sweetness, or a little red cabbage for color. If you prefer a lighter version, you can substitute Greek yogurt for half of the mayonnaise.
Always remember to give the coleslaw a quick toss before serving, as the dressing may settle at the bottom. Enjoy this delicious side dish alongside your holiday favorites!
15.Ratatouille
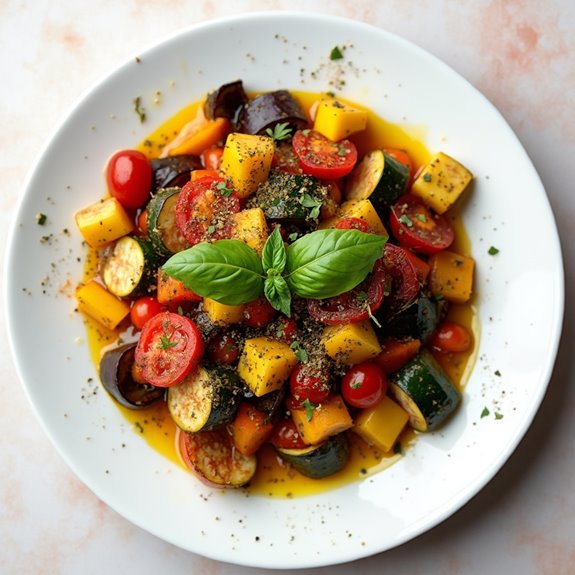
Title: Ratatouille
Prep Time: 20 minutes
Cook Time: 40 minutes
Number of Servings: 6
Required Equipment List: Large skillet or Dutch oven, knife, cutting board, spoon, measuring cups, and spoons
Cuisine Type: French
Ratatouille is a classic French dish that celebrates the vibrant flavors of summer vegetables, making it an ideal side dish for festive meals or family gatherings. This rustic dish is a medley of eggplant, zucchini, bell peppers, and tomatoes, all sautéed together with aromatic herbs like thyme and basil. The result is a hearty, colorful dish that not only looks beautiful on the plate but also brings a depth of flavor that will complement any main course.
This recipe for ratatouille is straightforward and approachable, allowing home cooks to enjoy the essence of French cuisine without any fuss. The vegetables are cooked to perfection, retaining their individual textures while harmonizing beautifully with the herbs and spices.
Whether served warm or at room temperature, ratatouille is a versatile dish that can be enjoyed as a side or even as a main course when paired with crusty bread or rice.
Ingredients:
- 1 medium eggplant, diced
- 2 medium zucchini, sliced
- 1 red bell pepper, chopped
- 1 yellow bell pepper, chopped
- 1 large onion, diced
- 3 cloves garlic, minced
- 4 ripe tomatoes, chopped
- 1/4 cup olive oil
- 1 teaspoon dried thyme
- 1 teaspoon dried basil
- Salt and pepper to taste
- Fresh basil leaves for garnish (optional)
Instructions:
- Begin by preparing your vegetables. Dice the eggplant, slice the zucchini, chop the bell peppers, and dice the onion. Mince the garlic and chop the tomatoes. This will help streamline the cooking process.
- In a large skillet or Dutch oven, heat the olive oil over medium heat. Add the diced onion and sauté for about 5 minutes until it becomes translucent. Then, add the minced garlic and cook for an additional minute until fragrant.
- Next, add the diced eggplant to the skillet. Cook for about 5-7 minutes, stirring occasionally, until the eggplant starts to soften. This step is essential as it allows the eggplant to absorb the flavors from the oil and onions.
- Once the eggplant is softened, add the sliced zucchini and chopped bell peppers to the skillet. Season with salt, pepper, dried thyme, and dried basil. Stir well to combine, and continue cooking for another 10 minutes until the vegetables are tender.
- Finally, add the chopped tomatoes to the skillet. Mix everything together and let it simmer for about 10-15 minutes, uncovered, to allow the flavors to meld and the mixture to thicken. Stir occasionally to prevent sticking.
- Once cooked, taste and adjust the seasoning if necessary. Remove the skillet from heat and let the ratatouille sit for a few minutes. Serve warm, garnished with fresh basil leaves if desired.
Extra Tips: For an added depth of flavor, consider roasting the vegetables in the oven instead of sautéing them, as this enhances their natural sweetness. You can also experiment with additional vegetables, such as squash or mushrooms, to customize the dish to your liking.
Ratatouille can be made ahead of time and stored in the refrigerator; it tastes even better the next day as the flavors continue to develop.
16.Corn Pudding
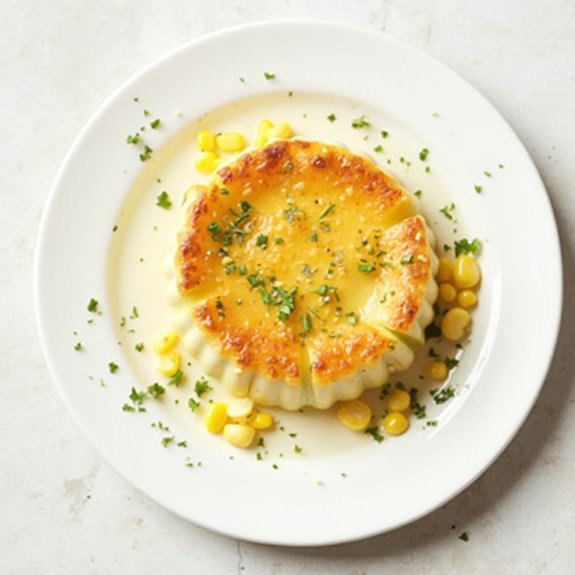
Title: Corn Pudding
Prep Time: 15 minutes
Cook Time: 45 minutes
Number of Servings: 8
Required Equipment List: Mixing bowl, baking dish, whisk, oven
Cuisine Type: American
Corn pudding is a classic side dish that brings warmth and comfort to any holiday table. This creamy, custard-like dish combines sweet corn with a velvety texture, making it a delightful complement to your Christmas feast. With its sweet and savory flavors, corn pudding is sure to become a favorite among your guests, providing a perfect balance to richer main dishes like roasted turkey or glazed ham.
The beauty of corn pudding lies in its simplicity, as it requires just a handful of ingredients yet delivers a satisfying and hearty dish. Made with fresh or frozen corn, eggs, milk, and a hint of sugar, this recipe showcases the natural sweetness of corn while adding a touch of creaminess. It’s easy to prepare ahead of time, allowing you to enjoy more time with family and friends during the holidays.
Ingredients:
- 2 cups fresh or frozen corn kernels
- 3 large eggs
- 1 cup milk
- 1/4 cup sugar
- 1/4 cup butter, melted
- 1 cup cornmeal
- 1 teaspoon baking powder
- 1/2 teaspoon salt
Instructions:
- Preheat your oven to 350°F (175°C). Grease a 2-quart baking dish with cooking spray or butter to prevent sticking and facilitate easy serving.
- In a large mixing bowl, combine the corn kernels, eggs, milk, and melted butter. Whisk together until the mixture is well combined and smooth.
- In a separate bowl, mix the cornmeal, sugar, baking powder, and salt. Gradually add the dry ingredients to the wet mixture, stirring until just combined. Be careful not to overmix, as this can affect the texture of the pudding.
- Pour the corn pudding mixture into the prepared baking dish, spreading it evenly. Place the dish in the preheated oven and bake for 45 minutes, or until the top is golden brown and a toothpick inserted into the center comes out clean.
- Once baked, remove the corn pudding from the oven and allow it to cool for a few minutes before serving. This allows the pudding to set a little more, making it easier to serve.
Extra Tips: For an added depth of flavor, consider adding shredded cheese or diced jalapeños to the mixture before baking. This will give your corn pudding a cheesy, spicy kick that can transform the dish into something truly special.
You can also experiment with different types of corn, such as creamed corn, for a sweeter and creamier texture. Enjoy your delicious corn pudding alongside your holiday favorites!
17.Winter Fruit Salad
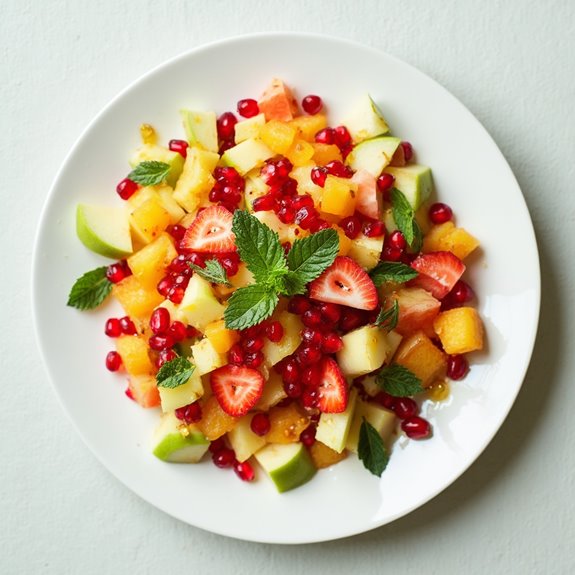
Title: Winter Fruit Salad
Prep Time: 15 minutes
Cook Time: 0 minutes
Number of Servings: 6
Required Equipment List: Mixing bowl, cutting board, knife, serving dish
Cuisine Type: American
Winter Fruit Salad is a rejuvenating and vibrant dish that perfectly captures the essence of the season. Bursting with colorful fruits like citrus, pomegranate, and apples, this salad not only looks stunning on your holiday table but is also a great way to incorporate healthy ingredients into your festive feasts.
With no cooking required, this recipe is quick and easy to prepare, making it an ideal side dish for any winter gathering. The combination of sweet, tart, and crunchy textures creates a delightful medley that’s sure to please everyone’s palate.
The addition of a simple honey-lime dressing adds a hint of sweetness and zing, bringing all the flavors together beautifully. This salad can be made ahead of time and stored in the refrigerator, allowing the flavors to meld while keeping the fruits fresh and crisp.
Ingredients:
- 2 cups diced apples (such as Granny Smith or Honeycrisp)
- 2 cups segmented oranges (or clementines)
- 1 cup pomegranate seeds
- 1 cup diced pineapple
- 1 cup sliced strawberries
- 1 tablespoon honey
- 1 tablespoon lime juice
- Fresh mint leaves (for garnish, optional)
Instructions:
- Begin by preparing all your fruits. Dice the apples, segment the oranges or clementines, and cut the pineapple into bite-sized pieces. Slice the strawberries and place all the prepared fruits in a large mixing bowl.
- In a small bowl, whisk together the honey and lime juice until well combined. This dressing will enhance the flavors of the fruits and add a touch of sweetness.
- Drizzle the honey-lime dressing over the mixed fruits in the bowl. Gently toss the fruits to guarantee they’re evenly coated with the dressing, being careful not to mash any of the delicate fruits.
- Once the fruits are well mixed, transfer the salad to a serving dish. If desired, garnish the salad with fresh mint leaves for a pop of color and added flavor.
- Serve the Winter Fruit Salad immediately, or cover and refrigerate until ready to serve. This salad is best enjoyed fresh but can be made a few hours in advance.
Extra Tips: To prevent the apples from browning, you can toss them in a little lime juice before adding them to the salad. Feel free to customize the salad with your favorite winter fruits or nuts, such as walnuts or pecans, for added crunch.
This salad pairs beautifully with roasted meats and makes for a rejuvenating contrast on your holiday table. Enjoy the burst of flavors!
18.Creamed Spinach
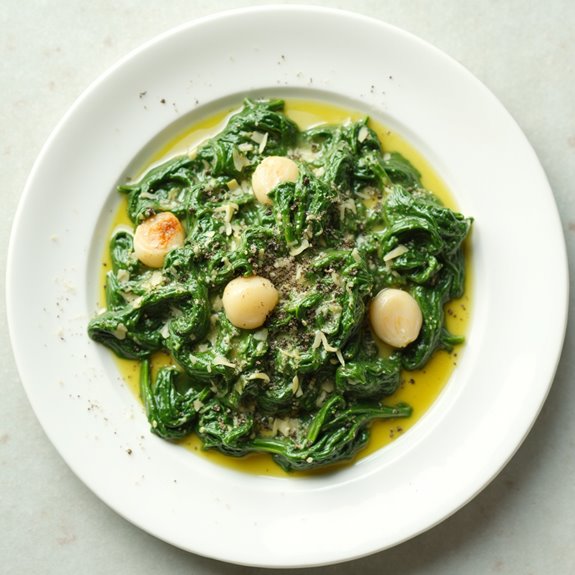
Title: Creamed Spinach
Prep Time: 10 minutes
Cook Time: 20 minutes
Number of Servings: 4
Required Equipment List: Large skillet, spatula, measuring cups, measuring spoons, mixing bowl
Cuisine Type: American
Creamed spinach is a classic side dish that adds a touch of elegance to any meal, especially during the holiday season. This rich and creamy dish features tender spinach enveloped in a luscious sauce made from cream, cheese, and seasonings.
It’s a fantastic way to incorporate greens into your festive spread while satisfying even the pickiest eaters. The creamy texture and savory flavors make it an irresistible addition to your holiday table, pairing beautifully with roasted meats and other hearty dishes.
This recipe is quick and easy, making it perfect for busy cooks who want to impress their guests without spending hours in the kitchen. With just a handful of ingredients and minimal prep time, you can whip up this delightful creamed spinach that’s both comforting and indulgent.
Whether you’re serving it at Christmas dinner or a cozy family gathering, this dish is sure to become a favorite in your culinary repertoire.
Ingredients:
- 1 pound fresh spinach (or 10 ounces frozen spinach)
- 2 tablespoons butter
- 2 cloves garlic, minced
- 1 cup heavy cream
- 1/2 cup grated Parmesan cheese
- 1/4 teaspoon nutmeg
- Salt and pepper to taste
Instructions:
- If using fresh spinach, wash and thoroughly dry the leaves. In a large skillet over medium heat, melt the butter. Once melted, add the minced garlic and sauté for about 1 minute until fragrant, being careful not to burn it.
- Add the spinach to the skillet and cook, stirring frequently, until wilted (about 3-5 minutes for fresh spinach). If using frozen spinach, add it directly to the skillet and cook until heated through, breaking it apart with a spatula.
- Once the spinach is cooked, reduce the heat to low and pour in the heavy cream. Stir well to combine, allowing the cream to heat up for a couple of minutes.
- Add the grated Parmesan cheese, nutmeg, salt, and pepper to the skillet. Stir until the cheese is melted and the sauce is creamy and thickened, around 2-3 minutes. Taste and adjust seasoning if necessary.
- Remove the skillet from heat and let it sit for a minute to thicken further before serving. Transfer the creamed spinach to a serving dish and enjoy warm alongside your holiday meal.
Extra Tips: For an added depth of flavor, consider sautéing some chopped onions or shallots with the garlic before adding the spinach.
If you want to make it even richer, you can substitute half of the heavy cream with cream cheese, which will give the dish a delightful tang. To make a lighter version, you can use half-and-half instead of heavy cream, but keep in mind that the sauce will be less rich.
Enjoy your creamed spinach as a comforting side that will delight your guests!
19.Potato Gratin
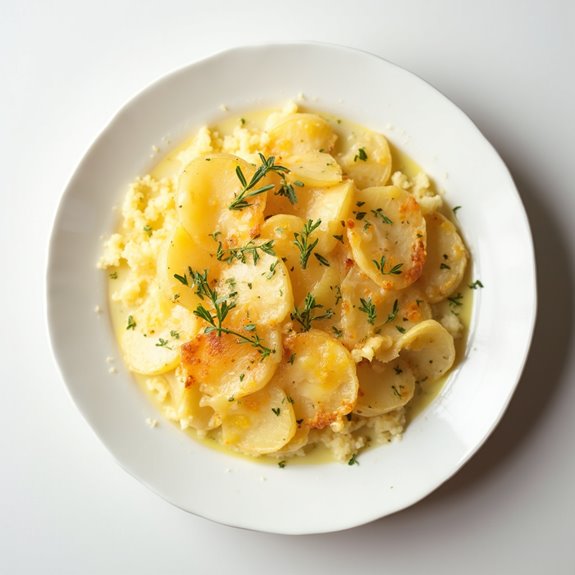
Title: Potato Gratin
Prep Time: 20 minutes
Cook Time: 60 minutes
Number of Servings: 6
Required Equipment List: Baking dish, large saucepan, whisk, mixing bowl, oven
Cuisine Type: French-inspired
Potato Gratin is a classic French dish that brings comfort and indulgence to any holiday table. Layered with thinly sliced potatoes, rich cream, and a blend of cheeses, this dish is baked until golden and bubbling, creating a crispy top and a creamy interior that’s simply irresistible.
It’s the perfect side dish for your festive meals, adding a touch of elegance while being relatively easy to prepare. The beauty of Potato Gratin lies in its versatility; you can customize it with different cheeses, herbs, or even vegetables to suit your taste.
The slow baking process allows the flavors to meld beautifully, making it a favorite among family and friends. Serve it alongside your holiday roast, and watch as it quickly becomes the star of the meal.
Ingredients:
- 2 pounds Yukon gold potatoes, peeled and thinly sliced
- 2 cups heavy cream
- 1 cup grated Gruyère cheese
- 1 cup grated Parmesan cheese
- 3 cloves garlic, minced
- Salt and pepper to taste
- 1 tablespoon fresh thyme leaves (optional)
- 2 tablespoons unsalted butter (for greasing)
- 1/4 teaspoon nutmeg (optional)
Instructions:
- Preheat your oven to 375°F (190°C). Grease a 9×13-inch baking dish with the unsalted butter to prevent sticking and guarantee an easy cleanup.
- In a large saucepan, combine the heavy cream, minced garlic, salt, pepper, and nutmeg (if using). Heat the mixture over medium heat until it’s warm but not boiling, stirring occasionally. This step helps to infuse the cream with flavor.
- Layer half of the sliced potatoes evenly in the bottom of the prepared baking dish. Pour half of the warm cream mixture over the potatoes, followed by half of the Gruyère and Parmesan cheese.
- Repeat the layering process with the remaining potatoes, cream, and cheeses.
- Cover the baking dish with aluminum foil and bake in the preheated oven for 45 minutes. This allows the potatoes to cook through and absorb the flavors of the cream.
- After 45 minutes, remove the foil and bake for an additional 15-20 minutes, or until the top is golden brown and the potatoes are tender when pierced with a fork. For an extra crispy top, you can place it under the broiler for a few minutes, watching closely to prevent burning.
- Once baked, remove the gratin from the oven and let it rest for about 10 minutes before serving. This resting period helps to set the layers and makes it easier to slice and serve.
Extra Tips: To enhance the flavor of your Potato Gratin, consider adding sautéed onions, leeks, or even cooked bacon between the layers.
You can also experiment with different cheese combinations; a sharp cheddar or a creamy Fontina can create delightful variations. To make the dish ahead of time, you can prepare it up to the baking step, cover it tightly, and refrigerate. Just add an extra 10-15 minutes to the baking time if baking from cold.
Enjoy your deliciously creamy Potato Gratin!
Conclusion
As you plan your holiday feast, don’t forget the magic that side dishes bring to the table! From creamy garlic mashed potatoes to vibrant cranberry orange salad, these recipes are sure to impress your family and friends. So, why settle for the same old sides when you can elevate your Christmas dinner with new flavors and textures? Immerse yourself in these ideas and make your holiday meal unforgettable. After all, isn’t it the little things that make the season bright?


