19 One-Pot Recipes That Kids Will Love
If you're on the hunt for one-pot recipes your kids will love, you're in for a treat! Think Cheesy Chicken and Rice or Veggie-Packed Taco Pasta—delicious and simple. One-Pot Spaghetti Bolognese? That's a rich favorite that's quick to whip up. Who doesn't want fewer dishes to wash? By combining flavors in one pot, everything absorbs deliciousness while cutting down cleanup. You'll find meals like Easy Beef Stroganoff and Sweet Potato Black Bean Chili that cater to various tastes. Curious about how to customize these dishes to suit your family's preferences? Stick around; you'll find loads of helpful ideas!
Cheesy Chicken and Rice

Title: Cheesy Chicken and Rice
Prep Time: 10 minutes
Cook Time: 30 minutes
Number of Servings: 4
Required Equipment List: Large pot, wooden spoon, measuring cups, cutting board, knife
Cuisine Type: American
This Cheesy Chicken and Rice dish is a comforting, hearty meal that combines tender chicken, creamy cheese, and fluffy rice, all cooked in one pot. Perfect for busy weeknights, this recipe isn't only simple to prepare but also a hit with kids and adults alike.
The combination of flavors is rich and satisfying, making it a family favorite that can be served with a side of vegetables or enjoyed on its own. The beauty of this recipe lies in its one-pot nature, which means fewer dishes to wash and more time to enjoy your meal.
The chicken is seasoned to perfection and cooked until juicy, while the rice absorbs all the delicious flavors, creating a cohesive and tasty dish. Whether you're feeding a crowd or just your family, this Cheesy Chicken and Rice will quickly become a regular on your dinner rotation.
Ingredients:
- 1 pound boneless, skinless chicken breasts, cubed
- 1 cup long-grain white rice
- 2 cups chicken broth
- 1 cup shredded cheddar cheese
- 1 onion, chopped
- 2 cloves garlic, minced
- 1 teaspoon paprika
- 1 teaspoon salt
- 1/2 teaspoon black pepper
- 2 tablespoons olive oil
- Fresh parsley, chopped (for garnish, optional)
Instructions:
- In a large pot, heat the olive oil over medium heat. Once hot, add the chopped onion and sauté for about 3-4 minutes until it becomes translucent. Add the minced garlic and continue to sauté for another minute until fragrant.
- Add the cubed chicken to the pot and season with paprika, salt, and black pepper. Cook the chicken for about 5-7 minutes, stirring occasionally, until it's browned and cooked through.
- Stir in the rice, making sure it's well combined with the chicken and onions. Pour in the chicken broth and bring the mixture to a boil. Once boiling, reduce the heat to low, cover the pot, and let it simmer for about 20 minutes or until the rice is tender and has absorbed the liquid.
- Once the rice is cooked, remove the pot from heat and stir in the shredded cheddar cheese until melted and well incorporated. If desired, let it sit for a few minutes to cool slightly and allow the cheese to fully meld into the dish.
- Serve the Cheesy Chicken and Rice warm, garnished with fresh parsley if desired. This dish is perfect for family dinners or meal prep for the week ahead.
Extra Tips: For added flavor, consider marinating the chicken in a mix of olive oil, salt, and pepper for about 30 minutes before cooking. You can also mix in some frozen peas or corn during the last few minutes of cooking for extra color and nutrition.
To make it a bit spicier, add some diced jalapeños or a few dashes of hot sauce to the mixture. Enjoy your delicious and cheesy creation!
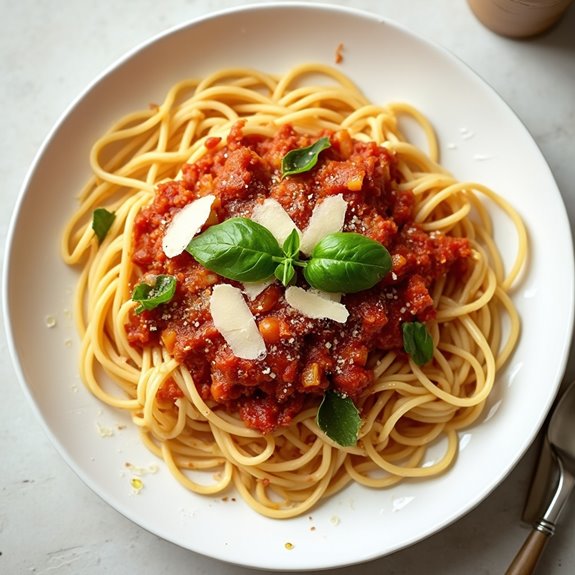
One-Pot Spaghetti Bolognese
Title: One-Pot Spaghetti Bolognese
Prep Time: 10 minutes
Cook Time: 30 minutes
Number of Servings: 4
Required Equipment List: Large pot, wooden spoon, measuring cups, knife, cutting board
Cuisine Type: Italian
One-Pot Spaghetti Bolognese is a fantastic meal that combines the rich flavors of ground meat, tomatoes, and herbs with the convenience of a single pot. This dish is an excellent choice for families, as it's not only easy to prepare but also allows for a wholesome, hearty meal that everyone can enjoy.
The simplicity of this recipe makes it perfect for a weeknight dinner, and it can be ready in just about 40 minutes from start to finish. By cooking the spaghetti directly in the sauce, you enhance the flavors and guarantee that every strand is coated in the delicious Bolognese sauce.
This method also minimizes cleanup, as you won't have to wash multiple pots and pans. With a few basic ingredients, you can create a comforting and satisfying dish that rivals any restaurant's spaghetti Bolognese.
Ingredients:
- 12 ounces spaghetti
- 1 pound ground beef or turkey
- 1 medium onion, diced
- 2 cloves garlic, minced
- 1 can (14 ounces) crushed tomatoes
- 2 cups beef or chicken broth
- 1 tablespoon tomato paste
- 1 teaspoon dried basil
- 1 teaspoon dried oregano
- Salt and pepper to taste
- Grated Parmesan cheese (for serving)
- Fresh basil leaves (for garnish, optional)
Instructions:
- In a large pot over medium heat, add the ground meat and cook until browned, breaking it apart with a wooden spoon. This will take about 5-7 minutes. Once browned, drain excess fat if necessary.
- Add the diced onion and minced garlic to the pot with the cooked meat. Sauté for about 3-4 minutes, or until the onion is translucent and fragrant.
- Stir in the crushed tomatoes, broth, tomato paste, dried basil, and dried oregano. Season with salt and pepper to taste. Bring the mixture to a boil.
- Once boiling, add the spaghetti to the pot, making sure it's submerged in the sauce. Reduce the heat to low, cover, and let it simmer for about 15-20 minutes, stirring occasionally, until the spaghetti is al dente and the sauce has thickened.
- Remove the pot from heat and allow it to sit for a few minutes before serving. This resting time will help the sauce adhere to the pasta better.
- Serve the spaghetti in bowls, topped with grated Parmesan cheese and garnished with fresh basil leaves if desired.
Extra Tips: For an extra layer of flavor, consider adding a splash of red wine to the sauce while it simmers. You can also mix in some chopped vegetables like bell peppers or mushrooms along with the onions for added nutrition.
If you prefer a spicier dish, a pinch of red pepper flakes can elevate the heat. This dish keeps well, so feel free to make a larger batch for leftovers—just reheat gently with a splash of broth to restore moisture. Enjoy your one-pot wonder!
Veggie-Packed Taco Pasta
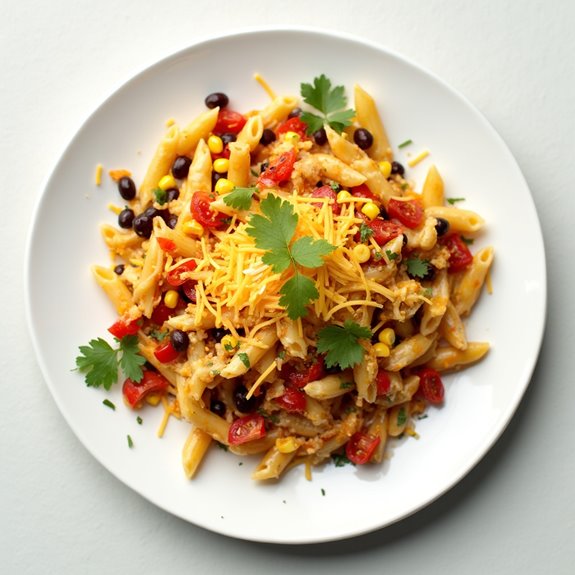
Title: Veggie-Packed Taco Pasta
Prep Time: 10 minutes
Cook Time: 20 minutes
Number of Servings: 6
Required Equipment List: Large pot, stirring spoon, measuring cups, colander
Cuisine Type: Mexican-American
Veggie-Packed Taco Pasta is a fun and flavorful dish that combines the best of tacos and pasta in one easy-to-make meal. This recipe is perfect for families looking to sneak in some extra vegetables while still keeping dinner exciting for the kids.
The combination of pasta, ground beef (or turkey), and an array of colorful veggies makes this dish not only hearty but also visually appealing. With the delicious taco seasoning mingling with the pasta, every bite is a fiesta of flavors that will have everyone coming back for seconds.
This recipe is incredibly versatile, allowing you to mix and match your favorite vegetables or even make it vegetarian by omitting the meat or substituting it with beans. It's a one-pot meal, which means minimal cleanup, making it ideal for busy weeknights or casual family gatherings.
Serve it topped with shredded cheese, sour cream, and fresh cilantro for an irresistible finish that will keep everyone asking for your secret taco pasta recipe.
Ingredients:
- 8 ounces pasta (such as penne or fusilli)
- 1 pound ground beef (or turkey)
- 1 tablespoon olive oil
- 1 medium onion, diced
- 1 bell pepper, diced
- 1 cup corn (fresh or frozen)
- 1 can (15 ounces) black beans, drained and rinsed
- 2 cups diced tomatoes (canned or fresh)
- 1 packet taco seasoning
- 1 cup shredded cheese (cheddar or Mexican blend)
- Salt and pepper to taste
- Fresh cilantro for garnish (optional)
Instructions:
- In a large pot, heat the olive oil over medium heat. Add the diced onion and bell pepper, sautéing for about 3-4 minutes until the vegetables are softened and fragrant. This will create a flavorful base for your dish.
- Add the ground beef (or turkey) to the pot and cook until browned, breaking it up with a spoon as it cooks. Season with salt and pepper to taste. Confirm the meat is fully cooked before proceeding to the next step.
- Stir in the taco seasoning, diced tomatoes, corn, and black beans. Mix everything well, allowing the flavors to meld for about 2 minutes.
- Pour in 4 cups of water and bring the mixture to a boil. Once boiling, add the pasta and cook according to package instructions, typically around 8-10 minutes, stirring occasionally to prevent sticking.
- Once the pasta is cooked al dente and the liquid has mostly absorbed, remove the pot from heat. Stir in the shredded cheese until melted and evenly distributed throughout the pasta.
- Serve the Veggie-Packed Taco Pasta warm, garnished with fresh cilantro if desired, and additional toppings such as sour cream or more cheese for added flavor.
Extra Tips: For added nutrition, consider including more veggies such as zucchini, spinach, or mushrooms. You can also spice things up by adding chopped jalapeños or a dash of hot sauce during cooking.
If you prefer a creamier texture, stir in a dollop of cream cheese or sour cream right before serving. This dish can also be made ahead of time and reheated, making it a great option for meal prep!
Creamy Tomato Basil Soup
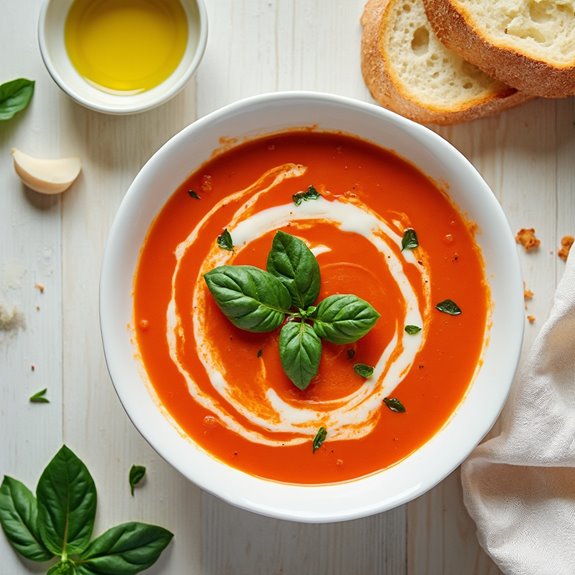
Title: Creamy Tomato Basil Soup
Prep Time: 10 minutes
Cook Time: 30 minutes
Number of Servings: 4
Required Equipment List: Large pot, blender or immersion blender, measuring cups, ladle, wooden spoon
Cuisine Type: Italian-American
This Creamy Tomato Basil Soup is a warm and comforting dish that brings the classic flavors of Italy right to your table. With its rich tomato base infused with fresh basil and a touch of cream, this soup is both satisfying and wholesome. It's perfect for chilly evenings, served with a side of crusty bread or a simple salad, making it an ideal meal for families and kids alike.
The beauty of this recipe lies in its simplicity and the use of fresh ingredients. The vibrant flavors of ripe tomatoes, aromatic garlic, and fresh basil blend beautifully to create a luscious texture. Plus, it's a great way to sneak in some veggies for the little ones, as they'll love the creamy consistency and comforting taste.
This soup can also be made in advance and frozen for future meals, making it a practical choice for busy weeknights.
Ingredients:
- 2 tablespoons olive oil
- 1 onion, chopped
- 2 cloves garlic, minced
- 1 can (28 ounces) crushed tomatoes
- 2 cups vegetable broth
- 1 teaspoon sugar
- 1 teaspoon dried basil
- 1/2 cup heavy cream
- Salt and pepper to taste
- Fresh basil leaves for garnish
Instructions:
- In a large pot, heat the olive oil over medium heat. Add the chopped onion and sauté for about 5 minutes until it becomes translucent. This will create a flavorful base for your soup.
- Stir in the minced garlic and cook for an additional minute, being careful not to burn it. The aroma of garlic will enhance the soup's flavor profile as it cooks.
- Add the crushed tomatoes, vegetable broth, sugar, and dried basil to the pot. Stir well to combine all ingredients, then bring the mixture to a simmer. Allow it to cook for about 15 minutes, letting the flavors meld together.
- After simmering, remove the pot from heat and use an immersion blender to puree the soup until smooth. If you don't have an immersion blender, carefully transfer the soup in batches to a regular blender, then return it to the pot.
- Stir in the heavy cream and season with salt and pepper to taste. Return the pot to low heat and warm the soup gently for a few more minutes, ensuring it doesn't boil.
- Once heated through, ladle the soup into bowls and garnish with fresh basil leaves before serving. Enjoy this comforting dish with a side of your favorite bread.
Extra Tips: For an extra layer of flavor, consider roasting fresh tomatoes and garlic in the oven before adding them to the pot. This will caramelize the sugars and deepen the taste of your soup.
You can also substitute the heavy cream with coconut milk for a dairy-free version. To make it even more kid-friendly, serve the soup with a sprinkle of grated cheese on top or alongside fun-shaped grilled cheese sandwiches.
Easy Beef Stroganoff
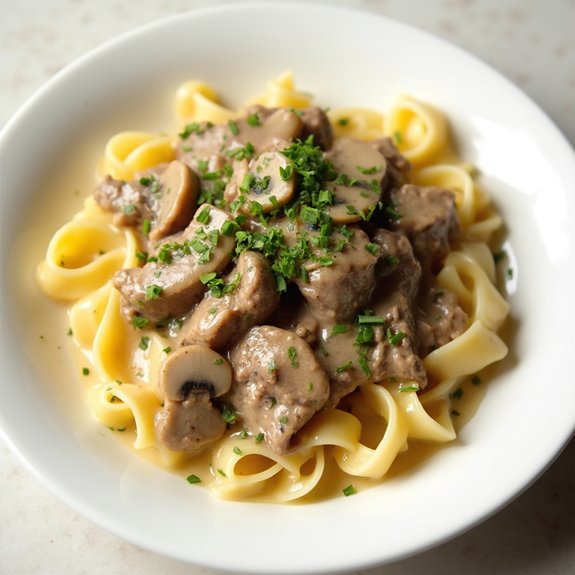
Title: Easy Beef Stroganoff
Prep Time: 10 minutes
Cook Time: 30 minutes
Number of Servings: 4
Required Equipment List: Large skillet, measuring cups, measuring spoons, wooden spoon, serving bowls
Cuisine Type: Russian-American
Easy Beef Stroganoff is a comforting and hearty dish that brings the rich flavors of tender beef and creamy sauce together in one pot. This recipe is perfect for busy weeknights when you want something delicious without spending hours in the kitchen.
The combination of sautéed mushrooms and onions with beef creates a savory base, while the addition of sour cream and mustard gives the sauce a creamy, tangy finish that pairs perfectly with egg noodles or rice.
This dish not only offers robust flavors but is also a great way to introduce kids to different textures and tastes. The one-pot nature of this recipe means less cleanup, making it an ideal choice for family dinners. Serve it alongside a fresh salad or some steamed vegetables for a complete meal that everyone will love.
Ingredients:
- 1 pound beef sirloin, thinly sliced
- 1 onion, diced
- 8 ounces mushrooms, sliced
- 2 cloves garlic, minced
- 1 tablespoon olive oil
- 2 cups beef broth
- 1 tablespoon Worcestershire sauce
- 1 tablespoon Dijon mustard
- 1 cup sour cream
- Salt and pepper to taste
- 8 ounces egg noodles (or rice, if preferred)
- Fresh parsley, chopped (for garnish)
Instructions:
- In a large skillet, heat the olive oil over medium heat. Add the diced onions and sliced mushrooms, cooking for about 5 minutes until they begin to soften. Stir in the minced garlic and cook for an additional minute until fragrant.
- Increase the heat to medium-high and add the thinly sliced beef to the skillet. Season with salt and pepper. Cook until the beef is browned on all sides, about 5-7 minutes. Be sure to stir frequently to guarantee even cooking.
- Pour in the beef broth and add the Worcestershire sauce and Dijon mustard. Bring the mixture to a gentle boil, then reduce the heat to low and let it simmer for 10 minutes, allowing the flavors to meld together.
- Stir in the sour cream until fully combined, creating a creamy sauce. Allow it to heat through for another 5 minutes, but don't let it boil, as this can curdle the sour cream.
- Meanwhile, cook the egg noodles according to the package instructions in a separate pot. Drain the noodles and add them to the skillet with the beef stroganoff, stirring to combine. If using rice, serve the stroganoff over the rice instead.
- Once everything is mixed and heated through, garnish with chopped fresh parsley before serving. Enjoy your delicious one-pot meal!
Extra Tips: For extra flavor, consider adding a splash of white wine to the skillet after browning the beef and let it reduce slightly before adding the broth.
You can also customize this dish by adding vegetables like peas or bell peppers. If you want a thicker sauce, mix a teaspoon of cornstarch with a tablespoon of cold water and stir it into the stroganoff just before serving to achieve the desired consistency.
Chicken Alfredo Casserole
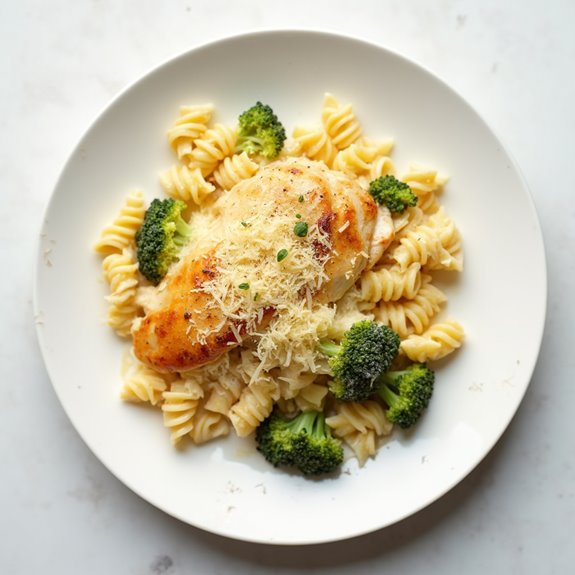
Title: Chicken Alfredo Casserole
Prep Time: 15 minutes
Cook Time: 30 minutes
Number of Servings: 6
Required Equipment List: Large mixing bowl, 9×13 inch baking dish, oven, measuring cups, measuring spoons, spoon
Cuisine Type: Italian-American
This Chicken Alfredo Casserole is a comforting and creamy dish that combines tender chicken, pasta, and a rich Alfredo sauce, all baked together in one convenient dish. Perfect for families and gatherings, this casserole is hearty and satisfying, making it a great weeknight dinner option.
The creamy sauce and melted cheese create a deliciously indulgent meal that kids will love, while being easy enough for parents to prepare. Not only is this dish simple to make, but it also allows for customization. You can add your favorite vegetables or switch out the chicken for another protein if desired.
This Chicken Alfredo Casserole is a fantastic way to bring everyone together for a delicious meal that feels special without requiring hours in the kitchen.
Ingredients:
- 2 cups cooked rotini pasta
- 2 cups cooked chicken, shredded
- 2 cups Alfredo sauce
- 1 cup shredded mozzarella cheese
- 1/2 cup grated Parmesan cheese
- 1 cup broccoli florets (optional)
- 1 teaspoon garlic powder
- Salt and pepper to taste
- 1 tablespoon olive oil (for greasing)
Instructions:
- Preheat your oven to 350°F (175°C). Grease a 9×13 inch baking dish with olive oil to prevent sticking and facilitate easy serving.
- In a large mixing bowl, combine the cooked rotini pasta, shredded chicken, Alfredo sauce, garlic powder, and salt and pepper. If using broccoli florets, add them to the mixture as well. Stir until everything is well combined.
- Transfer the mixture into the prepared baking dish, spreading it out evenly. This guarantees that the casserole cooks uniformly and all ingredients are well incorporated.
- Sprinkle the shredded mozzarella cheese and grated Parmesan cheese evenly over the top of the casserole. This will create a deliciously cheesy crust once baked.
- Bake in the preheated oven for 25-30 minutes, or until the cheese is melted and bubbly, and the edges are lightly golden. Keep an eye on it to avoid over-browning.
- Once baked, remove the casserole from the oven and let it cool for a few minutes before serving. This allows the flavors to meld together and makes it easier to serve.
Extra Tips: For added flavor, consider adding Italian seasoning or fresh herbs like parsley or basil to the mixture before baking. You can also experiment with different types of cheese, such as cheddar or gouda, for a unique twist.
If you prefer a crunchier topping, sprinkle some breadcrumbs mixed with a little melted butter on top before baking for a delightful crunch. Enjoy your delicious Chicken Alfredo Casserole!
Southwest Quinoa Skillet
Title: Southwest Quinoa Skillet
Prep Time: 10 minutes
Cook Time: 20 minutes
Number of Servings: 4
Required Equipment List: Large skillet, measuring cups, measuring spoons, wooden spoon
Cuisine Type: Southwestern
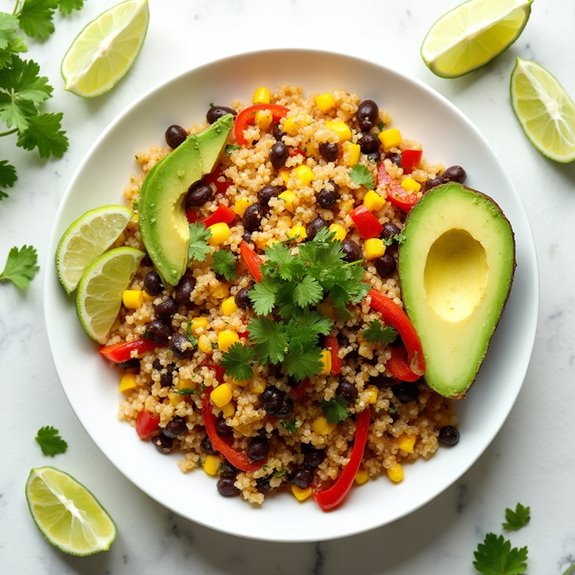
The Southwest Quinoa Skillet is a vibrant and nutritious dish that brings together the hearty goodness of quinoa with a medley of colorful vegetables and zesty spices. This one-pot meal isn't only easy to prepare but also packed with protein and fiber, making it a fantastic option for kids and adults alike.
Perfect for busy weeknights, this dish can be on the table in just about 30 minutes, allowing you to serve up a wholesome dinner without the hassle of multiple pots and pans. This recipe is highly customizable, so feel free to add your favorite ingredients or adjust the spice levels to suit your family's taste preferences.
The combination of black beans, corn, bell peppers, and spices creates a deliciously satisfying flavor profile, while the avocado and cilantro added at the end provide a fresh and creamy finish. Serve it warm for a comforting meal that's sure to please everyone at the dinner table.
Ingredients:
- 1 cup quinoa, rinsed
- 2 cups vegetable broth
- 1 can black beans, drained and rinsed
- 1 cup corn (frozen or canned)
- 1 red bell pepper, diced
- 1 teaspoon chili powder
- 1 teaspoon cumin
- Salt and pepper to taste
- 1 avocado, diced
- 1/4 cup fresh cilantro, chopped
- Lime wedges (for serving)
Instructions:
- In a large skillet, combine the rinsed quinoa and vegetable broth. Bring to a boil over medium-high heat, then reduce the heat to low, cover, and let it simmer for about 15 minutes, or until the quinoa is cooked and the liquid is absorbed.
- Once the quinoa is cooked, stir in the black beans, corn, and diced red bell pepper. Add the chili powder, cumin, salt, and pepper. Mix everything well and cook for an additional 5 minutes, allowing the vegetables to heat through and the flavors to meld.
- Remove the skillet from heat and gently fold in the diced avocado and chopped cilantro. This adds a creamy texture and fresh flavor to the dish, making it even more enjoyable.
- Serve the Southwest Quinoa Skillet warm, garnished with lime wedges on the side. Squeeze fresh lime juice over the dish to enhance the flavors and add a zesty kick.
Extra Tips: To make this dish even more exciting, you can add diced jalapeños for heat or sprinkle some shredded cheese on top before serving. For a complete meal, consider pairing it with a side of tortilla chips or a simple salad.
Leftovers can be stored in the refrigerator and reheated for a quick lunch or dinner; just add a splash of water to keep it moist while reheating. Enjoy your healthy and delicious Southwest Quinoa Skillet!
One-Pan Mediterranean Chicken
Title: One-Pan Mediterranean Chicken
Prep Time: 15 minutes
Cook Time: 30 minutes
Number of Servings: 4
Required Equipment List: Large skillet or frying pan, cutting board, knife, measuring cups, and spoons
Cuisine Type: Mediterranean
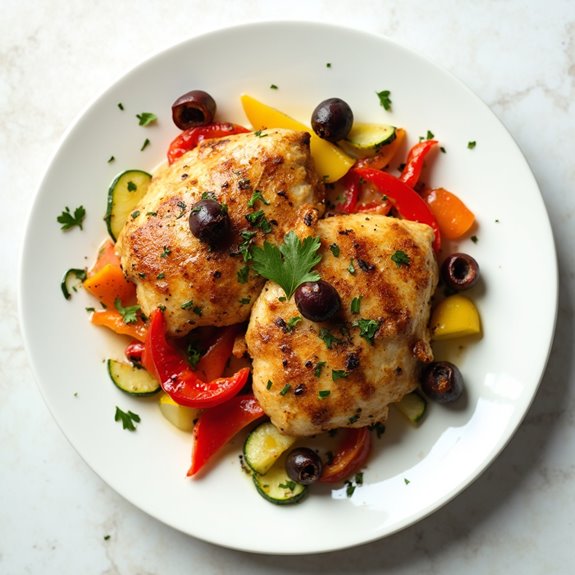
One-Pan Mediterranean Chicken is a flavorful and colorful dish that brings the essence of the Mediterranean right to your dinner table. With tender chicken breasts marinated in a delightful blend of herbs and spices, this dish is accompanied by a vibrant medley of bell peppers, zucchini, and olives, all cooked together to create a harmonious meal.
Not only is it packed with flavor, but it also requires minimal cleanup, making it a perfect choice for busy weeknights or family gatherings. This recipe isn't only easy to prepare but also incredibly versatile. You can substitute the vegetables based on what you have on hand or your family's preferences.
The combination of juicy chicken and fresh vegetables, drizzled with a hint of lemon, makes for a nutritious and satisfying meal that everyone will enjoy. Serve it over rice or alongside warm pita bread for a complete Mediterranean experience.
Ingredients:
- 4 boneless, skinless chicken breasts
- 2 tablespoons olive oil
- 1 teaspoon dried oregano
- 1 teaspoon garlic powder
- Salt and pepper to taste
- 1 red bell pepper, sliced
- 1 yellow bell pepper, sliced
- 1 zucchini, sliced
- 1 cup pitted Kalamata olives
- Juice of 1 lemon
- Fresh parsley for garnish (optional)
Instructions:
- Start by seasoning the chicken breasts with olive oil, dried oregano, garlic powder, salt, and pepper. Make sure the chicken is well coated with the seasoning, and let it marinate for about 10 minutes while you prepare the vegetables.
- In a large skillet over medium heat, add a little more olive oil if needed, and place the marinated chicken breasts in the pan. Cook for about 5-6 minutes on each side until they're golden brown and cooked through. Once done, remove the chicken from the skillet and set it aside.
- In the same skillet, add the sliced red and yellow bell peppers and zucchini. Sauté the vegetables for about 5 minutes until they're tender but still vibrant in color. This step enhances their flavors and brings out their natural sweetness.
- Return the cooked chicken to the skillet and add the Kalamata olives. Squeeze the juice of one lemon over the dish, and stir everything together gently to combine the flavors. Allow it to cook for an additional 5 minutes, ensuring everything is heated through.
- Once everything is cooked and well combined, remove the skillet from heat. Serve the Mediterranean chicken warm, garnished with fresh parsley if desired.
Extra Tips: To enhance the dish further, consider adding a sprinkle of feta cheese on top before serving for a delicious salty flavor. If you prefer a spicier kick, you can include sliced jalapeños or red pepper flakes when cooking the vegetables.
This dish pairs beautifully with a side of couscous or a simple green salad, making it a well-rounded meal that's both healthy and satisfying. Enjoy your culinary creation!
Kid-Friendly Chili
Title: Kid-Friendly Chili
Prep Time: 15 minutes
Cook Time: 30 minutes
Number of Servings: 6
Required Equipment List: Large pot, wooden spoon, measuring cups, cutting board, knife
Cuisine Type: American
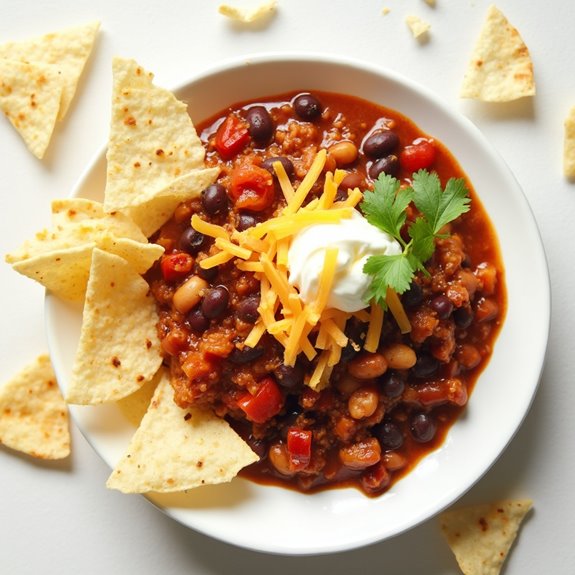
This Kid-Friendly Chili is a hearty and nutritious dish that the whole family will love. Packed with lean ground turkey, beans, and a variety of veggies, it's a great way to sneak in some extra nutrition while still being delicious. The mild spices and rich flavors make it appealing for kids, and the one-pot cooking method means less mess and an easy cleanup.
Perfect for chilly days or casual family dinners, this chili is sure to become a weeknight favorite. The beauty of this recipe lies in its versatility; you can easily customize the ingredients based on your kids' preferences. Whether you want to add more vegetables, switch out the protein for ground beef or tofu, or even throw in some corn for sweetness, this chili allows for plenty of creativity.
Serve it with some cornbread or tortilla chips, and watch your little ones enjoy every last bite!
Ingredients:
- 1 pound lean ground turkey
- 1 can (15 oz) kidney beans, rinsed and drained
- 1 can (15 oz) black beans, rinsed and drained
- 1 can (14.5 oz) diced tomatoes with green chilies
- 1 cup diced bell peppers (any color)
- 1 cup diced onions
- 2 cloves garlic, minced
- 1 tablespoon chili powder
- 1 teaspoon cumin
- 1 teaspoon paprika
- Salt and pepper to taste
- 1 cup chicken broth
- Olive oil for cooking
- Optional toppings: shredded cheese, sour cream, cilantro
Instructions:
- In a large pot, heat a splash of olive oil over medium heat. Add the diced onions, bell peppers, and minced garlic, sautéing until the onions are translucent and the peppers are tender, about 5 minutes.
- Add the ground turkey to the pot, breaking it up with a wooden spoon. Cook until the turkey is browned and no longer pink, about 5-7 minutes. Season with salt, pepper, chili powder, cumin, and paprika during this step.
- Next, stir in the diced tomatoes with their juices, kidney beans, black beans, and chicken broth. Mix everything well to combine and bring the mixture to a gentle boil.
- Once boiling, reduce the heat to low and let the chili simmer uncovered for about 20 minutes. Stir occasionally, allowing the flavors to meld together and the chili to thicken slightly.
- Taste the chili and adjust the seasonings if necessary. If your kids prefer a milder flavor, you can add a little more broth to dilute the spices. Serve hot with optional toppings like shredded cheese, sour cream, or fresh cilantro.
Extra Tips: For a thicker chili, consider mashing some of the beans before adding them to the pot. This will help create a creamier texture. If your kids are particularly sensitive to spice, feel free to adjust the amount of chili powder or use a milder version.
Leftover chili can be stored in the refrigerator for up to 3 days and also freezes beautifully, making it a convenient meal prep option for busy nights!
Macaroni and Cheese Bake
Title: Macaroni and Cheese Bake
Prep Time: 15 minutes
Cook Time: 30 minutes
Number of Servings: 6
Required Equipment List: Large pot, baking dish, mixing bowl, whisk, oven
Cuisine Type: American
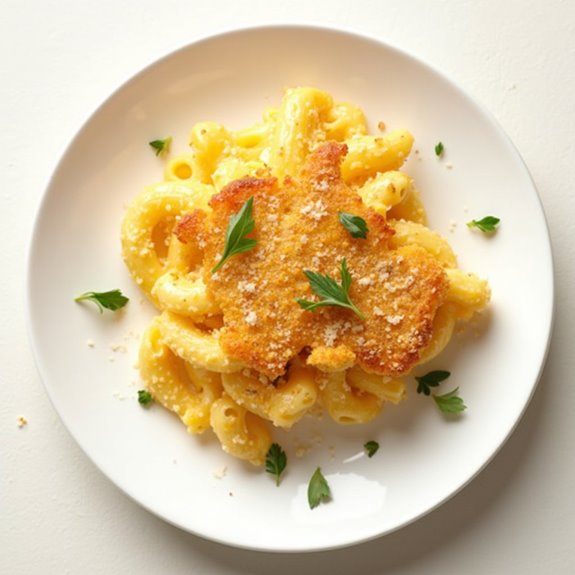
This Macaroni and Cheese Bake is a comforting and satisfying dish that kids will adore. With its creamy cheese sauce enveloping the pasta and a crispy golden topping, this recipe is an elevated take on the classic mac and cheese. Perfect for family dinners or a potluck, this bake is sure to please even the pickiest eaters with its rich and cheesy flavor.
What makes this version special is the addition of a crunchy breadcrumb topping that adds texture and a delightful contrast to the creamy pasta underneath. It's easy to prepare, and the best part is that you can customize it by adding vegetables like broccoli or even cooked chicken for a heartier meal. This one-pot wonder isn't only delicious but also a fantastic way to sneak in some nutrition.
Ingredients:
- 2 cups elbow macaroni
- 4 tablespoons unsalted butter
- 1/4 cup all-purpose flour
- 3 cups milk
- 2 cups shredded sharp cheddar cheese
- 1 cup shredded mozzarella cheese
- 1 teaspoon garlic powder
- 1 teaspoon onion powder
- Salt and pepper to taste
- 1 cup breadcrumbs
- 1/4 cup grated Parmesan cheese
Instructions:
- Preheat your oven to 350°F (175°C). Bring a large pot of salted water to a boil and cook the elbow macaroni according to package instructions until al dente. Drain the pasta and set aside.
- In the same pot, melt the butter over medium heat. Once melted, whisk in the flour and cook for about 1-2 minutes until it turns a light golden color. This creates a roux that will thicken your cheese sauce.
- Gradually pour in the milk while continuing to whisk to avoid lumps. Increase the heat and cook, stirring constantly, until the mixture thickens and bubbles. Once thickened, remove from heat and stir in the garlic powder, onion powder, and a pinch of salt and pepper.
- Add the shredded cheddar and mozzarella cheeses to the sauce, stirring until melted and smooth. Then, fold in the cooked macaroni until the pasta is well coated with the cheese sauce.
- Transfer the macaroni and cheese mixture into a greased baking dish. In a separate bowl, combine the breadcrumbs and grated Parmesan cheese, then sprinkle the mixture evenly over the top of the pasta.
- Bake in the preheated oven for 25-30 minutes or until the top is golden brown and crispy. Allow to cool for a few minutes before serving.
Extra Tips: For added flavor, you can mix in cooked vegetables like peas or spinach into the cheese mixture before baking. If you prefer a little heat, consider adding a dash of cayenne pepper or red pepper flakes to the cheese sauce.
Make sure to keep an eye on the bake during the last few minutes to prevent the breadcrumbs from burning. This dish can also be made ahead of time and stored in the refrigerator; just reheat before serving! Enjoy your cheesy masterpiece!
Teriyaki Salmon and Broccoli
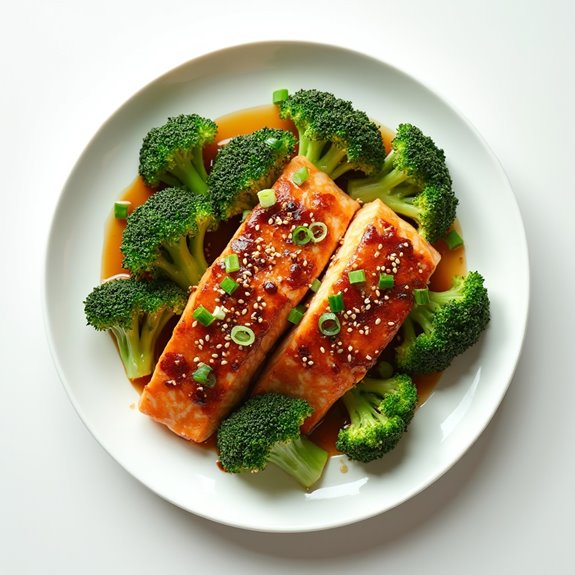
Title: Teriyaki Salmon and Broccoli
Prep Time: 10 minutes
Cook Time: 20 minutes
Number of Servings: 4
Required Equipment List: Large skillet, measuring cups, measuring spoons, spatula
Cuisine Type: Asian-inspired
Teriyaki Salmon and Broccoli is a delicious, nutritious, and easy-to-make dish that the whole family will love. This one-pot meal brings together tender salmon fillets and vibrant broccoli florets, all coated in a sweet and savory teriyaki sauce.
It's perfect for busy weeknights when you want to get a wholesome dinner on the table without a lot of fuss. The combination of flavors and textures makes this recipe not only satisfying but also visually appealing.
Cooking everything in one skillet means less cleanup, and the dish can be on the table in just 30 minutes. The salmon is packed with omega-3 fatty acids, and when paired with broccoli, it creates a well-rounded meal that's full of vitamins and minerals.
This recipe is also easily adaptable; you can swap out the salmon for chicken or tofu and use any seasonal vegetables you have on hand.
Ingredients:
- 4 salmon fillets
- 2 cups broccoli florets
- 1/4 cup teriyaki sauce
- 2 tablespoons olive oil
- 2 cloves garlic, minced
- 1 teaspoon ginger, minced
- Salt and pepper to taste
- Sesame seeds (for garnish, optional)
- Green onions, chopped (for garnish, optional)
Instructions:
- Heat the olive oil in a large skillet over medium heat. Once hot, add the minced garlic and ginger, sautéing for about 1 minute until fragrant. Be careful not to burn the garlic.
- Season the salmon fillets with salt and pepper on both sides. Place the fillets in the skillet, skin side down, and cook for about 4-5 minutes, until the skin is crispy and the salmon is cooked halfway through.
- Carefully flip the salmon fillets over and add the broccoli florets to the skillet. Pour the teriyaki sauce over the salmon and broccoli, ensuring everything is well-coated.
- Cover the skillet with a lid and allow it to cook for another 5-7 minutes, or until the salmon is cooked through and the broccoli is tender. The steam from the broccoli will help cook the salmon evenly.
- Once cooked, remove the skillet from heat and let it sit for a minute. Serve the salmon and broccoli on plates, drizzling any remaining teriyaki sauce from the skillet over the top. Garnish with sesame seeds and chopped green onions if desired.
Extra Tips: For a little extra flavor, feel free to marinate the salmon in the teriyaki sauce for 15-30 minutes before cooking. This will enhance the flavor profile of the fish.
Additionally, if you prefer a bit of spice, you can add a dash of red pepper flakes to the teriyaki sauce or serve with a side of sriracha. This dish pairs beautifully with steamed rice or quinoa for a complete meal. Enjoy your cooking!
BBQ Pulled Pork Sliders
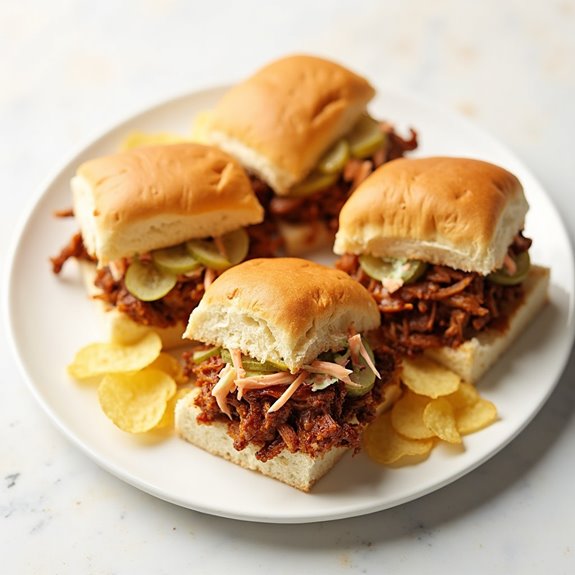
Title: BBQ Pulled Pork Sliders
Prep Time: 15 minutes
Cook Time: 8 hours (slow cooker)
Number of Servings: 8
Required Equipment List: Slow cooker, mixing bowl, measuring spoons, serving platter
Cuisine Type: American
BBQ Pulled Pork Sliders are a crowd-pleaser that brings a delicious taste of southern comfort food to your table. This recipe features tender, slow-cooked pork shoulder that's infused with a mouthwatering barbecue sauce, perfect for piling high on soft slider buns.
These sliders aren't only easy to prepare but also make for a fun and interactive meal, allowing everyone to customize their own sandwiches with toppings like coleslaw, pickles, and additional sauce.
The beauty of this dish lies in its simplicity; with just a few ingredients and minimal prep, you can let your slow cooker do the work while you enjoy your day. Ideal for family gatherings, game day, or casual dinners, BBQ Pulled Pork Sliders are sure to satisfy both kids and adults alike.
Serve them with a side of chips or a fresh salad for a complete meal that everyone will love.
Ingredients:
- 2 pounds pork shoulder
- 1 cup BBQ sauce (store-bought or homemade)
- 1 tablespoon brown sugar
- 1 tablespoon apple cider vinegar
- 1 teaspoon garlic powder
- 1 teaspoon onion powder
- 1/2 teaspoon smoked paprika
- Salt and pepper to taste
- 8 slider buns
- Coleslaw (optional, for topping)
- Pickles (optional, for topping)
Instructions:
- Begin by seasoning the pork shoulder with salt and pepper. In a mixing bowl, combine the BBQ sauce, brown sugar, apple cider vinegar, garlic powder, onion powder, and smoked paprika, mixing until well combined. This will serve as your flavorful marinade.
- Place the seasoned pork shoulder into the slow cooker and pour the BBQ sauce mixture over the top, ensuring the pork is well coated. Cover the slow cooker with the lid and set it to low heat for approximately 8 hours, or until the pork is tender and easily shreds with a fork.
- Once cooked, remove the pork shoulder from the slow cooker and place it on a cutting board. Use two forks to shred the meat into bite-sized pieces, discarding any excess fat. Return the shredded pork to the slow cooker and stir it into the remaining BBQ sauce to keep it moist and flavorful.
- To assemble the sliders, slice the slider buns in half and place a generous scoop of the BBQ pulled pork on the bottom half of each bun. If desired, top with coleslaw and pickles for added crunch and flavor before placing the top half of the bun on.
- Serve the sliders warm on a serving platter, along with extra BBQ sauce on the side for those who want to add more to their sandwiches. These sliders are best enjoyed fresh but can be stored in the refrigerator for leftovers.
Extra Tips: For added flavor, consider marinating the pork shoulder overnight in the BBQ sauce mixture before cooking. This allows the flavors to penetrate the meat even more.
You can also experiment with different types of BBQ sauce, such as spicy or honey-based, to suit your taste preferences. If you're short on time, you can use pre-cooked pulled pork from the store and simply heat it up with BBQ sauce for a quicker option. Enjoy your delicious sliders!
Vegetable Fried Rice
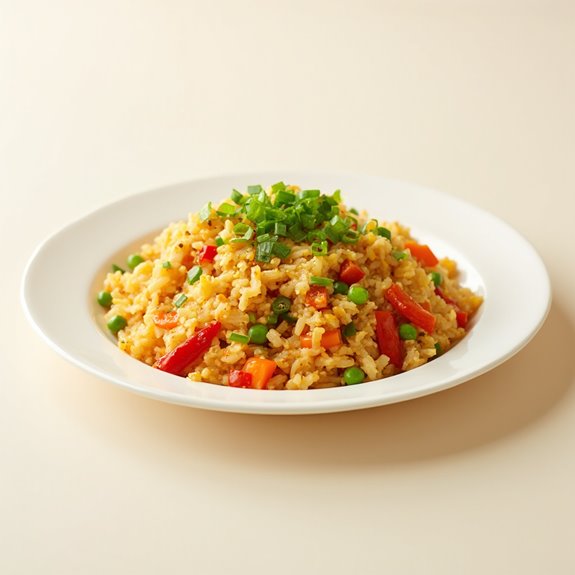
Title: Vegetable Fried Rice
Prep Time: 10 minutes
Cook Time: 15 minutes
Number of Servings: 4
Required Equipment List: Large skillet or wok, spatula, measuring cups, knife, cutting board
Cuisine Type: Asian
Vegetable Fried Rice is a colorful and nutritious dish that's perfect for kids and adults alike. This recipe is a fantastic way to use leftover rice, and the vibrant mix of vegetables adds both flavor and nutrition. The dish is quick to prepare and can be easily customized with your favorite veggies or proteins, making it a go-to option for busy weeknights or lunchboxes.
This one-pot meal isn't only delicious but also a fun way for kids to enjoy vegetables. The combination of soy sauce and sesame oil gives the rice a savory depth, while the bright vegetables add crunch and color. Serve it as a standalone dish or pair it with grilled chicken or tofu for a complete meal that everyone will love.
Ingredients:
- 3 cups cooked rice (preferably day-old)
- 1 cup mixed vegetables (carrots, peas, bell peppers)
- 2 tablespoons soy sauce
- 1 tablespoon sesame oil
- 2 eggs, beaten
- 2 green onions, chopped
- 2 cloves garlic, minced
- Salt and pepper to taste
Instructions:
- Heat the sesame oil in a large skillet or wok over medium heat. Once hot, add the minced garlic and sauté for about 30 seconds until fragrant, being careful not to burn it.
- Add the mixed vegetables to the skillet and stir-fry for about 3-4 minutes until they're tender but still crisp. If you're using frozen vegetables, verify they're heated through before moving on to the next step.
- Push the vegetables to one side of the skillet and pour the beaten eggs into the empty side. Scramble the eggs until fully cooked, then mix them in with the vegetables.
- Add the cooked rice to the skillet, breaking up any clumps. Pour the soy sauce over the rice and stir everything together until well combined. Cook for another 2-3 minutes, allowing the rice to heat through and absorb the flavors.
- Finally, stir in the chopped green onions and season with salt and pepper to taste. Remove from heat and serve warm, garnished with additional green onions if desired.
Extra Tips: For an extra kick, consider adding a splash of hot sauce or a sprinkle of crushed red pepper flakes when you add the soy sauce. You can also incorporate proteins like chicken, shrimp, or tofu for a heartier dish.
Using day-old rice is ideal as it helps to prevent the fried rice from becoming mushy. Feel free to get creative with the vegetables based on what you have on hand!
One-Pot Jambalaya
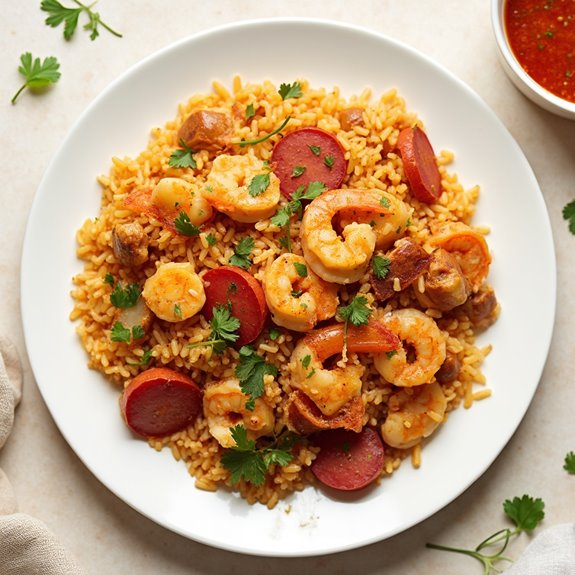
Title: One-Pot Jambalaya
Prep Time: 15 minutes
Cook Time: 30 minutes
Number of Servings: 6
Required Equipment List: Large pot or Dutch oven, wooden spoon, measuring cups, measuring spoons
Cuisine Type: Cajun/Creole
One-Pot Jambalaya is a classic dish that brings the vibrant flavors of Louisiana cuisine right to your table. This one-pot wonder combines the heartiness of rice with a medley of proteins, vegetables, and spices, creating a satisfying meal in no time. The dish is packed with the bold flavors of smoked sausage, tender chicken, and succulent shrimp, all simmered with the holy trinity of Cajun cooking: bell peppers, onions, and celery.
It's not just a meal; it's a celebration of flavors and a perfect option for family dinners or gatherings with friends. The beauty of this jambalaya recipe lies in its simplicity. Everything cooks together in one pot, allowing the flavors to meld beautifully while minimizing cleanup.
This dish isn't only delicious but also adaptable – you can easily modify the proteins or add your favorite vegetables. Serve it with a sprinkle of fresh parsley or a dash of hot sauce for an extra kick, and you'll have a dish that's sure to impress everyone at the table.
Ingredients:
- 1 tablespoon olive oil
- 1 pound smoked sausage, sliced
- 1 pound boneless, skinless chicken thighs, diced
- 1 cup onion, chopped
- 1 cup bell pepper, chopped
- 1 cup celery, chopped
- 4 cloves garlic, minced
- 1 can (14.5 ounces) diced tomatoes, undrained
- 4 cups chicken broth
- 2 cups long-grain rice
- 1 tablespoon Cajun seasoning
- 1 teaspoon dried thyme
- 1 pound shrimp, peeled and deveined
- Salt and pepper to taste
- Chopped parsley (for garnish)
Instructions:
- In a large pot or Dutch oven, heat the olive oil over medium heat. Add the sliced smoked sausage and cook until browned, about 5 minutes. Remove the sausage from the pot and set it aside, leaving the rendered fat in the pot.
- In the same pot, add the diced chicken thighs and cook until browned on all sides, about 5-7 minutes. Once cooked, return the sausage to the pot and add the chopped onion, bell pepper, celery, and minced garlic. Sauté the mixture for about 5 minutes, or until the vegetables are softened.
- Stir in the diced tomatoes, chicken broth, long-grain rice, Cajun seasoning, and dried thyme. Bring the mixture to a boil, then reduce the heat to low. Cover the pot and let it simmer for about 20 minutes, or until the rice is tender and has absorbed most of the liquid.
- Once the rice is cooked, gently fold in the shrimp, and season with salt and pepper to taste. Cover the pot again and let it cook for an additional 5 minutes, or until the shrimp are pink and cooked through.
- Remove the pot from heat and let it sit for a few minutes to allow the flavors to meld further. Fluff the jambalaya with a fork and garnish with chopped parsley before serving.
Extra Tips: For a touch of heat, feel free to add diced jalapeños or a few dashes of hot sauce during cooking. You can also customize this jambalaya by adding your favorite vegetables, such as okra or corn.
If you prefer a smoky flavor, consider using andouille sausage instead of regular smoked sausage. This dish is perfect for leftovers, as the flavors deepen and improve the next day! Enjoy your delicious one-pot jambalaya!
Beef and Broccoli Stir-Fry
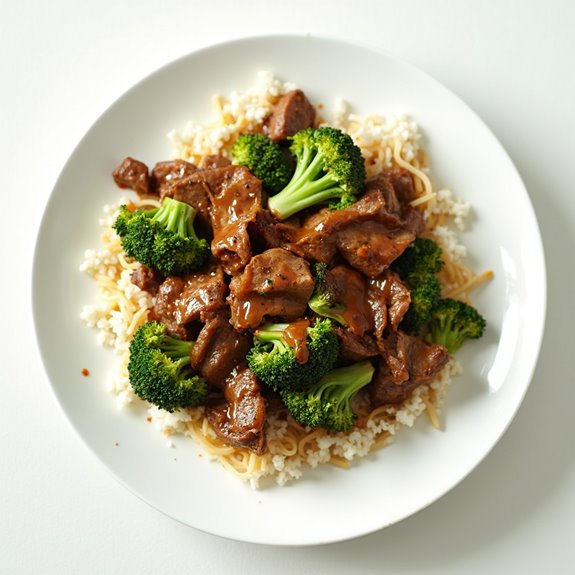
Title: Beef and Broccoli Stir-Fry
Prep Time: 10 minutes
Cook Time: 15 minutes
Number of Servings: 4
Required Equipment List: Large skillet or wok, measuring cups, measuring spoons, spatula, cutting board, knife
Cuisine Type: Chinese-American
Beef and Broccoli Stir-Fry is a classic dish that combines tender strips of beef with vibrant green broccoli, all tossed in a savory sauce. This quick and easy recipe is perfect for busy weeknights, as it comes together in just 25 minutes. The dish isn't only delicious but also packed with nutrients, making it a great choice for kids and adults alike.
The rich flavors of ginger and garlic in the sauce complement the beef perfectly, while the broccoli adds a satisfying crunch. This one-pot meal can be served over rice or noodles, making it versatile and satisfying. Plus, you can easily customize the recipe by adding other vegetables such as bell peppers or snap peas to boost the nutritional value and flavor.
With minimal cleanup required, this Beef and Broccoli Stir-Fry is a fantastic option for families seeking a wholesome meal without the fuss.
Ingredients:
- 1 pound beef sirloin, thinly sliced
- 4 cups broccoli florets
- 3 tablespoons soy sauce
- 2 tablespoons oyster sauce
- 1 tablespoon cornstarch
- 2 teaspoons vegetable oil
- 1 teaspoon minced garlic
- 1 teaspoon minced ginger
- Salt and pepper to taste
- Cooked rice or noodles for serving
Instructions:
- In a small bowl, whisk together the soy sauce, oyster sauce, and cornstarch until smooth. This mixture will serve as the stir-fry sauce that thickens as it cooks, creating a delicious glaze for the beef and broccoli.
- Heat the vegetable oil in a large skillet or wok over medium-high heat. Once hot, add the minced garlic and ginger, stirring quickly for about 30 seconds until fragrant. Be careful not to burn them, as they can become bitter.
- Add the thinly sliced beef to the skillet, seasoning it with salt and pepper. Stir-fry for about 3-4 minutes until the beef is browned and cooked through. Remove the beef from the skillet and set it aside on a plate.
- In the same skillet, add the broccoli florets and stir-fry for about 2-3 minutes, until they're bright green and slightly tender. If desired, you can add a splash of water to help steam the broccoli.
- Return the cooked beef to the skillet and pour the sauce over the mixture. Stir everything together, ensuring the beef and broccoli are evenly coated. Continue to cook for an additional 2-3 minutes, allowing the sauce to thicken.
- Once the sauce has reached your desired consistency, remove the skillet from heat. Serve the Beef and Broccoli Stir-Fry hot over cooked rice or noodles and enjoy!
Extra Tips: For added flavor, consider marinating the beef in a little soy sauce and cornstarch for 15-30 minutes before cooking. This will help tenderize the meat and infuse it with extra flavor.
If you prefer a spicier kick, feel free to add a dash of red pepper flakes or a sliced chili pepper while stir-frying. Leftovers can be stored in the refrigerator for up to three days, making this dish a great option for meal prep!
Simple Lemon Garlic Shrimp
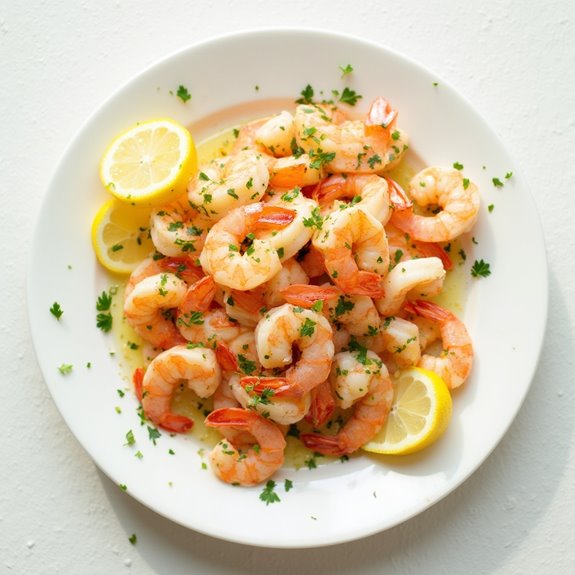
Title: Simple Lemon Garlic Shrimp
Prep Time: 10 minutes
Cook Time: 10 minutes
Number of Servings: 4
Required Equipment List: Large skillet, measuring spoons, spatula, serving dish
Cuisine Type: Mediterranean
This Simple Lemon Garlic Shrimp recipe is a quick and flavorful dish that the whole family will love. The shrimp are sautéed with fresh garlic and bright lemon juice, creating a deliciously zesty flavor that pairs perfectly with pasta, rice, or even a fresh salad.
This recipe is ideal for busy weeknights or when you want to impress guests without spending hours in the kitchen. With its vibrant ingredients and minimal cooking time, this dish isn't only easy to prepare but also packed with protein.
The addition of fresh parsley adds a hint of color and freshness, making it a delightful centerpiece on any dinner table. Plus, it's a great way to introduce kids to seafood in a fun and tasty way!
Ingredients:
- 1 pound large shrimp, peeled and deveined
- 3 tablespoons olive oil
- 4 cloves garlic, minced
- 1 teaspoon red pepper flakes (optional)
- Zest and juice of 1 lemon
- Salt and pepper to taste
- 1/4 cup fresh parsley, chopped
Instructions:
- Heat the olive oil in a large skillet over medium heat. Once hot, add the minced garlic and red pepper flakes (if using). Sauté for about 1 minute until fragrant, being careful not to burn the garlic.
- Add the shrimp to the skillet in a single layer. Season with salt and pepper. Cook for about 2-3 minutes on each side, or until the shrimp turn pink and are opaque.
- Once the shrimp are cooked, add the lemon juice and zest to the skillet. Toss to coat the shrimp evenly in the zesty sauce. Cook for an additional minute to heat through.
- Remove the skillet from heat and stir in the chopped parsley. This will add a fresh flavor and vibrant color to the dish.
- Serve immediately, either on a bed of rice, pasta, or alongside a fresh salad. Make sure to drizzle any remaining lemon garlic sauce over the top for extra flavor.
Extra Tips: For a more robust flavor, marinate the shrimp in lemon juice, garlic, and olive oil for 15-30 minutes before cooking. You can also customize the dish by adding vegetables such as spinach or cherry tomatoes during the cooking process.
If you have leftovers, they can be stored in an airtight container in the fridge for up to two days and can be reheated gently on the stove. Enjoy your delicious and simple lemon garlic shrimp!
Chicken and Vegetable Curry
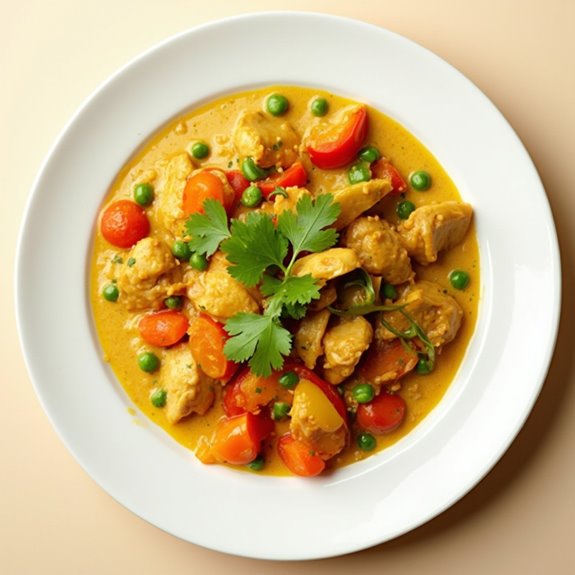
Title: Chicken and Vegetable Curry
Prep Time: 15 minutes
Cook Time: 30 minutes
Number of Servings: 4
Required Equipment List: Large pot, cutting board, knife, measuring cups, stirring spoon
Cuisine Type: Indian
This Chicken and Vegetable Curry is a wholesome and flavorful dish that's perfect for introducing kids to the wonderful world of spices and diverse cuisines. The tender chicken pieces simmer in a creamy, spiced sauce alongside colorful vegetables, making it not only delicious but also visually appealing.
This one-pot meal is a great way to sneak in nutritious ingredients while keeping cleanup to a minimum, making it an ideal choice for busy weeknight dinners. The combination of coconut milk and aromatic spices creates a rich and comforting curry that pairs beautifully with rice or flatbreads.
The recipe is easily customizable—feel free to swap in your kids' favorite vegetables or adjust the spice level to suit their tastes. With its vibrant colors and enticing aroma, this Chicken and Vegetable Curry is sure to become a family favorite.
Ingredients:
- 1 pound boneless, skinless chicken breasts, cut into bite-sized pieces
- 1 tablespoon vegetable oil
- 1 onion, chopped
- 2 cloves garlic, minced
- 1 tablespoon ginger, minced
- 1 tablespoon curry powder
- 1 teaspoon turmeric
- 1 can (14 ounces) coconut milk
- 1 cup chicken broth
- 2 cups mixed vegetables (such as bell peppers, carrots, and peas)
- Salt and pepper to taste
- Fresh cilantro (for garnish, optional)
Instructions:
- In a large pot, heat the vegetable oil over medium heat. Add the chopped onion and sauté for about 3-4 minutes until it becomes translucent. This will create a flavorful base for your curry.
- Stir in the minced garlic and ginger, cooking for an additional minute until fragrant. Be careful not to burn the garlic, as it can turn bitter.
- Add the chicken pieces to the pot and season with salt and pepper. Cook for 5-7 minutes, stirring occasionally, until the chicken is browned on all sides.
- Sprinkle the curry powder and turmeric over the chicken, mixing well to coat the pieces evenly with the spices. Cook for another minute to release the flavors of the spices.
- Pour in the coconut milk and chicken broth, stirring to combine. Bring the mixture to a gentle simmer, then reduce the heat to low and cover the pot. Let it cook for about 15 minutes, allowing the chicken to cook through and the flavors to meld.
- After 15 minutes, add the mixed vegetables to the pot. Stir well and cook for an additional 5-10 minutes, until the vegetables are tender yet still vibrant in color.
- Taste the curry and adjust the seasoning with more salt and pepper if needed. Serve the curry warm, garnished with fresh cilantro if desired, alongside rice or flatbreads.
Extra Tips: To enhance the flavor of your curry, consider adding a splash of lime juice before serving for a bright finish. If your kids enjoy a bit of heat, you can include a pinch of red pepper flakes or some chopped fresh chili.
Leftovers can be stored in the refrigerator for up to three days and taste even better the next day as the flavors continue to develop. Enjoy your cooking adventure!
Sloppy Joe Casserole
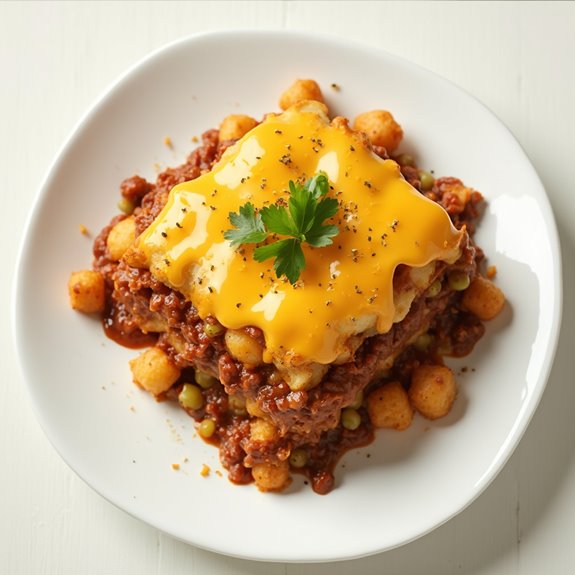
Title: Sloppy Joe Casserole
Prep Time: 15 minutes
Cook Time: 30 minutes
Number of Servings: 6
Required Equipment List: Large skillet, 9×13-inch baking dish, measuring cups, measuring spoons, wooden spoon, oven
Cuisine Type: American
Sloppy Joe Casserole is a fun and hearty dish that combines the classic flavors of a Sloppy Joe sandwich in a comforting casserole format. This dish is perfect for families, as it's easy to prepare and can feed a crowd.
The ground beef is cooked with a savory blend of spices and a tangy sauce, then layered with fluffy tater tots and cheesy goodness. It's a meal that not only satisfies hunger but also brings back nostalgic memories of childhood favorites.
This one-pot wonder is incredibly versatile, allowing you to customize the toppings or even swap out the meat for a plant-based alternative. Whether you're serving it for a cozy family dinner or a gathering with friends, this Sloppy Joe Casserole is sure to be a hit.
Plus, it's a fantastic way to get kids involved in the kitchen, as they can help layer the ingredients and sprinkle on the cheese!
Ingredients:
- 1 pound ground beef
- 1 small onion, diced
- 1 green bell pepper, diced
- 1 cup Sloppy Joe sauce (store-bought or homemade)
- 1 teaspoon garlic powder
- 1 teaspoon Worcestershire sauce
- Salt and pepper to taste
- 1 bag (32 ounces) frozen tater tots
- 2 cups shredded cheddar cheese
- Fresh parsley for garnish (optional)
Instructions:
- Preheat your oven to 375°F (190°C). In a large skillet over medium heat, add the ground beef, onion, and green bell pepper. Cook until the beef is browned and the vegetables are soft, about 5-7 minutes. Drain any excess fat from the skillet.
- Stir in the Sloppy Joe sauce, garlic powder, Worcestershire sauce, salt, and pepper. Allow the mixture to simmer for a few minutes until heated through. This will help the flavors meld together beautifully.
- In a greased 9×13-inch baking dish, spread the beef mixture evenly across the bottom. Layer the frozen tater tots on top of the beef mixture, arranging them in a single layer for even cooking.
- Bake the casserole in the preheated oven for 20 minutes. After 20 minutes, remove the dish from the oven and sprinkle the shredded cheddar cheese generously over the tater tots.
- Return the casserole to the oven and bake for an additional 10 minutes, or until the cheese is melted and bubbly, and the tater tots are golden brown.
- Once done, remove the casserole from the oven and let it cool for a few minutes. Garnish with fresh parsley if desired, then serve warm and enjoy!
Extra Tips: For a little kick, consider adding some diced jalapeños to the beef mixture or topping the casserole with sliced pickles before serving.
You can also swap the cheddar cheese for pepper jack for an extra spicy twist. This casserole can be made ahead of time and stored in the refrigerator for up to two days; simply reheat before serving. Enjoy your delicious Sloppy Joe Casserole!
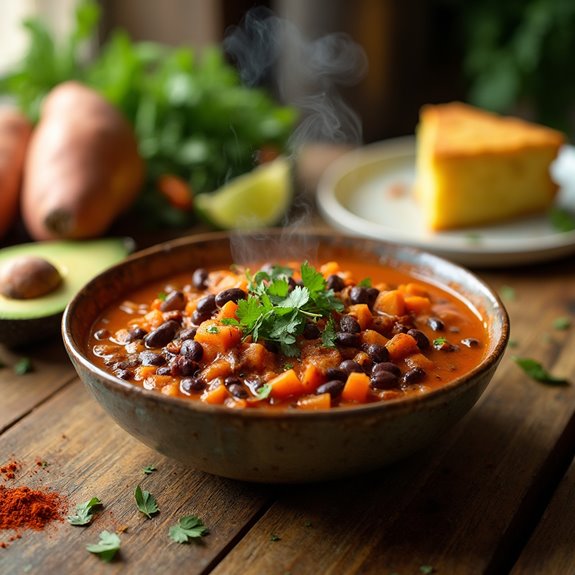
Sweet Potato and Black Bean Chili

Title: Sweet Potato and Black Bean Chili
Prep Time: 15 minutes
Cook Time: 30 minutes
Number of Servings: 6
Required Equipment List: Large pot, wooden spoon, measuring cups, cutting board, knife
Cuisine Type: Vegetarian
This Sweet Potato and Black Bean Chili is a hearty and nutritious meal that's perfect for both kids and adults alike. Packed with the natural sweetness of sweet potatoes and the protein-rich goodness of black beans, this chili isn't only filling but also bursting with flavor.
The combination of spices, tomatoes, and vegetables creates a warm and comforting dish that's ideal for chilly evenings or anytime you crave something wholesome. Moreover, this one-pot recipe makes cleanup a breeze, as everything is cooked together in one pot.
It's easy to customize based on the ingredients you have on hand, and it can be made ahead of time and stored for quick meals throughout the week. Serve it with a side of cornbread or over rice for a complete and satisfying meal that the whole family will love.
Ingredients:
- 2 medium sweet potatoes, peeled and diced
- 1 can (15 oz) black beans, drained and rinsed
- 1 can (14 oz) diced tomatoes, with juices
- 1 medium onion, diced
- 2 cloves garlic, minced
- 1 bell pepper, diced
- 2 cups vegetable broth
- 1 tablespoon chili powder
- 1 teaspoon cumin
- 1/2 teaspoon smoked paprika
- Salt and pepper to taste
- Optional toppings: avocado, cilantro, lime wedges
Instructions:
- In a large pot, heat a drizzle of olive oil over medium heat. Add the diced onion and bell pepper, and sauté for about 5 minutes until softened. Stir in the minced garlic and cook for an additional minute until fragrant.
- Add the diced sweet potatoes to the pot, followed by the chili powder, cumin, smoked paprika, salt, and pepper. Stir to coat the sweet potatoes with the spices and cook for about 2-3 minutes.
- Pour in the diced tomatoes (with their juices) and vegetable broth, then add the rinsed black beans. Stir everything together and bring the mixture to a boil.
- Once boiling, reduce the heat to low, cover the pot, and let it simmer for 20-25 minutes, or until the sweet potatoes are tender. Stir occasionally to prevent sticking and guarantee even cooking.
- Taste and adjust seasoning if needed. If you prefer a thicker chili, use a potato masher to mash some of the sweet potatoes directly in the pot. Serve hot, garnished with optional toppings like diced avocado, fresh cilantro, and lime wedges.
Extra Tips: To add extra depth of flavor, consider roasting the sweet potatoes in the oven before adding them to the chili. You can also amp up the spice level by adding chopped jalapeños or a pinch of cayenne pepper.
This chili freezes well, so feel free to make a double batch and save some for a quick meal on busy days. Enjoy your delicious and healthy chili!
Conclusion
Incorporating these one-pot recipes into your weekly meals is like adding a splash of color to a black-and-white photo—it's transformative! Whether you're maneuvering around picky eaters or simply juggling a busy schedule, these dishes make cooking a breeze. So, why not gather the family around and plunge into these delicious creations? You'll not only fill their bellies but also create lasting memories together. Happy cooking, and remember, the best meals are the ones shared!

