21 Air Fryer Snack Recipes Perfect for Guilt-Free Indulgence
Looking for guilt-free snacks? Air fryer recipes are your best friend! You can whip up crispy kale chips or indulge in sweet potato fries, all while cutting down on calories. Why not try spicy chickpeas for a protein-packed crunch or zucchini fritters with a tasty yogurt dip? These treats not only taste great but also fit various dietary needs. Plus, they're quick to make—perfect for those last-minute cravings! With so many options, how can you choose? Stick around, and you'll uncover a whole world of delicious, healthy air fryer snacks waiting just for you!
Crispy Air Fryer Kale Chips
Title: Crispy Air Fryer Kale Chips
Prep Time: 10 minutes
Cook Time: 10 minutes
Number of Servings: 4
Required Equipment List: Air fryer, mixing bowl, measuring spoons
Cuisine Type: Snack
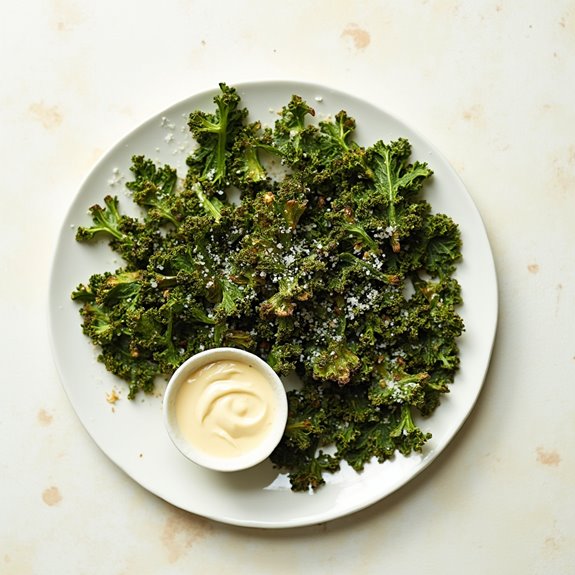
Crispy Air Fryer Kale Chips are a delicious and healthy alternative to traditional potato chips, perfect for satisfying those crunchy cravings without the guilt. Made from fresh kale leaves, these chips are seasoned to perfection and cooked in an air fryer for a light and crispy texture.
This recipe is incredibly simple and only requires a few ingredients, making it a quick snack option for busy days or a great addition to your meal prep routine. The air fryer allows you to achieve that satisfying crunch without the need for excess oil, keeping the chips low in calories while still bursting with flavor.
You can customize the seasoning to your taste, whether you prefer a classic salt finish or want to experiment with spices like garlic powder or nutritional yeast for a cheesy flavor. Enjoy these kale chips as a standalone snack or serve them alongside your favorite dip for a delightful treat.
Ingredients:
- 1 bunch of kale
- 1 tablespoon olive oil
- 1 teaspoon sea salt
- Optional seasonings (garlic powder, nutritional yeast, or chili powder)
Instructions:
- Begin by washing the kale thoroughly under cold water. Once cleaned, dry the leaves completely using a salad spinner or by patting them down with a clean kitchen towel. Removing excess moisture is essential for achieving crispy chips.
- Remove the tough stems from the kale and tear the leaves into bite-sized pieces. Place the kale leaves in a mixing bowl, then drizzle with olive oil and sprinkle with sea salt. Use your hands to massage the oil and salt into the leaves, ensuring they're evenly coated.
- Preheat your air fryer to 350°F (175°C). Once preheated, arrange the kale leaves in a single layer in the air fryer basket. Avoid overcrowding the basket to allow for even cooking and maximum crispiness.
- Cook the kale chips in the air fryer for about 5-7 minutes, shaking the basket halfway through to promote even cooking. Keep an eye on them, as cooking times may vary depending on the size of the kale pieces and the air fryer model.
- Once the kale is crisp and slightly golden, remove the chips from the air fryer and let them cool for a few minutes. If desired, sprinkle additional seasonings at this stage for an extra flavor boost.
Extra Tips: For the best results, make sure to use fresh, dry kale leaves, as moisture can lead to soggy chips. Feel free to experiment with different seasonings to find your favorite flavor combinations.
Store any leftover chips in an airtight container to maintain their crispiness, but keep in mind that they're best enjoyed fresh!
Healthy Sweet Potato Fries
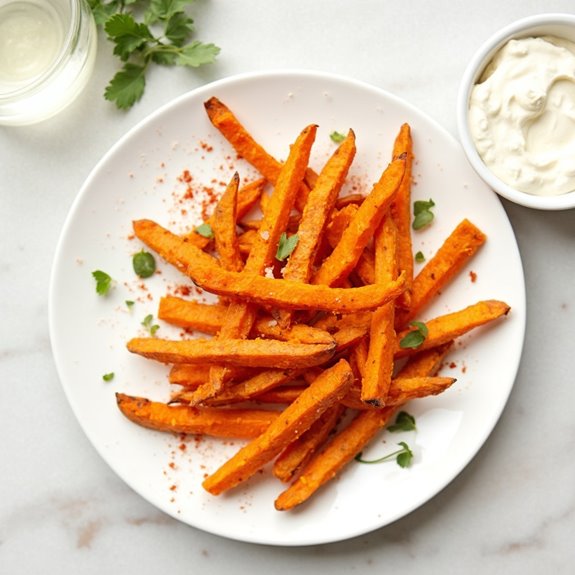
Title: Healthy Sweet Potato Fries
Prep Time: 10 minutes
Cook Time: 20 minutes
Number of Servings: 4
Required Equipment List: Air fryer, cutting board, knife, mixing bowl, measuring spoons
Cuisine Type: American
Healthy Sweet Potato Fries are a delicious and nutritious alternative to traditional fries, making them perfect for snacking or serving alongside your favorite meals. Air frying these sweet potatoes results in a crispy exterior and a soft, fluffy interior without the need for excessive oil, providing a guilt-free indulgence.
With their vibrant color and natural sweetness, these fries not only satisfy your cravings but also contribute beneficial nutrients to your diet, including vitamins A and C, fiber, and antioxidants.
The beauty of this recipe lies in its simplicity and versatility. You can season the fries to your liking, whether you prefer classic salt and pepper, a sprinkle of paprika for a smoky flavor, or even a hint of cinnamon for a touch of sweetness.
These sweet potato fries are perfect for dipping into your favorite sauces, making them a hit at parties, game days, or as a wholesome side dish for family dinners.
Ingredients:
- 2 large sweet potatoes
- 1 tablespoon olive oil
- 1 teaspoon salt
- 1/2 teaspoon paprika
- 1/2 teaspoon garlic powder
- 1/4 teaspoon black pepper
Instructions:
- Begin by peeling the sweet potatoes and cutting them into thin strips, approximately 1/4 inch thick. Try to make the pieces as uniform as possible to guarantee even cooking.
- In a mixing bowl, combine the sweet potato strips with olive oil, salt, paprika, garlic powder, and black pepper. Toss well to guarantee that all the fries are evenly coated with the oil and seasonings.
- Preheat the air fryer to 400°F (200°C) for about 5 minutes. This step helps to achieve a crispy texture on the fries.
- Once preheated, place the seasoned sweet potato fries in the air fryer basket in a single layer, guaranteeing they aren't overcrowded. You may need to cook them in batches depending on the size of your air fryer.
- Cook the fries for 15-20 minutes, shaking the basket halfway through to promote even cooking. They're done when they're golden brown and crispy to your liking.
- Once cooked, remove the fries from the air fryer and let them cool slightly before serving. You can sprinkle with additional salt or seasoning if desired.
Extra Tips: For an even crispier finish, consider soaking the cut sweet potatoes in cold water for about 30 minutes before seasoning and cooking. This helps to remove excess starch.
Additionally, feel free to experiment with different spices and herbs based on your preferences. These fries pair wonderfully with a variety of dipping sauces such as ketchup, aioli, or a yogurt-based dip, making them a versatile snack option. Enjoy your healthy sweet potato fries!
Air Fryer Buffalo Cauliflower

Title: Air Fryer Buffalo Cauliflower
Prep Time: 15 minutes
Cook Time: 25 minutes
Number of Servings: 4
Required Equipment List: Air fryer, mixing bowl, measuring spoons, spatula
Cuisine Type: American
Air Fryer Buffalo Cauliflower is a fantastic, healthier alternative to traditional buffalo wings, perfect for game day snacking or as a delicious appetizer. The cauliflower florets are tossed in a spicy buffalo sauce and air-fried to crispy perfection, providing the same satisfying crunch without the excess oil.
This dish delivers that classic buffalo flavor that will please even the most devoted wing lovers while keeping it vegan-friendly. This recipe isn't only quick and easy to prepare but also versatile. You can adjust the level of heat by selecting your favorite buffalo sauce, whether you prefer a mild kick or something that packs a punch.
Pair these crispy bites with your favorite dipping sauce, such as ranch or blue cheese, and watch them disappear at your next gathering.
Ingredients:
- 1 large head of cauliflower, cut into florets
- 1 cup all-purpose flour
- 1 cup plant-based milk
- 1 teaspoon garlic powder
- 1 teaspoon onion powder
- 1 teaspoon smoked paprika
- Salt and pepper to taste
- 1 cup buffalo sauce
- Fresh parsley, chopped (for garnish)
Instructions:
- Begin by preheating your air fryer to 400°F (200°C) for about 5 minutes. This guarantees that the cauliflower will cook evenly and get that perfect crispy texture.
- In a mixing bowl, combine the flour, plant-based milk, garlic powder, onion powder, smoked paprika, salt, and pepper. Whisk until smooth to create a batter that will coat the cauliflower florets.
- Dip each cauliflower floret into the batter, making sure it's fully coated, and then gently shake off any excess batter. This will help achieve a crispy coating when air-fried.
- Place the coated cauliflower florets in a single layer in the air fryer basket, making sure they aren't overcrowded. You may need to work in batches depending on the size of your air fryer.
- Air fry the cauliflower for 15-20 minutes, shaking the basket halfway through cooking to guarantee even crisping. The florets should be golden brown and crispy when done.
- Once the cauliflower is cooked, transfer it to a large mixing bowl and toss it with the buffalo sauce until all pieces are evenly coated.
- Return the sauced cauliflower to the air fryer for an additional 5 minutes to allow the sauce to set and add an extra layer of flavor.
- Finally, remove the cauliflower from the air fryer and garnish with fresh chopped parsley before serving.
Extra Tips: For an extra crunch, you can sprinkle some breadcrumbs or panko over the cauliflower before air-frying. If you like more heat, consider adding a dash of cayenne pepper to the batter or using a hotter buffalo sauce.
These buffalo cauliflower bites can be served with celery sticks and a side of your favorite dipping sauce for a complete snack experience. Enjoy your delicious and guilt-free treat!
Zucchini Fritters With Yogurt Dip

Title: Zucchini Fritters With Yogurt Dip
Prep Time: 15 minutes
Cook Time: 10 minutes
Number of Servings: 4
Required Equipment List: Mixing bowl, grater, air fryer, parchment paper, spatula
Cuisine Type: Mediterranean
Zucchini Fritters with Yogurt Dip is a delicious and healthy snack or appetizer that's easy to prepare and cook in the air fryer. These fritters are made with fresh zucchini, which gives them a light and invigorating flavor, while the addition of herbs and spices creates a savory twist.
The yogurt dip adds a creamy and tangy element that perfectly complements the fritters, making them an irresistible treat for any occasion. This recipe isn't only quick to whip up but also incredibly versatile. You can serve these fritters as a light lunch, a party appetizer, or a side dish at dinner.
The air fryer method guarantees that the fritters are crispy without the excess oil, making them a healthier alternative to traditional frying. Enjoy these delightful zucchini fritters warm, paired with the cool yogurt dip for a satisfying snack experience.
Ingredients:
- 2 medium zucchini, grated
- 1 teaspoon salt
- 1/2 cup all-purpose flour
- 1/4 cup grated Parmesan cheese
- 1 large egg
- 1/4 teaspoon black pepper
- 1/4 teaspoon garlic powder
- 1/4 teaspoon onion powder
- Cooking spray
- 1 cup plain Greek yogurt
- 1 tablespoon fresh dill, chopped (or mint)
- 1 tablespoon lemon juice
Instructions:
- Start by grating the zucchini into a mixing bowl. Sprinkle the grated zucchini with salt and let it sit for about 10 minutes. This will help draw out excess moisture from the zucchini, guaranteeing your fritters aren't soggy.
- After 10 minutes, use a clean dish towel or cheesecloth to squeeze out as much moisture as possible from the zucchini. Transfer the drained zucchini back to the mixing bowl.
- To the zucchini, add the flour, Parmesan cheese, egg, black pepper, garlic powder, and onion powder. Mix everything together until well combined, forming a thick batter.
- Preheat your air fryer to 375°F (190°C). Line the air fryer basket with parchment paper to prevent sticking. Lightly spray the parchment with cooking spray to guarantee a crispy finish.
- Using a spoon, drop spoonfuls of the zucchini batter into the air fryer basket, flattening them slightly to form fritters. Make sure to leave space in between each fritter for even cooking.
- Air fry the fritters for about 8-10 minutes, flipping them halfway through, until they're golden brown and crispy. Remove them from the basket and repeat the process until all the batter is cooked.
- While the fritters are cooking, prepare the yogurt dip by combining the Greek yogurt, fresh dill, and lemon juice in a small bowl. Mix well and season with salt to taste.
Extra Tips: For added flavor, feel free to incorporate other herbs like parsley or chives into the fritter mixture. If you want a bit of heat, consider adding some red pepper flakes.
These fritters can be served warm or at room temperature, making them perfect for picnics or gatherings. Store any leftovers in an airtight container in the refrigerator for up to 2 days, and reheat them in the air fryer for a few minutes before serving. Enjoy your delicious and healthy zucchini fritters!
Spicy Chickpeas for Snacking
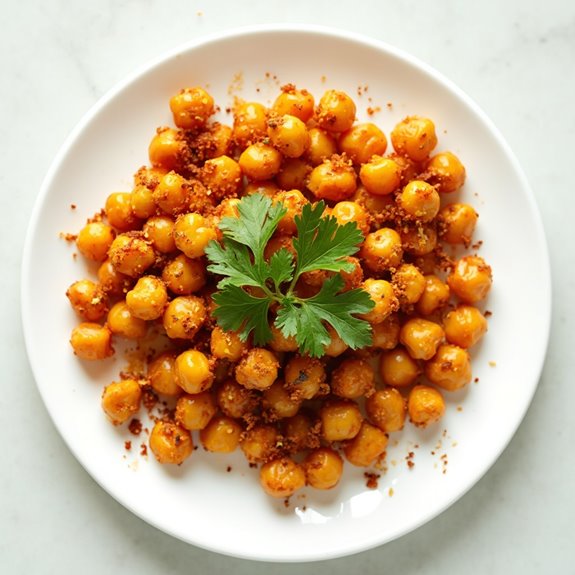
Title: Spicy Chickpeas for Snacking
Prep Time: 10 minutes
Cook Time: 15 minutes
Number of Servings: 4
Required Equipment List: Air fryer, mixing bowl, measuring spoons, spatula
Cuisine Type: Middle Eastern
Spicy Chickpeas are a delicious and nutritious snack that can easily be made in an air fryer. These crunchy bites pack a punch of flavor, thanks to a blend of spices that create a perfect balance of heat and earthiness. Not only are they quick to prepare, but they also make for a great healthy snack option that's high in protein and fiber.
They're perfect for snacking at home, in lunchboxes, or as a party appetizer. The versatility of this recipe allows you to customize the spice level according to your preferences. You can enjoy them on their own, or toss them into salads and grain bowls for an added crunch.
With the air fryer, you can achieve that crispy texture without the need for excess oil, making these chickpeas a guilt-free indulgence. Whether you're a health-conscious eater or simply looking for a tasty snack, Spicy Chickpeas are sure to satisfy your cravings.
Ingredients:
- 1 can (15 ounces) chickpeas, drained and rinsed
- 1 tablespoon olive oil
- 1 teaspoon smoked paprika
- 1 teaspoon garlic powder
- 1/2 teaspoon cayenne pepper (adjust to taste)
- 1/2 teaspoon cumin
- Salt to taste
- Fresh parsley for garnish (optional)
Instructions:
- Begin by draining and rinsing the chickpeas under cold water. Pat them dry with a clean kitchen towel or paper towel to remove excess moisture, which will help them crisp up in the air fryer.
- In a mixing bowl, combine the dried chickpeas with olive oil, smoked paprika, garlic powder, cayenne pepper, cumin, and salt. Toss the chickpeas until they're evenly coated with the spice mixture.
- Preheat your air fryer to 400°F (200°C) for about 5 minutes. This guarantees that the chickpeas start cooking immediately, promoting a crunchy texture.
- Once preheated, add the seasoned chickpeas to the air fryer basket in a single layer. You may need to cook them in batches depending on the size of your air fryer.
- Cook the chickpeas for 12-15 minutes, shaking the basket halfway through to guarantee even cooking. Keep an eye on them to prevent burning, as cooking times may vary based on your air fryer model.
- Once the chickpeas are golden brown and crispy, remove them from the air fryer and let them cool slightly. Taste and adjust the seasoning if necessary. Garnish with fresh parsley, if desired, before serving.
Extra Tips: To enhance the flavor even further, consider adding a sprinkle of lemon juice or zest after cooking for a revitalizing twist. These chickpeas can be stored in an airtight container for up to a week, though they're best enjoyed fresh due to their crispy texture.
Feel free to experiment with different spices like curry powder or chili powder to create your own signature flavor!
Air Fryer Popcorn Shrimp
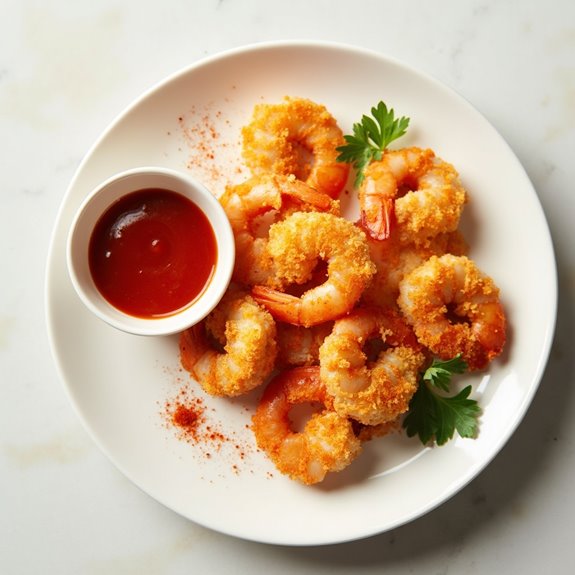
Title: Air Fryer Popcorn Shrimp
Prep Time: 15 minutes
Cook Time: 10 minutes
Number of Servings: 4
Required Equipment List: Air fryer, mixing bowl, measuring cups, tongs
Cuisine Type: American
Air Fryer Popcorn Shrimp is a deliciously crispy and healthier alternative to traditional fried shrimp, perfect for a quick snack or a delightful appetizer. This dish features tender shrimp coated with a seasoned breadcrumb mixture, providing a satisfying crunch without the excess oil.
The air fryer cooks the shrimp quickly and evenly, allowing the flavors to shine while keeping the preparation simple and straightforward. This recipe isn't only easy to make but also highly customizable. You can adjust the seasoning to your liking, whether you prefer a spicy kick or a more classic flavor.
Serve these popcorn shrimp with a zesty dipping sauce or atop a fresh salad for a complete meal. With just a few ingredients and minimal prep time, you can enjoy restaurant-quality shrimp right at home.
Ingredients:
- 1 pound shrimp, peeled and deveined
- 1 cup panko breadcrumbs
- 1/2 cup all-purpose flour
- 2 large eggs
- 1 teaspoon garlic powder
- 1 teaspoon paprika
- 1/2 teaspoon salt
- 1/2 teaspoon black pepper
- Cooking spray
Instructions:
- Begin by preheating your air fryer to 400°F (200°C) for about 5 minutes. This guarantees that the shrimp cook evenly and achieve a crispy texture.
- In a mixing bowl, combine the flour, garlic powder, paprika, salt, and black pepper. In a separate bowl, whisk the eggs until well blended. Place the panko breadcrumbs in a third bowl.
- Dip each shrimp into the flour mixture, shaking off the excess, then into the egg mixture, and finally coat it with the panko breadcrumbs. Make sure each shrimp is fully coated for maximum crunch.
- Arrange the coated shrimp in a single layer in the air fryer basket, making sure not to overcrowd them. Spray the shrimp lightly with cooking spray to help them crisp up during cooking.
- Cook the shrimp in the air fryer for about 8-10 minutes, flipping halfway through, until they're golden brown and crispy. Keep an eye on them to avoid overcooking.
- Once cooked, remove the shrimp from the air fryer and serve immediately with your choice of dipping sauce, such as cocktail sauce or a spicy aioli.
Extra Tips: To achieve the best results, confirm that the shrimp are completely dry before coating them. This helps the batter adhere better.
You can also experiment with different seasonings in the breadcrumb mixture, such as cayenne pepper for heat or dried herbs for added flavor. For a healthier option, try using whole wheat panko breadcrumbs. Enjoy your crispy air fryer popcorn shrimp!
Garlic Parmesan Brussels Sprouts
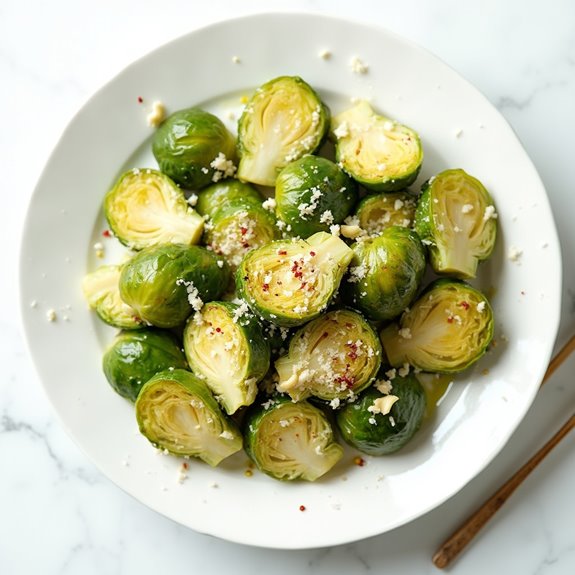
Title: Garlic Parmesan Brussels Sprouts
Prep Time: 10 minutes
Cook Time: 15 minutes
Number of Servings: 4
Required Equipment List: Air fryer, mixing bowl, measuring spoons
Cuisine Type: American
Garlic Parmesan Brussels Sprouts are a deliciously crispy and savory side dish that makes the perfect accompaniment to any meal. This recipe takes the humble Brussels sprout, tosses it with garlic and Parmesan cheese, and cooks it in an air fryer for a healthy and satisfying snack or side.
The air fryer not only cuts down on cooking time but also gives the sprouts a delightful crunch without the need for excessive oil. Preparing these Brussels sprouts is incredibly simple and requires minimal effort, making them a great option for busy weeknights or entertaining guests.
The combination of garlic and Parmesan creates a flavor explosion that pairs beautifully with the earthy taste of Brussels sprouts. Once you've tried this quick and easy recipe, you'll want to make it again and again!
Ingredients:
- 1 pound Brussels sprouts, halved
- 3 tablespoons olive oil
- 4 cloves garlic, minced
- 1/2 cup grated Parmesan cheese
- 1 teaspoon salt
- 1/2 teaspoon black pepper
- 1/2 teaspoon red pepper flakes (optional)
Instructions:
- Preheat your air fryer to 375°F (190°C). This step guarantees that the Brussels sprouts will cook evenly and become perfectly crispy.
- In a mixing bowl, combine the halved Brussels sprouts, olive oil, minced garlic, salt, black pepper, and red pepper flakes (if using). Toss everything together until the sprouts are well coated in the oil and seasonings.
- Place the seasoned Brussels sprouts in the air fryer basket in a single layer. Avoid overcrowding the basket to allow for proper air circulation, which is key for achieving a crispy texture.
- Air fry the Brussels sprouts for 12-15 minutes, shaking the basket halfway through the cooking time to guarantee even browning. Keep an eye on them towards the end to prevent burning.
- Once the Brussels sprouts are golden brown and crispy, remove them from the air fryer and immediately sprinkle the grated Parmesan cheese over the hot sprouts. Toss gently to distribute the cheese evenly and serve immediately.
Extra Tips: For an added burst of flavor, consider adding a squeeze of fresh lemon juice over the Brussels sprouts just before serving. You can also substitute the Parmesan with a dairy-free alternative if you're looking for a vegan option.
If you prefer a different seasoning profile, feel free to experiment with herbs like thyme or rosemary for a unique twist. Enjoy your crispy, cheesy Brussels sprouts!
Mini Air Fryer Pizzas

Title: Mini Air Fryer Pizzas
Prep Time: 10 minutes
Cook Time: 8 minutes
Number of Servings: 4
Required Equipment List: Air fryer, mixing bowl, rolling pin, pizza cutter
Cuisine Type: Italian-American
Mini Air Fryer Pizzas are a fun and delicious way to enjoy personal-sized pizzas right from your kitchen. These bite-sized delights are perfect for quick snacks, family dinners, or entertaining friends. The air fryer gives the crust a delightful crispiness while guaranteeing the toppings are perfectly melted and flavorful.
Plus, with the ability to customize each mini pizza with your favorite toppings, everyone can create their own unique combination. This recipe isn't only quick to prepare but also a great way to involve kids in the kitchen. Using pre-made dough saves time, and you can easily swap out ingredients based on what you have on hand.
Whether you opt for classic pepperoni and cheese or go for gourmet ingredients like arugula and prosciutto, these mini pizzas will surely become a household favorite.
Ingredients:
- 1 pound store-bought pizza dough
- 1 cup pizza sauce
- 2 cups shredded mozzarella cheese
- 1 cup assorted toppings (pepperoni, bell peppers, mushrooms, olives, etc.)
- Olive oil, for brushing
- Italian seasoning, for sprinkling
- Flour, for dusting
Instructions:
- Preheat your air fryer to 380°F (190°C) for about 5 minutes while you prepare the pizzas. This guarantees that the pizzas will cook evenly and achieve a nice, crispy crust.
- On a lightly floured surface, roll out the pizza dough to about ¼ inch thick. Use a round cutter or a small bowl to cut out circles of dough that will fit in your air fryer basket, typically about 4 inches in diameter.
- Brush the tops of the dough circles lightly with olive oil. This will help the crust crisp up nicely in the air fryer and add a touch of flavor.
- Spread a tablespoon of pizza sauce on each dough circle, leaving a small border around the edges. Then, sprinkle a generous amount of shredded mozzarella cheese on top of the sauce.
- Add your favorite toppings on each mini pizza. Be creative and mix and match toppings based on personal preferences. Finally, sprinkle a dash of Italian seasoning over the top for added flavor.
- Place the mini pizzas in the preheated air fryer basket in a single layer, making sure not to overcrowd them. Cook for 6-8 minutes, or until the cheese is melted and the crust is golden brown.
- Once cooked, carefully remove the mini pizzas from the air fryer using tongs or a spatula. Let them cool for a minute before slicing and serving.
Extra Tips: If you want to make the dough even more flavorful, consider adding herbs or garlic powder to the dough while rolling it out. For a crispier crust, air fry the dough circles for a couple of minutes before adding the toppings.
Additionally, feel free to experiment with different cheeses such as provolone or cheddar for a unique twist. These mini pizzas are best enjoyed fresh, but you can store leftovers in an airtight container and reheat them in the air fryer for a quick snack later on. Enjoy your mini pizza creations!
Crispy Air Fryer Tofu Bites
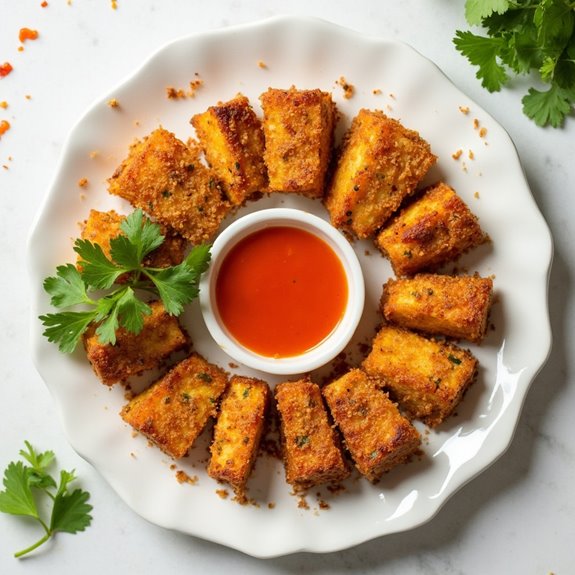
Title: Crispy Air Fryer Tofu Bites
Prep Time: 15 minutes
Cook Time: 15 minutes
Number of Servings: 4
Required Equipment List: Air fryer, mixing bowl, cutting board, knife, measuring spoons
Cuisine Type: Asian-inspired
Crispy Air Fryer Tofu Bites are a delicious and healthy snack that packs a punch of flavor and texture. Made with firm tofu, these bites are marinated in a savory blend of soy sauce, garlic, and sesame oil before being air-fried to perfection. The result is a crispy exterior that contrasts beautifully with the soft and tender interior, making them a satisfying treat for both tofu lovers and skeptics alike.
They can be served as an appetizer, a side dish, or even tossed on top of salads for added protein. This recipe is perfect for busy weeknights or casual gatherings, as it requires minimal prep and cooking time. The air fryer guarantees that the tofu gets perfectly crispy without the need for excess oil, making it a healthier alternative to traditional frying methods.
Serve these crispy tofu bites with a dipping sauce of your choice, such as sweet chili sauce or soy sauce, to enhance their flavor even further.
Ingredients:
- 14 ounces firm tofu
- 3 tablespoons soy sauce
- 1 tablespoon sesame oil
- 1 teaspoon garlic powder
- 1 teaspoon onion powder
- 1 teaspoon cornstarch
- Salt and pepper to taste
- Cooking spray
Instructions:
- Start by pressing the tofu to remove excess moisture. Wrap the block of tofu in a clean kitchen towel and place a heavy object on top for about 10 minutes. Once pressed, cut the tofu into bite-sized cubes.
- In a mixing bowl, combine soy sauce, sesame oil, garlic powder, onion powder, salt, and pepper. Add the cubed tofu to the bowl and gently toss to coat the tofu evenly in the marinade. Let it sit for about 5 minutes to absorb the flavors.
- After marinating, sprinkle the cornstarch over the tofu and toss again until all pieces are coated. The cornstarch will help create a crispy texture when air-fried.
- Preheat your air fryer to 400°F (200°C). Once preheated, lightly spray the air fryer basket with cooking spray to prevent sticking. Place the tofu cubes in a single layer in the basket, making sure they aren't overcrowded.
- Air fry the tofu for about 12-15 minutes, shaking the basket halfway through to guarantee even cooking. The tofu should be golden brown and crispy on all sides when done.
- Once cooked, remove the tofu bites from the air fryer and let them cool slightly before serving. Enjoy them warm with your favorite dipping sauce.
Extra Tips: For an even more flavorful tofu, consider marinating it for a longer period, up to a few hours or overnight in the refrigerator. You can also experiment with different spices and sauces in the marinade to customize the flavor to your liking.
If you prefer a little heat, add a dash of cayenne pepper or chili flakes to the marinade for a spicy kick. Enjoy your crispy air fryer tofu bites as a healthy snack or a fun party appetizer!
Air Fryer Veggie Spring Rolls

Title: Air Fryer Veggie Spring Rolls
Prep Time: 20 minutes
Cook Time: 15 minutes
Number of Servings: 4
Required Equipment List: Air fryer, mixing bowl, cutting board, knife, pastry brush
Cuisine Type: Asian-inspired
Air Fryer Veggie Spring Rolls are a delicious and healthier alternative to the traditional deep-fried version, making them an ideal snack or appetizer. Packed with vibrant vegetables and wrapped in a crispy shell, these spring rolls aren't only visually appealing but also bursting with flavor.
The air fryer provides a guilt-free cooking method that results in a satisfying crunch without the excess oil, allowing you to enjoy this classic dish with a lighter twist. These spring rolls are highly versatile, allowing you to customize the filling according to your taste preferences or seasonal ingredients.
A mix of fresh vegetables such as carrots, bell peppers, and cabbage creates an invigorating and satisfying bite. Serve these crispy delights with a side of sweet chili sauce or soy sauce for dipping, making them perfect for a casual gathering or a fun family dinner.
Ingredients:
- 1 cup shredded cabbage
- 1 cup shredded carrots
- 1/2 cup bell peppers, thinly sliced
- 1/4 cup green onions, chopped
- 1 teaspoon minced garlic
- 1 teaspoon soy sauce
- 1 package spring roll wrappers
- Cooking spray or oil for brushing
Instructions:
- In a mixing bowl, combine the shredded cabbage, carrots, bell peppers, green onions, minced garlic, and soy sauce. Mix well until all the vegetables are evenly coated with the sauce.
- Lay out a spring roll wrapper on a clean surface, with one corner pointing towards you. Place about 2 tablespoons of the vegetable mixture in the center of the wrapper.
- Fold the bottom corner of the wrapper over the filling, then fold in the sides, and roll it up tightly to form a spring roll. Use a little water to seal the top corner. Repeat this process with the remaining wrappers and filling.
- Preheat your air fryer to 375°F (190°C). Lightly spray or brush the spring rolls with cooking spray or oil to promote crispiness during cooking.
- Place the spring rolls in a single layer in the air fryer basket, making sure they don't touch to allow even cooking. Air fry for 12-15 minutes, or until golden brown and crispy, flipping them halfway through for even browning.
- Once cooked, remove the spring rolls from the air fryer and let them cool slightly before serving. Enjoy them with your favorite dipping sauce.
Extra Tips: For extra flavor, consider adding some finely chopped mushrooms or bean sprouts to the vegetable filling. If you enjoy a bit of spice, a dash of sriracha or chili flakes can be mixed into the vegetable mixture.
Confirm that you don't overfill the wrappers to prevent them from bursting during cooking. These spring rolls can also be made ahead of time and frozen, making them a convenient option for meal prep or quick snacks!
Sweet Cinnamon Apple Chips
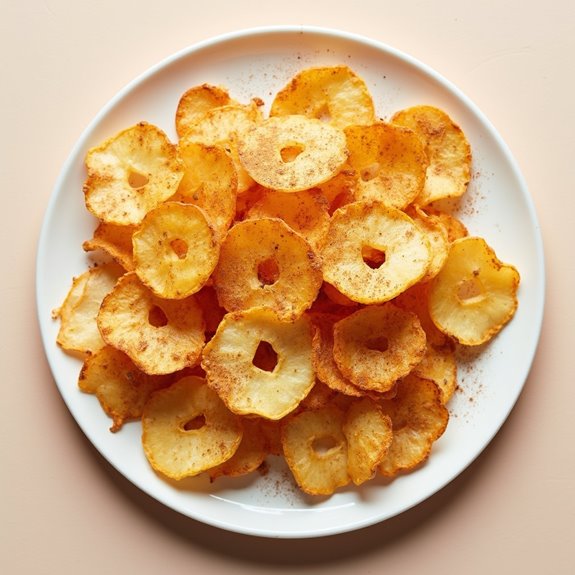
Title: Sweet Cinnamon Apple Chips
Prep Time: 10 minutes
Cook Time: 15 minutes
Number of Servings: 4
Required Equipment List: Air fryer, cutting board, sharp knife, mixing bowl, parchment paper (optional)
Cuisine Type: American
Sweet Cinnamon Apple Chips are a delightful and healthy snack that the whole family can enjoy. This recipe transforms fresh apples into crispy, flavorful chips with just a touch of cinnamon. Perfect for satisfying your sweet tooth without the guilt, these apple chips aren't only easy to make but also a great way to use up any extra apples you may have on hand.
Whether you enjoy them on their own or as a crunchy topping for yogurt or salads, these chips are sure to become a favorite. Using an air fryer for this recipe guarantees that the apple chips achieve the perfect level of crispiness without the need for excessive oil. The process is quick, allowing you to enjoy a homemade snack in no time.
With just a few simple ingredients, you can create a wholesome treat that's perfect for kids' lunches, afternoon snacks, or even as a healthy dessert option.
Ingredients:
- 2 large apples (any variety)
- 1 teaspoon ground cinnamon
- 1 tablespoon sugar (optional)
- Cooking spray (optional)
Instructions:
- Begin by preheating your air fryer to 160°F (70°C). This lower temperature helps to dehydrate the apples without burning them, guaranteeing they become crispy and delicious.
- While the air fryer is preheating, wash and core the apples. Slice them thinly, about 1/8 inch thick, using a sharp knife or a mandoline for uniformity. The thinner the slices, the crispier the chips will become.
- In a mixing bowl, toss the apple slices with the ground cinnamon and sugar (if using) until they're evenly coated. This will enhance the flavor and sweetness of the chips.
- Arrange the apple slices in a single layer in the air fryer basket. If needed, you can use parchment paper to prevent sticking, but be careful not to overcrowd the basket as this will hinder the crisping process.
- Air fry the apple slices for about 15 minutes, checking them halfway through and flipping them for even cooking. Keep an eye on them as cooking times may vary slightly based on your air fryer model.
- Once the apple chips are golden brown and crispy, remove them from the air fryer and let them cool completely on a wire rack. They'll continue to crisp up as they cool.
Extra Tips: To prevent browning, you can soak the apple slices in a mixture of water and lemon juice for a few minutes before drying and seasoning them. Make sure to dry them thoroughly before air frying.
For a fun twist, try experimenting with different spices like nutmeg or allspice, or even add a sprinkle of sea salt for a sweet and salty combination. Store any leftover chips in an airtight container to maintain their crispiness. Enjoy your healthy snack!
Air Fryer Stuffed Mushrooms

Title: Air Fryer Stuffed Mushrooms
Prep Time: 10 minutes
Cook Time: 15 minutes
Number of Servings: 4
Required Equipment List: Air fryer, mixing bowl, spoon, baking dish
Cuisine Type: American
Air Fryer Stuffed Mushrooms are a delicious and easy-to-make appetizer that will impress your guests at any gathering. These savory bites feature tender mushroom caps filled with a flavorful mixture of cream cheese, herbs, and breadcrumbs, all cooked to perfection in the air fryer. The result is a delightful combination of flavors and textures that make for a perfect party snack or a tasty addition to your dinner table.
Using an air fryer allows the stuffed mushrooms to cook quickly while achieving a crispy, golden topping without the need for excess oil. This method not only enhances the flavor but also makes the dish healthier than traditional frying. Whether served as an appetizer or a side dish, these stuffed mushrooms are sure to be a hit with everyone.
Ingredients:
- 16 large white mushrooms
- 4 ounces cream cheese, softened
- 1/2 cup breadcrumbs
- 1/4 cup grated Parmesan cheese
- 2 tablespoons fresh parsley, chopped
- 1 teaspoon garlic powder
- Salt and pepper to taste
- Olive oil spray
Instructions:
- Begin by cleaning the mushrooms gently with a damp cloth to remove any dirt. Remove the stems from the mushrooms and finely chop them, setting aside the caps for stuffing.
- In a mixing bowl, combine the chopped mushroom stems, cream cheese, breadcrumbs, grated Parmesan cheese, parsley, garlic powder, salt, and pepper. Mix until all the ingredients are well combined and a creamy filling is formed.
- Preheat the air fryer to 350°F (175°C). While the air fryer is heating up, carefully spoon the filling into each mushroom cap, packing it in slightly to guarantee it holds together.
- Lightly spray the air fryer basket with olive oil to prevent sticking. Place the stuffed mushrooms in a single layer in the air fryer basket, making sure they don't touch each other.
- Cook the mushrooms in the air fryer for about 12-15 minutes, or until they're golden brown and the filling is heated through. You may need to cook them in batches depending on the size of your air fryer.
- Once cooked, remove the mushrooms from the air fryer and allow them to cool slightly before serving. Enjoy these delicious appetizers warm, garnished with additional parsley if desired.
Extra Tips: For added flavor, feel free to experiment with different cheese varieties, such as feta or mozzarella, in the stuffing mixture. If you prefer a bit of spice, consider adding a pinch of red pepper flakes or finely chopped jalapeños.
These stuffed mushrooms can also be made ahead of time; simply prepare and fill them, then refrigerate until you're ready to air fry. Enjoy your delightful creation!
Loaded Air Fryer Nachos

Title: Loaded Air Fryer Nachos
Prep Time: 10 minutes
Cook Time: 10 minutes
Number of Servings: 4
Required Equipment List: Air fryer, mixing bowl, cutting board, knife, serving plate
Cuisine Type: Tex-Mex
Loaded Air Fryer Nachos are the ultimate snack for gatherings, game days, or a cozy night in. This recipe takes the classic nacho concept and elevates it with a quick and easy air fryer method, allowing for perfectly crispy tortilla chips topped with a medley of your favorite toppings.
The combination of gooey melted cheese, savory seasoned ground beef (or your choice of protein), fresh veggies, and zesty jalapeños creates a mouthwatering dish that everyone will love.
Preparing nachos in the air fryer not only cuts down on cooking time but also guarantees that every chip gets that satisfying crunch without the need for excess oil. You can easily customize this recipe to suit your taste preferences! Whether you go with classic toppings or experiment with different ingredients, these loaded nachos are assured to be a hit at your next event.
Ingredients:
- 8 ounces tortilla chips
- 1 cup shredded cheddar cheese
- 1 cup cooked ground beef (or black beans for a vegetarian option)
- 1/2 cup diced tomatoes
- 1/4 cup sliced jalapeños
- 1/4 cup sliced green onions
- 1/4 cup sour cream (for serving)
- 1/4 cup guacamole (for serving)
- Fresh cilantro (for garnish, optional)
Instructions:
- Preheat your air fryer to 350°F (175°C) for about 5 minutes. This will guarantee that your nachos cook evenly and achieve that crispy texture you desire.
- In a mixing bowl, combine the cooked ground beef (or black beans), diced tomatoes, and jalapeños. Stir until the ingredients are well mixed and season with salt and pepper to taste.
- Spread half of the tortilla chips in an even layer in the air fryer basket. Top the chips with half of the cheese, followed by half of the meat and veggie mixture. Then, add the remaining chips on top, layering with the rest of the cheese and the meat mixture.
- Air fry the nachos for 5-7 minutes, or until the cheese is melted and bubbly. Keep an eye on them to prevent burning, as cooking times may vary slightly depending on your air fryer model.
- Once done, carefully remove the nachos from the air fryer and transfer them to a serving plate. Top with sliced green onions and garnish with fresh cilantro if desired. Serve immediately with sour cream and guacamole on the side.
Extra Tips: For an extra kick, consider adding some diced red onion or black olives to the mix before air frying. If you have any leftover nachos, they can be stored in the fridge and reheated in the air fryer for a quick snack later on.
Experiment with different cheeses, such as pepper jack or Monterey Jack, for varying flavors. Enjoy your loaded nachos fresh out of the air fryer!
Air Fryer Coconut Shrimp

Title: Air Fryer Coconut Shrimp
Prep Time: 15 minutes
Cook Time: 10 minutes
Number of Servings: 4
Required Equipment List: Air fryer, mixing bowls, whisk, plate
Cuisine Type: Tropical
Air Fryer Coconut Shrimp is a deliciously crispy and flavorful snack that brings a taste of the tropics to your kitchen. With a light and crunchy coating made from shredded coconut and breadcrumbs, this dish is perfect for serving as an appetizer or a fun party snack.
The air fryer method allows the shrimp to cook quickly while achieving that satisfying crunch without the excess oil of traditional frying. This recipe highlights the natural sweetness of shrimp, complemented by the tropical flavor of coconut.
It's simple to prepare and can be paired with a variety of dipping sauces, such as sweet chili sauce or a tangy lime aioli. Whether you're hosting a gathering or just indulging in a cozy night at home, these coconut shrimp will transport your taste buds to a sunny beach paradise.
Ingredients:
- 1 pound large shrimp, peeled and deveined
- 1/2 cup all-purpose flour
- 1 large egg, beaten
- 1 cup shredded coconut
- 1/2 cup panko breadcrumbs
- 1 teaspoon garlic powder
- 1 teaspoon paprika
- Salt and pepper to taste
- Cooking spray
Instructions:
- Preheat your air fryer to 400°F (200°C) for about 5 minutes. This will guarantee that the shrimp cook evenly and develop a crispy texture.
- In a mixing bowl, combine the flour, garlic powder, paprika, salt, and pepper. Mix well to guarantee the seasoning is evenly distributed.
- In a separate bowl, beat the egg until well blended. In a third bowl, combine the shredded coconut and panko breadcrumbs.
- Dip each shrimp first into the flour mixture, coating it well, then into the beaten egg, and finally into the coconut-panko mixture. Press gently to guarantee that the coating sticks well to the shrimp.
- Arrange the coated shrimp in a single layer in the air fryer basket. Lightly spray them with cooking spray to help achieve a golden color.
- Cook the shrimp in the air fryer for 8-10 minutes, flipping them halfway through, until they're golden brown and cooked through. The shrimp should reach an internal temperature of 120°F (49°C).
- Once cooked, remove the shrimp from the air fryer and serve immediately with your choice of dipping sauce.
Extra Tips: For added flavor, consider marinating the shrimp in a mixture of lime juice, garlic, and spices for 20-30 minutes before coating them. This will enhance the overall taste and make the shrimp even more delicious.
Be careful not to overcrowd the air fryer basket; cooking in batches will guarantee that each shrimp gets perfectly crispy. Enjoy your tropical treat!
Cheesy Broccoli Bites
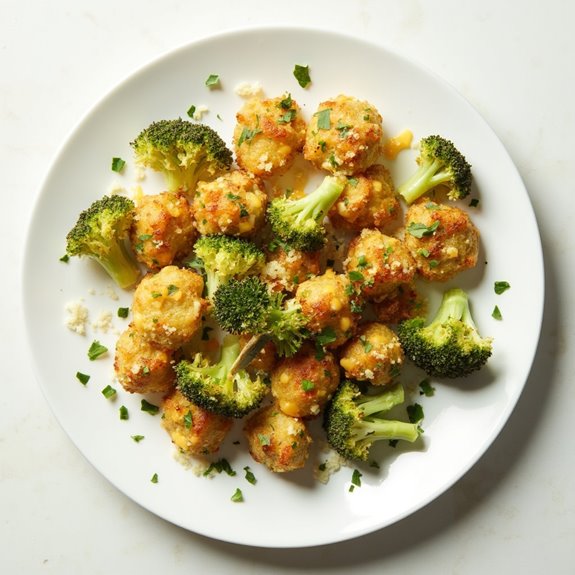
Title: Cheesy Broccoli Bites
Prep Time: 10 minutes
Cook Time: 15 minutes
Number of Servings: 4
Required Equipment List: Air fryer, mixing bowl, spoon, measuring cups, parchment paper (optional)
Cuisine Type: American
Cheesy Broccoli Bites are a delicious and healthful snack that combines the goodness of broccoli with the irresistible flavor of cheese. These bite-sized treats are perfect for kids and adults alike, making them a great addition to any party platter or a quick snack option.
The air fryer makes them crispy on the outside while keeping the inside tender and cheesy, delivering a satisfying crunch with every bite. Packed with nutrients, these cheesy bites aren't only tasty but also a great way to sneak in some veggies.
They can be easily customized with your choice of cheese and spices, allowing you to tailor the flavor to your liking. Whether you're looking for a quick appetizer or a healthy snack, these Cheesy Broccoli Bites are sure to become a family favorite.
Ingredients:
- 2 cups fresh broccoli florets
- 1 cup shredded cheddar cheese
- 1/2 cup breadcrumbs
- 1/4 cup grated Parmesan cheese
- 1 large egg
- 1 teaspoon garlic powder
- Salt and pepper to taste
- Cooking spray
Instructions:
- Begin by preheating your air fryer to 375°F (190°C). This guarantees that the broccoli bites will cook evenly and achieve that perfect crispy texture.
- In a mixing bowl, combine the fresh broccoli florets and shredded cheddar cheese. Use a spoon to mix until the cheese is evenly distributed throughout the broccoli.
- Next, add the breadcrumbs, grated Parmesan cheese, egg, garlic powder, salt, and pepper to the broccoli mixture. Stir well until all ingredients are thoroughly combined and form a cohesive mixture.
- Using your hands, scoop small amounts of the mixture and shape them into bite-sized balls or patties. If the mixture is too crumbly, you can add a little more egg to help bind it together.
- Lightly spray the air fryer basket with cooking spray to prevent sticking. Arrange the broccoli bites in a single layer in the basket, making sure to leave some space between them for airflow.
- Cook the bites in the air fryer for 12-15 minutes, flipping them halfway through the cooking time to guarantee they're evenly browned and crispy on all sides.
Extra Tips: For added flavor, consider incorporating different spices such as paprika or Italian seasoning into the mixture. If you want a little kick, a pinch of red pepper flakes can elevate the taste.
These cheesy bites are best enjoyed fresh but can be stored in an airtight container in the refrigerator for a couple of days. Simply reheat them in the air fryer for a few minutes to regain their crispiness. Enjoy your delicious and healthy snack!
Spiced Air Fryer Nuts
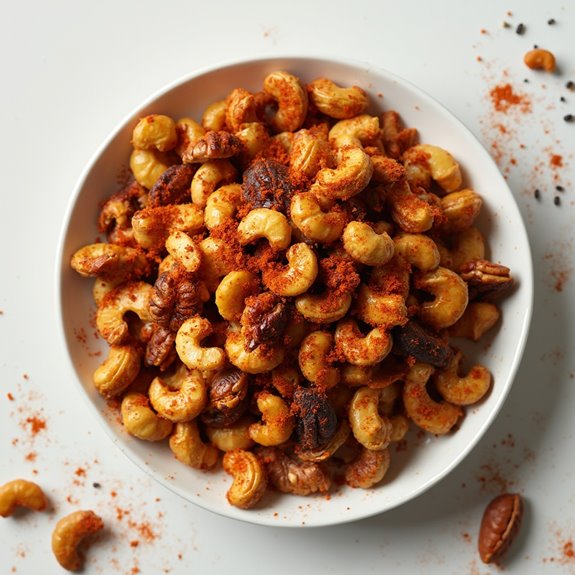
Title: Spiced Air Fryer Nuts
Prep Time: 10 minutes
Cook Time: 10 minutes
Number of Servings: 4
Required Equipment List: Air fryer, mixing bowl, measuring spoons, spatula
Cuisine Type: Snack
These Spiced Air Fryer Nuts are a perfect quick and healthy snack that can be made in just a matter of minutes. With a delightful combination of spices, this recipe transforms ordinary nuts into a flavorful and crunchy treat.
Whether you're looking for a nibble while watching a movie or a snack to take to a gathering, these nuts are sure to impress everyone with their bold flavors and satisfying crunch.
The beauty of this recipe lies in its versatility; you can use any mix of nuts you prefer, such as almonds, cashews, or walnuts. The air fryer guarantees that the nuts are perfectly roasted, achieving a golden color and enhancing their natural flavors without the need for excess oil.
Plus, the addition of spices like paprika, garlic powder, and cayenne pepper adds a delicious kick, making these nuts an addictive snack that you won't be able to resist.
Ingredients:
- 2 cups mixed nuts (almonds, cashews, walnuts, etc.)
- 1 tablespoon olive oil
- 1 teaspoon paprika
- 1/2 teaspoon garlic powder
- 1/2 teaspoon onion powder
- 1/4 teaspoon cayenne pepper (adjust to taste)
- 1/2 teaspoon salt
- 1/4 teaspoon black pepper
Instructions:
- In a mixing bowl, combine the mixed nuts with olive oil, making sure they're evenly coated. This will help the spices adhere to the nuts during cooking.
- In a separate small bowl, mix together paprika, garlic powder, onion powder, cayenne pepper, salt, and black pepper. Sprinkle this spice mixture over the coated nuts and toss until all the nuts are evenly coated in the spices.
- Preheat your air fryer to 350°F (175°C) for about 3-5 minutes. This step guarantees that the nuts start roasting immediately for prime flavor and texture.
- Once preheated, transfer the spiced nuts to the air fryer basket in a single layer. If your air fryer is small, you may need to cook them in batches to avoid overcrowding.
- Air fry the nuts for about 8-10 minutes, shaking the basket halfway through to guarantee even cooking. Keep an eye on them, as cooking times may vary based on the type of nuts and your air fryer model.
- After cooking, remove the nuts from the air fryer and let them cool for a few minutes before serving. This allows them to crisp up further as they cool.
Extra Tips: Feel free to customize the spices based on your preferences; adding herbs like rosemary or thyme can introduce new flavors.
If you prefer a sweeter version, consider adding a sprinkle of cinnamon and a drizzle of honey before air frying. Store any leftovers in an airtight container to maintain their crunch, but they're best enjoyed fresh!
Air Fryer Veggie Chips
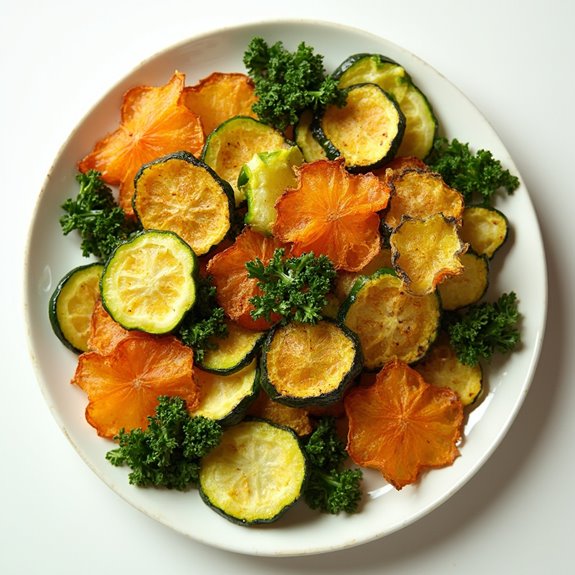
Title: Air Fryer Veggie Chips
Prep Time: 10 minutes
Cook Time: 15 minutes
Number of Servings: 4
Required Equipment List: Air fryer, mixing bowl, knife, cutting board
Cuisine Type: Snack
Air Fryer Veggie Chips are a fantastic, healthier alternative to traditional potato chips, offering a satisfying crunch without the guilt. By using an air fryer, you can achieve that crispy texture with minimal oil, allowing the natural flavors of the vegetables to shine.
This recipe is versatile, as you can use a variety of vegetables such as kale, sweet potatoes, beets, or zucchini, making it an excellent way to use up leftover produce in your kitchen. These veggie chips are perfect for snacking or as a crunchy topping for salads and soups.
Not only are they delicious, but they're also packed with nutrients, making them a great choice for health-conscious individuals or anyone looking to enjoy a guilt-free treat. The air fryer guarantees that they cook evenly and quickly, so you can enjoy your homemade chips in no time.
Ingredients:
- 1 medium sweet potato
- 1 medium zucchini
- 1 cup kale leaves
- 2 tablespoons olive oil
- Salt and pepper to taste
- Optional: garlic powder, paprika, or your favorite seasoning
Instructions:
- Begin by washing and peeling the sweet potato, then slice it thinly using a sharp knife or a mandoline for even thickness. The thinner the slices, the crispier the chips will be.
- Next, slice the zucchini into thin rounds, guaranteeing they're of similar thickness to the sweet potato slices for even cooking. For the kale, remove the stems and tear the leaves into bite-sized pieces.
- In a mixing bowl, combine the sweet potato and zucchini slices, drizzle with olive oil, and season with salt, pepper, and any additional seasonings you desire. Toss gently to coat the vegetables evenly.
- Preheat the air fryer to 375°F (190°C). Once heated, place a single layer of the sweet potato and zucchini slices in the air fryer basket, ensuring they aren't overcrowded. You may need to work in batches depending on the size of your air fryer.
- Cook the veggie chips for 10-15 minutes, shaking the basket halfway through to guarantee even cooking. Keep an eye on them as cooking times may vary based on thickness. The kale should be added in the last 5 minutes of cooking to prevent burning.
- Once the chips are golden and crispy, remove them from the air fryer and let them cool on a wire rack. This will help maintain their crispiness. Repeat the process with any remaining vegetables.
Extra Tips: To enhance the flavor of your veggie chips, experiment with different seasonings like nutritional yeast for a cheesy flavor or cayenne pepper for a spicy kick.
You can also try mixing various vegetables together for a colorful and diverse chip mix. Make sure to store any leftover chips in an airtight container to keep them fresh, but they're best enjoyed immediately for maximum crunchiness.
Savory Air Fryer Meatballs
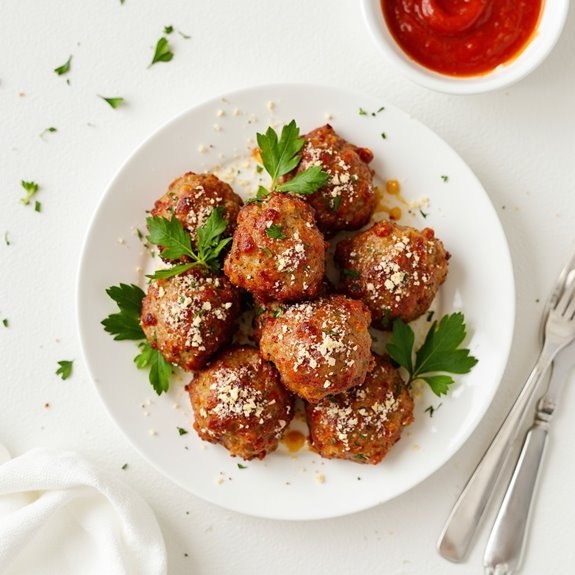
Title: Savory Air Fryer Meatballs
Prep Time: 15 minutes
Cook Time: 20 minutes
Number of Servings: 4
Required Equipment List: Air fryer, mixing bowl, baking sheet, measuring cups, measuring spoons
Cuisine Type: Italian-American
Savory Air Fryer Meatballs are a flavorful and healthy twist on a classic dish, perfect for snacking or as a hearty addition to pasta and salads. These meatballs are made with lean ground meat, breadcrumbs, and a mix of herbs and spices, resulting in a tender and juicy bite every time.
Cooking them in the air fryer allows for a crispy exterior without the need for excess oil, making them a great option for those looking to indulge without all the guilt.
This recipe is incredibly versatile, allowing you to customize the flavors to your liking. You can easily swap out the meat for turkey or chicken for a lighter version, or experiment with different herbs such as basil or oregano. Serve them with your favorite dipping sauce or toss them in marinara for a delicious meal that everyone will love.
Ingredients:
- 1 pound ground beef (or turkey)
- 1/2 cup breadcrumbs
- 1/4 cup grated Parmesan cheese
- 1/4 cup chopped fresh parsley
- 1 egg
- 2 cloves garlic, minced
- 1 teaspoon onion powder
- 1 teaspoon Italian seasoning
- 1/2 teaspoon salt
- 1/4 teaspoon black pepper
- Olive oil spray (for cooking)
Instructions:
- In a large mixing bowl, combine the ground meat, breadcrumbs, grated Parmesan cheese, chopped parsley, egg, minced garlic, onion powder, Italian seasoning, salt, and black pepper. Use your hands or a spoon to mix the ingredients until well combined, being careful not to overwork the meat.
- Preheat your air fryer to 400°F (200°C) for about 5 minutes. This step guarantees that the meatballs start cooking immediately upon being placed in the fryer, promoting even browning.
- While the air fryer is preheating, shape the meat mixture into meatballs, roughly 1 to 1.5 inches in diameter. You should get about 20 meatballs from the mixture, depending on the size you prefer.
- Once the air fryer is preheated, lightly spray the basket with olive oil to prevent sticking. Place the meatballs in a single layer in the basket, making sure they aren't touching to allow for even cooking. You may need to work in batches depending on the size of your air fryer.
- Cook the meatballs in the air fryer for 10 minutes, then carefully flip them over and cook for an additional 5-10 minutes, or until they reach an internal temperature of 160°F (70°C) and are golden brown on the outside.
- Once cooked, remove the meatballs from the air fryer and let them rest for a few minutes before serving. They can be enjoyed on their own, with a dip, or added to pasta dishes or salads.
Extra Tips: For an extra flavor boost, consider adding chopped onions or bell peppers to the meat mixture. If you prefer a bit of heat, a pinch of red pepper flakes can be a great addition.
Remember that cooking times may vary based on the size of the meatballs and the specific air fryer model, so it's always best to check for doneness using a meat thermometer. Enjoy your deliciously savory air fryer meatballs!
Air Fryer Eggplant Parmesan
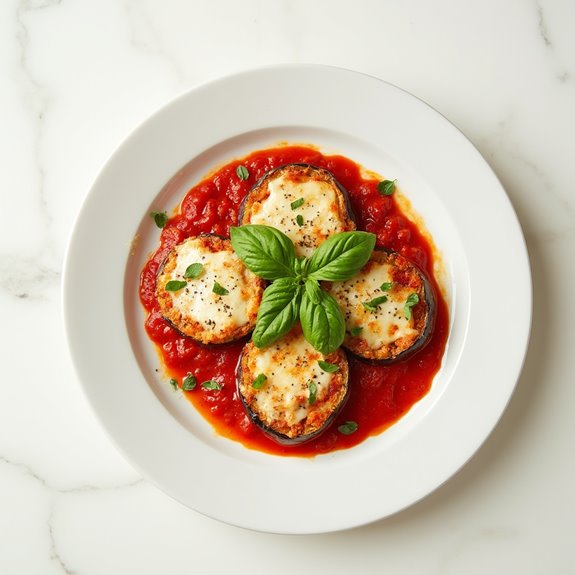
Title: Air Fryer Eggplant Parmesan
Prep Time: 20 minutes
Cook Time: 25 minutes
Number of Servings: 4
Required Equipment List: Air fryer, shallow bowls, tongs, baking sheet, knife, cutting board
Cuisine Type: Italian-American
Air Fryer Eggplant Parmesan is a deliciously crispy and healthier twist on the classic Italian dish. By using the air fryer, you achieve the same satisfying crunch without the excess oil typically used in frying. This recipe features tender slices of eggplant coated in seasoned breadcrumbs and parmesan, layered with marinara sauce and mozzarella cheese, resulting in a comforting meal that's perfect for any occasion.
It's a great option for vegetarians and anyone looking to enjoy a lighter version of a beloved favorite. This recipe isn't only easy to follow but also adaptable; you can customize the spices and sauce to suit your taste. The air fryer cooks the eggplant quickly, achieving a golden-brown crust while keeping the inside perfectly tender.
Serve this dish with a side salad or over a bed of pasta for a complete meal that's sure to impress family and friends alike.
Ingredients:
- 1 large eggplant, sliced into 1/2-inch rounds
- 1 cup breadcrumbs
- 1/2 cup grated parmesan cheese
- 1 teaspoon garlic powder
- 1 teaspoon dried oregano
- 1/2 teaspoon salt
- 1/4 teaspoon black pepper
- 1 cup marinara sauce
- 1 cup shredded mozzarella cheese
- Olive oil spray
Instructions:
1. Begin by preparing the eggplant slices. Lay them out on a cutting board and sprinkle both sides with salt. Let them sit for about 15 minutes to draw out excess moisture.
Afterward, rinse the eggplant slices under cold water and pat them dry with paper towels.
2. In a shallow bowl, combine the breadcrumbs, grated parmesan cheese, garlic powder, oregano, salt, and black pepper. Mix well until the dry ingredients are evenly distributed.
3. Preheat your air fryer to 375°F (190°C). While it heats, take each eggplant slice and dip it into the breadcrumb mixture, ensuring both sides are well-coated. Shake off any excess crumbs.
4. Arrange the coated eggplant slices in a single layer in the air fryer basket. Spray lightly with olive oil to promote browning. Cook for 10-12 minutes, flipping halfway through, until the eggplant is golden brown and crispy.
5. Once cooked, remove the eggplant slices from the air fryer and place half of them on a baking sheet. Spoon half of the marinara sauce over the slices, followed by half of the mozzarella cheese.
Repeat the layering with the remaining eggplant, sauce, and cheese.
6. Return the baking sheet to the air fryer and cook at 375°F (190°C) for an additional 5-7 minutes, or until the cheese is melted and bubbly. Remove from the air fryer and let it cool for a few minutes before serving.
Extra Tips: For added flavor, consider mixing some Italian seasoning or fresh herbs into the breadcrumb mixture. If you prefer a little heat, a pinch of red pepper flakes can be added as well.
This dish can be made ahead of time; simply assemble and refrigerate until you're ready to bake it in the air fryer. Enjoy your delightful Air Fryer Eggplant Parmesan with a sprinkle of fresh basil on top for an extra touch!
Crunchy Air Fryer Onion Rings
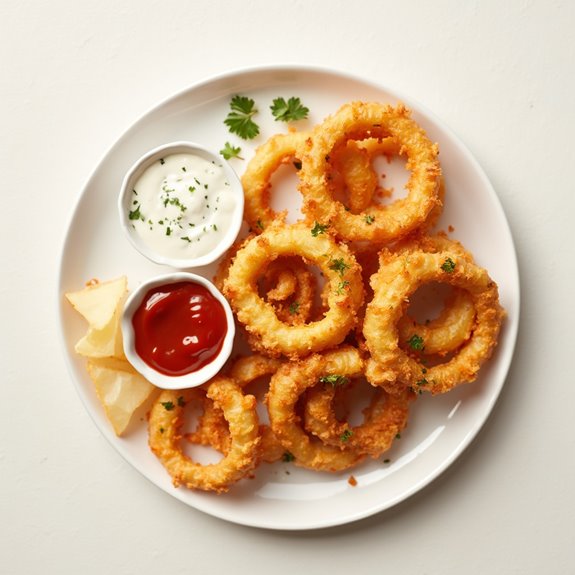
Title: Crunchy Air Fryer Onion Rings
Prep Time: 15 minutes
Cook Time: 15 minutes
Number of Servings: 4
Required Equipment List: Air fryer, mixing bowls, cutting board, knife, whisk, measuring cups, and tongs
Cuisine Type: American
These Crunchy Air Fryer Onion Rings are a delicious and healthier alternative to traditional deep-fried onion rings. With just a fraction of the oil, you can achieve a crispy outer coating while keeping the sweet, tender onion inside. Perfect as a snack or a side dish, these onion rings are sure to be a hit at any gathering.
The air fryer guarantees even cooking and a satisfying crunch without the need for excessive oil, making them a guilt-free indulgence. Preparing these onion rings is a breeze, and you can customize the seasoning to suit your taste. The combination of panko breadcrumbs and spices creates a delightful texture and flavor that will have everyone reaching for seconds.
Serve them with your favorite dipping sauce, such as ranch or spicy ketchup, for an irresistible treat that's sure to impress family and friends.
Ingredients:
- 2 large onions
- 1 cup buttermilk
- 1 cup all-purpose flour
- 1 teaspoon garlic powder
- 1 teaspoon paprika
- 1/2 teaspoon salt
- 1/2 teaspoon black pepper
- 1 cup panko breadcrumbs
- Cooking spray
Instructions:
- Begin by peeling the onions and slicing them into 1/2-inch thick rings. Separate the rings and place them in a mixing bowl. Pour the buttermilk over the onion rings, making certain they're fully submerged. Allow them to soak for at least 10 minutes to enhance the flavor and tenderness.
- In another mixing bowl, combine the flour, garlic powder, paprika, salt, and black pepper. Stir the mixture well to make sure the spices are evenly distributed. This will serve as the dry coating for the onion rings.
- After soaking, remove the onion rings from the buttermilk, letting any excess liquid drip off. Dredge each ring in the seasoned flour mixture, shaking off any excess flour, then dip it back into the buttermilk briefly. Finally, coat the onion ring in panko breadcrumbs, pressing gently to adhere.
- Preheat your air fryer to 400°F (200°C). Once heated, lightly spray the air fryer basket with cooking spray to prevent sticking. Arrange the coated onion rings in a single layer in the basket, making sure not to overcrowd them. You may need to cook in batches depending on the size of your air fryer.
- Cook the onion rings in the air fryer for 10-12 minutes, flipping them halfway through for even browning. They should be golden brown and crispy once done. If desired, you can spray them lightly with additional cooking spray before the second half of cooking for extra crunch.
- Once cooked, carefully remove the onion rings from the air fryer using tongs. Serve immediately with your favorite dipping sauces and enjoy the crispy goodness!
Extra Tips: For an extra kick, consider adding cayenne pepper to the flour mixture to spice things up. If you want to make the onion rings even more flavorful, let the onion rings marinate in the buttermilk overnight.
Keep in mind that air fryers may vary in cooking time, so be sure to check on them occasionally to prevent overcooking. Enjoy your delicious and crunchy air fryer onion rings!
Chocolate-Dipped Air Fryer Bananas
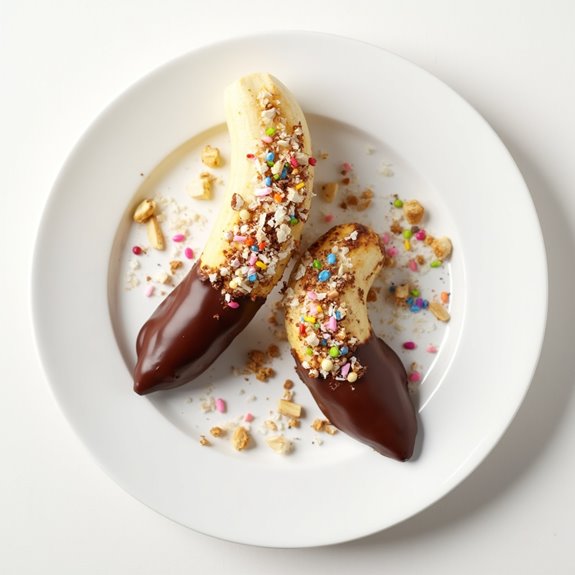
Title: Chocolate-Dipped Air Fryer Bananas
Prep Time: 10 minutes
Cook Time: 10 minutes
Number of Servings: 4
Required Equipment List: Air fryer, mixing bowl, fork, parchment paper
Cuisine Type: American
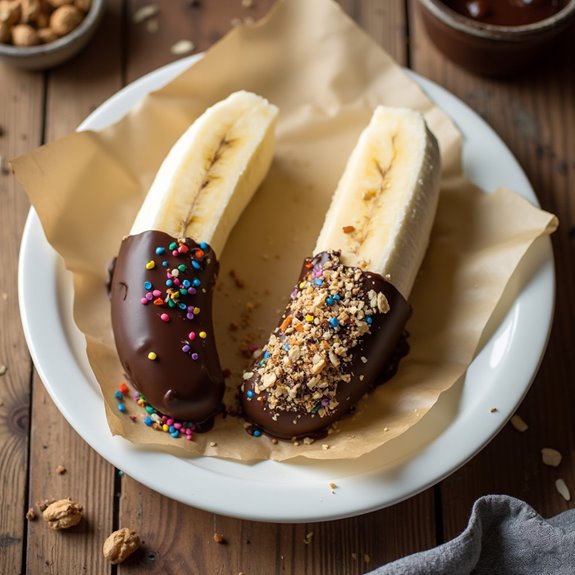
Chocolate-Dipped Air Fryer Bananas are a quick and delightful dessert that combines the sweetness of ripe bananas with the rich decadence of melted chocolate. This recipe is perfect for satisfying your sweet tooth without the guilt, and it's incredibly easy to make. The bananas are cooked in the air fryer, resulting in a warm and tender treat that pairs perfectly with a variety of dipping options.
Ideal for a fun family dessert or an impressive treat for guests, these bananas are sure to please everyone. In addition to their delicious taste, these chocolate-dipped bananas are also a healthier dessert alternative. By using the air fryer, you can achieve that crispy exterior while keeping the inside soft and luscious.
With just a handful of ingredients and minimal prep time, you'll have a delightful snack that's not only tasty but also visually appealing. Serve them on their own or with a scoop of ice cream for an extra indulgent experience.
Ingredients:
- 2 ripe bananas
- 1 cup chocolate chips (semi-sweet or dark)
- 1 tablespoon coconut oil (optional)
- Toppings: crushed nuts, sprinkles, or shredded coconut (optional)
- Parchment paper (for serving)
Instructions:
- Begin by preheating your air fryer to 350°F (175°C). This step guarantees that the air fryer is hot enough to create a nice texture on the bananas as they cook.
- Peel the bananas and cut them in half lengthwise. If you prefer bite-sized pieces, you can also slice them into rounds. Arrange the banana pieces in a single layer in the air fryer basket, making sure they don't overlap.
- In a microwave-safe bowl, combine the chocolate chips and coconut oil (if using). Microwave in 30-second intervals, stirring in between, until the chocolate is fully melted and smooth.
- Using a fork or a brush, dip or spread the melted chocolate onto the banana pieces, guaranteeing they're well-coated. If you want to add toppings, sprinkle them generously over the chocolate-coated bananas before they go into the air fryer.
- Place the chocolate-dipped bananas back into the air fryer and cook for an additional 5-7 minutes, or until the chocolate is slightly hardened and the bananas are warm. Keep an eye on them to prevent burning.
- Carefully remove the bananas from the air fryer and place them on a serving plate lined with parchment paper. Allow them to cool slightly before serving.
Extra Tips: For a fun twist, try using flavored chocolate chips, such as mint or peanut butter, to enhance the flavor of your bananas. If you're feeling adventurous, you can also experiment with different toppings like crushed pretzels or granola for added crunch.
Serve these delicious treats warm for the best experience, and enjoy them with friends and family for a delightful dessert!
Conclusion
So there you have it—21 air fryer snack recipes that'll make your taste buds dance without the guilt! These snacks are like a refreshing change on a hot day, offering delicious flavors while keeping your health in check. Whether you're craving something crunchy or a bit sweet, there's a recipe here for you. Why not give them a try? You might just find your new favorite snack waiting for you in the air fryer!

