15 Holiday Snack Recipe Ideas
Looking to spice up your holiday gatherings? You've come to the right place! Try a festive cheese platter loaded with colorful fruits and nuts, or snack on spicy roasted nuts that pack a punch. Mini sausage rolls and cranberry brie bites are sure to be crowd-pleasers. For something on the healthier side, serve sweet potato rounds or a vibrant veggie tray with dip. Don't forget sweet treats like chocolate-covered pretzels and cinnamon sugar tortilla chips! Who knew holiday snacks could be this fun and delicious? Stick around; there's even more tasty inspiration waiting for you!
Festive Cheese Platter

Title: Festive Cheese Platter
Prep Time: 20 minutes
Cook Time: 0 minutes
Number of Servings: 8
Required Equipment List: Serving board or platter, cheese knife, small bowls
Cuisine Type: International
A Festive Cheese Platter is an elegant and versatile appetizer that's perfect for any holiday gathering. It allows you to showcase a variety of cheeses, fruits, nuts, and accompaniments that appeal to all tastes. The beauty of a cheese platter lies in its simplicity; no cooking is required, and you can easily customize it to suit your preferences or dietary restrictions.
This visually stunning display not only adds a touch of sophistication to your table but also encourages social interaction as guests mingle and sample different flavors. Creating the perfect cheese platter is all about balance and variety. Choose a range of textures and flavors such as creamy brie, sharp cheddar, and tangy blue cheese. Complement these cheeses with an assortment of fresh fruits like grapes and figs, alongside crunchy nuts and artisanal crackers.
Adding a few spreads, such as honey or fig jam, elevates the experience and offers delightful pairings for each cheese. With just a little bit of planning, you can create a memorable centerpiece that will leave your guests impressed and satisfied.
Ingredients:
- 8 ounces brie cheese
- 8 ounces aged cheddar cheese
- 4 ounces blue cheese
- 4 ounces goat cheese
- 1 cup assorted fresh fruits (grapes, figs, apple slices)
- 1 cup mixed nuts (almonds, walnuts, pecans)
- 1 package assorted crackers (water crackers, baguette slices)
- 1 jar honey or fig jam
- Fresh herbs (rosemary or thyme) for garnish
Instructions:
- Start by selecting a large serving board or platter that will accommodate all your ingredients. Make sure it's clean and dry before arranging the components.
- Unwrap the cheeses and cut the brie and cheddar into wedges. Leave the blue cheese and goat cheese in their whole form for a rustic look, but feel free to crumble the goat cheese slightly for easier serving.
- Arrange the cheese on the platter, placing larger blocks towards the center and smaller cheeses around the edges. This creates a visually appealing layout that draws the eye.
- Fill in the empty spaces with fresh fruits, arranging them in clusters for a colorful presentation. Grapes can be left on the stem, while figs can be sliced in half to showcase their interior.
- Add bowls of honey or fig jam on the platter for drizzling or dipping. Surround these with mixed nuts, scattering them around the cheeses and fruits for added texture and crunch.
- Finally, tuck in assorted crackers around the edges of the platter, ensuring there's easy access to each component. Garnish with fresh herbs to add a pop of color and a fragrant touch.
Extra Tips: To enhance the flavors, consider letting the cheeses come to room temperature for about 30 minutes before serving. This will allow their true flavors to shine through.
Feel free to personalize your platter with seasonal ingredients or your favorite cheeses. Don't forget to include cheese knives or small spoons for the spreads to make it easier for guests to serve themselves. Enjoy creating a festive atmosphere with this delicious cheese platter!
Spicy Roasted Nuts
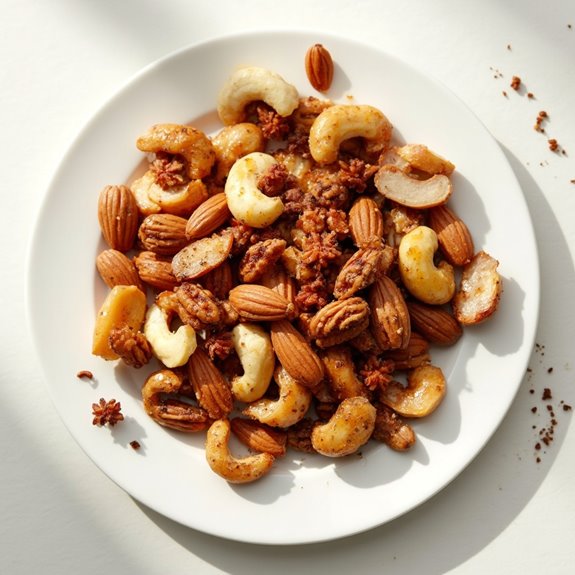
Title: Spicy Roasted Nuts
Prep Time: 10 minutes
Cook Time: 20 minutes
Number of Servings: 6
Required Equipment List: Baking sheet, mixing bowl, wooden spoon, oven
Cuisine Type: Snack
Spicy Roasted Nuts are a perfect blend of savory and spicy flavors, making them an irresistible snack for any gathering or a delightful treat for yourself. This recipe combines a variety of nuts, including almonds, cashews, and pecans, which are seasoned with a mix of spices and roasted until golden brown.
The result is a crunchy, flavorful snack that can be enjoyed on its own or as a topping for salads and soups. The beauty of this recipe lies in its versatility; you can easily adjust the spice levels according to your taste or even experiment with different nuts and seasonings.
Whether you're hosting a holiday party, watching a movie, or simply looking for a satisfying snack, these Spicy Roasted Nuts are sure to be a hit and disappear quickly!
Ingredients:
- 1 cup almonds
- 1 cup cashews
- 1 cup pecans
- 1 tablespoon olive oil
- 1 teaspoon cayenne pepper
- 1 teaspoon paprika
- 1 teaspoon garlic powder
- 1 teaspoon salt
- 1 tablespoon honey (optional)
Instructions:
- Preheat your oven to 350°F (175°C) and line a baking sheet with parchment paper to prevent the nuts from sticking and make cleanup easier.
- In a mixing bowl, combine the almonds, cashews, and pecans. Drizzle the olive oil over the nuts and toss them well to guarantee they're evenly coated.
- In a separate small bowl, mix together the cayenne pepper, paprika, garlic powder, and salt. If you prefer a hint of sweetness, add the honey to the olive oil before tossing. Sprinkle the spice mixture over the nuts and mix until they're fully coated.
- Spread the seasoned nuts in a single layer on the prepared baking sheet. This guarantees even roasting and prevents the nuts from steaming.
- Roast the nuts in the preheated oven for 15-20 minutes, stirring occasionally to promote even browning. Keep a close eye on them, as nuts can burn quickly. They're ready when they're golden brown and fragrant.
- Once roasted, remove the baking sheet from the oven and let the nuts cool completely. They'll become crunchier as they cool down. Store in an airtight container for up to a week.
Extra Tips: If you want to add more flavor, consider incorporating herbs like rosemary or thyme into the spice mix. For a different twist, try adding a bit of Worcestershire sauce to the nuts before roasting for a savory kick.
These nuts are perfect for serving at parties or gifting in decorative jars. Enjoy your spicy, crunchy creation!
Mini Sausage Rolls

Title: Mini Sausage Rolls
Prep Time: 15 minutes
Cook Time: 25 minutes
Number of Servings: 12
Required Equipment List: Baking sheet, parchment paper, oven, rolling pin, knife, mixing bowl
Cuisine Type: British
Mini Sausage Rolls are a classic party snack that never fails to impress. These bite-sized treats feature delicious sausage meat wrapped in flaky pastry, making them perfect for any gathering, from holiday parties to casual get-togethers.
They're easy to prepare and can be served warm or at room temperature, allowing for flexibility when entertaining guests. With a golden, crispy exterior and a savory filling, mini sausage rolls are sure to disappear quickly!
This recipe allows you to customize the filling by using your favorite sausage or adding herbs and spices for an extra kick. The use of store-bought puff pastry makes the preparation a breeze, guaranteeing that you can whip up a batch in no time.
Whether served with a side of tangy mustard or a sweet chili dipping sauce, these mini sausage rolls are bound to be a hit with both kids and adults alike.
Ingredients:
- 1 pound sausage meat (or sausages removed from casings)
- 1 sheet of puff pastry (thawed if frozen)
- 1 egg (beaten, for egg wash)
- 1 tablespoon Dijon mustard (optional)
- Salt and pepper to taste
- Fresh herbs (such as thyme or parsley, optional)
Instructions:
- Preheat your oven to 400°F (200°C). Line a baking sheet with parchment paper to prevent sticking and facilitate easy cleanup during the baking process.
- On a lightly floured surface, roll out the puff pastry sheet to smooth it out. Cut the pastry into long rectangles, approximately 3 inches wide, guaranteeing you have enough for the filling and some space to seal the edges.
- In a mixing bowl, combine the sausage meat with salt, pepper, and any optional herbs or mustard for added flavor. Mix well until fully combined.
- Place a spoonful of the sausage mixture along one edge of each pastry rectangle. Be careful not to overfill, as this can make sealing difficult.
- Roll the pastry over the filling to create a log shape, then press down to seal the edge. Use a fork to crimp the edges further, ensuring the filling stays inside during baking. Cut each roll into smaller pieces, about 2 inches long.
- Place the mini sausage rolls on the prepared baking sheet, brush the tops with the beaten egg to give them a golden color, and bake in the oven for 20-25 minutes or until they're puffed and golden brown.
Extra Tips: To guarantee your mini sausage rolls are perfectly crispy, avoid overworking the pastry when rolling it out.
Additionally, you can experiment with different types of sausage, such as spicy Italian or chicken sausage, to create unique flavor combinations. If you want to make these rolls ahead of time, you can prepare them and freeze them unbaked; just add a few extra minutes to the baking time when cooking from frozen. Enjoy your tasty bites!
Cranberry Brie Bites

Title: Cranberry Brie Bites
Prep Time: 15 minutes
Cook Time: 15 minutes
Number of Servings: 12
Required Equipment List: Baking sheet, parchment paper, oven, knife, mixing bowl
Cuisine Type: American
Cranberry Brie Bites are a delightful appetizer that combines the rich creaminess of Brie cheese with the tartness of cranberry sauce, all wrapped in flaky puff pastry. These bites are perfect for holiday gatherings or casual get-togethers, providing a burst of flavor in every bite.
The combination of sweet and savory makes them a crowd-pleaser, appealing to both cheese lovers and those who enjoy a touch of sweetness in their appetizers. The best part about this recipe is its simplicity, as it uses store-bought puff pastry for a quick and easy preparation.
You can customize the filling by adding nuts, herbs, or spices to elevate the flavors even further. Whether served warm from the oven or at room temperature, these Cranberry Brie Bites are sure to be a hit at your next festive occasion.
Ingredients:
- 1 sheet of puff pastry, thawed
- 4 ounces Brie cheese, cut into small pieces
- 1/2 cup cranberry sauce
- 1 egg, beaten (for egg wash)
- Fresh rosemary or thyme (for garnish, optional)
- Salt and pepper to taste
Instructions:
- Preheat your oven to 400°F (200°C). Line a baking sheet with parchment paper to prevent the pastry from sticking and to make cleanup easier.
- On a lightly floured surface, roll out the puff pastry sheet to smooth out any creases. Cut the pastry into 3-inch squares, creating about 12 squares in total.
- Place a small piece of Brie cheese in the center of each pastry square. Top the cheese with about a teaspoon of cranberry sauce. If you like, sprinkle a pinch of salt and pepper on top for added flavor.
- Fold the corners of each pastry square towards the center to create a small pocket, pinching the edges to seal them securely. Brush the tops of the bites with the beaten egg to give them a golden color when baked.
- Arrange the sealed bites on the prepared baking sheet, spacing them about an inch apart. Bake in the preheated oven for 12-15 minutes, or until the pastry is puffed and golden brown.
- Once baked, remove the bites from the oven and let them cool slightly before serving. Garnish with fresh rosemary or thyme if desired, and serve warm or at room temperature.
Extra Tips: You can prepare the bites in advance and freeze them before baking. Just place the unbaked bites on a baking sheet, freeze until solid, and then transfer them to a freezer bag.
When you're ready to serve, bake them directly from the freezer, adding a few extra minutes to the baking time. Feel free to experiment with different fillings, such as fig jam or chopped nuts, for a unique twist on this classic appetizer. Enjoy your Cranberry Brie Bites!
Sweet Potato Rounds

Title: Sweet Potato Rounds
Prep Time: 10 minutes
Cook Time: 25 minutes
Number of Servings: 4
Required Equipment List: Baking sheet, parchment paper, knife, mixing bowl, measuring spoons
Cuisine Type: American
Sweet Potato Rounds are a delicious and nutritious snack that brings a delightful twist to your holiday gatherings. These bite-sized treats feature roasted sweet potatoes, which aren't only naturally sweet but also packed with vitamins and minerals.
By slicing the sweet potatoes into rounds and roasting them until they're tender and caramelized, you create a perfect canvas for various toppings, allowing for endless customization based on your taste preferences.
This recipe isn't only simple but also offers a healthy alternative to traditional holiday snacks. You can enjoy the sweet potato rounds as they're or dress them up with toppings like feta cheese, herbs, or a drizzle of balsamic glaze. They make an excellent appetizer or side dish that will impress your guests and satisfy their cravings for something hearty yet wholesome.
Ingredients:
- 2 medium sweet potatoes
- 2 tablespoons olive oil
- 1 teaspoon paprika
- 1/2 teaspoon garlic powder
- Salt and pepper to taste
- Optional toppings: crumbled feta cheese, chopped fresh herbs, balsamic glaze
Instructions:
- Preheat your oven to 425°F (220°C). Line a baking sheet with parchment paper for an easy cleanup and to prevent sticking during roasting.
- Wash and peel the sweet potatoes, then slice them into rounds approximately 1/4 inch thick. Uniformity in size guarantees even cooking and a consistent texture.
- In a mixing bowl, combine the sweet potato rounds, olive oil, paprika, garlic powder, salt, and pepper. Toss until all the rounds are evenly coated with the oil and spices.
- Spread the sweet potato rounds in a single layer on the prepared baking sheet. Make sure they aren't overlapping to guarantee they roast properly and become crispy.
- Roast in the preheated oven for 20-25 minutes, flipping the rounds halfway through the cooking time. The sweet potatoes should be golden brown and tender when done.
- Once roasted, remove the sweet potato rounds from the oven and let them cool slightly. If desired, top with crumbled feta, fresh herbs, or a drizzle of balsamic glaze before serving.
Extra Tips: For added flavor, try experimenting with different spices such as cumin or chili powder to give your sweet potato rounds a unique twist.
If you want a crispy texture, consider broiling them for the last few minutes of cooking. These rounds can also be made ahead of time and reheated in the oven just before serving, making them a convenient and festive addition to your holiday spread. Enjoy!
Chocolate-Covered Pretzels

Title: Chocolate-Covered Pretzels
Prep Time: 15 minutes
Cook Time: 10 minutes
Number of Servings: 12
Required Equipment List: Baking sheet, parchment paper, microwave-safe bowl, fork
Cuisine Type: American
Chocolate-Covered Pretzels are a delightful treat that perfectly balances sweet and salty flavors, making them a favorite snack during the holiday season and beyond. These crunchy pretzels are dipped in smooth, melted chocolate and can be customized with a variety of toppings, from sprinkles to crushed nuts. They're simple to make and incredibly fun to decorate, making them a great activity for kids and adults alike.
This recipe isn't only quick to prepare but also versatile, allowing you to use white, milk, or dark chocolate based on your preference. You can also incorporate festive toppings to make them more visually appealing for holiday gatherings. Whether served on a platter at a party or packaged as a thoughtful gift, Chocolate-Covered Pretzels are sure to be a hit with everyone.
Ingredients:
- 2 cups pretzel rods or twists
- 1 cup chocolate chips (milk, dark, or white)
- 1 tablespoon coconut oil (optional, for smoother chocolate)
- Assorted toppings (sprinkles, crushed nuts, sea salt, etc.)
Instructions:
- Begin by preparing your workspace. Line a baking sheet with parchment paper to prevent the pretzels from sticking as they cool. This will also make for easy cleanup once you're done.
- In a microwave-safe bowl, combine the chocolate chips and coconut oil (if using). Microwave in 30-second intervals, stirring in between, until the chocolate is completely melted and smooth. Be careful not to overheat the chocolate to avoid burning.
- Once the chocolate is melted, dip each pretzel into the chocolate, using a fork to guarantee it's fully coated. Allow any excess chocolate to drip off before placing the pretzel on the prepared baking sheet.
- While the chocolate is still wet, sprinkle your desired toppings over the pretzels. You can mix and match various toppings to create a fun presentation.
- Place the baking sheet in the refrigerator for about 10-15 minutes, or until the chocolate has completely set. This will help the chocolate harden and give the pretzels a nice, glossy finish.
- Once set, remove the pretzels from the refrigerator and serve them immediately or store them in an airtight container for up to a week.
Extra Tips: For a festive touch, consider drizzling a contrasting chocolate color over the coated pretzels after they've set. This adds an extra layer of decoration and flavor. If you're looking to make these a bit healthier, try using dark chocolate and topping them with nuts or seeds for added crunch and nutrition. Enjoy your delicious chocolate-covered pretzels as a snack or dessert that everyone will love!
Stuffed Mushroom Caps
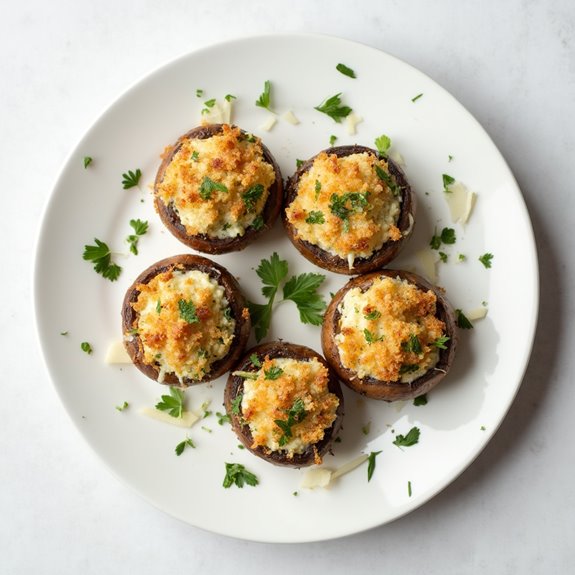
Title: Stuffed Mushroom Caps
Prep Time: 15 minutes
Cook Time: 20 minutes
Number of Servings: 6
Required Equipment List: Baking sheet, mixing bowl, oven, spoon, knife
Cuisine Type: American
Stuffed mushroom caps are a delicious and versatile appetizer that can elevate any gathering or holiday feast. These bite-sized delights are filled with a savory mixture of cream cheese, herbs, and breadcrumbs, which perfectly complement the earthy flavor of the mushrooms.
They're easy to prepare and can be made ahead of time, allowing you to spend more time enjoying the company of your guests rather than being stuck in the kitchen. The beauty of stuffed mushrooms lies in their adaptability; you can customize the filling with your favorite ingredients, such as sausage, spinach, or even different cheeses, making this recipe a crowd-pleaser for any occasion.
Once baked, they become golden and slightly crispy on the edges while remaining soft and creamy on the inside. Serve them warm, and watch them disappear in no time!
Ingredients:
- 12 large cremini or button mushrooms
- 8 ounces cream cheese, softened
- 1/2 cup breadcrumbs
- 1/4 cup grated Parmesan cheese
- 2 cloves garlic, minced
- 2 tablespoons fresh parsley, chopped
- 1/2 teaspoon dried oregano
- Salt and pepper to taste
- Olive oil for drizzling
Instructions:
- Preheat your oven to 375°F (190°C). Line a baking sheet with parchment paper or lightly grease it to prevent the stuffed mushrooms from sticking.
- Clean the mushrooms by wiping them with a damp cloth. Carefully remove the stems and set the caps aside. Finely chop the mushroom stems and place them in a mixing bowl.
- To the bowl with the chopped stems, add the softened cream cheese, breadcrumbs, Parmesan cheese, minced garlic, parsley, oregano, salt, and pepper. Mix well until all ingredients are combined and form a creamy filling.
- Spoon the filling generously into each mushroom cap, pressing down gently to guarantee they're well-stuffed. Place the filled caps on the prepared baking sheet.
- Drizzle a little olive oil over the stuffed mushrooms to enhance flavor and help them brown during baking. Bake in the preheated oven for about 20 minutes or until the tops are golden and the mushrooms are tender.
- Once baked, remove the mushrooms from the oven and let them cool slightly before serving. Enjoy warm as a delightful appetizer that will impress your guests.
Extra Tips: For an extra layer of flavor, consider adding cooked bacon or crumbled sausage to your filling mixture. You can also experiment with different herbs and spices to create your ideal flavor profile.
If you're preparing these ahead of time, you can assemble the stuffed mushrooms and refrigerate them until ready to bake—just add a couple of extra minutes to the cooking time if baking straight from the fridge. Enjoy your stuffed mushroom caps!
Holiday Veggie Tray
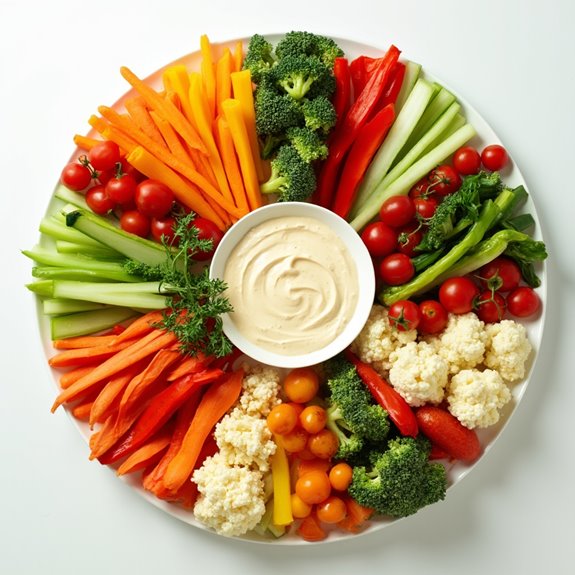
Title: Holiday Veggie Tray
Prep Time: 15 minutes
Cook Time: 0 minutes
Number of Servings: 8
Required Equipment List: Platter or serving board, knife, cutting board
Cuisine Type: American
A Holiday Veggie Tray is a delightful and colorful addition to any holiday gathering, providing a fresh and healthy option alongside the traditional festive treats. This dish allows for creativity and customization, as you can choose a variety of seasonal vegetables that not only add vibrant colors to your table but also cater to different taste preferences.
The best part is that this recipe requires no cooking, making it an incredibly easy and quick preparation. The key to a successful veggie tray is the selection of fresh, crisp vegetables and a tasty dip to accompany them. From classic favorites like carrots and celery to more exotic options like radishes and snap peas, the choices are endless.
Pairing the veggies with a flavorful dip, such as ranch, hummus, or tzatziki, elevates the experience and encourages guests to indulge in healthy snacking. This Holiday Veggie Tray is sure to be a hit at your next celebration!
Ingredients:
- 1 cup baby carrots
- 1 cup cherry tomatoes
- 1 cup cucumber, sliced
- 1 cup bell peppers, sliced (various colors)
- 1 cup celery sticks
- 1 cup snap peas
- 1 cup broccoli florets
- 1 cup cauliflower florets
- 1 cup ranch dressing or hummus (for dipping)
Instructions:
- Begin by washing all the vegetables thoroughly under cold water. This step guarantees that your veggie tray is clean and safe to eat. Pat them dry with a paper towel to remove any excess moisture.
- On a cutting board, slice the cucumbers and bell peppers into sticks or bite-sized pieces. Cut the celery into sticks of similar length, and if desired, trim the tops of the baby carrots for a neater presentation.
- Arrange the prepared vegetables on a large platter or serving board in a visually appealing manner. You can create sections for each type of vegetable or mix them up for a colorful display.
- In the center of the platter, place a small bowl filled with your choice of dip, such as ranch dressing or hummus. This not only serves as an attractive focal point but also makes it easy for guests to access the dip.
- Optional: Garnish the veggie tray with fresh herbs, such as parsley or dill, for an added touch of color and flavor.
Extra Tips: When preparing your Holiday Veggie Tray, try to use a variety of colors and textures to make it visually appealing. You can also include some seasonal vegetables, like roasted beets or Brussels sprouts, for a festive touch.
If you're serving the tray at a potluck or holiday party, consider covering it with plastic wrap until you're ready to present it to keep the vegetables fresh.
Cinnamon Sugar Tortilla Chips
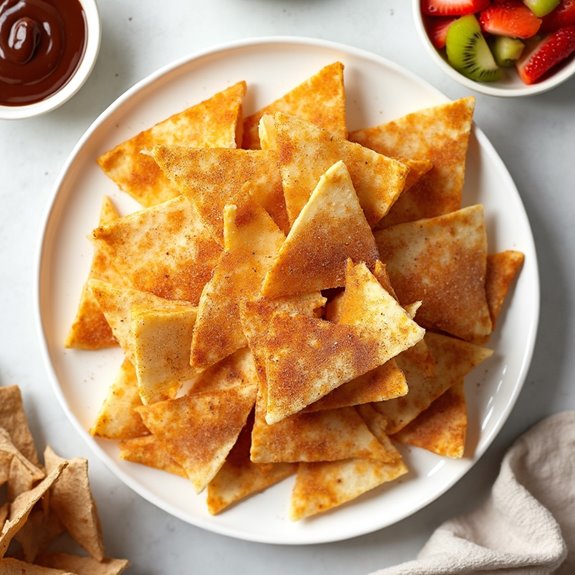
Title: Cinnamon Sugar Tortilla Chips
Prep Time: 10 minutes
Cook Time: 10 minutes
Number of Servings: 4
Required Equipment List: Baking sheet, oven, mixing bowl, brush
Cuisine Type: Mexican-American
Cinnamon Sugar Tortilla Chips are a delightful treat that combines the crunchiness of baked tortillas with the sweet and aromatic goodness of cinnamon and sugar. Perfect for snacking or as a fun dessert, these chips are incredibly easy to make and bound to please both kids and adults alike.
They can be enjoyed on their own or paired with dips like chocolate sauce or fruit salsa, making them versatile for any occasion. These chips aren't only delicious but also a healthier alternative to traditional fried snacks. By baking the tortillas instead of frying them, you can enjoy the same satisfying crunch without the excess oil.
Plus, the simple ingredients required for this recipe make it a go-to option for last-minute gatherings or a cozy night in. Get ready to impress your guests with these sweet and crispy treats!
Ingredients:
- 4 flour tortillas
- 1/4 cup sugar
- 1 tablespoon ground cinnamon
- 2 tablespoons melted butter
- Pinch of salt
Instructions:
- Preheat your oven to 350°F (175°C). Line a baking sheet with parchment paper to prevent the tortillas from sticking and guarantee easy cleanup.
- In a mixing bowl, combine the sugar, ground cinnamon, and a pinch of salt. This mixture will give the chips their sweet and spicy flavor.
- Brush both sides of each tortilla with melted butter, making certain they're evenly coated. This will help the cinnamon sugar mixture adhere to the tortillas and give them a nice golden color when baked.
- Sprinkle the cinnamon sugar mixture generously over both sides of the buttered tortillas, making sure to cover them evenly. For an extra touch, you can press the sugar mixture gently into the tortillas.
- Stack the tortillas and cut them into triangles or strips, depending on your preferred chip size. Arrange the cut tortillas in a single layer on the prepared baking sheet.
- Bake in the preheated oven for about 8-10 minutes, or until the chips are crisp and lightly golden. Keep an eye on them to prevent burning, as they can turn quickly.
- Once baked, remove the chips from the oven and let them cool for a few minutes. They'll continue to crisp up as they cool down. Serve with your favorite dip or enjoy them plain!
Extra Tips: To enhance the flavor, try adding a dash of vanilla extract to the melted butter before brushing it on the tortillas. For a fun twist, you can also experiment with different spices, such as nutmeg or allspice, in the cinnamon sugar mixture.
These chips are best enjoyed fresh but can be stored in an airtight container for a few days if needed. Enjoy your homemade cinnamon sugar tortilla chips!
Baked Spinach Dip

Title: Baked Spinach Dip
Prep Time: 15 minutes
Cook Time: 25 minutes
Number of Servings: 8
Required Equipment List: Mixing bowl, baking dish, oven, spatula, measuring cups, measuring spoons
Cuisine Type: American
Baked Spinach Dip is a classic appetizer that combines nutritious spinach with creamy cheeses and flavorful seasonings to create a delicious, crowd-pleasing dish. This dip is perfect for gatherings, parties, or simply enjoying with family on a cozy night at home.
The combination of mozzarella and cream cheese gives it a rich, velvety texture, while the addition of garlic and onion adds depth to the flavor profile. Served warm with crispy tortilla chips, fresh veggies, or toasted bread, this dip is bound to be a hit.
Making this baked spinach dip is both easy and quick, allowing you to whip it up even on the busiest of days. The versatility of this dish means you can adjust the ingredients to suit your preferences, including adding artichokes, bacon, or different types of cheese.
Whether it's for a festive occasion or a simple snack, this Baked Spinach Dip is sure to become a staple in your recipe collection.
Ingredients:
- 10 ounces frozen chopped spinach, thawed and drained
- 8 ounces cream cheese, softened
- 1 cup sour cream
- 1 cup shredded mozzarella cheese
- 1/2 cup grated Parmesan cheese
- 1/2 teaspoon garlic powder
- 1/2 teaspoon onion powder
- Salt and pepper to taste
- Tortilla chips or bread for serving
Instructions:
- Preheat your oven to 350°F (175°C) and grease a medium-sized baking dish. This will guarantee your dip doesn't stick to the dish during baking and makes for an easy cleanup.
- In a mixing bowl, combine the softened cream cheese, sour cream, garlic powder, onion powder, salt, and pepper. Using a spatula or electric mixer, blend until smooth and creamy, making sure all ingredients are well incorporated.
- Stir in the drained spinach, mozzarella cheese, and Parmesan cheese until evenly distributed. Make certain the spinach is well mixed into the creamy base to guarantee every bite is flavorful.
- Transfer the mixture to the prepared baking dish, spreading it out evenly. Use a spatula to smooth the top, which helps it bake evenly and gives it a nice presentation.
- Bake in the preheated oven for 20-25 minutes, or until the dip is bubbling and lightly golden on top. Keep an eye on it to prevent over-browning, as every oven is different.
- Once baked, remove the dish from the oven and let it cool for a few minutes before serving. This will help the dip set slightly, making it easier to scoop out and enjoy with your favorite dippers.
Extra Tips: To enhance the flavor even further, consider adding chopped fresh herbs like parsley or dill to the mixture before baking. For a spicy kick, you can mix in some diced jalapeños or a dash of hot sauce.
If you want to make it a meal, serve the baked spinach dip as a topping over grilled chicken or spread it on sandwiches. Enjoy your delicious creation!
Pomegranate Guacamole

Title: Pomegranate Guacamole
Prep Time: 10 minutes
Cook Time: 0 minutes
Number of Servings: 4
Required Equipment List: Mixing bowl, fork, knife, serving dish
Cuisine Type: Mexican-inspired
Pomegranate Guacamole is a vibrant twist on the classic guacamole that adds a burst of color and flavor. The tartness of pomegranate seeds complements the creamy richness of avocados, creating a revitalizing dip that's perfect for any gathering.
This recipe isn't only easy to prepare, but it also brings a festive flair to your snack table, making it an ideal choice for holiday parties or casual get-togethers.
This flavorful guacamole pairs beautifully with tortilla chips, fresh vegetables, or even as a topping for tacos or burritos. The addition of lime juice and cilantro brightens the dish, while the pomegranate seeds provide a delightful crunch and a pop of sweetness.
Whether you're entertaining guests or just craving a delicious snack, this Pomegranate Guacamole is sure to be a hit.
Ingredients:
- 2 ripe avocados
- 1/2 cup pomegranate seeds
- 1 small red onion, finely chopped
- 1 lime, juiced
- 1/4 cup fresh cilantro, chopped
- Salt to taste
Instructions:
- Start by cutting the avocados in half and removing the pits. Use a spoon to scoop the flesh into a mixing bowl. Mash the avocado with a fork until you reach your desired level of creaminess—smooth or chunky, depending on your preference.
- Add the finely chopped red onion to the mashed avocado. The onion adds a nice crunch and flavor that balances the creaminess of the avocado.
- Squeeze the juice of one lime into the bowl, ensuring you catch any seeds. The lime juice not only enhances the flavor but also helps to prevent the avocado from browning.
- Gently fold in the pomegranate seeds and chopped cilantro, mixing until everything is well combined. Be careful not to mash the pomegranate seeds; you want them to remain whole for added texture and burst of flavor.
- Taste the guacamole and add salt to your liking, adjusting the seasoning as needed. Serve immediately in a serving dish, garnished with a few extra pomegranate seeds and cilantro if desired.
Extra Tips: To keep your guacamole from browning too quickly, press a piece of plastic wrap directly onto the surface before refrigerating. This will minimize air exposure.
Additionally, you can customize this guacamole by adding diced tomatoes, jalapeños for a kick, or even some cumin for added depth of flavor. Enjoy this festive dip with your favorite snacks or as a fresh topping for various Mexican dishes!
Peppermint Bark
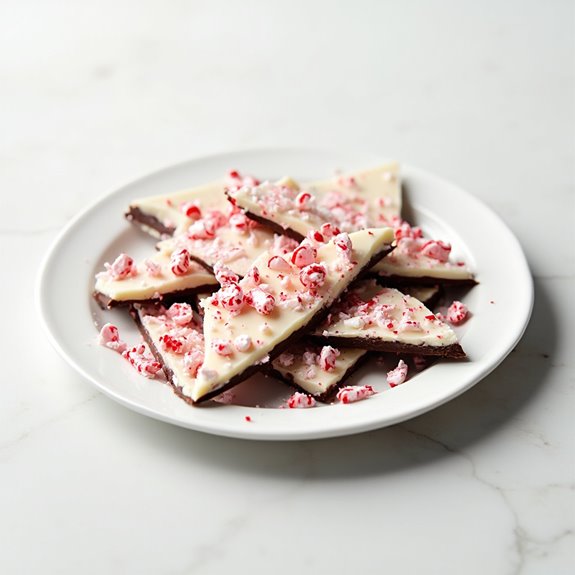
Title: Peppermint Bark
Prep Time: 15 minutes
Cook Time: 10 minutes
Number of Servings: 16
Required Equipment List: Baking sheet, parchment paper, microwave-safe bowl, spatula
Cuisine Type: American
Peppermint Bark is a classic holiday treat that combines rich chocolate with invigorating peppermint for a delightful flavor experience. This easy-to-make dessert is perfect for sharing with friends and family during the festive season. The layers of dark and white chocolate create a beautiful contrast, while the crushed peppermint candy adds a satisfying crunch and a burst of minty flavor.
Whether you're making it for a holiday party or as a sweet gift, this peppermint bark will surely be a hit. Making peppermint bark is a simple process that requires minimal ingredients and effort. The rich chocolate base is complemented by the sweetness of white chocolate, and the crushed peppermint adds a festive touch.
This recipe isn't only delicious but also versatile; you can easily adjust the toppings or add your favorite nuts for a personal twist. In just a short time, you can create a stunning holiday treat that looks as good as it tastes.
Ingredients:
- 12 ounces dark chocolate chips
- 12 ounces white chocolate chips
- 1/2 teaspoon peppermint extract
- 1/2 cup crushed candy canes or peppermint candies
Instructions:
- Line a baking sheet with parchment paper, ensuring that it covers the entire surface. This will prevent the peppermint bark from sticking and make it easy to lift out once set.
- In a microwave-safe bowl, melt the dark chocolate chips. Heat in the microwave in 30-second intervals, stirring after each interval until smooth and fully melted. Be careful not to overheat the chocolate.
- Once the dark chocolate is melted, pour it onto the prepared baking sheet and spread it evenly with a spatula to form a smooth layer. Place it in the refrigerator for about 10 minutes to allow it to set.
- While the dark chocolate is setting, melt the white chocolate chips in a separate microwave-safe bowl, following the same process as with the dark chocolate. Once melted, stir in the peppermint extract for an added burst of flavor.
- After the dark chocolate has set, remove the baking sheet from the refrigerator and pour the melted white chocolate over the dark chocolate layer. Use a spatula to spread it evenly, ensuring it covers the dark chocolate completely.
- Before the white chocolate sets, sprinkle the crushed candy canes evenly over the top, gently pressing them into the white chocolate to secure them. Return the baking sheet to the refrigerator for another 30 minutes to allow the bark to harden completely.
- Once fully set, remove the peppermint bark from the refrigerator and lift it off the baking sheet using the parchment paper. Break it into pieces of your desired size and enjoy!
Extra Tips: For a more festive appearance, consider drizzling melted chocolate over the top of the white chocolate layer before adding the crushed candy canes. You can also experiment with different types of chocolate, such as milk chocolate or dark chocolate with sea salt, to create your unique version of peppermint bark.
Store the finished bark in an airtight container at room temperature or in the refrigerator to keep it fresh and delicious.
Caramel Apple Slices
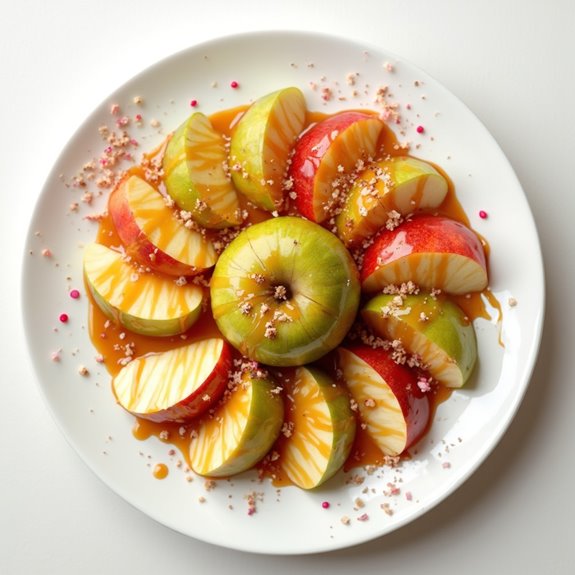
Title: Caramel Apple Slices
Prep Time: 10 minutes
Cook Time: 5 minutes
Number of Servings: 4
Required Equipment List: Medium saucepan, apple slicer, parchment paper, serving platter
Cuisine Type: American
Caramel Apple Slices are a fun and delicious twist on the classic caramel apple treat, perfect for holiday gatherings or a sweet snack. This recipe transforms fresh apple slices into a delightful dessert that combines the crispness of apples with the rich, gooey sweetness of caramel.
The simplicity of this dish allows it to be prepared quickly, making it a great option for both kids and adults to enjoy. These caramel-coated apple slices not only look appealing but also offer a convenient way to enjoy the flavors of caramel apples without the mess of eating a whole apple on a stick.
You can enhance the recipe by adding toppings like crushed nuts or sprinkles, making it a customizable treat that everyone can personalize. Serve them on a platter for a festive presentation at any gathering!
Ingredients:
- 2 large apples (such as Granny Smith or Honeycrisp)
- 1 cup caramel candies
- 2 tablespoons heavy cream
- Sea salt (optional, for garnish)
- Chopped nuts or sprinkles (optional, for toppings)
Instructions:
- Begin by preparing your apples. Wash them thoroughly and slice them into wedges using an apple slicer or knife. Make sure to remove the core and seeds, and arrange the slices on a serving platter lined with parchment paper to prevent sticking.
- In a medium saucepan over low heat, combine the caramel candies and heavy cream. Stir continuously until the caramel is melted and smooth, creating a creamy sauce. Be careful not to overheat, as the caramel can burn quickly.
- Once the caramel is melted, remove the saucepan from heat. Carefully dip each apple slice into the warm caramel, ensuring that one side is fully coated. Allow any excess caramel to drip off before placing the coated slices back onto the parchment-lined platter.
- If desired, sprinkle a pinch of sea salt over the caramel-coated side of each apple slice for a sweet and salty flavor. You can also add chopped nuts or colorful sprinkles at this stage for extra texture and fun.
- Let the caramel-set apple slices cool for a few minutes at room temperature before serving. This allows the caramel to slightly harden for easier handling.
Extra Tips: For an added depth of flavor, consider adding a splash of vanilla extract to the caramel mixture as it melts. If you're short on time, you can use pre-made caramel sauce instead of melting candies. Just heat it gently and dip the apple slices in for a quick and easy snack.
Store any leftovers in an airtight container in the refrigerator, but be aware that the caramel may soften when refrigerated. Enjoy your delightful caramel apple slices!
Savory Puff Pastry Twists

Title: Savory Puff Pastry Twists
Prep Time: 15 minutes
Cook Time: 20 minutes
Number of Servings: 8
Required Equipment List: Baking sheet, parchment paper, oven, pastry brush, knife
Cuisine Type: French-inspired
Savory Puff Pastry Twists are a delightful appetizer that combines the flaky, buttery texture of puff pastry with a variety of delicious fillings. These twists are perfect for holiday gatherings, parties, or any occasion where you want to impress your guests with a simple yet elegant snack.
The versatility of puff pastry allows for endless flavor combinations, making it easy to customize according to your taste preferences. These twists are quick to prepare and bake, making them an ideal choice for those who want to whip up a tasty treat without spending hours in the kitchen.
Filled with ingredients like cheese, herbs, or even savory spreads, these puff pastry twists are sure to be a hit. Serve them warm from the oven for a delightful snack that pairs beautifully with a glass of wine or a revitalizing beverage.
Ingredients:
- 1 sheet of puff pastry, thawed
- 1 cup shredded cheese (such as cheddar or mozzarella)
- 1/2 cup cooked and crumbled bacon or ham (optional)
- 1 tablespoon fresh herbs (like parsley or thyme), chopped
- 1 egg, beaten (for egg wash)
- Salt and pepper to taste
- 1 tablespoon Dijon mustard (optional)
Instructions:
- Preheat your oven to 400°F (200°C) and line a baking sheet with parchment paper to prevent the pastry from sticking. This will also help with easy cleanup after baking.
- On a lightly floured surface, roll out the thawed puff pastry sheet to smooth out any creases and create an even thickness. Cut the pastry into strips, approximately 1 inch wide, using a sharp knife.
- If desired, spread a thin layer of Dijon mustard onto each strip for added flavor. Sprinkle shredded cheese evenly over half of each strip, followed by crumbled bacon or ham and chopped herbs. Season with salt and pepper to taste.
- Fold the other half of each pastry strip over the filling to create a pocket, pressing the edges to seal. Twist each filled strip several times to create a spiral shape and place them on the prepared baking sheet.
- Brush the tops of the pastry twists with the beaten egg to give them a beautiful golden color as they bake. Bake in the preheated oven for 15-20 minutes or until the twists are puffed and golden brown.
- Once baked, remove the twists from the oven and allow them to cool slightly before serving. They're best enjoyed warm but can also be served at room temperature.
Extra Tips: For an extra layer of flavor, consider adding some grated Parmesan cheese or a sprinkle of garlic powder to the filling. Feel free to experiment with different types of cheese or add sautéed vegetables for a vegetarian option.
These savory puff pastry twists can be made ahead of time and frozen before baking; simply bake them from frozen, adding a few extra minutes to the cooking time. Enjoy your delightful creations!
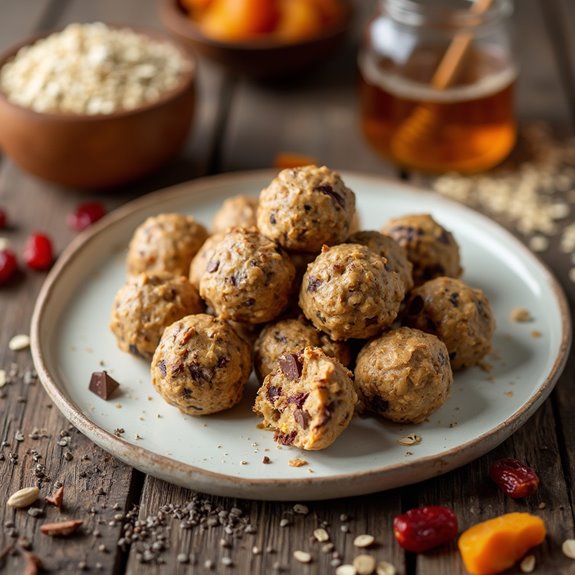
Nutty Energy Bites
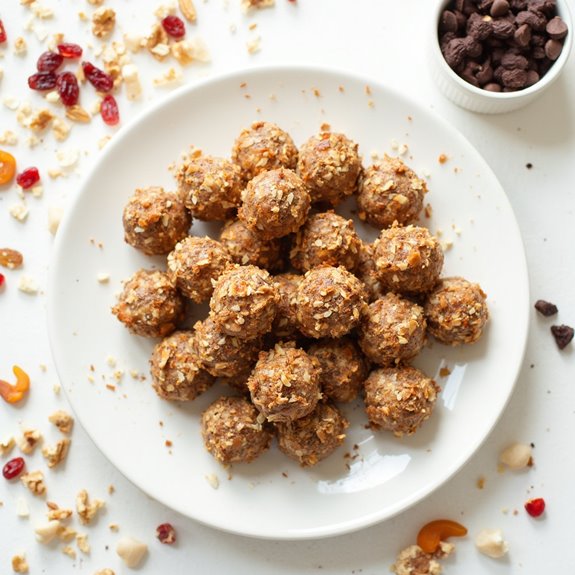
Title: Nutty Energy Bites
Prep Time: 10 minutes
Cook Time: 0 minutes
Number of Servings: 12
Required Equipment List: Mixing bowl, spoon, baking sheet, parchment paper (optional)
Cuisine Type: Snack
Nutty Energy Bites are a quick and nutritious snack perfect for on-the-go energy or as a post-workout treat. These no-bake bites combine a variety of wholesome ingredients, including nuts, seeds, and dried fruits, resulting in a chewy texture that's satisfying and delicious.
They're also customizable, allowing you to mix and match your favorite nuts and add-ins for a personalized touch. Not only are these energy bites a healthy choice, but they're also incredibly easy to make. Simply mix all ingredients together, form them into bite-sized balls, and you're done!
With their natural sweetness from honey or maple syrup, these bites make for a great alternative to sugary snacks, providing a steady energy boost without the crash.
Ingredients:
- 1 cup rolled oats
- 1/2 cup almond butter (or any nut butter of your choice)
- 1/3 cup honey (or maple syrup for a vegan option)
- 1/2 cup chopped nuts (such as almonds, walnuts, or pecans)
- 1/4 cup mini chocolate chips (optional)
- 1/4 cup dried fruit (such as cranberries, raisins, or apricots)
- 1/4 cup chia seeds or flaxseeds
- 1 teaspoon vanilla extract
- A pinch of salt
Instructions:
- In a mixing bowl, combine the rolled oats, almond butter, honey, chopped nuts, mini chocolate chips (if using), dried fruit, chia seeds or flaxseeds, vanilla extract, and a pinch of salt. Stir until all the ingredients are well combined and coated.
- Once the mixture is thoroughly mixed, use your hands to form small balls, about 1 inch in diameter. You can dampen your hands slightly to prevent sticking.
- Place the formed energy bites on a baking sheet lined with parchment paper for easy cleanup. Make sure to space them out to allow for easy handling.
- Once all the mixture has been shaped into bites, refrigerate them for at least 30 minutes to help them set. This will make them firmer and easier to handle.
- After chilling, you can store the energy bites in an airtight container in the refrigerator for up to one week or freeze them for longer storage.
Extra Tips: Feel free to experiment with different nuts, seeds, and dried fruits to find your perfect combination. For an extra flavor boost, consider adding a teaspoon of cinnamon or nutmeg to the mixture.
Additionally, if you prefer a less sweet version, you can reduce the amount of honey or maple syrup. These energy bites are versatile and can be adapted to fit various dietary preferences, ensuring a delicious and satisfying snack for everyone!
Conclusion
So, whether you're diving into a creamy cheese platter or munching on zesty roasted nuts, there's a festive treat for every taste bud. Picture the warmth of sweet potato rounds sitting alongside the chill of peppermint bark—it's a delicious contrast that captures the holiday spirit. As you whip up these snacks, remember: the joy of sharing tasty bites with loved ones makes every gathering extra special. What's on your snack table this season? Let the festivities begin!

