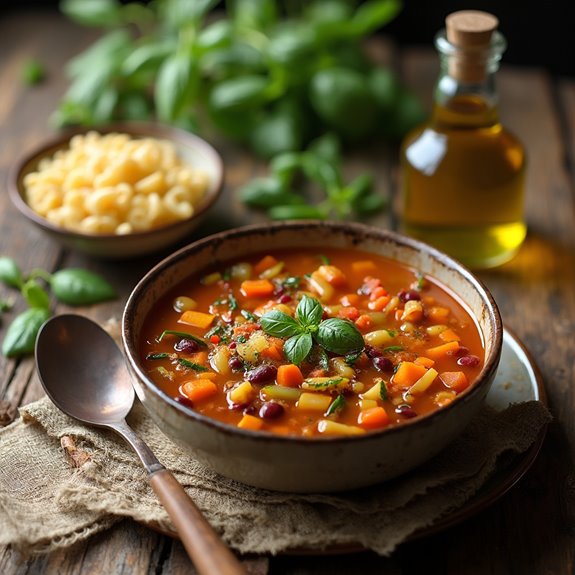
21 Beginner-Friendly Italian Side Dishes
Are you ready to impress with some delicious Italian side dishes? You'll love these 21 beginner-friendly options! Start with a Caprese salad, featuring vibrant tomatoes and fresh mozzarella, or whip up classic garlic bread that'll have everyone reaching for seconds. Roasted vegetables bring out the natural sweetness of seasonal produce, while bruschetta adds a fresh, zesty kick. Don't forget the antipasto platter for a delightful mix of cheeses and cured meats! Each dish is simple yet bursting with flavor, making them perfect for any occasion. Stick around; there's even more tasty inspiration waiting for you!
Caprese Salad
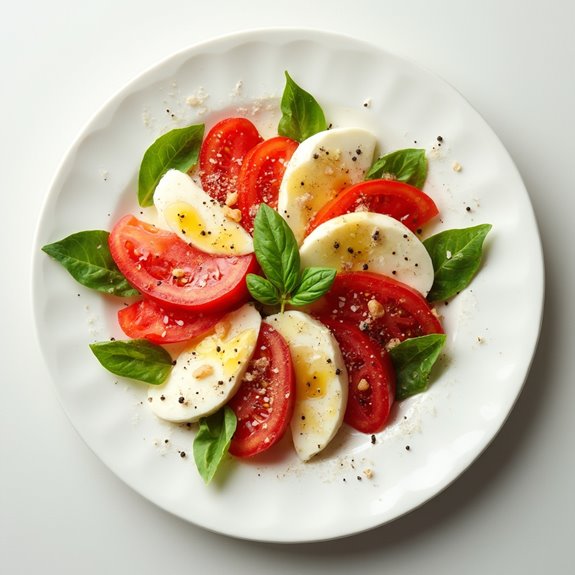
Title: Caprese Salad
Prep Time: 15 minutes
Cook Time: 0 minutes
Number of Servings: 4
Required Equipment List: Cutting board, knife, serving platter
Cuisine Type: Italian
Caprese Salad is a classic Italian dish that beautifully showcases the simplicity and freshness of its ingredients. Traditionally made with ripe tomatoes, fresh mozzarella cheese, and fragrant basil, this salad is a celebration of summer flavors. Drizzled with high-quality olive oil and balsamic vinegar, it delivers a delightful balance of sweetness, creaminess, and acidity, making it a perfect appetizer or side dish for any meal.
This salad not only looks stunning with its vibrant colors but also comes together in just minutes, making it an ideal option for busy weeknights or entertaining guests. Whether served as a starter or alongside grilled meats, Caprese Salad is sure to impress with its invigorating taste and elegant presentation. Enjoy this dish as a light lunch, a side at dinner, or even as a part of a picnic spread.
Ingredients:
- 4 ripe tomatoes, sliced
- 8 ounces fresh mozzarella cheese, sliced
- 1 cup fresh basil leaves
- 3 tablespoons extra-virgin olive oil
- 1 tablespoon balsamic vinegar (optional)
- Salt and pepper to taste
Instructions:
- Start by washing the ripe tomatoes and basil leaves under cold water. Pat them dry with a clean towel to remove excess moisture, which could make the salad soggy.
- On a cutting board, slice the tomatoes into thick rounds, about 1/4 inch thick. If the tomatoes are particularly juicy, you might want to remove some of the seeds to prevent the salad from becoming watery.
- Next, slice the fresh mozzarella cheese into rounds of a similar thickness to the tomatoes. This will create a beautiful layering effect when assembling the salad.
- On a serving platter, alternate layers of sliced tomatoes and mozzarella cheese. For every slice of tomato, place a slice of mozzarella on top, followed by a fresh basil leaf. Continue this pattern until all ingredients are arranged beautifully on the platter.
- Drizzle the extra-virgin olive oil evenly over the assembled salad, followed by the balsamic vinegar if using. Finish with a sprinkle of salt and freshly cracked pepper to enhance the flavors.
Extra Tips: For the best flavor, use the ripest tomatoes you can find, ideally heirloom varieties if they're in season. Fresh mozzarella should be used for peak taste; avoid pre-shredded cheese as it won't have the same creamy texture.
You can also experiment with different types of olive oil to find a flavor profile that you enjoy. For an extra touch, add a few slices of avocado or a handful of arugula for a peppery kick. Enjoy your Caprese Salad fresh for the best experience!
Garlic Bread

Title: Garlic Bread
Prep Time: 10 minutes
Cook Time: 15 minutes
Number of Servings: 4
Required Equipment List: Baking sheet, oven, mixing bowl, knife, aluminum foil (optional)
Cuisine Type: Italian-American
Garlic bread is a beloved Italian-American classic that makes the perfect accompaniment to pasta dishes, salads, and soups. This recipe combines the rich flavors of butter, fresh garlic, and herbs, all spread generously on a loaf of crusty bread. Whether you prefer it toasted until golden or slightly softer, this garlic bread is sure to elevate any meal, leaving your guests craving more.
Making garlic bread at home is both quick and simple, requiring only a handful of ingredients that you likely already have in your pantry. This versatile side dish can be customized with additional toppings such as cheese or herbs, allowing you to create the perfect flavor profile to suit your tastes. With minimal prep and cook time, garlic bread is an excellent choice for weeknight dinners or entertaining guests with ease.
Ingredients:
- 1 loaf of Italian or French bread
- 1/2 cup unsalted butter, softened
- 4 cloves garlic, minced
- 2 tablespoons fresh parsley, chopped
- 1/4 teaspoon salt
- 1/4 teaspoon black pepper
- 1/4 teaspoon red pepper flakes (optional)
- Grated Parmesan cheese (optional, for topping)
Instructions:
- Preheat your oven to 375°F (190°C). This temperature is ideal for toasting the garlic bread evenly without burning it. If you prefer a softer texture, you can wrap the bread in aluminum foil before baking.
- In a mixing bowl, combine the softened butter, minced garlic, chopped parsley, salt, black pepper, and red pepper flakes (if using). Mix well until all ingredients are evenly incorporated, creating a flavorful garlic spread.
- Slice the loaf of bread in half lengthwise, creating two equal pieces. If you prefer smaller portions, you can also slice the bread into individual pieces.
- Generously spread the garlic butter mixture over the cut sides of the bread, ensuring that every inch is covered for maximum flavor. If you like, you can sprinkle grated Parmesan cheese on top for an extra savory touch.
- Place the bread halves on a baking sheet, cut side up, and bake in the preheated oven for about 10-15 minutes. Keep an eye on the bread; you want it to be golden brown and crispy on the edges while remaining soft in the center.
- Once the bread is done baking, remove it from the oven and let it cool slightly before slicing into individual pieces for serving. Enjoy your delicious garlic bread warm!
Extra Tips: To enhance the flavor of your garlic bread, consider adding a sprinkle of Italian seasoning or fresh herbs like basil or oregano to the butter mixture. If you want to make it extra indulgent, try adding mozzarella cheese on top before baking for a cheesy garlic bread variation.
Garlic bread is best enjoyed fresh out of the oven, but any leftovers can be stored in an airtight container and reheated in the oven for a quick snack.
Roasted Vegetables
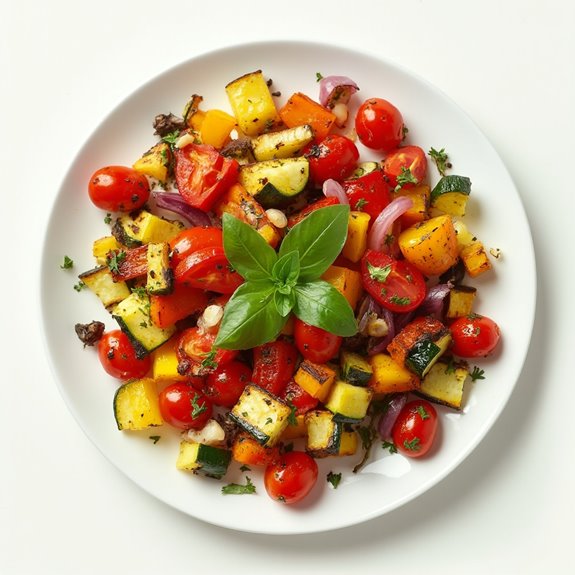
Title: Roasted Vegetables
Prep Time: 15 minutes
Cook Time: 30 minutes
Number of Servings: 4
Required Equipment List: Baking sheet, parchment paper, mixing bowl, oven
Cuisine Type: Italian
Roasted vegetables are a quintessential Italian side dish that brings out the natural sweetness and flavors of fresh produce. This simple yet delicious recipe highlights seasonal vegetables, making it a versatile choice for any meal. The roasting process caramelizes the veggies, creating a delightful texture and depth of flavor that complements a wide array of main dishes.
Whether you're serving it alongside grilled meats, pastas, or as part of a vegetarian feast, roasted vegetables will surely please everyone at the table. The beauty of this dish lies in its flexibility; you can use any combination of vegetables you prefer or have on hand. Classic choices include bell peppers, zucchini, eggplant, and cherry tomatoes, but feel free to experiment with seasonal varieties like Brussels sprouts or butternut squash.
Tossed in olive oil, garlic, and fresh herbs, these roasted vegetables aren't only easy to prepare but also packed with nutrients, making them a healthy addition to your dining experience.
Ingredients:
- 2 cups bell peppers (any color), diced
- 2 cups zucchini, sliced
- 2 cups cherry tomatoes, halved
- 1 cup red onion, chopped
- 4 cloves garlic, minced
- 3 tablespoons olive oil
- 1 teaspoon dried oregano
- Salt and pepper to taste
- Fresh basil or parsley for garnish (optional)
Instructions:
- Preheat your oven to 425°F (220°C). Line a baking sheet with parchment paper to prevent the vegetables from sticking and make cleanup easier.
- In a large mixing bowl, combine the diced bell peppers, sliced zucchini, halved cherry tomatoes, and chopped red onion. Add the minced garlic, olive oil, dried oregano, salt, and pepper. Toss everything together until the vegetables are evenly coated with the oil and seasonings.
- Spread the vegetable mixture in a single layer on the prepared baking sheet. Make sure not to overcrowd the pan, as this will prevent the vegetables from roasting properly and achieving that nice caramelization.
- Roast in the preheated oven for 25-30 minutes, stirring halfway through the cooking time. The vegetables should be tender and slightly browned when finished. Keep an eye on them to avoid burning.
- Once roasted, remove the baking sheet from the oven and let the vegetables cool for a few minutes. Transfer to a serving dish and garnish with fresh basil or parsley if desired. Serve warm.
Extra Tips: To enhance the flavor, consider adding a splash of balsamic vinegar or a sprinkle of grated Parmesan cheese right before serving. If you want to add a touch of heat, a pinch of red pepper flakes can be mixed into the vegetables before roasting.
Roasted vegetables can be stored in the refrigerator and enjoyed cold in salads or reheated as a side dish throughout the week, making them a convenient option for meal prep. Enjoy this colorful and nutritious side dish!
Bruschetta

Title: Bruschetta
Prep Time: 10 minutes
Cook Time: 10 minutes
Number of Servings: 4
Required Equipment List: Baking sheet, oven, mixing bowl, knife, cutting board
Cuisine Type: Italian
Bruschetta is a classic Italian appetizer that showcases the vibrant flavors of fresh ingredients. This simple yet delicious dish typically features grilled bread topped with a mixture of ripe tomatoes, fresh basil, garlic, and a drizzle of olive oil. It's perfect for summer gatherings or as a starter before a main meal, bringing a taste of Italy to your table.
The combination of crunchy bread and juicy toppings creates a delightful contrast that's sure to impress your guests. Making bruschetta is quick and easy, making it an ideal choice for beginner cooks. The key to a great bruschetta lies in using high-quality, fresh ingredients, especially ripe tomatoes and fragrant basil.
Feel free to customize the topping by adding ingredients like mozzarella or balsamic vinegar for an extra burst of flavor. Whether you're hosting a party or just enjoying a snack at home, bruschetta is a versatile dish that never fails to please.
Ingredients:
- 1 French baguette or Italian bread
- 4 ripe tomatoes, diced
- 1/4 cup fresh basil, chopped
- 2 cloves garlic, minced
- 2 tablespoons olive oil
- Salt and pepper to taste
- Balsamic glaze (optional, for drizzling)
Instructions:
- Preheat your oven to 400°F (200°C). Slice the baguette into 1/2-inch thick slices and arrange them on a baking sheet. This will create the perfect base for your bruschetta.
- Brush the tops of the bread slices lightly with olive oil. Place the baking sheet in the preheated oven and toast the bread for about 5-7 minutes, or until golden and crisp. Keep an eye on them to prevent burning.
- While the bread is toasting, prepare the topping. In a mixing bowl, combine the diced tomatoes, chopped basil, minced garlic, olive oil, salt, and pepper. Stir gently to mix the ingredients together, allowing the flavors to meld.
- Once the bread is toasted, remove it from the oven and let it cool for a minute. Spoon the tomato mixture generously onto each slice of toasted bread, making sure to include some of the juices for added flavor.
- If desired, drizzle balsamic glaze over the topped bruschetta for an extra touch of sweetness and acidity. Serve immediately while the bread is still warm and enjoy!
Extra Tips: For an added layer of flavor, consider rubbing a cut garlic clove on the toasted bread before topping it with the tomato mixture. You can also experiment with different toppings, such as roasted bell peppers or olives, to create your own unique bruschetta variations.
This dish is best enjoyed fresh, so try to assemble it just before serving to keep the bread crispy.
Antipasto Platter
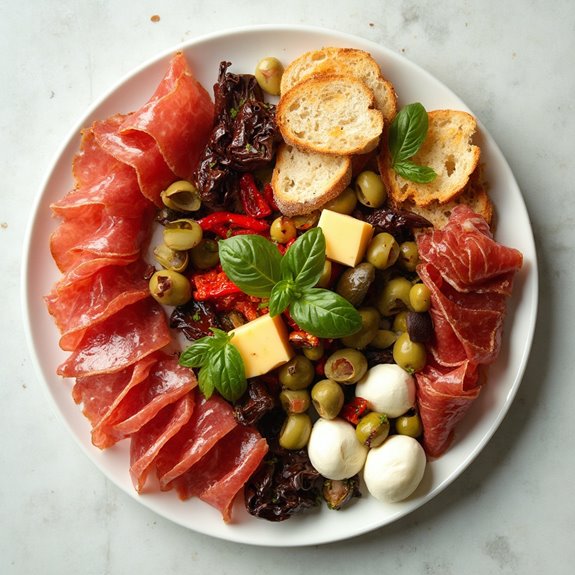
Title: Antipasto Platter
Prep Time: 20 minutes
Cook Time: 0 minutes
Number of Servings: 6
Required Equipment List: Serving platter, cutting board, knife
Cuisine Type: Italian
An Antipasto Platter is a classic Italian starter that showcases a delightful array of flavors and textures, making it a perfect appetizer for gatherings or a light meal. Traditionally enjoyed before the main course, this colorful spread consists of various cured meats, cheeses, olives, marinated vegetables, and bread, allowing guests to pick and choose their favorites. Its vibrant presentation and delightful combinations make it a feast for the eyes as well as the palate.
Creating an Antipasto Platter isn't only simple but also highly customizable based on personal preferences and seasonal ingredients. You can mix and match your favorite cured meats like prosciutto or salami, pair them with a selection of cheeses ranging from tangy goat cheese to creamy mozzarella, and add a variety of olives and marinated vegetables for extra flavor. This dish is an excellent way to explore Italian cuisine and is perfect for entertaining guests with minimal cooking involved.
Ingredients:
- 6 ounces prosciutto
- 6 ounces salami
- 6 ounces fresh mozzarella, sliced
- 6 ounces aged cheddar cheese, cubed
- 1 cup assorted olives (green and black)
- 1 cup marinated artichoke hearts
- 1 cup roasted red peppers
- Fresh basil leaves for garnish
- Crusty bread or breadsticks
Instructions:
- Begin by selecting a large serving platter or wooden board to arrange your antipasto ingredients. This will serve as the focal point of your presentation, so choose one that's visually appealing.
- Start by layering the cured meats on one side of the platter. Fold the slices of prosciutto and salami in half or roll them up for a more elegant appearance. Aim for a mix of colors and textures to create visual interest.
- Next, add the cheeses to the platter. Arrange the mozzarella slices and cheddar cubes in a way that complements the meats. You can also choose to place the cheese next to the olives to provide a variety of flavors in each bite.
- Fill in the remaining space on the platter with the assorted olives, marinated artichoke hearts, and roasted red peppers. Distributing these ingredients evenly will guarantee that each guest can easily reach for their favorites.
- Finally, garnish the platter with fresh basil leaves for a pop of color and added aroma. Serve with crusty bread or breadsticks on the side, allowing guests to create their own delicious bites.
Extra Tips: Feel free to get creative with your antipasto platter by adding seasonal fruits like figs or grapes for a sweet contrast. You can also include different types of cheeses or meats according to your preferences.
To enhance the flavors, consider drizzling some extra virgin olive oil or balsamic glaze over the vegetables just before serving. An antipasto platter isn't only versatile but also encourages social interaction, making it a wonderful addition to any gathering. Enjoy!
Frittata

Title: Frittata
Prep Time: 10 minutes
Cook Time: 20 minutes
Number of Servings: 4
Required Equipment List: Oven-safe skillet, mixing bowl, whisk, spatula
Cuisine Type: Italian
The Frittata is a versatile Italian dish that's fundamentally a thick omelette, perfect for breakfast, brunch, or even a light dinner. Made with eggs and a variety of ingredients, such as cheeses, vegetables, and meats, this dish is both hearty and satisfying.
The beauty of a frittata lies in its adaptability; you can use whatever ingredients you have on hand, making it a great way to reduce food waste while enjoying a delicious meal. Cooking a frittata is a straightforward process that involves whisking together eggs and your choice of ingredients, then cooking it on the stovetop before finishing it in the oven to achieve a fluffy texture.
This dish can be served warm or at room temperature, making it ideal for gatherings or meal prep. Once you master the basic technique, you can experiment with different flavor combinations, ensuring a delightful meal every time.
Ingredients:
- 6 large eggs
- 1/2 cup milk
- 1 cup diced vegetables (such as bell peppers, spinach, or zucchini)
- 1 cup shredded cheese (such as mozzarella or cheddar)
- 1/2 cup cooked meat (such as bacon, sausage, or ham) – optional
- Salt and pepper to taste
- 1 tablespoon olive oil
- Fresh herbs for garnish (such as parsley or basil) – optional
Instructions:
- Preheat your oven to 375°F (190°C). This temperature is ideal for finishing the frittata in the oven, ensuring it cooks evenly and rises beautifully.
- In a mixing bowl, whisk together the eggs, milk, salt, and pepper until well combined. This mixture forms the base of the frittata and should be light and airy.
- In an oven-safe skillet, heat the olive oil over medium heat. Add the diced vegetables to the skillet and sauté for about 5 minutes or until they're tender. If you're using cooked meat, add it to the skillet to warm through.
- Pour the egg mixture over the sautéed vegetables and meat, stirring gently to distribute them evenly. Allow it to cook on the stovetop for about 5 minutes until the edges start to set.
- Sprinkle the shredded cheese over the top of the frittata and transfer the skillet to the preheated oven. Bake for 10-15 minutes, or until the eggs are fully set and the cheese is melted and golden.
- Once cooked, remove the frittata from the oven and let it cool for a few minutes. Slice it into wedges and serve warm, garnished with fresh herbs if desired.
Extra Tips: For a creamier texture, you can add a splash of cream instead of milk. Experiment with seasonal vegetables and different cheeses to create unique flavor profiles.
Frittatas can also be made ahead of time and stored in the refrigerator, making them an excellent option for meal prep. Enjoy your frittata hot or cold, and feel free to pair it with a simple salad or crusty bread for a complete meal.
Italian Potato Salad
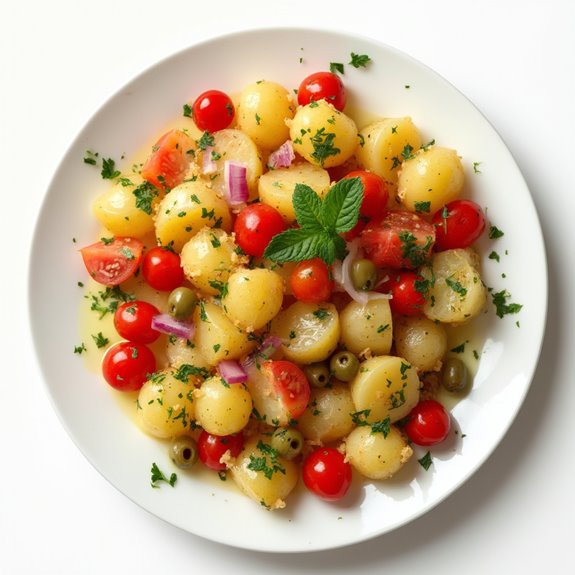
Title: Italian Potato Salad
Prep Time: 15 minutes
Cook Time: 20 minutes
Number of Servings: 6
Required Equipment List: Large pot, colander, mixing bowl, spoon, knife, cutting board
Cuisine Type: Italian
Italian Potato Salad is a revitalizing and hearty dish that showcases the versatility of potatoes, making it a perfect side for any meal. This salad is typically made with tender boiled potatoes, vibrant vegetables, and a zesty dressing that ties everything together. Unlike the creamy versions often found in American cuisine, this Italian take emphasizes fresh ingredients and a light, tangy vinaigrette, which highlights the natural flavors of the vegetables.
It's ideal for picnics, barbecues, or as a side dish for family dinners. The beauty of this Italian Potato Salad lies in its simplicity and the ability to customize it with your favorite ingredients. Fresh herbs like parsley and basil add an aromatic touch, while olives and capers provide a delightful brininess. This dish can be served warm or chilled, making it versatile for any occasion.
With just a handful of ingredients, you can create a satisfying and colorful salad that will impress your guests and complement any main course.
Ingredients:
- 2 pounds small potatoes (red or yellow)
- 1 cup cherry tomatoes, halved
- 1/2 cup green olives, sliced
- 1/4 cup red onion, finely chopped
- 1/4 cup fresh parsley, chopped
- 3 tablespoons olive oil
- 1 tablespoon red wine vinegar
- 1 teaspoon Dijon mustard
- Salt and pepper to taste
Instructions:
- Begin by washing the potatoes thoroughly under running water. Place them in a large pot and cover with cold water, adding a pinch of salt. Bring the water to a boil over high heat and then reduce it to a simmer. Cook the potatoes for about 15-20 minutes or until they're fork-tender but still firm.
- Once the potatoes are cooked, drain them in a colander and allow them to cool slightly. Once they're cool enough to handle, cut them into bite-sized pieces. You can leave the skin on for added texture and flavor.
- In a large mixing bowl, combine the halved cherry tomatoes, sliced green olives, finely chopped red onion, and chopped parsley. Add the cut potatoes to the bowl and gently toss everything together.
- In a separate small bowl, whisk together the olive oil, red wine vinegar, Dijon mustard, salt, and pepper until well combined. Pour the dressing over the potato mixture, and toss gently to coat all the ingredients evenly.
- Taste and adjust the seasoning as needed. You can serve the salad immediately while warm or refrigerate it for about 30 minutes to allow the flavors to meld together before serving.
Extra Tips: For an added burst of flavor, consider adding some crumbled feta cheese or roasted red peppers to the salad. You can also substitute different herbs, such as basil or oregano, to suit your taste. This salad can be made ahead of time and stored in the refrigerator for up to two days, making it a great option for meal prep or entertaining. Enjoy the bright and fresh flavors of this classic Italian dish!
Sautéed Spinach
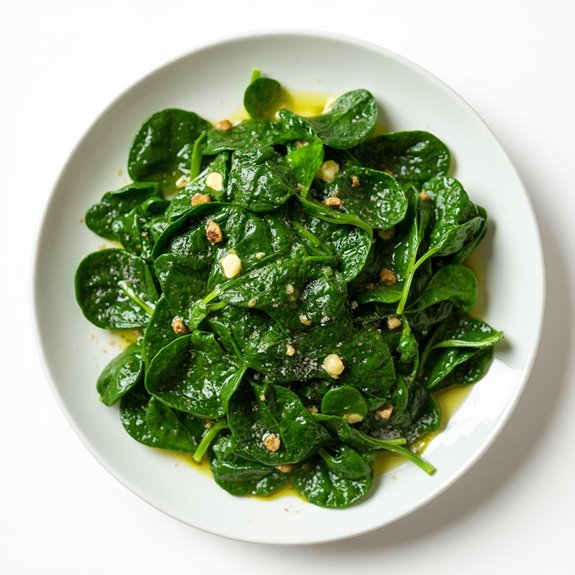
Title: Sautéed Spinach
Prep Time: 5 minutes
Cook Time: 10 minutes
Number of Servings: 4
Required Equipment List: Large skillet, spatula, measuring spoons
Cuisine Type: Italian
Sautéed spinach is a simple yet flavorful Italian side dish that showcases the natural sweetness and vibrancy of fresh spinach. This dish comes together in just a few minutes, making it an ideal accompaniment to a variety of main courses.
The garlic and olive oil enhance the spinach's flavor, while a squeeze of lemon juice at the end adds a revitalizing brightness that elevates the dish. This sautéed spinach recipe isn't only quick and easy but also packed with nutrients, making it a healthy choice for any meal.
Whether served alongside grilled chicken, fish, or pasta, this side dish is versatile enough to complement a range of flavors. Plus, with its vibrant green color, it adds a beautiful touch to your dinner plate, making your meal as visually appealing as it's delicious.
Ingredients:
- 1 pound fresh spinach, washed and trimmed
- 2 tablespoons olive oil
- 2 cloves garlic, minced
- Salt, to taste
- Pepper, to taste
- Juice of 1 lemon
Instructions:
- In a large skillet, heat the olive oil over medium heat. Once the oil is hot, add the minced garlic and sauté for about 30 seconds, just until fragrant. Be careful not to let the garlic burn, as it can turn bitter.
- Add the fresh spinach to the skillet, using tongs or a spatula to toss it in the garlic-infused oil. Cook for about 3-5 minutes, stirring occasionally, until the spinach is wilted and bright green.
- Season the sautéed spinach with salt and pepper to taste. Continue to cook for an additional minute to allow the flavors to meld together.
- Remove the skillet from heat and squeeze the juice of one lemon over the cooked spinach. Toss again to combine, ensuring the spinach is evenly coated with the lemon juice.
- Transfer the sautéed spinach to a serving dish and enjoy it warm as a delightful side to your favorite main course.
Extra Tips: For added flavor, you can incorporate red pepper flakes for a hint of heat or finish the dish with a sprinkle of grated Parmesan cheese.
If you have leftover sautéed spinach, it can be easily incorporated into omelets, pasta dishes, or grain bowls for a nutritious boost. Always remember to wash your spinach thoroughly to remove any grit or dirt before cooking. Enjoy your healthy and delicious sautéed spinach!
Polenta
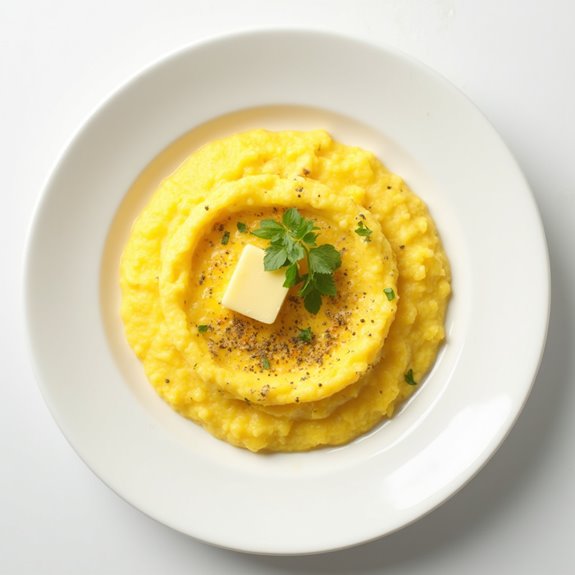
Title: Creamy Polenta with Parmesan Cheese
Prep Time: 10 minutes
Cook Time: 30 minutes
Number of Servings: 4
Required Equipment List: Medium saucepan, whisk, wooden spoon, serving dish
Cuisine Type: Italian
Creamy Polenta is a comforting and versatile Italian side dish that can elevate any meal. Made from coarsely ground cornmeal, polenta offers a delightful texture and a neutral base that pairs beautifully with various toppings and sauces. This recipe combines polenta with rich Parmesan cheese, creating a creamy and flavorful dish that can be served alongside roasted vegetables, grilled meats, or as a base for a hearty sauce.
This dish isn't only easy to prepare but also allows for customization based on your preferences. Whether you enjoy it smooth and creamy or prefer a firmer texture, polenta can be adjusted to your liking. Additionally, it can be made ahead of time and reheated, making it an excellent choice for busy weeknights or entertaining guests.
Ingredients:
- 1 cup polenta (coarse cornmeal)
- 4 cups water or vegetable broth
- 1 teaspoon salt
- 1/2 cup grated Parmesan cheese
- 2 tablespoons unsalted butter
- Freshly ground black pepper (to taste)
- Chopped fresh herbs (optional, for garnish)
Instructions:
- In a medium saucepan, bring the water or vegetable broth to a boil over medium-high heat. Add the salt to the boiling liquid, which will enhance the flavor of the polenta.
- Gradually whisk the polenta into the boiling liquid, stirring constantly to prevent lumps from forming. Once added, reduce the heat to low and continue to whisk until the mixture begins to thicken, about 5 minutes.
- After the polenta has thickened, switch to a wooden spoon and stir frequently, cooking for an additional 20-25 minutes. The polenta is done when it pulls away from the sides of the saucepan and has a creamy consistency.
- Remove the saucepan from the heat and stir in the butter and grated Parmesan cheese. Mix until the cheese is melted and fully incorporated, creating a rich and creamy texture.
- Taste the polenta and adjust the seasoning with freshly ground black pepper. If you prefer a thinner consistency, you can add a splash of water or broth to achieve your desired texture.
- Spoon the creamy polenta into a serving dish and garnish with chopped fresh herbs if desired. Serve warm as a side dish alongside your favorite entrees.
Extra Tips: For a more intense flavor, consider using homemade broth instead of water. You can also experiment with different types of cheese, such as goat cheese or cheddar, for a unique twist.
If you want to prepare polenta ahead of time, allow it to cool and set, then slice it and grill or fry the pieces for a delicious crispy texture. Enjoy this creamy polenta as a comforting side dish that complements a wide range of meals!
Ratatouille
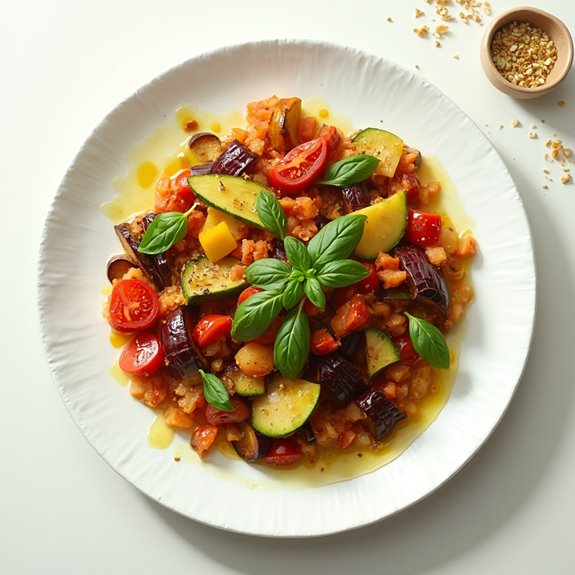
Title: Ratatouille
Prep Time: 20 minutes
Cook Time: 40 minutes
Number of Servings: 6
Required Equipment List: Large skillet, cutting board, knife, wooden spoon, measuring cups, measuring spoons
Cuisine Type: French
Ratatouille is a classic Provençal vegetable dish that showcases a medley of vibrant, seasonal vegetables, beautifully layered and simmered to perfection. This rustic dish not only bursts with flavors but also offers a healthy and colorful addition to any meal.
With its origins rooted in the south of France, ratatouille is often enjoyed as a side dish or even on its own, served with crusty bread or over pasta for a satisfying vegetarian option. This recipe celebrates the essence of summer, utilizing fresh ingredients like zucchini, eggplant, bell peppers, and tomatoes, all simmered together with aromatic herbs.
The result is a hearty and comforting dish that can be made ahead of time, as it only gets better with flavors melding together after a day in the fridge. Perfect for a family gathering or a cozy dinner, ratatouille is a dish that's both simple to prepare and impressive to serve.
Ingredients:
- 1 medium eggplant, diced
- 2 medium zucchinis, sliced
- 1 bell pepper (any color), chopped
- 1 medium onion, chopped
- 2 cloves garlic, minced
- 4 ripe tomatoes, diced (or one can of diced tomatoes)
- 1/4 cup olive oil
- 1 teaspoon dried thyme
- 1 teaspoon dried basil
- Salt and pepper to taste
- Fresh basil leaves for garnish (optional)
Instructions:
- Begin by preparing all your vegetables. Dice the eggplant, slice the zucchinis, chop the bell pepper and onion, and mince the garlic. If using fresh tomatoes, dice them as well. This will help streamline the cooking process.
- In a large skillet, heat the olive oil over medium heat. Add the chopped onion and sauté for about 5 minutes until it becomes translucent. Then add the minced garlic and cook for an additional minute, stirring frequently to avoid burning.
- Next, add the diced eggplant to the skillet and cook for about 5-7 minutes, stirring occasionally until it starts to soften. The eggplant will absorb some of the oil, so you may want to add a splash more if it seems too dry.
- Once the eggplant is softened, add the sliced zucchini and chopped bell pepper to the skillet. Stir everything together and continue to cook for another 5-7 minutes until the vegetables are tender.
- Finally, add the diced tomatoes, dried thyme, dried basil, salt, and pepper to the skillet. Stir well to combine, then reduce the heat to low. Cover the skillet and let the ratatouille simmer for 20-25 minutes, stirring occasionally to guarantee even cooking.
- Once the ratatouille is done simmering, taste and adjust the seasoning if necessary. Serve warm, garnished with fresh basil leaves if desired.
Extra Tips: For a more complex flavor, consider roasting the vegetables beforehand to caramelize them slightly before adding them to the skillet. You can also customize the dish by including other vegetables such as squash or mushrooms based on what you have on hand.
Ratatouille is incredibly versatile—enjoy it as a side, a filling for crepes, or even as a topping for grilled chicken or fish.
Pasta Primavera
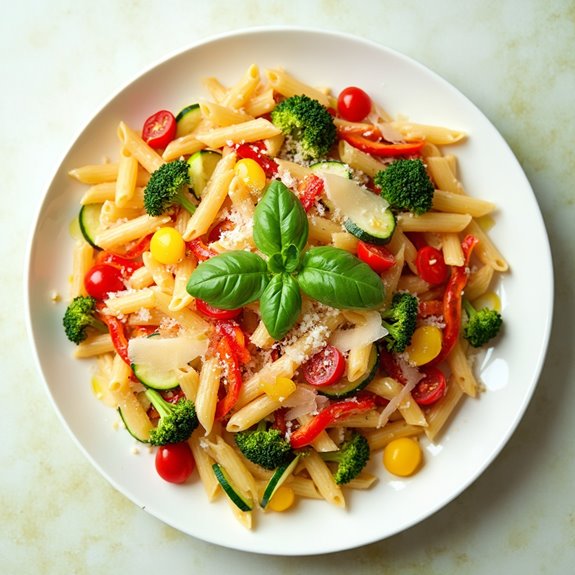
Title: Pasta Primavera
Prep Time: 15 minutes
Cook Time: 20 minutes
Number of Servings: 4
Required Equipment List: Large pot, colander, large skillet, wooden spoon, measuring cups, and spoons
Cuisine Type: Italian
Pasta Primavera is a colorful and delicious dish that celebrates the vibrant flavors of fresh seasonal vegetables. This recipe showcases a medley of bell peppers, zucchini, and cherry tomatoes, all tossed with perfectly cooked pasta and a light garlic and olive oil sauce.
It's a quick and easy meal that not only satisfies your hunger but also provides a wholesome serving of vegetables, making it an ideal choice for a weeknight dinner or a leisurely weekend lunch.
The beauty of Pasta Primavera lies in its versatility; you can easily switch up the vegetables based on what's in season or what you have on hand. This dish can be enjoyed warm or at room temperature, making it perfect for picnics or potlucks.
With its bright colors and fresh flavors, Pasta Primavera is sure to impress both family and guests alike.
Ingredients:
- 12 ounces pasta (such as penne or fettuccine)
- 2 tablespoons olive oil
- 2 cloves garlic, minced
- 1 bell pepper (red or yellow), sliced
- 1 zucchini, sliced
- 1 cup cherry tomatoes, halved
- 1 cup broccoli florets
- Salt and pepper to taste
- Grated Parmesan cheese (for serving)
- Fresh basil leaves (for garnish)
Instructions:
- Begin by cooking the pasta according to the package instructions in a large pot of salted boiling water. Once al dente, reserve 1 cup of the pasta water, then drain the pasta in a colander and set aside.
- In a large skillet over medium heat, add the olive oil and minced garlic. Sauté for about 1 minute, or until the garlic becomes fragrant but not browned.
- Add the sliced bell pepper, zucchini, and broccoli florets to the skillet. Cook for about 5-7 minutes, stirring occasionally, until the vegetables are tender yet still crisp.
- Stir in the cherry tomatoes and cook for an additional 2-3 minutes, allowing them to soften slightly. Season the vegetables with salt and pepper to taste.
- Add the cooked pasta to the skillet, tossing everything together. If the mixture appears dry, gradually add some of the reserved pasta water until you reach your desired consistency.
- Serve the Pasta Primavera warm, topped with grated Parmesan cheese and garnished with fresh basil leaves for an added burst of flavor.
Extra Tips: To make this dish even more colorful and nutritious, feel free to incorporate other seasonal vegetables such as asparagus, carrots, or snap peas.
You can also add protein by including grilled chicken, shrimp, or chickpeas. For a bit of heat, consider adding red pepper flakes. This dish can be made ahead of time and stored in the refrigerator, making it great for meal prep.
Enjoy your fresh and vibrant Pasta Primavera!
Grilled Zucchini
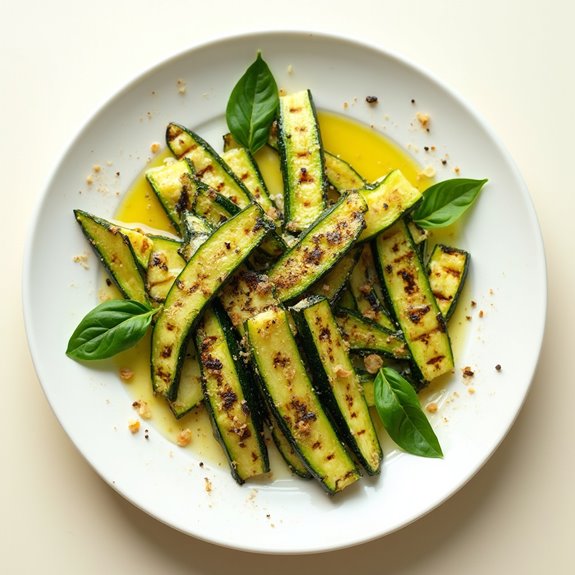
Title: Grilled Zucchini
Prep Time: 10 minutes
Cook Time: 15 minutes
Number of Servings: 4
Required Equipment List: Grill or grill pan, tongs, cutting board, knife, bowl
Cuisine Type: Italian
Grilled zucchini is a simple yet flavorful side dish that highlights the fresh taste of summer vegetables. This dish transforms ordinary zucchini into a delectable treat, making it the perfect accompaniment to any Italian meal, grilled meats, or even as a standalone appetizer.
With just a few ingredients, this recipe showcases the natural sweetness of zucchini, enhanced by the smoky char from grilling and a drizzle of olive oil. The beauty of grilled zucchini lies in its versatility. You can easily customize the seasoning to suit your taste, whether it's adding garlic, herbs, or spices.
This dish not only adds color to your plate but is also a healthy option for those looking to incorporate more vegetables into their diet. Enjoy this delightful grilled zucchini at your next gathering, or as a quick and easy side for a weeknight dinner.
Ingredients:
- 4 medium zucchinis
- 3 tablespoons olive oil
- 1 teaspoon garlic powder
- 1 teaspoon salt
- 1/2 teaspoon black pepper
- 1 tablespoon fresh lemon juice
- Fresh basil leaves (for garnish, optional)
Instructions:
- Begin by preparing the zucchini. Wash and dry the zucchinis, then slice them lengthwise into quarters to create long, thin strips. This will allow for even grilling and enhanced flavor absorption.
- In a large bowl, combine the olive oil, garlic powder, salt, pepper, and fresh lemon juice. Whisk the ingredients together until well blended. Add the zucchini strips to the bowl and toss until they're all evenly coated with the marinade.
- Preheat your grill or grill pan over medium-high heat. Once hot, place the zucchini strips directly on the grill grates. Be sure to leave enough space between each piece for even cooking.
- Grill the zucchini for about 3-4 minutes on each side, or until they're tender and have nice grill marks. Avoid overcooking to maintain a bit of crunch in the zucchini.
- Once grilled, remove the zucchini from the grill and arrange them on a serving platter. If desired, garnish with fresh basil leaves for an added burst of flavor and color.
Extra Tips: For an extra kick of flavor, consider adding a sprinkle of red pepper flakes to the marinade before tossing with the zucchini. If you prefer a more robust flavor, marinate the zucchini for 30 minutes in the refrigerator before grilling.
Grilled zucchini can be served warm or at room temperature, making it a great dish for picnics or potlucks. Enjoy experimenting with different herbs and spices to find your perfect combination!
Risotto
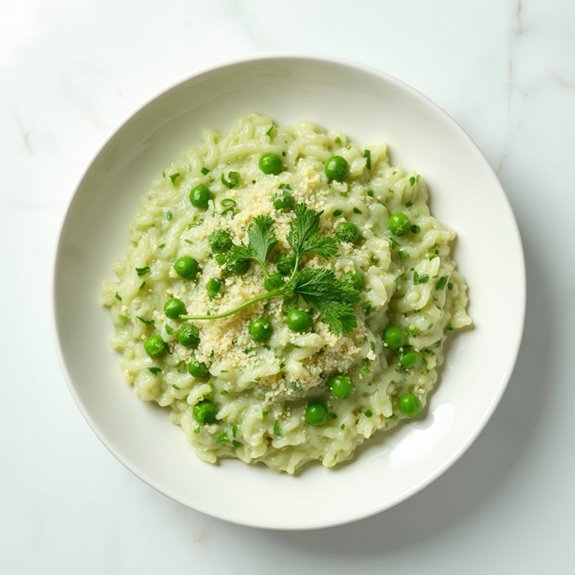
Title: Creamy Risotto with Peas and Parmesan
Prep Time: 10 minutes
Cook Time: 30 minutes
Number of Servings: 4
Required Equipment List: Medium saucepan, wooden spoon, ladle, measuring cups, measuring spoons
Cuisine Type: Italian
Creamy Risotto with Peas and Parmesan is a classic Italian dish that showcases the beauty of simple ingredients coming together to create a comforting and luxurious meal. Risotto is known for its creamy texture, achieved through the slow addition of broth while stirring continuously. This recipe incorporates sweet peas and rich Parmesan cheese, making it a delightful side dish or a stand-alone vegetarian option.
Perfect for any occasion, it's a dish that impresses both in flavor and presentation. The beauty of risotto lies in its versatility; you can easily customize it by adding other vegetables, herbs, or proteins. The slow cooking process allows the rice to absorb the flavors of the broth, resulting in a creamy, rich dish that's both satisfying and indulgent.
This risotto recipe is beginner-friendly and requires minimal ingredients, making it accessible for anyone looking to elevate their cooking skills.
Ingredients:
- 1 cup Arborio rice
- 4 cups vegetable broth
- 1 cup frozen peas
- 1 small onion, finely chopped
- 2 tablespoons olive oil
- 1/2 cup dry white wine
- 1/2 cup grated Parmesan cheese
- Salt and pepper to taste
- Fresh parsley for garnish (optional)
Instructions:
- In a medium saucepan, heat the vegetable broth over low heat to keep it warm while you prepare the risotto. This is important as adding cold broth to the rice can disrupt the cooking process.
- In a separate large saucepan, heat the olive oil over medium heat. Add the chopped onion and sauté for about 5 minutes until it becomes soft and translucent, stirring occasionally to prevent browning.
- Once the onion is softened, add the Arborio rice to the pan and stir well for about 1-2 minutes until the rice is lightly toasted and coated in the oil.
- Pour in the dry white wine and stir continuously until the liquid is almost completely absorbed by the rice. This step adds depth and flavor to the risotto.
- Begin adding the warm vegetable broth, one ladle at a time, stirring frequently. Wait until each addition is almost fully absorbed before adding the next ladle. This process should take about 18-20 minutes until the rice is creamy and al dente.
- When the rice is cooked to your liking, stir in the frozen peas and grated Parmesan cheese. Season with salt and pepper to taste. Continue to stir for an additional 2-3 minutes until the peas are heated through and the cheese is melted.
- Remove from heat and let the risotto sit for a minute before serving. Garnish with fresh parsley if desired and serve warm.
Extra Tips: To add extra creaminess without using too much cheese, you can stir in a tablespoon of butter at the end of cooking. Make sure to taste and adjust the seasoning as needed, as the saltiness of the broth and cheese can vary.
If you want to experiment with flavors, consider adding finely chopped herbs or sautéed mushrooms for a twist on this classic risotto. Enjoy this comforting dish alongside your favorite protein or as a hearty standalone meal!
Stuffed Peppers
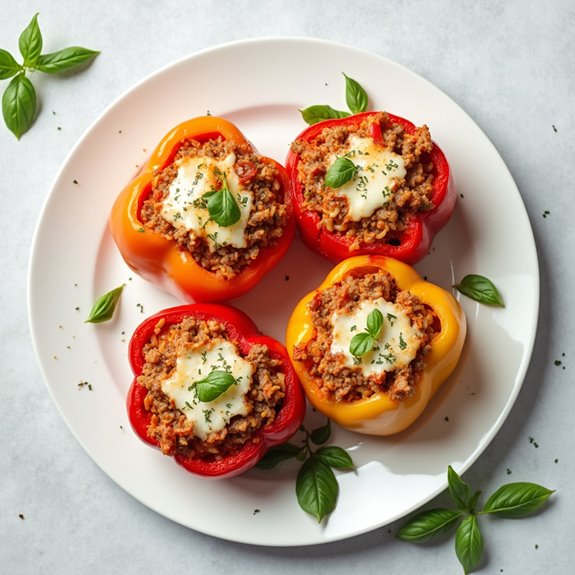
Title: Stuffed Peppers
Prep Time: 15 minutes
Cook Time: 30 minutes
Number of Servings: 4
Required Equipment List: Baking dish, mixing bowl, oven, knife, cutting board
Cuisine Type: Italian
Stuffed Peppers are a classic Italian dish that brings a delightful combination of flavors and textures to your table. This recipe features vibrant bell peppers filled with a savory mixture of rice, ground meat, tomatoes, herbs, and cheese, baked to perfection. The peppers become tender and flavorful, making for a satisfying meal that can be enjoyed by the whole family.
This dish isn't only delicious but also visually appealing, presenting a colorful array of ingredients that will entice any diner. The beauty of stuffed peppers is their versatility; you can customize the filling based on your preferences or what you have on hand. Whether you choose to use beef, turkey, or a vegetarian option, the result will be a hearty and wholesome dish.
Pair these stuffed peppers with a side salad or some crusty bread for a complete meal that showcases the comforting and vibrant flavors of Italian cuisine.
Ingredients:
- 4 large bell peppers (any color)
- 1 cup cooked rice (white or brown)
- 1/2 pound ground beef or turkey
- 1 cup canned diced tomatoes (with juice)
- 1/2 cup onion, finely chopped
- 1 teaspoon garlic powder
- 1 teaspoon Italian seasoning
- 1/2 cup shredded mozzarella cheese
- Salt and pepper to taste
- Fresh basil, chopped (for garnish, optional)
Instructions:
- Preheat your oven to 375°F (190°C). While the oven is heating, prepare the bell peppers by cutting the tops off and removing the seeds and membranes. Set aside.
- In a mixing bowl, combine the cooked rice, ground meat, diced tomatoes, chopped onion, garlic powder, Italian seasoning, salt, and pepper. Mix well until all the ingredients are evenly incorporated.
- Stuff each bell pepper generously with the rice and meat mixture, pressing down slightly to pack the filling. Place the stuffed peppers upright in a baking dish, ensuring they fit snugly.
- Cover the baking dish with aluminum foil and bake in the preheated oven for 20 minutes. This will help the peppers cook through and retain moisture.
- After 20 minutes, remove the foil and sprinkle shredded mozzarella cheese on top of each stuffed pepper. Return to the oven and bake uncovered for an additional 10 minutes, or until the cheese is melted and bubbly.
- Once baked, remove the stuffed peppers from the oven and let them cool for a few minutes. Garnish with chopped fresh basil if desired before serving.
Extra Tips: For added flavor, you can sauté the onions and garlic in a little olive oil before mixing them into the filling. This will enhance their sweetness and depth.
Feel free to experiment with different spices or add in vegetables like zucchini or mushrooms to the filling for an extra nutritional boost. Leftover stuffed peppers can be stored in the refrigerator and reheated for a quick meal throughout the week. Enjoy your delicious creation!
Cicoria Ripassata
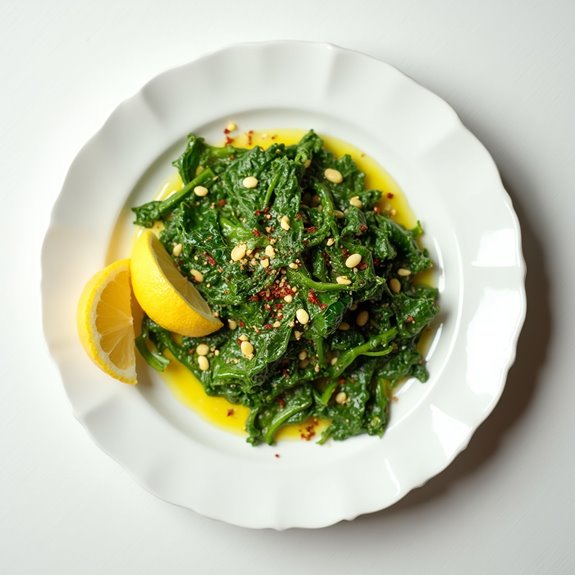
Title: Cicoria Ripassata
Prep Time: 10 minutes
Cook Time: 15 minutes
Number of Servings: 4
Required Equipment List: Large skillet, wooden spoon, knife, cutting board
Cuisine Type: Italian
Cicoria Ripassata is a classic Italian side dish that highlights the earthy flavors of chicory, also known as dandelion greens. This dish is typically sautéed with garlic and olive oil, allowing the natural bitterness of the greens to shine through while balancing it with the richness of the oil.
It's a simple yet elegant addition to any meal, providing a nutritious and flavorful option that pairs beautifully with grilled meats or pasta. This dish isn't only easy to prepare but also allows for customization based on your taste preferences.
You can add red pepper flakes for a bit of heat or squeeze fresh lemon juice over the top before serving for added brightness. Whether you're looking to eat healthier or simply explore traditional Italian cuisine, Cicoria Ripassata is a delightful choice that will elevate your dining experience.
Ingredients:
- 1 pound chicory (or dandelion greens), washed and trimmed
- 3 tablespoons olive oil
- 2 cloves garlic, minced
- Salt to taste
- Red pepper flakes (optional)
- Lemon wedges (for serving, optional)
Instructions:
- Begin by washing the chicory thoroughly under cold water to remove any dirt or grit. Trim off the tough ends and chop the greens into bite-sized pieces. Set them aside to drain in a colander.
- In a large skillet, heat the olive oil over medium heat. Once hot, add the minced garlic and sauté for about 1 minute, or until fragrant, being careful not to let it burn.
- Add the chopped chicory to the skillet, stirring well to coat the greens in the oil and garlic. Sauté for about 5-7 minutes, or until the greens are wilted and tender.
- Season the cicoria with salt to taste, and if desired, sprinkle in some red pepper flakes for a touch of heat. Cook for an additional minute to incorporate the flavors.
- Once cooked, remove the skillet from the heat and transfer the cicoria to a serving dish. If desired, serve with lemon wedges on the side for a revitalizing squeeze of citrus.
Extra Tips: To enhance the flavor of Cicoria Ripassata, consider adding a splash of balsamic vinegar during the last minute of cooking for a tangy twist.
If you prefer a milder taste, blanch the chicory in boiling water for a couple of minutes before sautéing, which will help reduce the bitterness. This dish can also be served warm or at room temperature, making it versatile for any occasion. Enjoy your delicious and healthy side dish!
Marinara Sauce
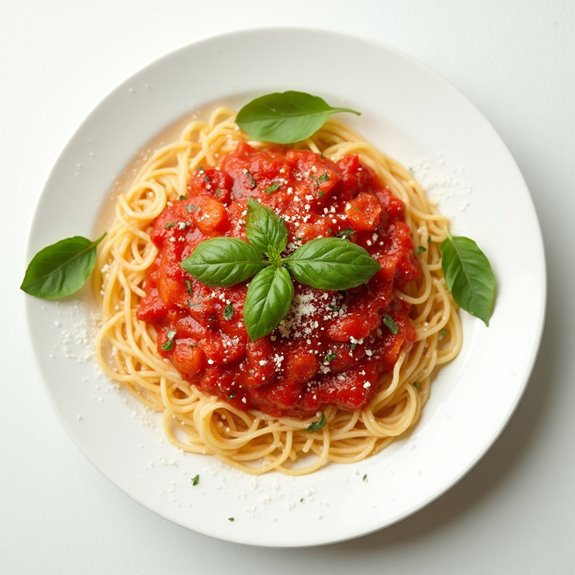
Title: Marinara Sauce
Prep Time: 10 minutes
Cook Time: 30 minutes
Number of Servings: 4
Required Equipment List: Large saucepan, wooden spoon, measuring cups, knife, cutting board
Cuisine Type: Italian
Marinara sauce is a classic Italian tomato sauce that isn't only simple to make but incredibly versatile. This recipe features fresh ingredients like ripe tomatoes, garlic, and herbs, creating a rich and flavorful sauce that can be used in a variety of dishes.
Whether you're tossing it with pasta, using it as a base for pizza, or serving it alongside meatballs, this marinara sauce is sure to elevate your meal. Making marinara sauce at home allows you to control the flavors and ingredients, ensuring a fresher taste than store-bought options.
With just a few basic ingredients, you can whip up a batch of this sauce in no time. The cooking process allows the flavors to meld beautifully, resulting in a sauce that's both comforting and satisfying.
Ingredients:
- 2 tablespoons olive oil
- 1 medium onion, diced
- 4 cloves garlic, minced
- 1 can (28 ounces) crushed tomatoes
- 1 teaspoon sugar
- 1 teaspoon dried oregano
- 1 teaspoon dried basil
- Salt and pepper to taste
- Fresh basil leaves (for garnish, optional)
Instructions:
- In a large saucepan, heat the olive oil over medium heat. Add the diced onion and sauté for about 5 minutes, or until the onion becomes translucent and fragrant. Stir occasionally to prevent burning.
- Add the minced garlic to the pan and cook for an additional 1-2 minutes, stirring frequently until the garlic is fragrant but not browned, as burnt garlic can impart a bitter flavor.
- Pour in the crushed tomatoes and stir to combine with the onion and garlic mixture. Add the sugar, dried oregano, and dried basil. The sugar helps to balance the acidity of the tomatoes, resulting in a well-rounded flavor.
- Season the sauce with salt and pepper to taste. Bring the sauce to a gentle simmer, then reduce the heat to low. Allow it to cook uncovered for about 20 minutes, stirring occasionally to prevent sticking.
- After 20 minutes, taste the sauce and adjust the seasoning if necessary. If you prefer a smoother sauce, you can use an immersion blender to blend it to your desired consistency.
- Once cooked, remove the sauce from heat and let it cool slightly. Serve warm, garnished with fresh basil leaves if desired, and enjoy it with your favorite pasta or as a base for other dishes.
Extra Tips: For a more robust flavor, consider adding a pinch of red pepper flakes for a hint of heat or incorporating a splash of red wine during the simmering process.
This marinara sauce can be made ahead of time and stored in the refrigerator for up to a week or frozen for longer storage. Enjoy your homemade marinara sauce in a variety of dishes, and feel free to experiment with additional ingredients like mushrooms or bell peppers for a unique twist!
Broccoli Rabe
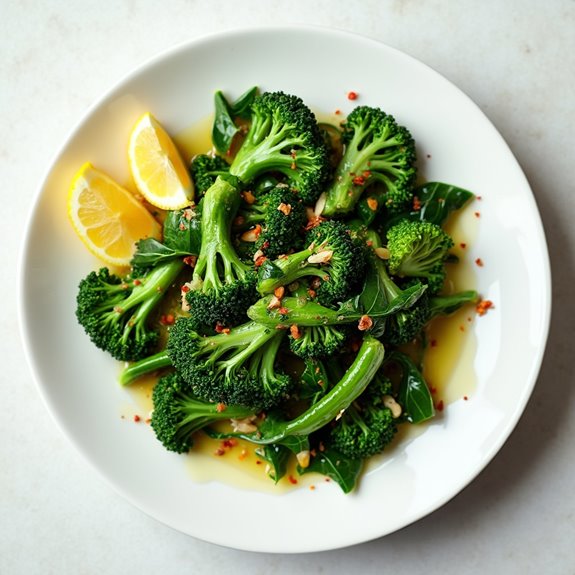
Title: Broccoli Rabe with Garlic and Chili Flakes
Prep Time: 10 minutes
Cook Time: 10 minutes
Number of Servings: 4
Required Equipment List: Large skillet, wooden spoon, knife, cutting board, tongs
Cuisine Type: Italian
Broccoli Rabe with Garlic and Chili Flakes is a simple yet flavorful Italian side dish that highlights the unique, slightly bitter taste of this leafy green vegetable. This dish is quick to prepare and serves as a perfect accompaniment to grilled meats, pasta, or even a hearty grain.
The sautéing process brings out the nutty flavor of the broccoli rabe, while the garlic and red chili flakes add a delightful kick, making it an exciting addition to any meal. This recipe emphasizes the importance of not overcooking the broccoli rabe, ensuring that it retains its vibrant green color and crisp texture.
The garlic is sautéed until fragrant, infusing the oil with its rich flavor, while the chili flakes provide an extra layer of warmth. Simple, healthy, and bursting with flavor, this dish embraces the essence of Italian cuisine, allowing you to enjoy the wonderful taste of fresh vegetables with minimal effort.
Ingredients:
- 1 pound broccoli rabe
- 4 cloves garlic, thinly sliced
- 1/4 teaspoon red chili flakes (adjust to taste)
- 3 tablespoons olive oil
- Salt to taste
- Lemon wedges (for serving, optional)
Instructions:
- Begin by rinsing the broccoli rabe under cold water to remove any dirt or grit. Trim the tough ends of the stems and cut the broccoli rabe into 2-3 inch pieces for even cooking.
- In a large skillet, heat the olive oil over medium heat. Once the oil is warm, add the sliced garlic and sauté for about 1-2 minutes or until the garlic turns golden brown and fragrant, being careful not to burn it.
- Add the broccoli rabe to the skillet and sprinkle with salt and red chili flakes. Toss the vegetables in the oil and garlic, ensuring they're well coated. Sauté for about 5-7 minutes, stirring occasionally, until the broccoli rabe is tender but still bright green.
- Once cooked, taste and adjust the seasoning if necessary. If you prefer a bit more heat, feel free to add more chili flakes. You can also squeeze some fresh lemon juice over the broccoli rabe for added brightness before serving.
- Transfer the sautéed broccoli rabe to a serving dish and serve warm as a side dish alongside your favorite main course. Enjoy!
Extra Tips: When preparing broccoli rabe, it can be beneficial to blanch it briefly in boiling water for 1-2 minutes before sautéing, especially if you find it too bitter. This step softens the greens and reduces bitterness, making it more palatable.
Additionally, feel free to experiment with adding other ingredients like pine nuts or Parmesan cheese for added texture and flavor. Enjoy this nutritious side dish that's both simple and satisfying!
Lemon Garlic Green Beans
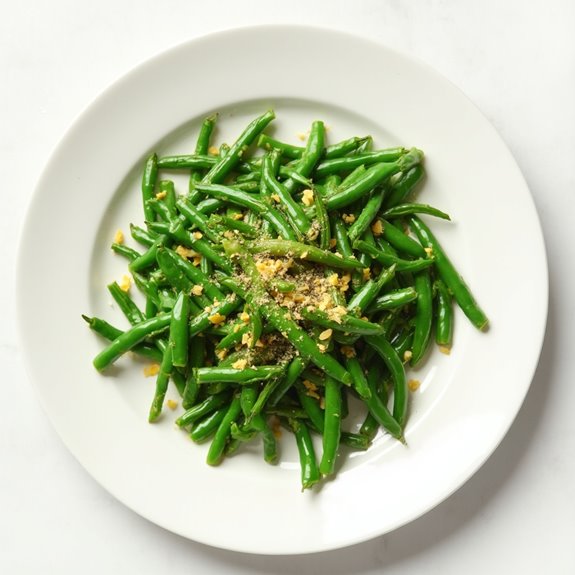
Title: Lemon Garlic Green Beans
Prep Time: 10 minutes
Cook Time: 10 minutes
Number of Servings: 4
Required Equipment List: Large skillet, measuring spoons, spatula, serving dish
Cuisine Type: Italian
Lemon Garlic Green Beans are a vibrant and flavorful side dish that perfectly complements a variety of main courses. This recipe features fresh green beans sautéed with aromatic garlic and brightened with a splash of lemon juice, creating a revitalizing contrast that's both simple and elegant.
Ideal for weeknight dinners or special occasions, these green beans aren't only quick to prepare but also packed with nutrients, making them a healthy addition to your meal.
With just a handful of ingredients, this dish showcases how easy it can be to elevate your vegetables. The combination of garlic and lemon enhances the natural flavor of the green beans, while the quick sauté method preserves their bright color and crunch.
Serve them alongside grilled meats, pasta dishes, or even as a part of a holiday spread, and watch them become a favorite among your guests.
Ingredients:
- 1 pound fresh green beans, trimmed
- 2 tablespoons olive oil
- 3 cloves garlic, minced
- Juice of 1 lemon
- Zest of 1 lemon
- Salt and pepper to taste
- Optional: grated Parmesan cheese for serving
Instructions:
- Begin by rinsing the green beans under cold water and trimming the ends. This will guarantee that they're clean and ready for cooking. Pat them dry with a paper towel to remove excess moisture.
- In a large skillet, heat the olive oil over medium heat. Once the oil is hot, add the minced garlic and sauté for about 1 minute, stirring frequently to prevent burning, until fragrant.
- Add the trimmed green beans to the skillet and sauté for approximately 5-7 minutes, stirring occasionally, until they're tender yet still crisp. You want them to maintain their vibrant color and not become mushy.
- Once the green beans are cooked to your liking, remove the skillet from heat and immediately squeeze the lemon juice over them. Sprinkle the lemon zest, salt, and pepper to taste, and toss everything together to guarantee the beans are well coated.
- Transfer the lemon garlic green beans to a serving dish. If desired, sprinkle with grated Parmesan cheese for an added layer of flavor before serving warm.
Extra Tips: For a bit of extra flavor, consider adding red pepper flakes during the sautéing step for a subtle kick. You can also experiment with adding toasted almonds or walnuts for added crunch and nuttiness.
If you have leftover green beans, they can be stored in an airtight container in the refrigerator for up to three days and reheated gently on the stovetop or in the microwave. Enjoy your deliciously simple side dish!
Risotto Balls

Title: Risotto Balls
Prep Time: 20 minutes
Cook Time: 30 minutes
Number of Servings: 4
Required Equipment List: Large pot, mixing bowl, spoon, frying pan, slotted spoon, baking sheet
Cuisine Type: Italian
Risotto Balls, also known as Arancini, are a delicious Italian appetizer that combines creamy risotto with a crispy exterior. These golden-brown balls are typically filled with cheese and can be served with marinara sauce for dipping. They're perfect for entertaining guests or as a comforting snack for yourself.
The process of turning leftover risotto into these delightful bites allows for creativity and helps minimize food waste, making it a practical dish as well.
The beauty of Risotto Balls lies in their versatility. You can fill them with a variety of ingredients such as mozzarella, peas, or even meat. Once you master the basic technique, feel free to experiment with different flavors and fillings to suit your taste. The result is a crunchy outer layer that gives way to a rich, flavorful center, making each bite a satisfying experience.
Ingredients:
- 2 cups cooked risotto (preferably cooled)
- 1 cup mozzarella cheese, cut into small cubes
- 1/2 cup all-purpose flour
- 2 large eggs, beaten
- 1 cup breadcrumbs
- Salt and pepper to taste
- Vegetable oil (for frying)
- Marinara sauce (for serving, optional)
Instructions:
- Begin by preparing your workspace. In a mixing bowl, combine the cooled risotto with salt and pepper to taste. Make sure your risotto isn't too hot, as this will make it difficult to shape the balls.
- Take a small amount of the risotto mixture in your hands and flatten it slightly. Place a cube of mozzarella cheese in the center and mold the risotto around it, forming a ball. Repeat this process until all the risotto is used, placing the formed balls on a baking sheet.
- Set up a breading station by placing the flour, beaten eggs, and breadcrumbs in separate shallow dishes. Roll each risotto ball in the flour, then dip it in the egg mixture, and finally coat it with breadcrumbs to guarantee an even coating.
- In a frying pan, heat vegetable oil over medium heat until it reaches around 350°F (175°C). Carefully add the breaded risotto balls in batches, frying them for about 3-4 minutes per side or until they're golden brown and crispy. Use a slotted spoon to remove them from the oil and drain on paper towels.
- Serve the Risotto Balls hot, either on their own or with a side of marinara sauce for dipping. Enjoy the contrast of the crispy exterior and the gooey, cheesy center.
Extra Tips: To enhance the flavor of your Risotto Balls, consider adding herbs such as parsley or basil to the risotto mixture. If you want an extra kick, you can also incorporate some cooked ground sausage or roasted vegetables into the filling.
Confirm your oil is hot enough before adding the balls to prevent them from absorbing too much oil. For a lighter version, try baking them in the oven at 400°F (200°C) until golden, flipping halfway through.
Arancini

Title: Arancini
Prep Time: 30 minutes
Cook Time: 30 minutes
Number of Servings: 4
Required Equipment List: Large pot, mixing bowl, frying pan, slotted spoon, paper towels, baking sheet
Cuisine Type: Italian
Arancini are delicious, crispy rice balls that are a popular Italian street food. Traditionally made with leftover risotto, they're filled with various ingredients such as cheese, peas, or meat, then rolled in breadcrumbs and fried until golden brown. This dish isn't only a great way to use up leftover rice but also a fantastic appetizer or snack that's sure to impress your family and friends.
Each bite is a delightful combination of flavors and textures, with a crunchy exterior giving way to a warm and cheesy center. Making arancini at home can be a fun and rewarding experience, especially when you can customize the fillings to suit your taste.
This recipe guides you through the process of creating these savory treats from scratch, starting with a simple risotto base. Once you master the technique, you can experiment with different fillings and even try baking them for a lighter version. Serve them with marinara sauce for dipping, and you have a perfect starter for any Italian meal or gathering.
Ingredients:
- 1 cup arborio rice
- 4 cups chicken or vegetable broth
- 1 small onion, finely chopped
- 2 tablespoons olive oil
- 1/2 cup grated Parmesan cheese
- 1 cup mozzarella cheese, cubed
- 1/2 cup frozen peas (optional)
- 2 eggs, beaten
- 1 cup breadcrumbs
- Salt and pepper to taste
- Oil for frying
Instructions:
- In a large pot, heat the olive oil over medium heat. Add the chopped onion and sauté until translucent. Stir in the arborio rice and cook for about 2 minutes until the rice is slightly toasted. Gradually add the broth, one cup at a time, stirring constantly until the rice absorbs the liquid. This process should take about 20 minutes, and the rice should be creamy and al dente when done. Remove from heat and let cool slightly.
- Once the risotto has cooled, stir in the beaten eggs, grated Parmesan cheese, and season with salt and pepper. If using peas, fold them in at this stage. Allow the mixture to cool completely, which will make it easier to shape the arancini.
- Once the rice mixture is cool, take about a golf ball-sized portion and flatten it in the palm of your hand. Place a cube of mozzarella cheese in the center and carefully shape the rice around it to form a ball. Repeat this process until all the rice mixture is used.
- Set up a breading station with one bowl of breadcrumbs and another shallow dish for beaten eggs. Dip each arancini ball first into the egg, then roll it in the breadcrumbs until fully coated. This will create a crunchy outer layer when fried.
- In a frying pan, heat about 2 inches of oil over medium-high heat. Once the oil is hot, carefully add the arancini in batches, frying until they're golden brown and crispy, about 3-4 minutes. Use a slotted spoon to remove them from the oil and drain on paper towels.
- Serve the arancini warm, with marinara sauce for dipping if desired. Enjoy the gooey, cheesy center and the crispy exterior!
Extra Tips: Make sure to let the risotto cool completely before shaping the arancini, as this will help them hold their shape. If you want to add extra flavor, consider mixing in some herbs like basil or parsley into the rice.
For a healthier option, you can bake the arancini in a preheated oven at 400°F (200°C) for about 20-25 minutes, turning them halfway through for even browning. Enjoy your homemade arancini as a delightful appetizer or snack!
Minestrone Soup
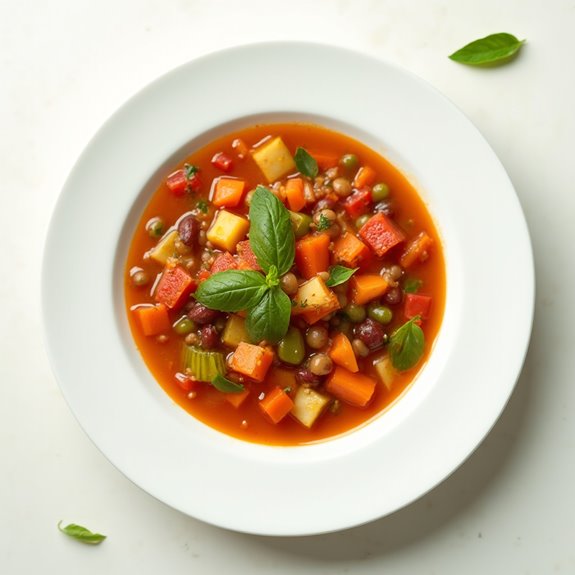
Title: Hearty Minestrone Soup
Prep Time: 15 minutes
Cook Time: 30 minutes
Number of Servings: 6
Required Equipment List: Large pot, wooden spoon, cutting board, knife, measuring cups, and spoons
Cuisine Type: Italian
Minestrone Soup is a classic Italian dish that's both hearty and nutritious, making it a fantastic option for any meal of the day. This vegetable-packed soup is rich in flavor and can easily be customized with your favorite seasonal vegetables. The combination of beans, pasta, and a savory broth creates a satisfying and filling dish that warms the soul on chilly days.
Perfect for serving family or guests, minestrone isn't only delicious but also a great way to incorporate a variety of nutrients into your diet. This recipe celebrates the essence of Italian cooking by utilizing fresh ingredients and simple techniques. The beauty of minestrone lies in its versatility—feel free to swap out vegetables based on what you have on hand or to accommodate personal taste preferences.
Whether served as a starter or a main dish, this minestrone soup is sure to become a beloved staple in your kitchen.
Ingredients:
- 1 tablespoon olive oil
- 1 onion, diced
- 2 carrots, diced
- 2 celery stalks, diced
- 3 cloves garlic, minced
- 1 zucchini, diced
- 1 cup green beans, cut into 1-inch pieces
- 1 can (14 oz) diced tomatoes
- 4 cups vegetable broth
- 1 can (15 oz) kidney beans, drained and rinsed
- 1 cup small pasta (e.g., ditalini or elbow)
- 1 teaspoon dried oregano
- 1 teaspoon dried basil
- Salt and pepper to taste
- Fresh basil leaves (for garnish)
Instructions:
- In a large pot, heat the olive oil over medium heat. Add the diced onion, carrots, and celery, and sauté for about 5 minutes until the vegetables are softened and the onion is translucent. Stir occasionally to prevent sticking.
- Add the minced garlic to the pot and cook for an additional minute, stirring constantly until fragrant. This step will enhance the overall flavor of the soup.
- Stir in the diced zucchini and green beans, cooking for another 3-4 minutes until they begin to soften. This will help the vegetables retain their texture and color in the final dish.
- Pour in the diced tomatoes (with their juices) and the vegetable broth. Bring the mixture to a boil, then reduce the heat to low and let it simmer for about 15 minutes. This will allow the flavors to meld beautifully.
- After simmering, add the kidney beans, small pasta, oregano, and basil to the pot. Continue to cook for another 10 minutes or until the pasta is al dente. Stir occasionally to guarantee that nothing sticks to the bottom of the pot.
- Season the soup with salt and pepper to taste, adjusting as needed. Once cooked, remove from heat and let it sit for a few minutes before serving. Garnish each bowl with fresh basil leaves for a pop of color and flavor.
Extra Tips: For a heartier version of minestrone, consider adding chopped spinach or kale towards the end of cooking for added greens. If you prefer a thicker soup, you can puree a portion of the soup with an immersion blender before adding the pasta.
Remember that minestrone is great for meal prep; it tastes even better the next day as the flavors continue to develop, so make extra to enjoy later!
Conclusion
So there you have it—21 delicious Italian side dishes that'll turn your meals into a culinary fiesta! Think of these recipes as your trusty sidekicks, ready to elevate your dinner game. Whether you're whipping up a cozy family meal or hosting friends, these dishes bring flavor and joy to the table. Why settle for ordinary when you can create something extraordinary? So roll up your sleeves, get cooking, and let your taste buds dance with delight!

