21 Healthy Instant Pot Dinner Recipes
If you're looking for healthy Instant Pot dinner recipes, you're in for a treat with these 21 options! From the hearty Quinoa and Black Bean Chili to zesty Lemon Garlic Chicken Thighs, there's something for everyone. You'll love the Vegetable Lentil Soup, which is packed with nutrients, or the Spicy Turkey and Rice Casserole for a family-friendly dish. Each recipe is quick to prepare and loaded with flavor. Plus, they make meal prep a breeze! Curious about even more tasty ideas that fit your cravings and busy schedule? Keep going, and you'll uncover some fantastic options!
Quinoa and Black Bean Chili
Title: Quinoa and Black Bean Chili
Prep Time: 10 minutes
Cook Time: 25 minutes
Number of Servings: 6
Required Equipment List: Instant Pot, measuring cups, measuring spoons, stirring spoon
Cuisine Type: Mexican-inspired
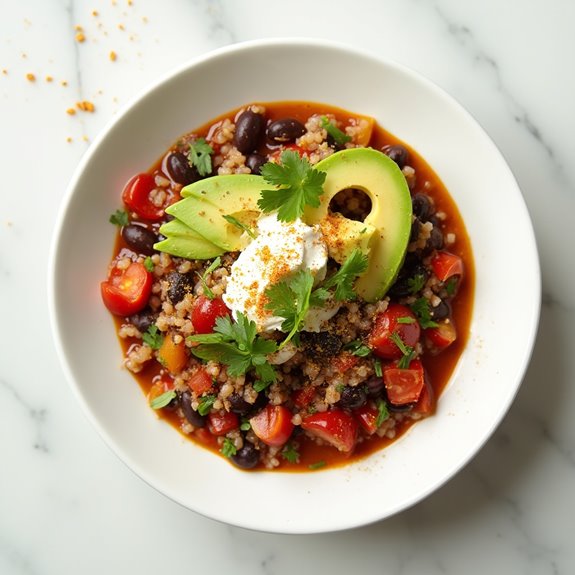
Quinoa and Black Bean Chili is a hearty and nutritious dish that combines protein-packed quinoa with fiber-rich black beans to create a filling meal perfect for any time of the year. The Instant Pot makes this recipe incredibly quick and easy, allowing you to enjoy a warm bowl of chili in under thirty minutes.
Loaded with spices, tomatoes, and bell peppers, this chili is bursting with flavor and can be easily adjusted to suit your taste preferences. This dish isn't only delicious but also highly nutritious, making it a great option for vegetarians and meat-eaters alike.
The combination of quinoa and black beans provides a complete protein, while the variety of vegetables adds essential vitamins and minerals. Serve it with your favorite toppings, such as avocado, cilantro, or a dollop of sour cream, and enjoy a satisfying meal that everyone will love.
Ingredients:
- 1 cup quinoa, rinsed
- 1 can (15 oz) black beans, drained and rinsed
- 1 can (14 oz) diced tomatoes
- 1 bell pepper, chopped
- 1 small onion, diced
- 3 cloves garlic, minced
- 2 cups vegetable broth
- 1 tablespoon chili powder
- 1 teaspoon cumin
- 1 teaspoon smoked paprika
- Salt and pepper to taste
- Optional toppings: avocado, cilantro, sour cream, cheese
Instructions:
1. Start by setting your Instant Pot to the sauté function. Once hot, add a splash of water or a little oil, then sauté the diced onion and bell pepper for about 3-4 minutes until they begin to soften.
Add the minced garlic and sauté for an additional minute until fragrant.
2. Next, add the rinsed quinoa, black beans, diced tomatoes (with their juices), vegetable broth, chili powder, cumin, smoked paprika, salt, and pepper to the pot. Stir everything together to combine the ingredients well.
3. Secure the lid on the Instant Pot and set the valve to the sealing position. Select the manual or pressure cook function and set the timer for 15 minutes.
Once the cooking time is complete, allow for a natural pressure release for about 10 minutes before carefully switching the valve to venting to release any remaining pressure.
4. Once the pressure is fully released, remove the lid and give the chili a good stir. Taste and adjust the seasoning if needed, adding more salt, pepper, or spices according to your preference.
5. Serve the chili hot, garnished with your choice of toppings such as diced avocado, fresh cilantro, sour cream, or shredded cheese. Enjoy a warm and comforting bowl of quinoa and black bean chili!
Extra Tips: For a spicier kick, consider adding diced jalapeños or a pinch of cayenne pepper to the chili. You can also personalize this recipe by adding other vegetables like corn or zucchini, or even some cooked ground meat if desired.
Leftovers store well in the refrigerator and can be frozen for later enjoyment, making this chili a great option for meal prep!
Lemon Garlic Chicken Thighs

Title: Lemon Garlic Chicken Thighs
Prep Time: 10 minutes
Cook Time: 20 minutes
Number of Servings: 4
Required Equipment List: Instant Pot, cutting board, knife, measuring spoons, serving platter
Cuisine Type: Mediterranean
Lemon Garlic Chicken Thighs are a flavorful and easy-to-make dish that will become a favorite in your dinner rotation. This recipe utilizes the Instant Pot to infuse the chicken with a zesty lemon and garlic marinade, resulting in tender, juicy thighs that are bursting with flavor.
The simplicity of the preparation makes it a fantastic option for busy weeknights when you still want to enjoy a home-cooked meal without spending hours in the kitchen. The combination of fresh lemon juice, minced garlic, and herbs creates a vibrant sauce that pairs beautifully with the rich flavor of the chicken thighs.
Serve this dish with a side of steamed vegetables or over a bed of rice for a complete meal that will impress your family and friends. With just a few ingredients and minimal effort, you can whip up a deliciously healthy dinner in no time.
Ingredients:
- 4 bone-in, skin-on chicken thighs
- 1/4 cup fresh lemon juice
- 4 cloves garlic, minced
- 1 tablespoon olive oil
- 1 teaspoon dried oregano
- 1 teaspoon salt
- 1/2 teaspoon black pepper
- 1/2 cup chicken broth
- Lemon slices (for garnish)
Instructions:
- In a mixing bowl, combine the lemon juice, minced garlic, olive oil, dried oregano, salt, and black pepper. Whisk together until well combined to create the marinade for the chicken.
- Pat the chicken thighs dry with paper towels to guarantee a nice sear. Place the chicken thighs in the bowl with the marinade and coat them thoroughly. Let them marinate for at least 10 minutes for maximum flavor.
- Set the Instant Pot to the sauté function. Once hot, add the marinated chicken thighs skin-side down and sear for about 4-5 minutes until the skin is golden brown. Flip the thighs and sear the other side for an additional 3-4 minutes.
- After searing, carefully remove the chicken thighs from the Instant Pot and set them aside. Pour the chicken broth into the pot, scraping any browned bits from the bottom to prevent a burn notice.
- Return the chicken thighs to the Instant Pot, skin-side up, and secure the lid. Set the Instant Pot to high pressure and cook for 10 minutes. Once the cooking time is complete, allow for a natural release for 5 minutes before performing a quick release for any remaining pressure.
- Carefully remove the chicken thighs from the pot and let them rest for a few minutes. Serve garnished with lemon slices and a drizzle of the cooking liquid for added flavor.
Extra Tips: For an extra layer of flavor, consider adding fresh herbs such as parsley or thyme to the marinade. If you prefer a bit of heat, you can include a pinch of red pepper flakes.
This dish works well with a variety of sides, from roasted vegetables to a fresh salad, so feel free to get creative with your accompaniments. Enjoy your delicious Lemon Garlic Chicken Thighs!
Vegetable Lentil Soup
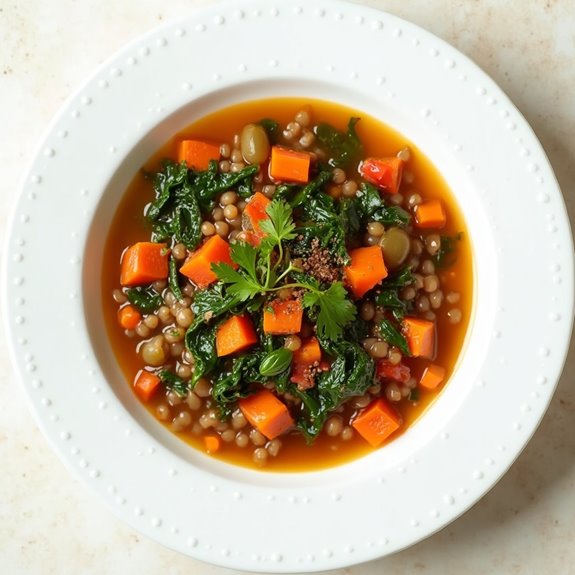
Title: Vegetable Lentil Soup
Prep Time: 10 minutes
Cook Time: 30 minutes
Number of Servings: 6
Required Equipment List: Instant Pot, measuring cups, measuring spoons, wooden spoon
Cuisine Type: Vegetarian
This Vegetable Lentil Soup is a hearty and nutritious dish that comes together effortlessly in your Instant Pot. Packed with protein-rich lentils and a variety of colorful vegetables, this soup isn't only delicious but also incredibly healthy.
The combination of spices creates a warm and comforting flavor profile, making it the perfect meal for chilly evenings or when you're in need of a cozy dish. Plus, it's a fantastic way to sneak in extra vegetables into your diet!
Using the Instant Pot notably reduces cooking time, allowing you to achieve that deep, rich flavor in a fraction of the time it would take on the stovetop. This recipe is versatile; you can customize it by adding your favorite vegetables or adjusting the spices according to your preference.
Serve it with a slice of crusty bread or a fresh salad for a complete meal that the whole family will love.
Ingredients:
- 1 cup lentils (any variety)
- 1 tablespoon olive oil
- 1 onion, chopped
- 2 carrots, diced
- 2 celery stalks, diced
- 3 cloves garlic, minced
- 1 teaspoon ground cumin
- 1 teaspoon smoked paprika
- 1/2 teaspoon dried thyme
- 1 can (14.5 oz) diced tomatoes
- 6 cups vegetable broth
- 2 cups kale or spinach, chopped
- Salt and pepper to taste
- Fresh parsley for garnish (optional)
Instructions:
- Set your Instant Pot to the 'Sauté' function and add the olive oil. Once the oil is hot, add the chopped onion, diced carrots, and diced celery. Sauté for about 5 minutes, or until the vegetables are softened and the onion is translucent.
- Stir in the minced garlic, ground cumin, smoked paprika, and dried thyme. Cook for an additional minute until the spices are fragrant.
- Add the lentils, diced tomatoes (with their juices), and vegetable broth to the pot. Season with salt and pepper to taste, and give everything a good stir to combine.
- Close the lid of the Instant Pot and set the valve to 'Sealing.' Select the 'Manual' or 'Pressure Cook' setting and adjust the timer to 15 minutes. Once the cooking cycle is complete, allow for a natural release of pressure for 10 minutes before carefully switching the valve to 'Venting' to release any remaining pressure.
- After the pressure has been released, open the lid and stir in the chopped kale or spinach. Let it sit for a few minutes until the greens are wilted. Adjust the seasoning with more salt and pepper if needed.
- Serve the soup hot, garnished with fresh parsley if desired. Enjoy this comforting bowl of Vegetable Lentil Soup with your choice of bread or a light side salad.
Extra Tips: For a creamier texture, consider blending a portion of the soup with an immersion blender before adding the greens. Feel free to experiment with different vegetables, such as bell peppers or zucchini, to suit your taste.
If you prefer a bit of heat, adding a pinch of red pepper flakes or a dash of hot sauce can enhance the flavor profile beautifully. Store any leftovers in the refrigerator for up to five days, and this soup also freezes well for future meals.
Spicy Turkey and Rice Casserole

Title: Spicy Turkey and Rice Casserole
Prep Time: 10 minutes
Cook Time: 30 minutes
Number of Servings: 6
Required Equipment List: Instant Pot, measuring cups, measuring spoons, wooden spoon, serving dish
Cuisine Type: American
This Spicy Turkey and Rice Casserole is a hearty, comforting dish that brings together lean ground turkey, colorful vegetables, and fluffy rice all in one pot. Packed with flavor from spices like chili powder and cumin, this casserole is perfect for those who enjoy a little kick in their meals.
The Instant Pot not only speeds up the cooking process but also melds the flavors beautifully, making for a satisfying dinner that your whole family will love. This recipe isn't just quick and easy but also highly customizable. You can add your favorite vegetables or adjust the spice levels according to your taste.
Serve it with a side of fresh salad or some crusty bread, and you have a nourishing meal that's perfect for busy weeknights or casual gatherings with friends. With minimal cleanup thanks to the use of the Instant Pot, you can enjoy the flavors of this delicious casserole without the hassle.
Ingredients:
- 1 pound lean ground turkey
- 1 cup long-grain white rice
- 1 can (15 oz) diced tomatoes, undrained
- 1 cup chicken broth
- 1 cup bell peppers, diced
- 1 medium onion, chopped
- 2 cloves garlic, minced
- 1 tablespoon chili powder
- 1 teaspoon cumin
- 1/2 teaspoon paprika
- Salt and pepper to taste
- 1 cup shredded cheese (optional)
- Fresh cilantro for garnish (optional)
Instructions:
- Turn your Instant Pot to the sauté setting. Once it's hot, add the ground turkey and cook until browned, breaking it apart with a wooden spoon. This should take about 5 minutes. Drain any excess fat if necessary.
- Add the chopped onion, bell peppers, and minced garlic to the pot. Sauté for an additional 2-3 minutes until the vegetables are softened.
- Stir in the chili powder, cumin, paprika, salt, and pepper, mixing well to coat the meat and vegetables with the spices. This will enhance the overall flavor of the casserole.
- Add the rice, diced tomatoes (with their juice), and chicken broth to the pot. Stir everything together, ensuring the rice is distributed evenly and submerged in the liquid.
- Close the lid of the Instant Pot, ensuring the valve is set to sealing. Set it to cook on high pressure for 10 minutes. Once the cooking time is complete, allow for a natural pressure release for 10 minutes before switching to a quick release for any remaining pressure.
- Carefully open the lid and fluff the casserole with a fork. If desired, sprinkle shredded cheese on top and let it melt for a couple of minutes before serving. Garnish with fresh cilantro for an added touch.
Extra Tips: To make this casserole even more nutritious, consider adding other vegetables such as corn or zucchini. If you prefer a less spicy version, reduce the amount of chili powder or omit it altogether.
Leftovers can be stored in an airtight container in the refrigerator for up to 3 days and reheated easily for a quick lunch or dinner option. Enjoy your spicy turkey and rice casserole!
Creamy Mushroom Risotto
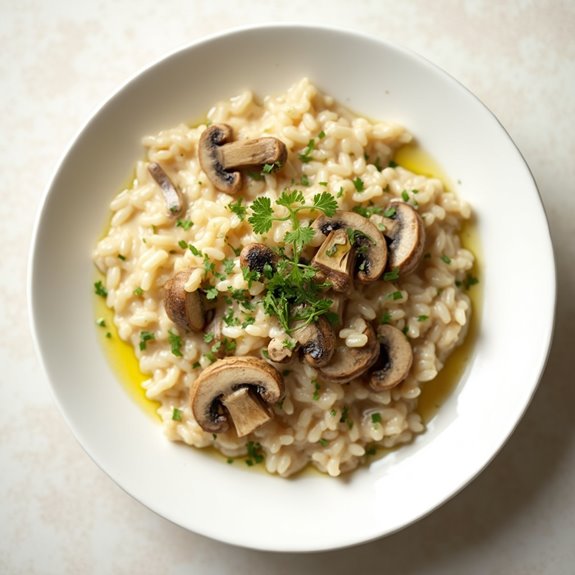
Title: Creamy Mushroom Risotto
Prep Time: 10 minutes
Cook Time: 30 minutes
Number of Servings: 4
Required Equipment List: Instant Pot, wooden spoon, measuring cups, measuring spoons
Cuisine Type: Italian
Creamy Mushroom Risotto is a luxurious and comforting dish that's surprisingly easy to make in an Instant Pot. The combination of arborio rice, rich mushrooms, and creamy broth creates a velvety texture that's hard to resist.
This risotto is perfect for a cozy dinner at home or entertaining guests, as it delivers impressive flavor without requiring constant stirring like traditional methods. The Instant Pot allows you to infuse the rice with the earthy flavors of mushrooms and broth while greatly reducing cooking time.
With a few simple ingredients and minimal hands-on time, you can have a restaurant-quality meal on your table in no time. Serve this risotto as a delightful main dish or as a hearty side to complement your favorite protein.
Ingredients:
- 1 tablespoon olive oil
- 1 small onion, diced
- 2 cloves garlic, minced
- 8 ounces mushrooms, sliced
- 1 cup arborio rice
- 4 cups vegetable or chicken broth
- 1/2 cup grated Parmesan cheese
- 1/2 cup heavy cream
- Salt and pepper to taste
- Fresh parsley, chopped (for garnish)
Instructions:
- Set your Instant Pot to the sauté function and heat the olive oil. Once hot, add the diced onion and sauté for about 2-3 minutes until translucent. Stir in the minced garlic and sliced mushrooms, cooking for an additional 3-4 minutes until the mushrooms are tender and their moisture has evaporated.
- Add the arborio rice to the pot, stirring well to coat the rice with the oil and mix with the mushrooms and onions. Toast the rice for about 1-2 minutes, allowing it to absorb some of the flavors.
- Pour in the vegetable or chicken broth, and stir to combine. Make sure to scrape any bits stuck to the bottom of the pot to prevent the burn warning. Close the lid of the Instant Pot and set the valve to sealing.
- Cook on high pressure for 6 minutes. Once the cooking time is complete, allow the pressure to release naturally for about 5 minutes, then carefully perform a quick release to release any remaining pressure.
- Once the lid is removed, stir in the grated Parmesan cheese and heavy cream, mixing until the risotto is creamy and well combined. Season with salt and pepper to taste, adjusting to your preference.
- Serve the risotto hot, garnished with fresh chopped parsley for a pop of color and freshness.
Extra Tips: For a richer flavor, consider using a mix of wild mushrooms, such as shiitake or cremini, along with the standard button mushrooms. You can also add a splash of white wine before adding the broth for an extra layer of depth.
If you prefer a lighter version, substitute the heavy cream with a splash of milk or omit it altogether. Risotto is best served immediately but can be reheated gently on the stovetop with a splash of broth if needed. Enjoy your creamy mushroom risotto!
Honey Garlic Salmon
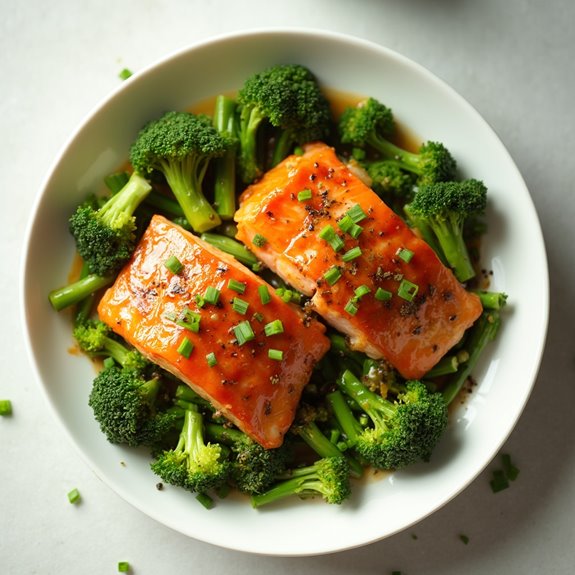
Title: Honey Garlic Salmon
Prep Time: 10 minutes
Cook Time: 8 minutes
Number of Servings: 4
Required Equipment List: Instant Pot, measuring spoons, mixing bowl, spatula
Cuisine Type: Asian-inspired
This Honey Garlic Salmon is a simple yet flavorful dish that brings together the rich taste of salmon with a sweet and savory honey garlic glaze. Cooking it in the Instant Pot guarantees that the salmon remains moist and tender, making it an ideal choice for a quick weeknight dinner or a special occasion.
The combination of honey, soy sauce, and garlic creates a delightful sauce that perfectly complements the natural flavors of the salmon, while the pressure cooking method locks in all the nutrients and moisture.
Preparing this dish is incredibly easy and requires minimal effort, allowing you to enjoy a delicious and healthy meal in a fraction of the time it would take using traditional methods. Served with steamed vegetables or over a bed of rice, this Honey Garlic Salmon isn't only satisfying but also packed with protein and omega-3 fatty acids, making it a nutritious option for you and your family.
Ingredients:
- 4 salmon fillets (about 6 ounces each)
- 1/4 cup honey
- 1/4 cup soy sauce
- 3 cloves garlic, minced
- 1 tablespoon olive oil
- 1 teaspoon ginger, minced
- Salt and pepper to taste
- Chopped green onions (for garnish, optional)
Instructions:
- In a mixing bowl, combine the honey, soy sauce, minced garlic, minced ginger, olive oil, salt, and pepper. Whisk the ingredients together until smooth to create the marinade for the salmon.
- Place the salmon fillets in the mixing bowl and coat them thoroughly with the honey garlic mixture. Allow the salmon to marinate for at least 5 minutes while you prepare the Instant Pot.
- Add 1 cup of water to the Instant Pot and place the trivet inside. This will help keep the salmon elevated above the water while cooking.
- Arrange the marinated salmon fillets on the trivet in a single layer. Pour any remaining marinade over the top of the fillets for added flavor.
- Close the Instant Pot lid and set the valve to the sealing position. Cook on high pressure for 5 minutes. Once the cooking cycle is complete, perform a quick release of the pressure by carefully turning the valve to venting.
- Carefully remove the salmon from the Instant Pot and serve immediately, drizzled with the cooking liquid. Garnish with chopped green onions if desired.
Extra Tips: To enhance the flavor even further, consider adding a squeeze of fresh lime juice just before serving. You can also pair the salmon with a side of steamed broccoli or asparagus for a complete meal.
If you prefer your salmon with a bit of a crust, you can finish it under the broiler for a minute or two after cooking in the Instant Pot. Enjoy your delicious and healthy Honey Garlic Salmon!
Mediterranean Chickpea Stew
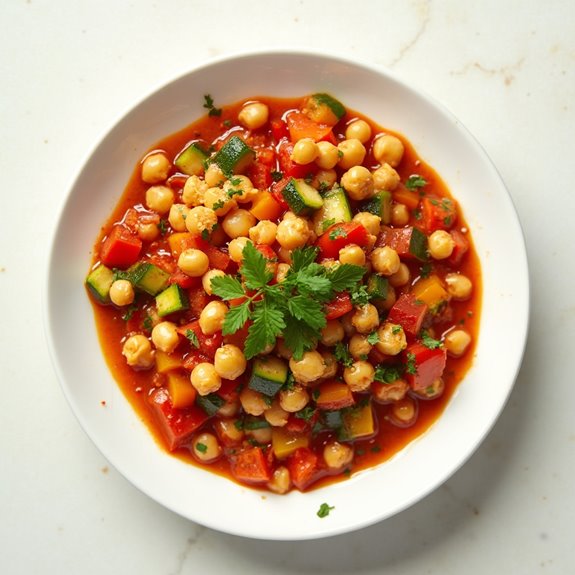
Title: Mediterranean Chickpea Stew
Prep Time: 10 minutes
Cook Time: 30 minutes
Number of Servings: 6
Required Equipment List: Instant Pot, measuring cups, cutting board, knife, wooden spoon
Cuisine Type: Mediterranean
This Mediterranean Chickpea Stew is a hearty and nourishing dish that brings together a delightful array of flavors and textures. Packed with protein-rich chickpeas, vibrant vegetables, and aromatic spices, this stew isn't only satisfying but also incredibly healthy.
The Instant Pot makes it easy to prepare, allowing the flavors to meld beautifully while saving you time in the kitchen. It's perfect for a cozy family dinner or meal prep for the week ahead.
This stew is versatile and can be served on its own, over a bed of fluffy couscous or rice, or alongside crusty bread for dipping. The combination of tomatoes, bell peppers, and zucchini adds freshness, while the spices like cumin and paprika provide warmth and depth.
You can easily adjust the ingredients based on what you have on hand, making it a flexible recipe that fits any pantry.
Ingredients:
- 1 tablespoon olive oil
- 1 onion, diced
- 3 cloves garlic, minced
- 1 bell pepper, diced
- 1 medium zucchini, diced
- 2 cans (15 oz each) chickpeas, drained and rinsed
- 1 can (14.5 oz) diced tomatoes, with juice
- 2 cups vegetable broth
- 1 teaspoon ground cumin
- 1 teaspoon smoked paprika
- 1/2 teaspoon salt
- 1/4 teaspoon black pepper
- 1 teaspoon dried oregano
- Fresh parsley or cilantro, for garnish (optional)
Instructions:
- Set your Instant Pot to the sauté function and heat the olive oil. Once hot, add the diced onion and sauté for about 3-4 minutes, or until the onion becomes translucent. Stir in the minced garlic and cook for an additional 1 minute until fragrant.
- Add the diced bell pepper and zucchini to the pot, stirring to combine. Sauté for another 3-4 minutes until the vegetables are tender. This will help build the flavor base for the stew.
- Next, add the drained chickpeas, diced tomatoes (with their juice), vegetable broth, ground cumin, smoked paprika, salt, black pepper, and oregano into the pot. Stir well to combine all the ingredients.
- Close the lid of the Instant Pot and set it to cook on high pressure for 15 minutes. Once the cooking time is complete, allow for a natural release of pressure for 10 minutes before manually releasing any remaining pressure.
- Carefully open the lid and give the stew a good stir. Taste and adjust seasoning if necessary. If you prefer a thicker stew, you can set the Instant Pot to sauté and let it simmer for a few more minutes to reduce the liquid.
- Serve the stew hot, garnished with fresh parsley or cilantro if desired. This dish pairs wonderfully with a side of crusty bread, rice, or couscous.
Extra Tips: For a bit of heat, consider adding a pinch of cayenne pepper or a chopped jalapeño during the cooking process. You can also include other vegetables such as carrots or spinach for added nutrition.
This stew can be stored in the refrigerator for up to 5 days, making it great for meal prep or leftovers. Enjoy your flavorful Mediterranean journey!
Beef and Broccoli Stir-Fry
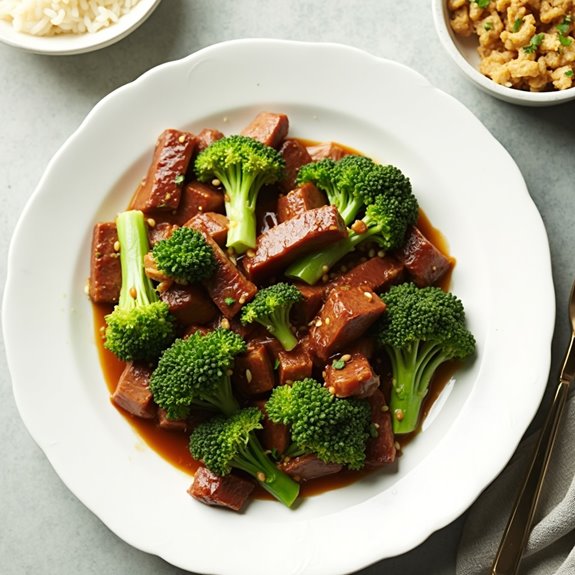
Title: Beef and Broccoli Stir-Fry
Prep Time: 10 minutes
Cook Time: 10 minutes
Number of Servings: 4
Required Equipment List: Instant Pot, cutting board, knife, measuring cups, measuring spoons, serving bowl
Cuisine Type: Chinese-American
Beef and Broccoli Stir-Fry is a classic dish that combines tender slices of beef with fresh, crisp broccoli in a savory sauce, all made effortlessly in your Instant Pot. This recipe offers a quick and healthy dinner option that's perfect for busy weeknights.
The rich flavors of soy sauce, garlic, and ginger complement the beef and broccoli beautifully, creating a dish that's both satisfying and nutritious. This quick stir-fry not only highlights the natural flavors of the ingredients but also retains the vibrant color and crunch of the broccoli, making it visually appealing as well.
Served over steamed rice or noodles, this beef and broccoli dish is a family favorite that can easily be made in under 30 minutes, allowing you to enjoy a delicious homemade meal without a lot of fuss.
Ingredients:
- 1 pound flank steak, thinly sliced
- 2 cups broccoli florets
- 1 tablespoon vegetable oil
- 1/4 cup soy sauce
- 2 tablespoons oyster sauce
- 1 tablespoon cornstarch
- 1 tablespoon minced garlic
- 1 tablespoon minced ginger
- 1/4 cup beef broth
- Salt and pepper to taste
- Cooked rice or noodles (for serving)
Instructions:
- Start by preparing the flank steak: thinly slice the meat against the grain and season it with a pinch of salt and pepper. This will help to enhance the flavor and tenderness of the beef while cooking.
- Turn on the Instant Pot and set it to the 'Sauté' function. Add the vegetable oil and allow it to heat up for a minute. Once hot, add the sliced beef in a single layer and cook for about 2-3 minutes, stirring occasionally, until the beef is browned but not fully cooked. Remove the beef from the pot and set it aside.
- In the same pot, add the minced garlic and ginger, sautéing for about 30 seconds until fragrant. Be careful not to burn them. Then, add the broccoli florets and stir-fry for another 1-2 minutes.
- In a small bowl, mix the soy sauce, oyster sauce, cornstarch, and beef broth together until well combined. Pour this sauce mixture into the pot with the broccoli, and stir to combine. Add the beef back to the pot and mix everything together.
- Close the lid of the Instant Pot and set the valve to 'Sealing.' Select the 'Pressure Cook' or 'Manual' setting and cook on high pressure for 3 minutes. Once the time is up, perform a quick release of the pressure by carefully turning the valve to 'Venting.'
- After the pressure has been released, open the lid and give the stir-fry a gentle stir to combine the flavors. Serve the beef and broccoli hot over cooked rice or noodles, and enjoy your quick and delicious meal.
Extra Tips: For added flavor, consider marinating the beef in a mixture of soy sauce, cornstarch, and a bit of sesame oil for 15-30 minutes before cooking. This can enhance the tenderness and flavor of the meat.
If you prefer a spicier kick, add some red pepper flakes or sliced chili peppers to the stir-fry. Feel free to substitute or add other vegetables like bell peppers or carrots for a more colorful dish. Enjoy your healthy and hearty beef and broccoli stir-fry!
Sweet Potato and Kale Curry
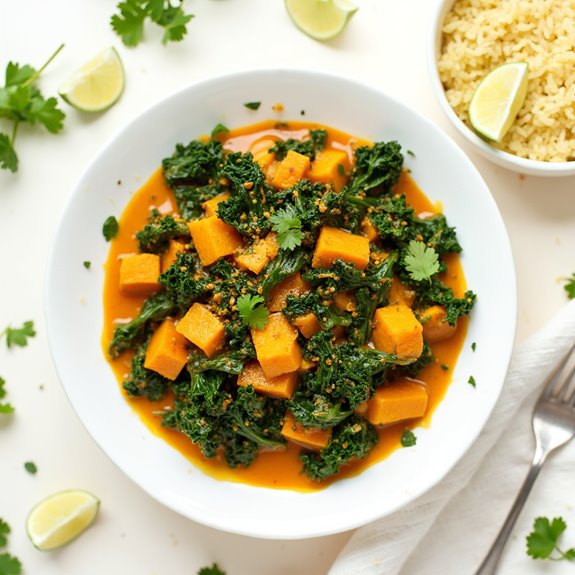
Title: Sweet Potato and Kale Curry
Prep Time: 15 minutes
Cook Time: 25 minutes
Number of Servings: 4
Required Equipment List: Instant Pot, cutting board, knife, measuring cups, measuring spoons, wooden spoon
Cuisine Type: Indian-inspired
This Sweet Potato and Kale Curry is a hearty and nutritious dish that showcases the natural sweetness of sweet potatoes combined with the earthy flavor of kale. The Instant Pot makes this recipe incredibly easy and quick, allowing you to create a delicious curry in under 30 minutes.
With warming spices such as cumin, coriander, and turmeric, this dish not only satisfies your hunger but also provides a comforting meal perfect for any night of the week. The vibrant colors and flavors of this curry make it both visually appealing and delicious.
It's also highly customizable; you can add other vegetables or adjust the spices to your preference. Serve it over rice or with naan for a complete meal that the whole family will love. This recipe isn't just filling; it's also packed with vitamins and minerals, making it a healthy choice for dinner.
Ingredients:
- 2 medium sweet potatoes, peeled and diced
- 1 onion, diced
- 3 cloves garlic, minced
- 1 inch ginger, minced
- 1 can (14 oz) coconut milk
- 4 cups kale, chopped
- 2 tablespoons curry powder
- 1 teaspoon ground cumin
- 1 teaspoon ground coriander
- 1/2 teaspoon turmeric
- 1/2 teaspoon salt
- 1 tablespoon olive oil
- 1 cup vegetable broth
Instructions:
- Turn the Instant Pot to the sauté function. Once hot, add the olive oil and diced onion, cooking until the onion is translucent, about 3-4 minutes. Stir in the minced garlic and ginger, cooking for an additional minute until fragrant.
- Add the diced sweet potatoes to the pot, followed by the curry powder, cumin, coriander, turmeric, and salt. Stir to coat the sweet potatoes in the spices, allowing them to absorb the flavors for about 2 minutes.
- Pour in the vegetable broth and coconut milk, stirring well to combine. Confirm that the sweet potatoes are submerged in the liquid to allow for even cooking.
- Close the lid of the Instant Pot, ensuring the vent is sealed. Set it to manual high pressure for 10 minutes. Once the cooking time is complete, carefully perform a quick release of the pressure.
- After releasing the pressure, open the lid and stir in the chopped kale. The residual heat will wilt the kale nicely. Let it sit for a few minutes to allow the flavors to meld before serving.
- Serve the curry warm over cooked rice or with naan. Enjoy the vibrant flavors and comforting textures of this healthy dish.
Extra Tips: For added depth of flavor, consider adding a splash of lime juice just before serving to brighten the curry. You can also adjust the spice levels by adding diced chili peppers or red pepper flakes if you like it spicier.
Additionally, feel free to include other vegetables such as carrots or bell peppers for extra color and nutrition. This curry can be stored in the refrigerator for up to 3 days, making it great for meal prep!
Coconut Curry Shrimp

Title: Coconut Curry Shrimp
Prep Time: 15 minutes
Cook Time: 10 minutes
Number of Servings: 4
Required Equipment List: Instant Pot, measuring cups, measuring spoons, spatula
Cuisine Type: Thai
Coconut Curry Shrimp is a quick and flavorful dish that brings the taste of Thailand right to your kitchen. This recipe combines succulent shrimp with a rich coconut milk base infused with fragrant spices, creating a comforting and satisfying meal.
The Instant Pot helps to lock in all the flavors while considerably reducing cooking time, making it perfect for busy weeknights or when you want to impress guests with minimal effort. The versatility of this dish allows you to customize it based on your preference for spice levels and vegetables.
Serve it over rice or noodles for a complete meal, and don't forget to garnish with fresh herbs for that extra pop of flavor. With its vibrant colors and delightful aroma, Coconut Curry Shrimp is sure to become a favorite in your household.
Ingredients:
- 1 pound shrimp, peeled and deveined
- 1 can (13.5 oz) coconut milk
- 2 tablespoons red curry paste
- 1 cup vegetable broth
- 1 bell pepper, sliced
- 1 cup snap peas
- 2 cloves garlic, minced
- 1 tablespoon ginger, minced
- 1 tablespoon fish sauce
- 1 tablespoon lime juice
- Fresh cilantro, for garnish
- Cooked rice or noodles, for serving
Instructions:
- Turn on the Instant Pot and select the 'Sauté' function. Once hot, add minced garlic and ginger, and sauté for about 1 minute until fragrant. Be careful not to burn them.
- Add the red curry paste to the pot and stir it into the garlic and ginger mixture, cooking for another minute to release its flavors.
- Pour in the coconut milk and vegetable broth, stirring well to combine with the curry paste. Make sure to scrape any bits off the bottom of the pot to prevent burning.
- Add the sliced bell pepper and snap peas to the pot, along with the shrimp. Stir to coat everything in the sauce, then close the lid of the Instant Pot and set it to 'Manual' or 'Pressure Cook' for 2 minutes.
- Once the cooking time is complete, perform a quick release of the pressure. Carefully open the lid, and stir in the fish sauce and lime juice to elevate the flavor.
- Serve the Coconut Curry Shrimp over cooked rice or noodles, garnished with fresh cilantro for a burst of freshness.
Extra Tips: For a spicier kick, add more red curry paste or some sliced jalapeños during cooking. You can also incorporate other vegetables like zucchini or carrots based on what you have on hand.
If you're not a fan of shrimp, this recipe works equally well with chicken or tofu. Adjust the cooking time accordingly if you choose to use a different protein. Enjoy your flavorful and aromatic dish!
Stuffed Bell Peppers

Title: Healthy Instant Pot Stuffed Bell Peppers
Prep Time: 15 minutes
Cook Time: 20 minutes
Number of Servings: 4
Required Equipment List: Instant Pot, cutting board, knife, measuring cups, mixing bowl
Cuisine Type: American-Mediterranean
Healthy Instant Pot Stuffed Bell Peppers are a delicious and nutritious option for a quick weeknight dinner. These vibrant bell peppers are filled with a savory mixture of lean ground turkey, quinoa, and fresh vegetables, all seasoned to perfection.
Cooking them in the Instant Pot not only saves time but also locks in moisture, ensuring that each bite is flavorful and tender. This dish is perfect for meal prep, as it reheats beautifully and can be customized based on seasonal ingredients or dietary preferences.
The combination of colorful bell peppers and hearty filling makes for a visually appealing and satisfying meal. Packed with protein, fiber, and essential vitamins, these stuffed peppers make a wholesome dinner option that the whole family will love.
Whether served with a side salad or enjoyed on their own, these Instant Pot stuffed bell peppers are sure to become a favorite at your dinner table.
Ingredients:
- 4 large bell peppers (any color)
- 1 pound lean ground turkey or beef
- 1 cup cooked quinoa
- 1 small onion, diced
- 2 cloves garlic, minced
- 1 can (14.5 oz) diced tomatoes
- 1 teaspoon Italian seasoning
- 1/2 teaspoon salt
- 1/4 teaspoon black pepper
- 1 cup shredded cheese (optional, for topping)
- 1 cup chicken or vegetable broth
Instructions:
- Start by preparing the bell peppers. Cut the tops off the peppers and remove the seeds and membranes. Set the cleaned peppers aside. You can also chop the tops and add them to the filling for extra flavor.
- In a mixing bowl, combine the ground turkey, cooked quinoa, diced onion, minced garlic, diced tomatoes (with their juices), Italian seasoning, salt, and pepper. Mix everything until well combined, ensuring the ingredients are evenly distributed.
- Carefully stuff each bell pepper with the filling mixture, packing it in gently but firmly to avoid overflow. Place the stuffed peppers upright in the Instant Pot.
- Pour the chicken or vegetable broth into the Instant Pot, being careful not to pour it directly into the stuffed peppers. This will create the steam needed for cooking.
- Close the lid of the Instant Pot, ensuring the valve is set to sealing. Select the manual or pressure cook setting and set the timer for 10 minutes. Once the cooking time is complete, allow for a natural pressure release for about 5 minutes before turning the valve to quick release.
- Remove the stuffed peppers from the Instant Pot and place them in a serving dish. If desired, sprinkle shredded cheese on top and let it melt for a couple of minutes before serving.
Extra Tips: For a spicier kick, consider adding diced jalapeños or a dash of hot sauce to the filling. You can also swap the quinoa for brown rice or a grain of your choice to alter the texture.
These stuffed peppers can be made ahead of time and frozen, making them a convenient option for busy weeknights. Just reheat them in the oven or microwave when ready to serve. Enjoy your flavorful and healthy meal!
Chicken Tikka Masala

Title: Chicken Tikka Masala
Prep Time: 15 minutes
Cook Time: 20 minutes
Number of Servings: 4
Required Equipment List: Instant Pot, measuring cups, measuring spoons, mixing bowl, spoon
Cuisine Type: Indian
Chicken Tikka Masala is a beloved dish that brings the rich flavors of Indian cuisine right into your kitchen with the convenience of an Instant Pot. This recipe features tender chunks of chicken marinated in a blend of spices and yogurt, which are then cooked in a creamy tomato sauce.
The combination of spices creates a fragrant and flavorful dish that's perfect for serving over rice or with warm naan bread. The Instant Pot makes this recipe not only quick but also incredibly simple, allowing you to achieve authentic flavors without the need for extensive cooking techniques.
The creamy sauce, enriched with coconut milk and spices, perfectly complements the marinated chicken, making it a favorite for both family dinners and gatherings. This dish is sure to impress guests and provide a comforting meal for any occasion.
Ingredients:
- 1 pound chicken breast, cut into bite-sized pieces
- 1 cup plain yogurt
- 2 tablespoons lemon juice
- 2 tablespoons garam masala
- 1 teaspoon cumin
- 1 teaspoon coriander
- 1 teaspoon turmeric
- 1 teaspoon paprika
- 1 teaspoon salt
- 1 tablespoon olive oil
- 1 onion, finely chopped
- 3 cloves garlic, minced
- 1 inch ginger, grated
- 1 can (15 oz) crushed tomatoes
- 1 cup coconut milk
- Fresh cilantro for garnish
Instructions:
- In a mixing bowl, combine the yogurt, lemon juice, garam masala, cumin, coriander, turmeric, paprika, and salt. Add the chicken pieces to the marinade and mix until well coated. Allow it to marinate for at least 15 minutes while you prepare the other ingredients.
- Set your Instant Pot to the sauté function and heat the olive oil. Add the chopped onion and sauté for about 3-4 minutes until it becomes translucent. Then, add the minced garlic and grated ginger, cooking for another minute until fragrant.
- Add the marinated chicken to the pot and sear it for about 5 minutes, stirring occasionally. This step helps to develop the flavors and gives the chicken a bit of color.
- Pour in the crushed tomatoes and coconut milk, stirring to combine everything. Confirm that the chicken is submerged in the sauce for even cooking.
- Close the lid of the Instant Pot, set the valve to sealing, and cook on high pressure for 10 minutes. Once the cooking time is complete, allow for a natural pressure release for 5 minutes, then switch to quick release to let out any remaining pressure.
- Carefully open the lid and stir the chicken tikka masala. Adjust seasoning as needed, and serve warm, garnished with fresh cilantro.
Extra Tips: For an extra layer of flavor, consider adding a tablespoon of sugar to balance the acidity of the tomatoes. You can also customize the spiciness by adding chopped green chilies or a pinch of cayenne pepper.
If you prefer a thicker sauce, simply switch the Instant Pot to sauté mode after cooking and let it simmer for a few minutes until it reaches your desired consistency. Enjoy this dish with basmati rice or naan for a complete meal!
Teriyaki Chicken Bowls
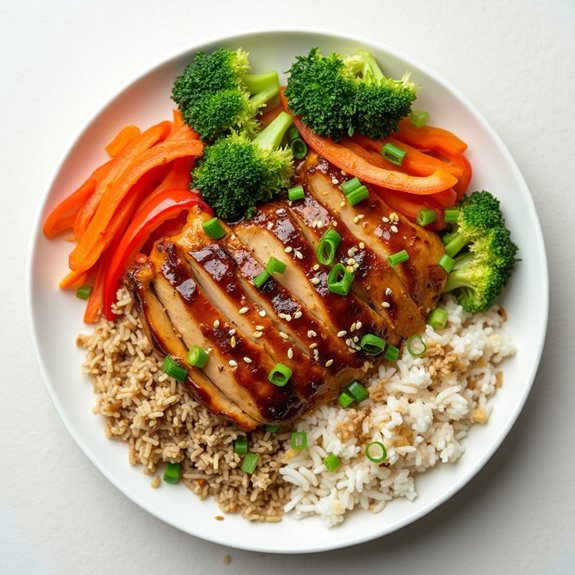
Title: Teriyaki Chicken Bowls
Prep Time: 10 minutes
Cook Time: 15 minutes
Number of Servings: 4
Required Equipment List: Instant Pot, measuring cups, measuring spoons, cutting board, knife
Cuisine Type: Asian
Teriyaki Chicken Bowls are a quick and nutritious meal that brings the flavors of Japan right into your kitchen. This recipe is designed for the Instant Pot, making it incredibly easy to prepare delicious chicken that's tender and infused with a savory teriyaki sauce.
Served over rice with fresh vegetables, these bowls aren't only satisfying but also visually appealing, making them perfect for family dinners or meal prepping for the week ahead.
This dish showcases the perfect balance of sweet and savory, with chicken thighs or breasts marinated in a homemade or store-bought teriyaki sauce. The Instant Pot guarantees that the chicken is cooked quickly while retaining its moisture, resulting in a meal that's both healthy and full of flavor.
Add your favorite toppings, such as sesame seeds and green onions, to create a personalized touch that will elevate your teriyaki chicken bowls.
Ingredients:
- 1 pound boneless, skinless chicken thighs or breasts
- 1 cup teriyaki sauce
- 1 cup rice (white or brown)
- 1 1/4 cups water
- 2 cups mixed vegetables (broccoli, bell peppers, carrots)
- 1 tablespoon sesame oil
- Sesame seeds (for garnish)
- Sliced green onions (for garnish)
Instructions:
- Start by adding the rice and water to the Instant Pot. Close the lid and set the valve to sealing. Cook on high pressure for 10 minutes. Once done, allow for a natural release for about 5 minutes before switching the valve to venting to release any remaining pressure.
- While the rice is cooking, season the chicken with salt and pepper. Turn the Instant Pot to sauté mode and add the sesame oil. Once hot, add the chicken and sear until browned on both sides, about 3-4 minutes per side.
- Pour the teriyaki sauce over the chicken, guaranteeing that it's evenly coated. Close the lid of the Instant Pot and set the valve to sealing again. Cook on high pressure for 8 minutes, then perform a quick release.
- Once the pressure has been released, remove the chicken and slice it into bite-sized pieces. If desired, you can thicken the sauce by turning the Instant Pot to sauté mode again and letting it simmer for a few minutes until it reduces.
- Fluff the cooked rice with a fork and divide it among four bowls. Top each bowl with the sliced teriyaki chicken and add the mixed vegetables. Drizzle additional teriyaki sauce over the top and garnish with sesame seeds and sliced green onions.
Extra Tips: To save time, consider using pre-cooked rice or frozen mixed vegetables that can be added directly to the bowls after the chicken is cooked.
If you prefer a spicier kick, add some sriracha or red pepper flakes to the teriyaki sauce. You can also customize the bowls with other toppings like avocado slices, seaweed, or pickled ginger for an extra layer of flavor.
Enjoy your delicious and healthy teriyaki chicken bowls!
Spinach and Feta Stuffed Chicken

Title: Spinach and Feta Stuffed Chicken
Prep Time: 15 minutes
Cook Time: 25 minutes
Number of Servings: 4
Required Equipment List: Instant Pot, measuring cups, mixing bowl, spoon, knife, cutting board
Cuisine Type: Mediterranean
Spinach and Feta Stuffed Chicken is a deliciously healthy dish that brings together the earthy flavors of spinach with the creamy tang of feta cheese. This recipe is perfect for a satisfying weeknight dinner and is cooked quickly in the Instant Pot, guaranteeing that the chicken remains juicy and tender.
The combination of fresh spinach, crumbled feta, and aromatic herbs makes this dish a nutritious choice that's bursting with flavor. Not only is this recipe simple to prepare, but it also allows for customization. You can easily add other ingredients such as sun-dried tomatoes or olives for added flavor.
The stuffed chicken breasts cook under pressure, sealing in moisture and infusing the meat with the savory filling, making every bite a delight. Serve with a light salad or your favorite grain for a complete meal that your family will love.
Ingredients:
- 4 boneless, skinless chicken breasts
- 2 cups fresh spinach, chopped
- 1 cup feta cheese, crumbled
- 1/2 cup cream cheese, softened
- 1 teaspoon garlic powder
- 1 teaspoon dried oregano
- Salt and pepper to taste
- 1 tablespoon olive oil
- 1/2 cup chicken broth
Instructions:
- In a mixing bowl, combine the chopped spinach, crumbled feta cheese, cream cheese, garlic powder, dried oregano, salt, and pepper. Mix well until the ingredients are thoroughly combined and set aside.
- Use a sharp knife to create a pocket in each chicken breast by slicing them horizontally, being careful not to cut all the way through. Stuff each pocket with the spinach and feta mixture, securing with toothpicks if necessary.
- Set your Instant Pot to the sauté setting and heat the olive oil. Once hot, add the stuffed chicken breasts and sear for about 2-3 minutes on each side until golden brown. This will add flavor and texture to the chicken.
- After searing, pour the chicken broth into the Instant Pot, making sure to scrape up any browned bits from the bottom of the pot. This adds more flavor to the dish and prevents the burn notice.
- Close the lid of the Instant Pot and set it to manual high pressure for 10 minutes. Once the cooking time is complete, allow for a natural release for 5 minutes before switching to a quick release to let out any remaining pressure.
- Carefully remove the chicken from the Instant Pot and let it rest for a few minutes before slicing. Remove any toothpicks, and serve with your choice of sides.
Extra Tips: To enhance the flavor profile, consider adding chopped fresh herbs like basil or parsley to the filling. Additionally, if you prefer a bit of heat, a pinch of red pepper flakes can be mixed into the stuffing.
Always ascertain that the chicken is cooked to an internal temperature of 165°F for safe consumption. Leftovers can be easily reheated and make for a great addition to salads or wraps the next day. Enjoy your delicious Spinach and Feta Stuffed Chicken!
Mexican Quinoa Bowl
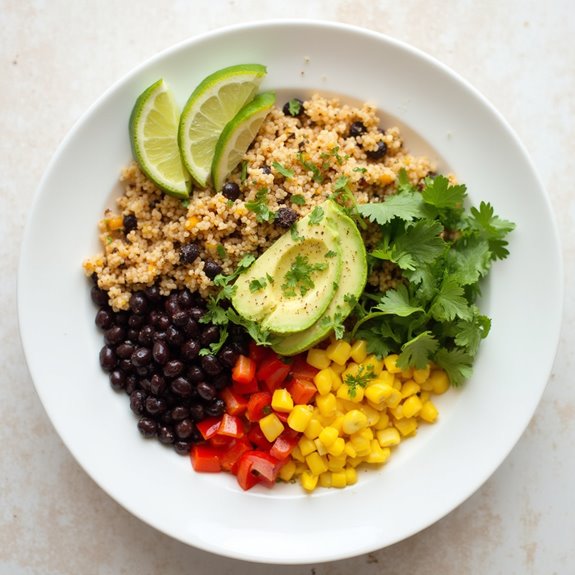
Title: Mexican Quinoa Bowl
Prep Time: 10 minutes
Cook Time: 20 minutes
Number of Servings: 4
Required Equipment List: Instant Pot, measuring cups, cutting board, knife, serving bowls
Cuisine Type: Mexican
The Mexican Quinoa Bowl is a vibrant and nutritious dish that's packed with flavor and protein, making it a perfect option for a quick weeknight dinner or a meal prep favorite. This recipe combines fluffy quinoa with black beans, corn, and colorful bell peppers, all seasoned with zesty spices that bring a taste of Mexico right to your kitchen.
Topped with fresh avocado, cilantro, and a squeeze of lime, this bowl isn't only filling but also invigoratingly healthy. Using the Instant Pot makes this recipe incredibly easy and efficient, allowing you to cook the quinoa and mix all the ingredients in one pot. The result is a delicious, well-balanced meal that can be enjoyed on its own or served alongside your favorite protein.
This Mexican Quinoa Bowl is a versatile dish that's perfect for customizing based on your preferences and can easily be made vegan-friendly.
Ingredients:
- 1 cup quinoa, rinsed
- 1 can (15 oz) black beans, drained and rinsed
- 1 cup corn (fresh, frozen, or canned)
- 1 red bell pepper, diced
- 1 green bell pepper, diced
- 1 teaspoon chili powder
- 1 teaspoon cumin
- 1/2 teaspoon garlic powder
- 2 cups vegetable broth
- Salt and pepper to taste
- 1 avocado, sliced
- Fresh cilantro, chopped (for garnish)
- Lime wedges (for serving)
Instructions:
- Start by rinsing the quinoa under cold water using a fine-mesh strainer. This step helps remove the natural coating called saponin, which can impart a bitter taste. Set aside.
- Turn on the Instant Pot and select the "Sauté" function. Once hot, add the diced bell peppers and sauté for about 3-4 minutes until they begin to soften. This will enhance their flavor and add depth to the dish.
- Add the rinsed quinoa, black beans, corn, chili powder, cumin, garlic powder, vegetable broth, salt, and pepper into the Instant Pot. Stir everything together to combine all the ingredients evenly.
- Close the lid of the Instant Pot, ensuring the valve is in the sealing position. Select the "Manual" or "Pressure Cook" setting and cook on high pressure for 1 minute. Once the cooking time is up, allow for a natural pressure release for about 10 minutes before performing a quick release for any remaining pressure.
- Carefully open the lid and fluff the quinoa mixture with a fork to combine the ingredients. Taste and adjust seasoning if needed, then serve in bowls topped with sliced avocado, chopped cilantro, and a squeeze of lime juice for an added burst of flavor.
Extra Tips: To elevate the flavor even further, consider adding diced tomatoes or jalapeños for a bit of heat. You can also customize the toppings based on your preference, such as adding cheese, sour cream, or salsa.
This dish is great for meal prep and can be stored in the refrigerator for up to five days, making it a convenient option for lunch or dinner throughout the week. Enjoy your healthy and delicious Mexican Quinoa Bowl!
Instant Pot Ratatouille
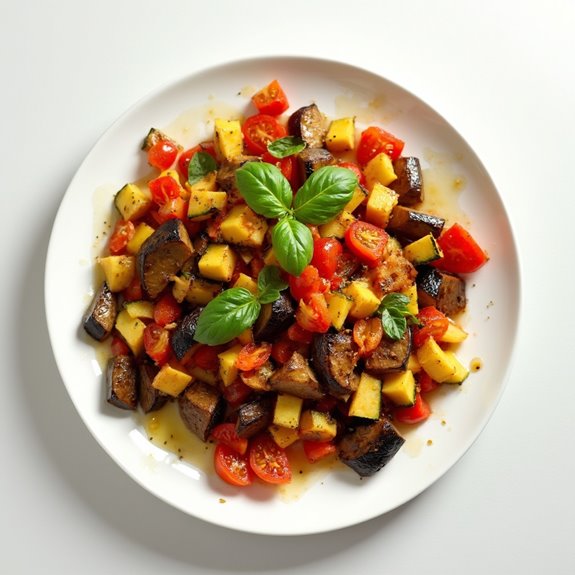
Title: Instant Pot Ratatouille
Prep Time: 15 minutes
Cook Time: 20 minutes
Number of Servings: 6
Required Equipment List: Instant Pot, cutting board, knife, measuring cups, measuring spoons
Cuisine Type: French
Instant Pot Ratatouille is a vibrant, vegetable-packed dish that celebrates the flavors of summer produce. This classic French recipe combines eggplant, zucchini, bell peppers, and tomatoes with aromatic herbs for a hearty and nutritious meal that can be served on its own or as a side dish.
Using the Instant Pot not only speeds up the cooking process but also helps to meld the flavors beautifully, creating a comforting dish that's rich in taste and low in effort. This ratatouille is perfect for meal prepping or serving as a family dinner, making it a versatile addition to your recipe collection.
The combination of fresh vegetables and herbs makes this dish not only colorful but also packed with nutrients. Serve it over rice, pasta, or even enjoy it with crusty bread for a complete and satisfying meal that everyone will love.
Ingredients:
- 1 medium eggplant, diced
- 2 medium zucchini, diced
- 1 bell pepper (any color), diced
- 1 medium onion, chopped
- 2 cloves garlic, minced
- 1 can (14.5 ounces) diced tomatoes
- 1 tablespoon olive oil
- 1 teaspoon dried thyme
- 1 teaspoon dried basil
- Salt and pepper to taste
- Fresh basil leaves (for garnish, optional)
Instructions:
- Start by preparing all your vegetables. Dice the eggplant, zucchini, and bell pepper, chop the onion, and mince the garlic. This will help streamline the cooking process and guarantee everything is ready to go when you start cooking in the Instant Pot.
- Set the Instant Pot to the sauté function and add the olive oil. Once heated, add the chopped onion and minced garlic. Sauté for about 2-3 minutes until the onion becomes translucent and fragrant.
- Add the diced eggplant, zucchini, and bell pepper to the pot. Stir well to combine with the onions and garlic, and sauté for another 5 minutes to slightly soften the vegetables.
- Pour in the canned diced tomatoes (with their juices) and add the dried thyme, dried basil, salt, and pepper. Stir everything together to guarantee the seasonings are evenly distributed throughout the vegetables.
- Cancel the sauté function, close the lid of the Instant Pot, and set it to cook on high pressure for 8 minutes. Make sure the steam release valve is set to sealing.
- After the cooking time is up, carefully perform a quick release of the pressure by turning the steam release valve to venting. Once all steam has escaped, open the lid and give the ratatouille a gentle stir.
- Taste and adjust the seasonings if needed. Serve the ratatouille warm, garnished with fresh basil leaves, and enjoy it as a main dish or a side.
Extra Tips: For an added depth of flavor, consider roasting the vegetables before adding them to the Instant Pot. You can also add other vegetables like mushrooms or carrots based on your preference.
This ratatouille can be stored in the refrigerator for up to 5 days and tastes even better the next day as the flavors continue to develop. Enjoy with a sprinkle of grated Parmesan cheese for an extra touch!
BBQ Pulled Pork Lettuce Wraps
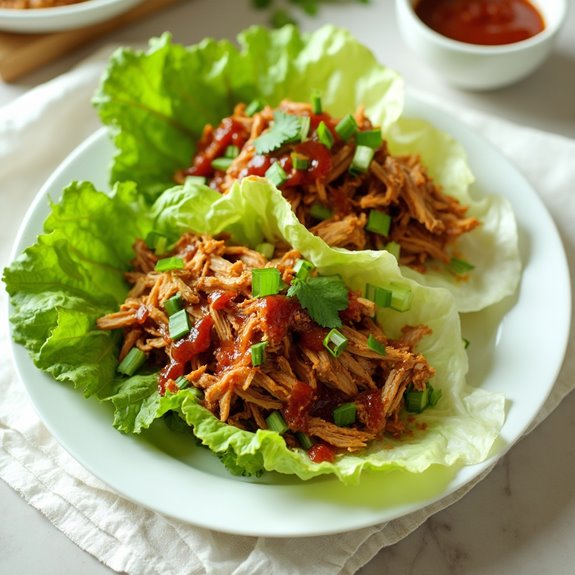
Title: BBQ Pulled Pork Lettuce Wraps
Prep Time: 15 minutes
Cook Time: 60 minutes
Number of Servings: 4
Required Equipment List: Instant Pot, mixing bowl, serving platter
Cuisine Type: American
BBQ Pulled Pork Lettuce Wraps are a delicious and healthy alternative to traditional pulled pork sandwiches. This recipe utilizes an Instant Pot to quickly cook the pork to tender perfection, while the flavorful BBQ sauce adds a tangy sweetness.
Served in crisp lettuce leaves, these wraps aren't only low-carb but also packed with flavor, making them a great option for anyone looking to enjoy a hearty meal without the extra calories of bread.
These wraps are versatile and can be customized with your favorite toppings, such as sliced jalapeños, shredded carrots, or fresh cilantro. The combination of warm, savory pulled pork and crunchy lettuce creates a satisfying texture contrast that will leave your taste buds wanting more.
Perfect for a family dinner or a casual gathering, BBQ Pulled Pork Lettuce Wraps are sure to be a hit!
Ingredients:
- 2 pounds pork shoulder
- 1 cup BBQ sauce
- 1 cup chicken broth
- 1 tablespoon onion powder
- 1 tablespoon garlic powder
- 1 teaspoon smoked paprika
- Salt and pepper to taste
- 8 large romaine or butter lettuce leaves
- Sliced green onions (for garnish)
- Fresh cilantro (for garnish, optional)
Instructions:
- Season the pork shoulder generously with salt, pepper, onion powder, garlic powder, and smoked paprika. Confirm that the spices are evenly distributed for maximum flavor.
- Place the seasoned pork shoulder in the Instant Pot and pour in the chicken broth. Secure the lid and set the valve to the sealing position. Select the 'Manual' or 'Pressure Cook' setting and adjust the cooking time to 60 minutes.
- Once the cooking time is complete, allow for a natural release for about 15 minutes before carefully switching the valve to the venting position to release any remaining pressure. Remove the lid and transfer the pork to a cutting board.
- Using two forks, shred the pork into bite-sized pieces, discarding any excess fat. Return the shredded pork to the Instant Pot and mix it with the BBQ sauce until well combined. Let it simmer on the 'Keep Warm' setting for a few minutes to meld the flavors.
- To serve, spoon a generous amount of the BBQ pulled pork into each lettuce leaf. Garnish with sliced green onions and fresh cilantro if desired. Enjoy your delicious and healthy wraps!
Extra Tips:
For a little extra kick, consider adding some diced jalapeños or a drizzle of hot sauce to your pulled pork before serving.
You can also prepare the pulled pork ahead of time and store it in the refrigerator; just reheat it when you're ready to serve. These wraps are perfect for meal prep since they can be easily assembled and enjoyed as a quick lunch or dinner throughout the week.
Thai Peanut Chicken

Title: Thai Peanut Chicken
Prep Time: 10 minutes
Cook Time: 15 minutes
Number of Servings: 4
Required Equipment List: Instant Pot, measuring cups, measuring spoons, wooden spoon, serving plates
Cuisine Type: Thai
Thai Peanut Chicken is a flavorful and satisfying dish that combines tender chicken with a rich, creamy peanut sauce. This recipe is perfect for busy weeknights as it comes together quickly in an Instant Pot, allowing you to enjoy a delicious homemade meal without spending hours in the kitchen.
The combination of savory, sweet, and slightly spicy flavors creates a dish that's sure to impress your family and friends. The creamy peanut sauce is made with simple ingredients like peanut butter, soy sauce, and coconut milk, which blend together seamlessly to create a luscious coating for the chicken.
This dish can be served over rice or noodles, making it a versatile option that caters to various dietary preferences. Garnished with fresh cilantro and chopped peanuts, Thai Peanut Chicken isn't only scrumptious but also visually appealing, making it the perfect centerpiece for your dinner table.
Ingredients:
- 1 pound boneless, skinless chicken thighs
- 1/2 cup creamy peanut butter
- 1/4 cup soy sauce
- 1 cup coconut milk
- 2 tablespoons honey
- 2 cloves garlic, minced
- 1 tablespoon fresh ginger, minced
- 1 tablespoon lime juice
- 1/4 teaspoon red pepper flakes (optional)
- Chopped cilantro and peanuts for garnish
Instructions:
- Begin by cutting the chicken thighs into bite-sized pieces and seasoning them with salt and pepper. This will enhance the flavor of the chicken and guarantee that it's well-seasoned throughout the cooking process.
- In a mixing bowl, combine the peanut butter, soy sauce, coconut milk, honey, minced garlic, minced ginger, lime juice, and red pepper flakes (if using). Stir until all ingredients are well blended, creating a thick and creamy sauce.
- Set the Instant Pot to the sauté function and add a small drizzle of oil. Once hot, add the seasoned chicken pieces and sauté for about 3-4 minutes until they're lightly browned on the outside. This step adds depth of flavor to the chicken.
- Pour the peanut sauce over the browned chicken in the Instant Pot, ensuring that all pieces are coated. Close the lid and set the valve to the sealing position. Select the manual function and set the timer for 8 minutes.
- Once the cooking time is complete, allow for a natural release for about 5 minutes, then carefully switch the valve to venting to release any remaining steam. Open the lid and give the chicken a good stir to coat it in the sauce.
- Serve the Thai Peanut Chicken over cooked rice or noodles and garnish with chopped cilantro and peanuts for an added crunch and burst of flavor.
Extra Tips: For a vegetarian option, you can substitute the chicken with firm tofu or chickpeas, adjusting the cooking time accordingly. Feel free to customize the level of spice by adding more or less red pepper flakes based on your preference.
This dish pairs wonderfully with steamed broccoli or snap peas for added nutrition and color. Enjoy your flavorful Thai Peanut Chicken!
Garlic Herb Cauliflower

Title: Garlic Herb Cauliflower
Prep Time: 10 minutes
Cook Time: 10 minutes
Number of Servings: 4
Required Equipment List: Instant Pot, measuring spoons, mixing bowl, serving dish
Cuisine Type: American
Garlic Herb Cauliflower is a simple yet flavorful side dish that can elevate any meal. This recipe utilizes the Instant Pot to quickly steam the cauliflower while infusing it with the delicious flavors of garlic and fresh herbs. Perfect for busy weeknights or entertaining guests, this dish isn't only nutritious but also incredibly satisfying.
The tender cauliflower is enhanced by a medley of herbs, making it a fantastic complement to grilled meats, fish, or even as a stand-alone vegetarian option. The beauty of this Garlic Herb Cauliflower lies in its versatility. You can easily swap out the herbs based on your preferences or what you have on hand.
This dish allows you to embrace the natural flavors of the cauliflower while adding a touch of sophistication. Whether you're looking for a healthy side or a creative way to incorporate more vegetables into your diet, this recipe is sure to please both the palate and the eye.
Ingredients:
- 1 head of cauliflower, cut into florets
- 2 tablespoons olive oil
- 4 cloves garlic, minced
- 1 teaspoon dried thyme
- 1 teaspoon dried oregano
- Salt and pepper to taste
- 1/4 cup fresh parsley, chopped (for garnish)
Instructions:
- Begin by preparing the cauliflower by cutting it into bite-sized florets. Rinse the florets under cold water to clean them and then set them aside to drain.
- In a mixing bowl, combine the olive oil, minced garlic, dried thyme, dried oregano, salt, and pepper. Stir the mixture well to create a flavorful herb blend that will coat the cauliflower.
- Add the cauliflower florets to the bowl with the herb mixture. Toss gently to guarantee that the cauliflower is evenly coated with the garlic and herbs.
- Pour 1 cup of water into the Instant Pot and place the steamer basket inside. Transfer the coated cauliflower florets into the steamer basket. Close the lid and set the valve to sealing.
- Set the Instant Pot to manual high pressure for 2 minutes. Once the cooking time is complete, quickly release the pressure by turning the valve to venting.
- Carefully open the lid and remove the steamer basket with the cauliflower. Transfer the cooked cauliflower to a serving dish and garnish with freshly chopped parsley before serving.
Extra Tips: For a bit of extra flavor, consider adding a squeeze of fresh lemon juice over the finished cauliflower before serving. If you prefer a little heat, you can sprinkle some red pepper flakes into the herb mixture.
This dish can also be made ahead of time and reheated in the oven for a few minutes, maintaining its delicious flavors. Enjoy this delightful side dish as part of your next meal!
Eggplant Parmesan
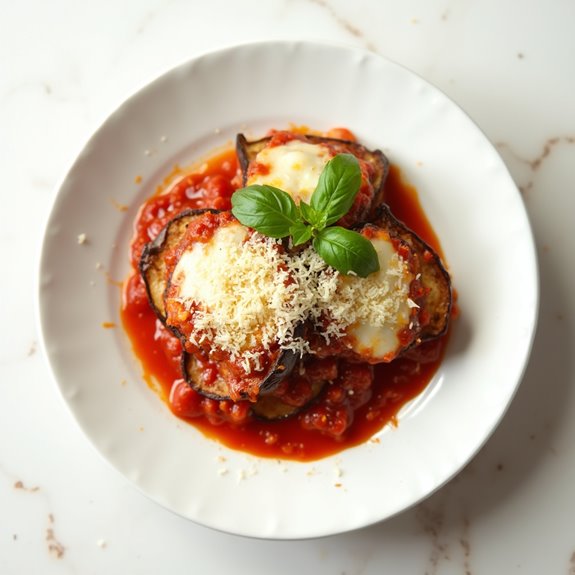
Title: Eggplant Parmesan
Prep Time: 20 minutes
Cook Time: 25 minutes
Number of Servings: 4
Required Equipment List: Instant Pot, cutting board, knife, mixing bowl, spatula, baking dish
Cuisine Type: Italian-American
Eggplant Parmesan is a classic Italian dish that combines tender layers of eggplant, rich marinara sauce, and gooey cheese into a comforting meal. Cooking it in the Instant Pot not only speeds up the process but also locks in the flavors, resulting in a dish that's just as delicious as its traditionally baked counterpart.
This recipe is perfect for a weeknight dinner or a cozy gathering, providing a hearty vegetarian option that everyone will enjoy. This recipe utilizes the Instant Pot to sauté the eggplant, allowing it to become beautifully tender while still maintaining its shape. The layering of the eggplant with marinara sauce and cheeses creates a harmonious blend of flavors and textures.
Serve it hot, garnished with fresh basil or parsley, alongside a simple salad or crusty bread for a satisfying meal.
Ingredients:
- 1 large eggplant, sliced into 1/2-inch rounds
- 1 teaspoon salt
- 1 tablespoon olive oil
- 2 cups marinara sauce
- 1 cup shredded mozzarella cheese
- 1/2 cup grated Parmesan cheese
- 1 teaspoon dried oregano
- Fresh basil leaves for garnish (optional)
Instructions:
- Begin by sprinkling the eggplant slices with salt and letting them sit for about 10 minutes. This process helps draw out excess moisture and bitterness from the eggplant. After 10 minutes, rinse the slices under cold water and pat them dry with paper towels.
- Set your Instant Pot to the sauté mode and add olive oil. Once the oil is hot, add the eggplant slices in batches, cooking until they're golden brown on both sides, about 3-4 minutes per side. Remove the cooked eggplant and set aside.
- Once all the eggplant is sautéed, pour a small amount of marinara sauce into the bottom of the Instant Pot. Layer half of the eggplant slices over the sauce, followed by half of the remaining marinara sauce, half of the mozzarella cheese, and half of the Parmesan cheese.
- Repeat the layers with the remaining ingredients.
- Close the Instant Pot lid, ensuring the vent is set to sealing. Select the manual or pressure cook function and set the timer for 10 minutes. Once the cooking cycle is complete, allow for a natural pressure release for 5 minutes before carefully switching the vent to release any remaining pressure.
- Carefully open the lid and check that the cheese has melted and the eggplant is tender. If desired, you can use the sauté function for a minute or two to get the cheese bubbly. Serve the Eggplant Parmesan warm, garnished with fresh basil leaves.
Extra Tips: For added flavor, consider adding some chopped fresh garlic or Italian seasoning to the marinara sauce before layering it with the eggplant. You can also swap out the mozzarella for other cheeses like provolone or fontina for a different twist.
If you prefer a crispier top, you can place the Eggplant Parmesan under the broiler for a couple of minutes after cooking in the Instant Pot. Enjoy your delicious and hearty meal!
Zucchini Noodle Primavera
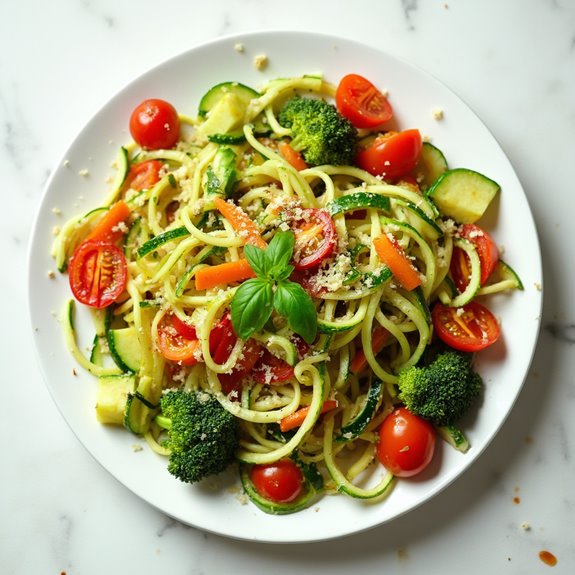
Title: Zucchini Noodle Primavera
Prep Time: 15 minutes
Cook Time: 10 minutes
Number of Servings: 4
Required Equipment List: Instant Pot, cutting board, knife, mixing bowl, tongs
Cuisine Type: Italian-American
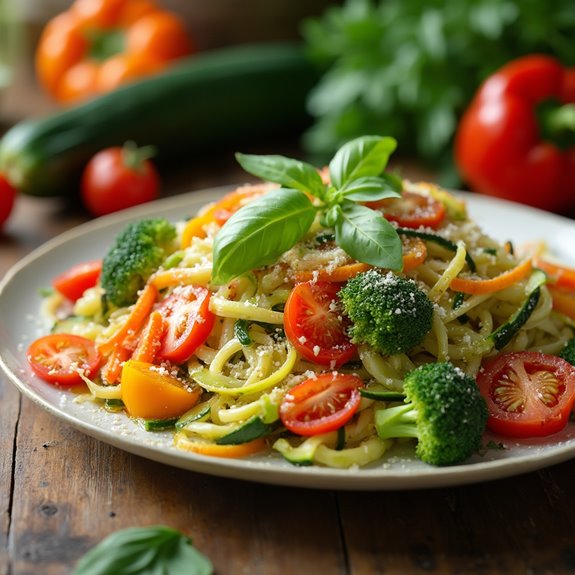
Zucchini Noodle Primavera is a vibrant and healthy dish that showcases the best of fresh vegetables and the unique texture of zucchini noodles. This dish is perfect for those looking to enjoy a light yet satisfying meal without compromising on flavor.
The Instant Pot makes it easy to combine all the ingredients quickly while preserving their freshness and nutrients, making it a fantastic option for busy weeknights or a wholesome family dinner.
The beauty of Zucchini Noodle Primavera lies in its versatility. You can customize the vegetables based on what you have on hand or what's in season, and the quick cooking time guarantees that each bite is bursting with flavor. Tossed in a light garlic and olive oil sauce, this dish isn't just a meal but a celebration of summer produce, making it a delightful way to incorporate more veggies into your diet.
Ingredients:
- 4 medium zucchini, spiralized
- 1 bell pepper, sliced
- 1 cup cherry tomatoes, halved
- 1 cup broccoli florets
- 1 carrot, julienned
- 3 cloves garlic, minced
- 2 tablespoons olive oil
- Salt and pepper to taste
- Fresh basil, for garnish
- Grated Parmesan cheese (optional)
Instructions:
- Begin by preparing all your vegetables. Spiralize the zucchini into noodles and place them in a mixing bowl. Slice the bell pepper, halve the cherry tomatoes, julienne the carrot, and cut the broccoli into small florets.
- Set your Instant Pot to the sauté function. Add the olive oil and minced garlic, sautéing for about 1 minute until fragrant, being careful not to let it burn.
- Add the sliced bell pepper, broccoli florets, and julienned carrot to the pot. Sauté the vegetables for about 3-4 minutes, stirring occasionally, until they begin to soften.
- Next, stir in the cherry tomatoes and season the mixture with salt and pepper. Then, add the spiralized zucchini noodles and give everything a gentle toss to combine.
- Secure the lid on the Instant Pot and switch to the manual setting. Cook on high pressure for 1 minute. Once the cooking time is complete, perform a quick release of the pressure.
- Carefully remove the lid and give the primavera a good toss to mix everything together. Serve immediately, garnished with fresh basil and grated Parmesan cheese, if desired.
Extra Tips: To avoid soggy zucchini noodles, make sure not to overcook them in the Instant Pot. The quick cooking time will keep them tender yet firm.
You can also add protein to the dish, such as grilled chicken or shrimp, to make it a complete meal. Feel free to experiment with different vegetables or add some crushed red pepper for a spicy kick. Enjoy your healthy and delicious Zucchini Noodle Primavera!
Conclusion
So, there you have it—21 delicious and healthy Instant Pot dinner recipes that'll jazz up your weeknight meals! Ever wonder how something so quick can be so good for you? It's all in the magic of pressure cooking! You can whip up nutritious dishes without slaving away in the kitchen. Give these recipes a try, and watch your dinner game improve. Who knew healthy eating could taste this amazing? Your taste buds and your body will thank you!

