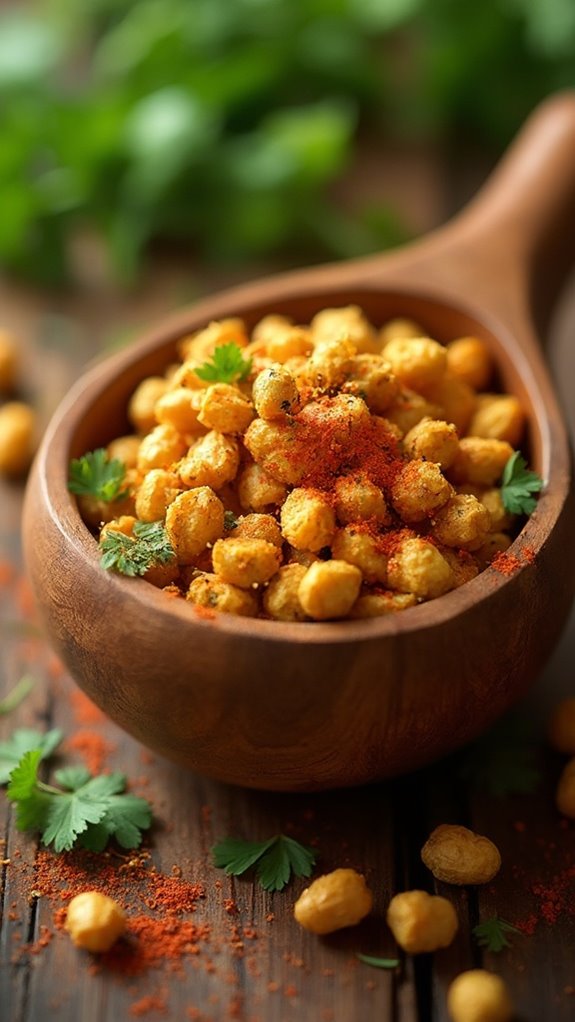
Top 15 Indian Appetizers for Parties
If you're throwing a party, Indian appetizers are a fantastic way to awaken your guests' taste buds! Consider serving classic favorites like samosas, with their crispy, spiced potato filling, or pakoras that pack a crunchy punch. Don't forget about paneer tikka, with marinated, grilled cheese that's simply irresistible. Other great choices include spicy aloo chaat for a tangy kick and dhokla, which is light and fluffy. Want to impress your friends? Set up a platter with vibrant veggie spring rolls and spicy masala peanuts. Who wouldn't want to taste these delights? Stick around, and you'll discover even more tempting options!
Samosas

Title: Samosas
Prep Time: 30 minutes
Cook Time: 30 minutes
Number of Servings: 12
Required Equipment List: Mixing bowl, rolling pin, frying pan, slotted spoon, paper towels
Cuisine Type: Indian
Samosas are a beloved Indian appetizer that are perfect for parties and gatherings. These crispy, deep-fried pastries are typically filled with spiced potatoes, peas, and sometimes meat, all wrapped in a flaky dough. Their satisfying crunch and flavorful filling make them an irresistible treat, sure to please any crowd.
Whether served with mint chutney or tamarind sauce, samosas are a delightful addition to any appetizer table. Making samosas from scratch may seem formidable, but with a little preparation and practice, you can achieve this delicious dish at home.
The combination of spices used in the filling enhances the flavors of the ingredients, while the golden-brown exterior adds a lovely texture. These versatile pastries can be enjoyed as a snack or as part of a larger meal, making them a staple in Indian cuisine.
Ingredients:
- 2 cups all-purpose flour
- 4 tablespoons oil
- 1/2 teaspoon salt
- Water (as needed)
- 2 large potatoes, boiled and mashed
- 1/2 cup green peas, cooked
- 1 teaspoon cumin seeds
- 1 teaspoon garam masala
- 1 teaspoon coriander powder
- 1/2 teaspoon turmeric powder
- 1-2 green chilies, finely chopped (optional)
- Salt to taste
- Oil for frying
Instructions:
- In a mixing bowl, combine the all-purpose flour, salt, and 4 tablespoons of oil. Mix well until the mixture resembles coarse crumbs. Gradually add water, a little at a time, and knead to form a smooth dough. Cover with a damp cloth and let it rest for 20 minutes.
- In another bowl, combine the mashed potatoes and cooked green peas. Heat a pan over medium heat and add cumin seeds. Once they begin to splutter, add the potato and pea mixture along with garam masala, coriander powder, turmeric powder, chopped green chilies, and salt. Mix well and cook for a few minutes until the spices are well incorporated. Remove from heat and let it cool.
- Divide the rested dough into equal portions and roll each portion into a ball. On a lightly floured surface, roll out each ball into a thin oval shape about 6 inches long. Cut the oval in half to create two semicircles.
- Take one semicircle and form a cone by folding it and sealing the edges with a little water. Confirm that the bottom edge is sealed well. Fill the cone with the potato and pea mixture, then seal the open edge by pressing it together, creating a triangular shape.
- Heat oil in a frying pan over medium heat. Once the oil is hot, carefully slide the samosas into the oil a few at a time, being careful not to overcrowd the pan. Fry until they're golden brown and crispy, about 5-7 minutes. Use a slotted spoon to remove them and drain on paper towels.
- Serve the samosas hot with mint chutney or tamarind sauce for dipping.
Extra Tips: For an extra crunch, you can add a tablespoon of semolina to the dough. Confirm the oil is hot enough before frying; if not, the samosas may absorb excess oil and become greasy. If you're short on time, you can also use store-bought pastry dough as a shortcut.
Feel free to experiment with different fillings, such as lentils or minced meat, to suit your taste preferences!
Pakoras

Title: Crispy Pakoras
Prep Time: 15 minutes
Cook Time: 20 minutes
Number of Servings: 4
Required Equipment List: Mixing bowl, frying pan, slotted spoon, paper towels
Cuisine Type: Indian
Crispy Pakoras are a beloved Indian snack that are perfect for parties or as an appetizer. These delightful fritters are made by coating vegetables or meat in a spiced chickpea flour batter and deep-frying them until they're golden and crispy. The result is a crunchy exterior that gives way to a tender, flavorful filling, making them a favorite among guests of all ages.
Whether served with a tangy tamarind chutney or a minty yogurt dip, pakoras are sure to be a hit at any gathering. This recipe allows for versatility, as you can use a variety of ingredients such as potatoes, onions, spinach, or even paneer. The chickpea flour not only binds everything together but also adds a unique nutty flavor that complements the spices.
With a simple preparation and quick cooking time, these crispy treats can be whipped up in no time, guaranteeing that you can enjoy the festivities without spending all day in the kitchen.
Ingredients:
- 1 cup chickpea flour (besan)
- 1 teaspoon cumin seeds
- 1 teaspoon garam masala
- 1/2 teaspoon turmeric powder
- 1/2 teaspoon red chili powder
- Salt to taste
- 1/2 cup water (adjust as needed)
- 2 cups mixed vegetables (potatoes, onions, spinach, etc.)
- Oil for deep frying
Instructions:
- In a mixing bowl, combine the chickpea flour, cumin seeds, garam masala, turmeric powder, red chili powder, and salt. Mix the dry ingredients well to guarantee the spices are evenly distributed.
- Gradually add water to the dry mixture, stirring continuously until you achieve a smooth, lump-free batter. The consistency should be thick enough to coat the back of a spoon.
- Prepare your vegetables by slicing them into bite-sized pieces. You can use a mix of your favorites such as potatoes, onions, or spinach. Add the vegetables to the batter, ensuring they're well coated.
- Heat oil in a frying pan over medium heat. Once the oil is hot, carefully drop spoonfuls of the batter-coated vegetables into the oil, making sure not to overcrowd the pan.
- Fry the pakoras for about 4-5 minutes or until they're golden brown and crispy. Use a slotted spoon to turn them occasionally, guaranteeing they cook evenly on all sides.
- Once cooked, remove the pakoras from the oil and place them on paper towels to absorb excess oil. Serve hot with your choice of chutney or dipping sauce.
Extra Tips: For an extra crunch, consider adding a tablespoon of rice flour to the chickpea flour mixture. You can also experiment with spices by adding ajwain (carom seeds) or even finely chopped green chilies for an added kick.
If you're looking for a healthier option, you can bake the pakoras in the oven at 400°F (200°C) for about 20 minutes, flipping halfway through for even cooking. Enjoy your crispy pakoras with a rejuvenating beverage!
Paneer Tikka
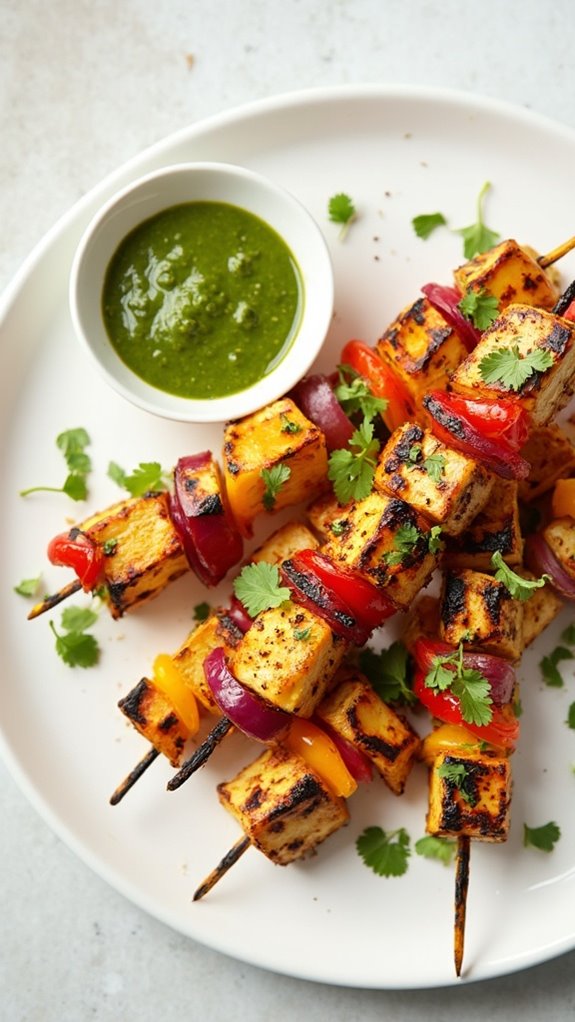
Title: Paneer Tikka
Prep Time: 20 minutes
Cook Time: 15 minutes
Number of Servings: 4
Required Equipment List: Mixing bowl, skewers, grill or oven, brush for oil
Cuisine Type: Indian
Paneer Tikka is a popular Indian appetizer that features marinated cubes of paneer (Indian cottage cheese) grilled to perfection. This dish isn't only visually appealing with its vibrant colors but also packed with flavors that are sure to impress your guests.
The marinade, made from yogurt and a blend of spices, infuses the paneer with a delightful taste, while grilling adds a smoky flavor and a charred finish. It's perfect for parties, barbecues, or simply as a delicious starter for any meal.
Making Paneer Tikka is relatively simple and requires only a few key ingredients. The dish is highly customizable; you can add your favorite vegetables like bell peppers, onions, and tomatoes to the skewers for an extra boost of flavor and nutrition.
Serve it with a side of mint chutney or yogurt sauce for dipping, and you'll have a crowd-pleasing appetizer that everyone will love.
Ingredients:
- 400 grams paneer, cut into cubes
- 1 cup plain yogurt
- 2 tablespoons ginger-garlic paste
- 2 tablespoons lemon juice
- 2 teaspoons red chili powder
- 1 teaspoon turmeric powder
- 1 teaspoon garam masala
- Salt to taste
- 1 tablespoon vegetable oil
- Bell peppers and onions (optional, cut into chunks)
- Fresh coriander leaves (for garnish)
Instructions:
1. In a mixing bowl, combine plain yogurt, ginger-garlic paste, lemon juice, red chili powder, turmeric powder, garam masala, salt, and vegetable oil. Mix well to create a smooth marinade.
2. Add the paneer cubes to the marinade, ensuring they're well coated. If using, add the bell peppers and onions to the bowl, mixing to coat them as well.
Cover the bowl and let the mixture marinate in the refrigerator for at least 30 minutes, or longer for more intense flavors.
3. Preheat your grill or oven to a high temperature (around 200°C or 400°F). If using wooden skewers, soak them in water for about 15 minutes to prevent burning.
4. Thread the marinated paneer and vegetables onto the skewers, alternating between the paneer and vegetables for a colorful presentation. Leave a little space between the pieces for even cooking.
5. Place the skewers on the grill or in the oven. Grill for about 12-15 minutes, turning occasionally, until the paneer is golden and slightly charred. Brush with a little oil during cooking for added moisture.
6. Once done, remove the skewers from the grill or oven and let them rest for a minute. Garnish with fresh coriander leaves and serve hot with mint chutney or yogurt sauce.
Extra Tips: For an extra flavor boost, consider adding a pinch of smoked paprika to the marinade for a deeper smoky taste.
You can also experiment with different spices or herbs based on your preference. If you don't have a grill, broiling in the oven works well too; just keep a close eye to prevent burning.
Enjoy your flavorful Paneer Tikka as a delightful party appetizer!
Aloo Tikki
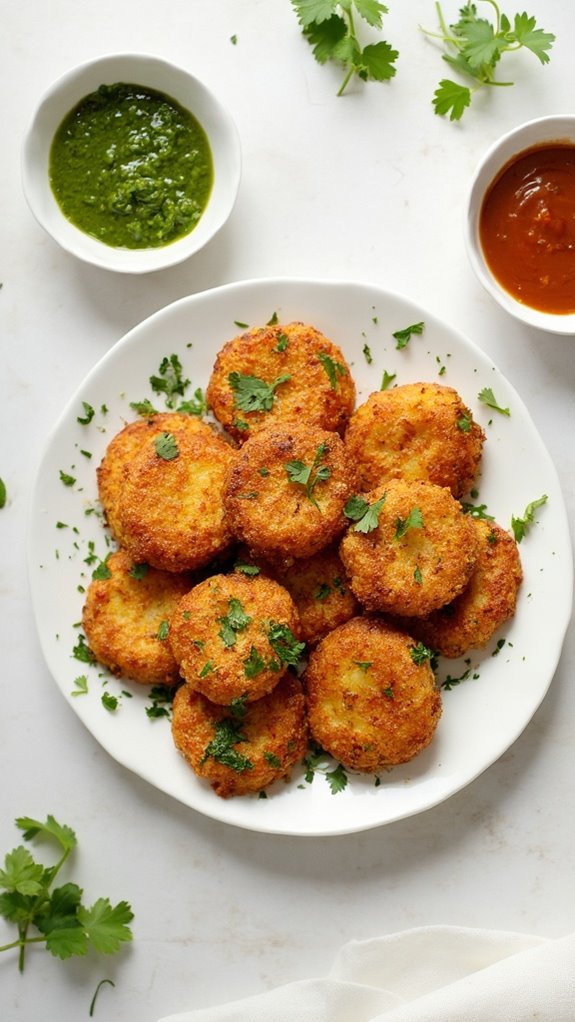
Title: Aloo Tikki
Prep Time: 20 minutes
Cook Time: 30 minutes
Number of Servings: 4
Required Equipment List: Mixing bowl, frying pan, spatula, measuring cups and spoons, plate
Cuisine Type: Indian
Aloo Tikki is a popular Indian street food snack made from spiced mashed potatoes. These crispy potato patties are usually served with tangy chutneys and fresh coriander, making them a delightful appetizer for any gathering. The combination of potatoes with spices such as cumin, coriander, and chili powder brings out robust flavors that are sure to please your guests.
Whether enjoyed as a standalone snack or as part of a larger meal, Aloo Tikki is a must-try! The preparation is straightforward, and the cooking process allows for a perfect golden crust on the outside while keeping the inside soft and flavorful. You can customize the spices according to your preference, and even add peas or other vegetables for an extra twist.
Serve them hot with green chutney or tamarind sauce for a delicious treat that will transport you straight to the bustling streets of India.
Ingredients:
- 4 medium-sized potatoes, boiled and mashed
- 1/2 cup green peas, boiled and mashed (optional)
- 1 teaspoon cumin seeds
- 1 teaspoon coriander powder
- 1 teaspoon red chili powder
- 1/2 teaspoon garam masala
- 1 tablespoon chopped fresh coriander
- Salt to taste
- 2 tablespoons cornflour (or breadcrumbs)
- Oil for frying
Instructions:
- In a mixing bowl, combine the boiled and mashed potatoes with the boiled green peas (if using). Mix them thoroughly until well combined, guaranteeing there are no lumps.
- Add cumin seeds, coriander powder, red chili powder, garam masala, chopped coriander, and salt to the potato mixture. Mix everything until the spices are evenly distributed throughout the mashed potatoes.
- To help bind the mixture, add cornflour (or breadcrumbs) and combine well. This will help the patties hold their shape during frying.
- Divide the mixture into equal portions and shape each portion into a round, flat patty. Verify that the patties aren't too thick, as this will help them cook evenly.
- Heat oil in a frying pan over medium heat. Once the oil is hot, carefully place the patties in the pan, making sure not to overcrowd the pan. Fry them until they're golden brown and crispy on both sides, about 3-4 minutes per side.
- Once cooked, remove the Aloo Tikki from the pan and place them on a plate lined with paper towels to absorb excess oil. Serve hot with your choice of chutney.
Extra Tips: For added flavor, consider mixing in finely chopped green chilies or ginger into the potato mixture. If you prefer a healthier version, you can bake the patties in an oven at 400°F (200°C) for about 20-25 minutes, flipping halfway through.
Additionally, serving Aloo Tikki with a side of yogurt can balance the spices and enhance the overall taste. Enjoy your delicious Aloo Tikki!
Veggie Spring Rolls

Title: Veggie Spring Rolls
Prep Time: 30 minutes
Cook Time: 10 minutes
Number of Servings: 4
Required Equipment List: Mixing bowl, frying pan, rolling mat, sharp knife, cutting board
Cuisine Type: Asian
Veggie Spring Rolls are a delightful and versatile appetizer that brings vibrant flavors and fresh ingredients to the table. These crunchy rolls are packed with an assortment of vegetables, making them not only delicious but also a healthy option for any gathering. The combination of crisp lettuce, carrots, cucumbers, and herbs wrapped in thin rice paper creates a revitalizing bite that pairs perfectly with a tangy dipping sauce.
These spring rolls can be made ahead of time, making them an ideal choice for parties or meal prep. The beauty of Veggie Spring Rolls lies in their adaptability; you can customize the filling based on seasonal produce or personal preferences. Serve them with a side of peanut sauce or sweet chili sauce for a delightful dipping experience, turning these rolls into a crowd-pleaser at any event.
They aren't only easy to make but also provide a fun and interactive element as guests can enjoy them fresh and cold.
Ingredients:
- 8 rice paper wrappers
- 1 cup shredded lettuce
- 1 cup grated carrots
- 1 cup thinly sliced cucumbers
- 1/2 cup fresh cilantro leaves
- 1/2 cup fresh mint leaves
- 1/2 cup sliced bell peppers (any color)
- 1/4 cup sliced green onions
- Dipping sauce of choice (peanut sauce or sweet chili sauce)
Instructions:
- Prepare all the vegetables by washing and slicing them into thin strips. Arrange them in separate bowls to make assembly easier. Make sure to keep the herbs like cilantro and mint whole for an aromatic touch.
- Fill a shallow dish with warm water. Dip one rice paper wrapper into the water for about 10-15 seconds or until it becomes soft and pliable. Carefully lay the wrapper flat on a clean surface or a rolling mat.
- On the lower third of the rice paper, place a small handful of shredded lettuce, followed by a few strips of carrots, cucumbers, bell peppers, and a sprinkle of green onions. Add a couple of mint and cilantro leaves for added flavor.
- Fold the sides of the rice paper over the filling and then roll it up tightly from the bottom to the top, ensuring the filling is securely wrapped inside. Repeat this process with the remaining wrappers and filling ingredients.
- Once all the spring rolls are assembled, serve them immediately with your choice of dipping sauce. If you're preparing them ahead of time, place them on a plate, cover with a damp cloth, and refrigerate until ready to serve.
Extra Tips: When making Veggie Spring Rolls, work quickly with the rice paper to prevent it from sticking to itself. If you find the wrappers are too sticky, dip your fingers in water to help with handling.
You can also experiment with fillings by adding protein such as shredded chicken, shrimp, or tofu for a heartier option. Make sure to serve the rolls with a variety of dipping sauces to cater to different tastes and add an exciting element to your appetizer spread. Enjoy your fresh and flavorful spring rolls!
Dhokla
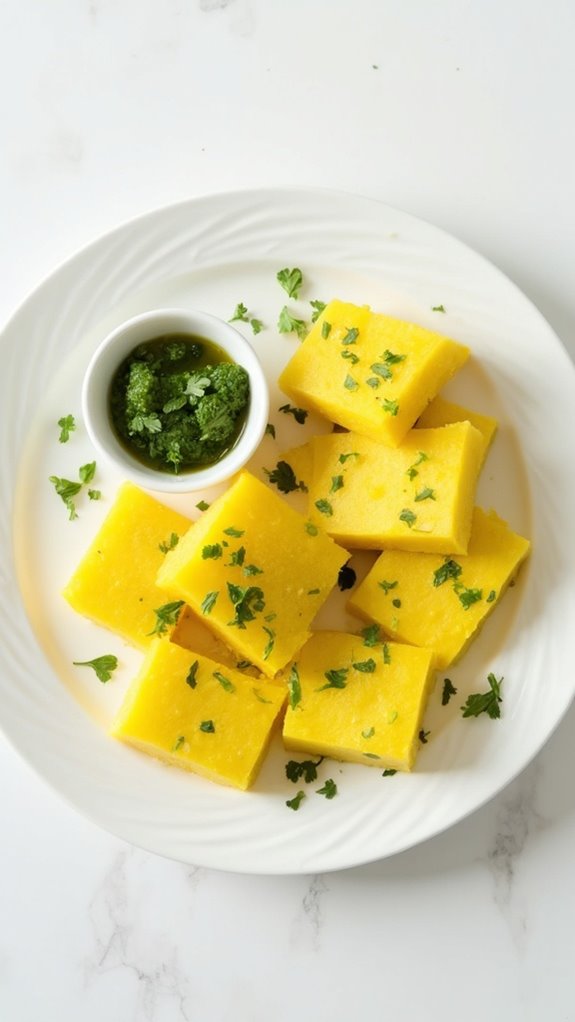
Title: Dhokla
Prep Time: 15 minutes
Cook Time: 20 minutes
Number of Servings: 4
Required Equipment List: Steamer, mixing bowl, whisk, plate, knife
Cuisine Type: Indian
Dhokla is a popular Gujarati snack that isn't only delicious but also healthy. This steamed, spongy cake made from fermented chickpea flour (besan) is light, fluffy, and packed with flavor. Traditionally served as a breakfast item or an appetizer at parties, dhokla can be enjoyed with a variety of chutneys, such as green chutney or sweet tamarind chutney. Its bright yellow color, derived from turmeric, makes it visually appealing as well.
What makes dhokla unique is its fermentation process, which not only enhances its taste but also adds nutritional value. This dish is vegan-friendly and gluten-free, making it suitable for various dietary preferences. The steaming process keeps the dhokla moist while giving it a soft texture, making it irresistible.
Once you master this simple recipe, you can experiment with different toppings and spices to create your own variations.
Ingredients:
- 1 cup besan (chickpea flour)
- 1/2 cup yogurt
- 1/2 cup water
- 1 teaspoon ginger paste
- 1 teaspoon green chili paste
- 1 teaspoon turmeric powder
- 1 teaspoon baking soda
- 1 teaspoon lemon juice
- Salt to taste
- 1 tablespoon oil
- 1 teaspoon mustard seeds
- 2 tablespoons chopped coriander leaves (for garnish)
- Green chutney (for serving)
Instructions:
- In a mixing bowl, combine the besan, yogurt, water, ginger paste, green chili paste, turmeric powder, and salt. Whisk the mixture until smooth and confirm there are no lumps. Let it rest for about 10 minutes to ferment slightly.
- After resting, add baking soda and lemon juice to the batter and mix well. The batter will start to foam, indicating that it's ready to be steamed. Grease a plate or a dhokla thali with oil to prevent sticking.
- Pour the batter into the greased plate, spreading it evenly. Place the plate in a steamer over boiling water and cover. Steam the dhokla for about 15-20 minutes or until a toothpick inserted in the center comes out clean.
- Once cooked, remove the plate from the steamer and let it cool for a few minutes. Cut the dhokla into square or diamond-shaped pieces using a knife.
- In a small pan, heat oil and add mustard seeds. Allow them to splutter, then pour the tempering over the cut dhokla pieces. Garnish with chopped coriander leaves and serve with green chutney.
Extra Tips: For added flavor, you can include a pinch of asafoetida (hing) to the batter. If you prefer a slightly spicy kick, increase the amount of green chili paste or serve with a spicy chutney.
Dhokla is best enjoyed fresh, but you can store any leftovers in an airtight container in the refrigerator for a day or two. Re-steaming or microwaving can help restore its softness before serving.
Chaat
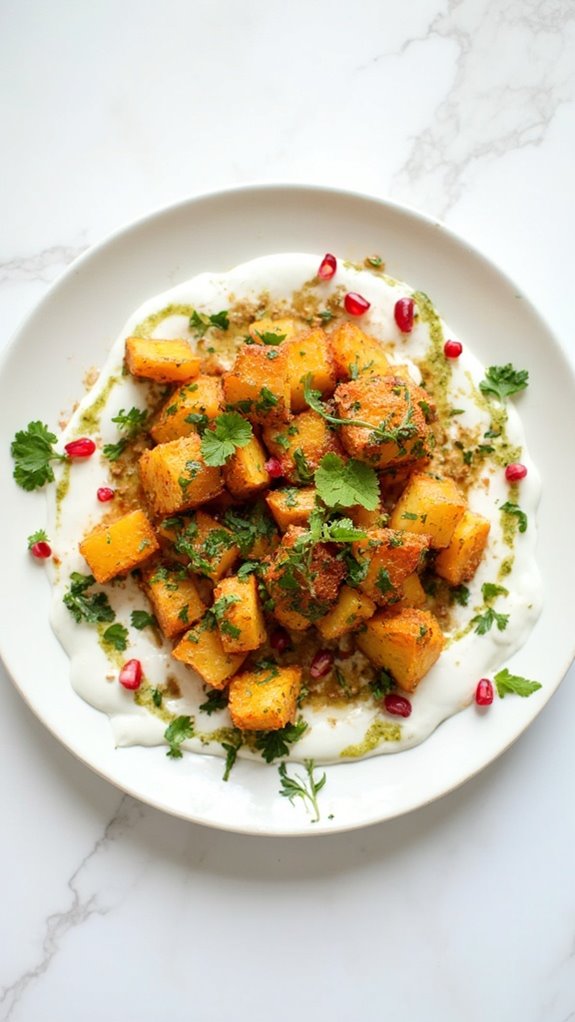
Title: Spicy Aloo Chaat (Potato Chaat)
Prep Time: 15 minutes
Cook Time: 10 minutes
Number of Servings: 4
Required Equipment List: Mixing bowl, frying pan, spatula, serving plates
Cuisine Type: Indian
Spicy Aloo Chaat is a vibrant and flavorful Indian street food that's sure to be a hit at any party. This dish combines crispy fried potatoes with an array of tangy spices, sweet chutneys, and fresh toppings, creating a delightful explosion of flavors in every bite.
The contrast between the crispy potatoes and the creamy yogurt, topped with revitalizing cilantro and a sprinkle of chaat masala, makes it an irresistible appetizer that will have your guests coming back for more.
This recipe isn't only easy to prepare but also allows for customization based on your taste preferences. You can adjust the spice levels or add different toppings like pomegranate seeds, chopped onions, or sev (crispy chickpea noodles) for an extra crunch.
Serve it warm or at room temperature, and watch as everyone enjoys this delicious and satisfying snack.
Ingredients:
- 3 medium potatoes, boiled and peeled
- 1 tablespoon oil
- 1 teaspoon cumin seeds
- 1 teaspoon chaat masala
- ½ teaspoon red chili powder
- ½ teaspoon salt (to taste)
- ½ cup yogurt
- 2 tablespoons tamarind chutney
- 2 tablespoons green chutney
- Chopped fresh cilantro (for garnish)
- Pomegranate seeds (for garnish, optional)
Instructions:
- Begin by dicing the boiled potatoes into small cubes. In a mixing bowl, combine the diced potatoes with salt, red chili powder, and chaat masala. Toss well to confirm the potatoes are evenly coated with the spices.
- Heat the oil in a frying pan over medium heat. Once hot, add the cumin seeds and let them sizzle for a few seconds until fragrant. Then, add the seasoned potato cubes to the pan and fry until they're golden brown and crispy on all sides, approximately 5-7 minutes.
- While the potatoes are frying, prepare the serving plates by drizzling some yogurt on the bottom of each plate. This will act as a creamy base for the chaat.
- Once the potatoes are crispy, remove them from the pan and place them on top of the yogurt layer. Drizzle the tamarind and green chutneys over the hot potatoes, allowing the flavors to meld together.
- Garnish the chaat with a sprinkle of chopped cilantro and pomegranate seeds for an extra burst of color and flavor. Serve immediately while the potatoes are still warm for the best experience.
Extra Tips: To make the dish even more exciting, consider adding some crispy sev on top for an added crunch. If you prefer a tangier flavor, increase the amount of tamarind chutney used.
Additionally, feel free to experiment with different chutneys or toppings to create your own signature version of this classic chaat.
Onion Bhaji

Title: Onion Bhaji
Prep Time: 15 minutes
Cook Time: 20 minutes
Number of Servings: 4
Required Equipment List: Mixing bowl, frying pan, slotted spoon, paper towels
Cuisine Type: Indian
Onion Bhaji is a classic Indian appetizer that's loved for its crispy texture and rich flavor. These deep-fried fritters are made primarily from thinly sliced onions mixed with chickpea flour and a blend of aromatic spices. The result is a crunchy exterior that gives way to a soft, flavorful inside, making them a perfect starter for any party or gathering.
Often enjoyed with a side of chutney or yogurt dip, these bhajis are sure to delight your guests and keep them coming back for more. Preparing Onion Bhaji is relatively simple and requires minimal ingredients, making it a great choice for both novice and experienced cooks.
The versatility of this dish allows you to customize the spices according to your taste preferences, and you can even add vegetables like spinach or potatoes for added nutrition. Whether served as an appetizer or a snack with tea, Onion Bhaji is a delightful treat that brings a taste of India to your dining table.
Ingredients:
- 2 large onions, thinly sliced
- 1 cup chickpea flour (besan)
- 1-2 green chilies, finely chopped (adjust to taste)
- 1 teaspoon cumin seeds
- 1 teaspoon coriander powder
- 1/2 teaspoon turmeric powder
- 1/2 teaspoon red chili powder
- Salt to taste
- Water (as needed)
- Oil for frying
Instructions:
- Start by placing the thinly sliced onions in a large mixing bowl. Add the chopped green chilies, cumin seeds, coriander powder, turmeric powder, red chili powder, and salt. Mix everything well and let it sit for about 10 minutes. This will help the onions release some moisture, which is essential for binding the bhaji mixture.
- After 10 minutes, add the chickpea flour to the onion mixture. Use your hands to mix everything together, making sure that the flour coats the onions well. If the mixture feels too dry, add a little water, one tablespoon at a time, until you achieve a thick batter that holds the onions together.
- Heat oil in a frying pan over medium heat. To check if the oil is hot enough, drop a small amount of the bhaji mixture into the oil; it should sizzle and rise to the surface. Once the oil is ready, carefully drop spoonfuls of the bhaji mixture into the hot oil, making sure not to overcrowd the pan.
- Fry the bhajis until they turn golden brown and crispy, about 5-7 minutes. Use a slotted spoon to turn them occasionally for even cooking. Once done, remove the bhajis from the oil and place them on a plate lined with paper towels to absorb excess oil.
- Repeat the frying process with the remaining mixture until all the bhajis are cooked. Serve the hot Onion Bhajis immediately with your choice of chutney or yogurt dip for a delicious appetizer.
Extra Tips: For an extra kick, you can add chopped fresh herbs like cilantro or mint to the bhaji mixture. Additionally, verify the oil is at the right temperature to prevent the bhajis from becoming greasy; too low of a temperature can cause them to absorb more oil.
If you prefer baking over frying, you can brush the bhajis with a little oil and bake them in a preheated oven at 375°F (190°C) for about 20-25 minutes, turning halfway for a healthier alternative. Enjoy your homemade Onion Bhajis!
Tandoori Chicken Skewers

Title: Tandoori Chicken Skewers
Prep Time: 30 minutes
Cook Time: 20 minutes
Number of Servings: 4
Required Equipment List: Mixing bowl, skewers, grill or oven, measuring cups, measuring spoons
Cuisine Type: Indian
Tandoori Chicken Skewers are a flavorful and aromatic appetizer that brings the essence of Indian cuisine to your gatherings. Marinated in a blend of yogurt and fragrant spices, these chicken skewers are grilled to perfection, offering a smoky flavor that's both delicious and satisfying.
The vibrant colors and enticing aromas of the spices make this dish a standout at any party, sure to impress your guests with its authenticity and taste. This recipe isn't only simple to prepare but also allows for flexibility regarding spice levels, making it suitable for a variety of palates.
The marination process tenderizes the chicken while infusing it with rich flavors, and grilling enhances the overall taste with a perfect char. Serve these skewers with a side of mint chutney or yogurt sauce for a revitalizing contrast, making them the perfect appetizer for any occasion.
Ingredients:
- 1 pound boneless chicken thighs, cut into 1-inch pieces
- 1 cup plain yogurt
- 2 tablespoons tandoori masala
- 1 tablespoon lemon juice
- 1 tablespoon vegetable oil
- 2 cloves garlic, minced
- 1 tablespoon ginger, grated
- Salt to taste
- Wooden or metal skewers
Instructions:
- In a mixing bowl, combine the plain yogurt, tandoori masala, lemon juice, vegetable oil, minced garlic, grated ginger, and salt. Whisk the mixture until well combined, creating a smooth marinade.
- Add the chicken pieces to the marinade, making sure that each piece is thoroughly coated. Cover the bowl with plastic wrap and refrigerate for at least 1 hour, or ideally overnight, to allow the flavors to penetrate the chicken.
- If using wooden skewers, soak them in water for 30 minutes to prevent burning during grilling. Meanwhile, preheat your grill or oven to medium-high heat (about 400°F/200°C).
- Thread the marinated chicken pieces onto the skewers, leaving a little space between each piece to guarantee even cooking.
- Place the skewers on the grill or in the oven and cook for about 15-20 minutes, turning occasionally, until the chicken is cooked through and has a nice char on the outside. The internal temperature should reach 165°F (75°C).
- Once cooked, remove the skewers from the grill or oven and let them rest for a few minutes before serving. This will help retain the juices within the chicken.
Extra Tips: For an extra kick, feel free to add slices of bell peppers and onions to the skewers along with the chicken. This not only enhances the flavor but also adds color to the presentation.
If you prefer a spicier dish, consider adding a pinch of cayenne pepper or chili powder to the marinade. Serve with lemon wedges and fresh cilantro for an added burst of freshness. Enjoy your flavorful tandoori chicken skewers!
Prawn Koliwada
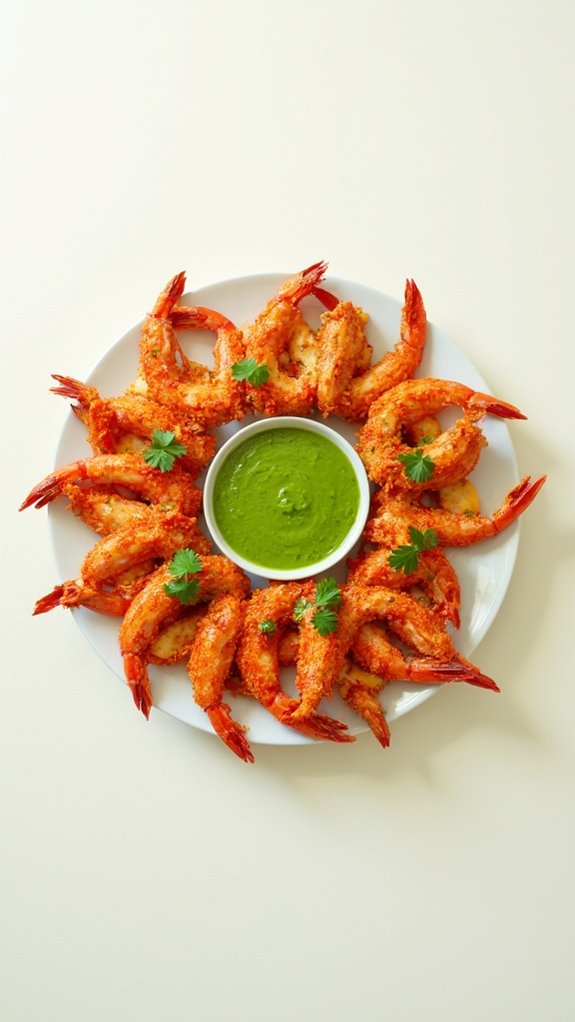
Title: Prawn Koliwada
Prep Time: 20 minutes
Cook Time: 15 minutes
Number of Servings: 4
Required Equipment List: Mixing bowl, frying pan, slotted spoon, paper towels, serving plate
Cuisine Type: Indian
Prawn Koliwada is a popular Indian appetizer that hails from the coastal regions, specifically Maharashtra. This dish features succulent prawns marinated in a spicy and tangy batter, which is then deep-fried until golden and crispy. The combination of spices used in the marinade not only enhances the flavor of the prawns but also gives them a beautiful reddish hue, making them visually appealing.
Perfect for parties or casual gatherings, these crunchy prawns are sure to be a hit among seafood lovers. The beauty of Prawn Koliwada lies in its versatility; it can be served as an appetizer with a side of tangy green chutney or enjoyed as a main dish with rice or naan. This recipe is straightforward and quick to prepare, making it an excellent choice for both experienced and novice cooks.
With the right balance of spices and a crispy texture, Prawn Koliwada will transport your taste buds to the shores of India.
Ingredients:
- 500 grams prawns, cleaned and deveined
- 1/2 cup rice flour
- 1/2 cup besan (gram flour)
- 1 tablespoon ginger-garlic paste
- 1 teaspoon red chili powder
- 1/2 teaspoon turmeric powder
- 1 teaspoon garam masala
- 1 tablespoon lemon juice
- Salt to taste
- Oil for deep frying
- Fresh coriander leaves for garnish (optional)
Instructions:
- In a mixing bowl, combine the cleaned prawns with ginger-garlic paste, red chili powder, turmeric powder, garam masala, lemon juice, and salt. Mix well to guarantee the prawns are evenly coated with the marinade. Allow the prawns to marinate for at least 15 minutes, which will help to infuse them with flavor.
- After marinating, add the rice flour and besan to the bowl with the prawns. Mix until the prawns are fully coated in the dry mixture, which will create a crispy exterior when fried. If the batter is too thick, you can add a little water to achieve the desired consistency.
- Heat oil in a frying pan over medium heat. To check if the oil is ready, drop a small piece of batter into the oil; if it sizzles and rises to the surface, the oil is hot enough for frying.
- Carefully add the marinated prawns to the hot oil in batches, ensuring not to overcrowd the pan. Fry until the prawns turn golden brown and crispy, usually about 3-4 minutes per batch. Use a slotted spoon to remove the prawns and transfer them to a plate lined with paper towels to absorb excess oil.
- Once all the prawns are fried, garnish them with fresh coriander leaves if desired. Serve hot with green chutney or your favorite dipping sauce for an added kick of flavor.
Extra Tips: For an even crispier texture, consider double coating the prawns by dipping them in the batter a second time before frying. Make sure the oil is hot enough to prevent the prawns from becoming soggy.
Additionally, you can adjust the spice levels by adding more or less chili powder based on your preference. Enjoy your Prawn Koliwada as a delicious appetizer or snack at your next party!
Dahi Puri

Title: Dahi Puri
Prep Time: 20 minutes
Cook Time: 10 minutes
Number of Servings: 4
Required Equipment List: Mixing bowl, spoon, serving platter
Cuisine Type: Indian
Dahi Puri is a delightful Indian street food that features crispy puris filled with a mixture of spiced potatoes, yogurt, and a medley of chutneys. This appetizer isn't only visually appealing but also offers a burst of flavors and textures with each bite. The crunch of the puris combined with the creamy yogurt and tangy chutneys makes it a favorite among partygoers, guaranteeing that it disappears quickly from the serving platter.
This dish is customizable, allowing you to adjust the spice levels according to your taste. The preparation involves making the filling, which is usually a mix of mashed potatoes and spices, and then assembling the puris just before serving to maintain their crispy texture. Dahi Puri is perfect for any occasion, from casual gatherings to festive celebrations, and is sure to impress your guests with its vibrant presentation and unique flavors.
Ingredients:
- 12-15 puris (small crispy shells)
- 2 medium potatoes, boiled and mashed
- 1/2 teaspoon cumin powder
- 1/2 teaspoon chat masala
- Salt to taste
- 1 cup yogurt, whisked
- 1/4 cup tamarind chutney
- 1/4 cup green chutney
- 1/4 cup chopped onions
- 1/4 cup chopped cilantro
- Red chili powder (for garnish)
Instructions:
- In a mixing bowl, combine the boiled and mashed potatoes with cumin powder, chat masala, and salt. Mix well until the spices are evenly distributed throughout the potato mixture.
- Prepare the yogurt by whisking it until smooth and creamy. If you prefer a bit of sweetness, you can add a teaspoon of sugar to the yogurt.
- On a serving platter, arrange the puris. Carefully break the top of each puri to create a small opening for filling.
- Fill each puri with a spoonful of the spiced potato mixture, pressing down gently to ascertain they're well-stuffed but not overflowing.
- Top the filled puris with a generous dollop of the whisked yogurt, followed by a drizzle of both tamarind and green chutney. Sprinkle chopped onions and cilantro on top for added flavor and color.
- Finally, garnish with a pinch of red chili powder for an extra kick. Serve immediately to enjoy the crunchiness of the puris and the freshness of the toppings.
Extra Tips: To keep the puris crispy, assemble the Dahi Puri just before serving. You can also prepare the potato filling and chutneys in advance to save time. If you want to add a twist, consider including some sev (crispy chickpea noodles) on top for added crunch. Adjust the level of spiciness by varying the amount of chili powder or chutney you use, making it suitable for everyone at your gathering. Enjoy this vibrant and flavorful appetizer!
Vegetable Kebabs
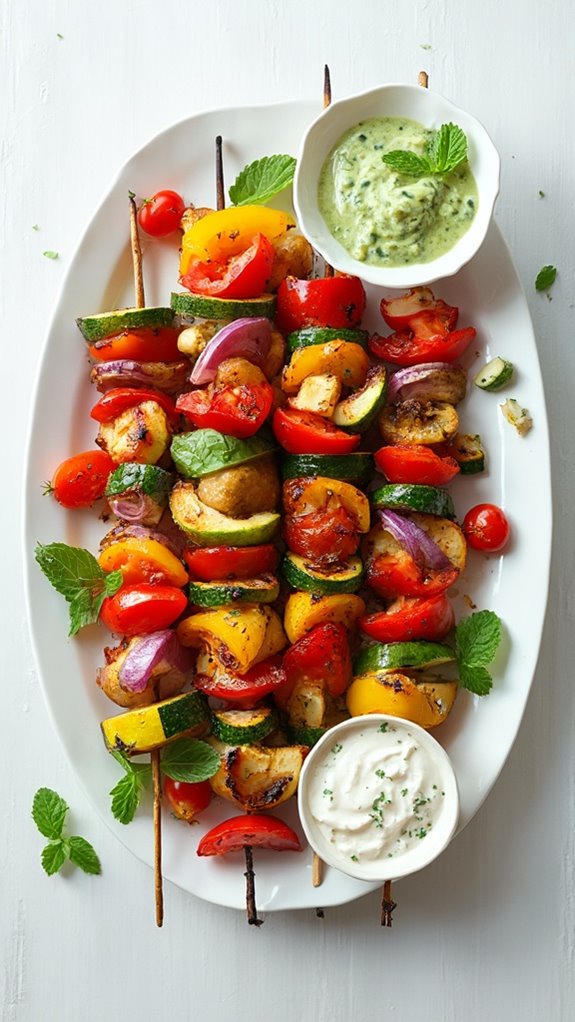
Title: Vegetable Kebabs
Prep Time: 20 minutes
Cook Time: 15 minutes
Number of Servings: 4
Required Equipment List: Skewers, grill or grill pan, mixing bowl, brush
Cuisine Type: Indian
Vegetable Kebabs are a vibrant and flavorful appetizer that captures the essence of Indian cuisine. Skewered vegetables are marinated in a blend of spices and yogurt, then grilled to perfection, resulting in a dish that's both healthy and delicious.
These kebabs are perfect for parties, as they can be served hot off the grill or at room temperature, making them versatile for any gathering. The combination of various vegetables like bell peppers, zucchini, and onions adds color and texture, while the spices infuse them with a mouth-watering aroma.
Not only are these Vegetable Kebabs packed with flavor, but they also make for a great vegetarian option that can please a crowd. They can easily be customized with your favorite vegetables or served with a tangy mint chutney or yogurt dip for added flavor.
These kebabs aren't just a feast for the palate but also a visual delight with their colorful presentation, making them a must-try for your next party.
Ingredients:
- 1 cup bell peppers (red, green, yellow), cut into chunks
- 1 cup zucchini, sliced
- 1 cup red onion, cut into wedges
- 1 cup cherry tomatoes
- 1 cup mushrooms, halved
- 1/2 cup plain yogurt
- 2 tablespoons lemon juice
- 2 tablespoons olive oil
- 1 teaspoon cumin powder
- 1 teaspoon coriander powder
- 1 teaspoon garam masala
- 1/2 teaspoon turmeric powder
- Salt and pepper to taste
- Skewers (if using wooden, soak in water for 30 minutes)
Instructions:
- In a mixing bowl, combine the plain yogurt, lemon juice, olive oil, cumin powder, coriander powder, garam masala, turmeric powder, salt, and pepper. Mix well to create a smooth marinade.
- Add the chopped vegetables (bell peppers, zucchini, red onion, cherry tomatoes, and mushrooms) to the marinade. Toss gently to coat all the vegetables evenly and let them marinate for at least 15 minutes to absorb the flavors.
- Preheat your grill or grill pan over medium-high heat. If using wooden skewers, make sure they're soaked in water to prevent burning.
- Thread the marinated vegetables onto the skewers, alternating between different types for a colorful presentation. Leave a little space between each piece to allow for even cooking.
- Place the skewers on the grill and cook for about 10-15 minutes, turning occasionally until the vegetables are tender and have nice grill marks. Make certain not to overcook, as you want them to retain their crunch.
- Once cooked, remove the kebabs from the grill and let them rest for a couple of minutes. Serve hot with mint chutney or yogurt dip.
Extra Tips: For an extra burst of flavor, consider adding a pinch of red chili powder to the marinade for some heat. You can also experiment with different vegetables like eggplant or corn, depending on the season.
If you're short on time, you can prepare the marinade in advance and let the vegetables soak overnight in the fridge for deeper flavor. Enjoy your delicious and colorful Vegetable Kebabs!
Pav Bhaji

Title: Pav Bhaji
Prep Time: 15 minutes
Cook Time: 30 minutes
Number of Servings: 4
Required Equipment List: Large pot, frying pan, potato masher, spatula, serving plates
Cuisine Type: Indian
Pav Bhaji is a vibrant and hearty Indian street food dish that has gained immense popularity for its rich flavors and satisfying nature. The dish consists of a spicy vegetable mash, known as bhaji, served alongside buttered and toasted bread rolls called pav.
Traditionally enjoyed as a snack or light meal, Pav Bhaji is perfect for parties and gatherings, as it offers a burst of flavors that appeals to people of all ages. The combination of various vegetables, spices, and a touch of butter creates a delightful experience for the palate.
The beauty of Pav Bhaji lies in its versatility; you can customize the vegetable mix based on what you have on hand or what you prefer. Common ingredients include potatoes, tomatoes, peas, and bell peppers, which are cooked down and mashed, resulting in a creamy texture.
Served with a squeeze of lemon and a sprinkle of fresh cilantro, this dish is sure to be a hit at any gathering, providing a comforting and nourishing option that your guests will love.
Ingredients:
- 2 large potatoes, peeled and diced
- 1 cup green peas (fresh or frozen)
- 1 cup cauliflower florets
- 1 bell pepper, diced
- 2 medium tomatoes, chopped
- 1 large onion, finely chopped
- 2-3 green chilies, finely chopped
- 2 tablespoons ginger-garlic paste
- 2 tablespoons Pav Bhaji masala
- 1 teaspoon turmeric powder
- 2 tablespoons butter
- Salt to taste
- Fresh cilantro, chopped (for garnish)
- Lemon wedges (for serving)
- 8 pav (bread rolls)
- Additional butter for toasting the pav
Instructions:
- In a large pot, boil the diced potatoes, green peas, and cauliflower in salted water until they're tender, about 15-20 minutes. Drain the vegetables and set them aside to cool slightly.
- In a frying pan, melt 2 tablespoons of butter over medium heat. Add the finely chopped onions and sauté until they're golden brown. Then, add the ginger-garlic paste and green chilies, cooking for another minute until fragrant.
- Add the chopped tomatoes to the pan, along with the turmeric powder and Pav Bhaji masala. Cook the mixture for about 5-7 minutes, stirring occasionally, until the tomatoes become soft and the oil begins to separate.
- Once the tomato mixture is ready, add the boiled vegetables to the pan. Using a potato masher, mash the vegetables together with the spices until you achieve a smooth consistency. If the mixture appears too thick, you can add a splash of water to loosen it up. Adjust the salt to taste.
- Let the bhaji simmer on low heat for another 5-10 minutes to allow the flavors to meld together. Meanwhile, heat a separate frying pan and melt some butter to toast the pav until golden brown on both sides.
- Serve the bhaji hot, garnished with fresh cilantro and accompanied by lemon wedges and the toasted pav. Enjoy this delicious dish with friends and family!
Extra Tips: For an even richer flavor, consider adding a dollop of cream or a bit more butter to the bhaji just before serving. You can also include other vegetables like carrots or bell peppers in the mash for added nutrition.
If you prefer a milder version, reduce the number of green chilies or omit them entirely. Pav Bhaji is best enjoyed fresh, but any leftovers can be stored in an airtight container in the refrigerator and reheated before serving.
Bombay Sandwich
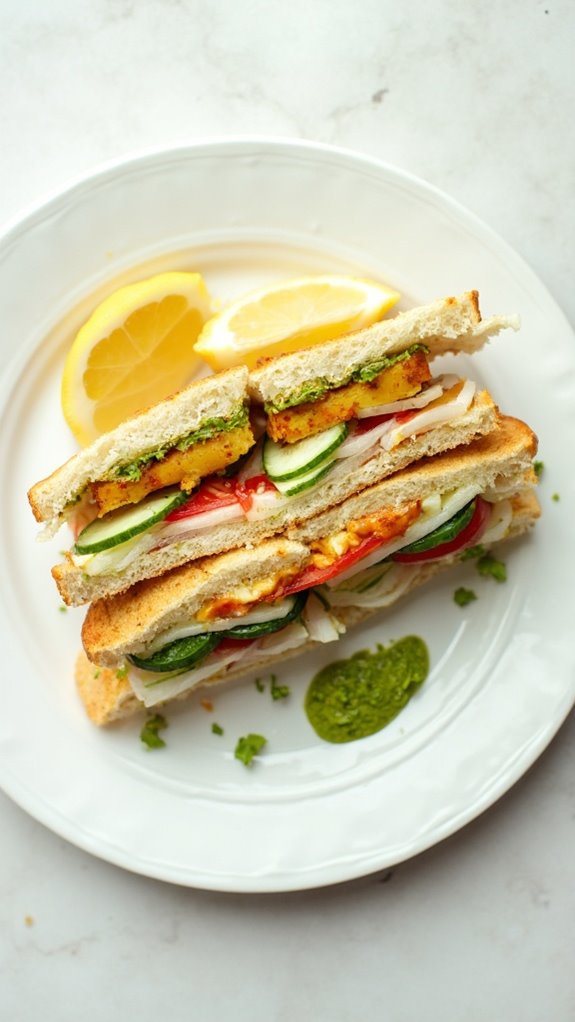
Title: Bombay Sandwich
Prep Time: 15 minutes
Cook Time: 10 minutes
Number of Servings: 4
Required Equipment List: Grill pan or sandwich press, knife, cutting board, spatula
Cuisine Type: Indian
The Bombay Sandwich is a popular street food that captures the essence of vibrant Indian flavors in a simple yet delicious sandwich. Layered with fresh vegetables, spicy chutney, and a hint of tangy lemon, this sandwich is perfect for parties or a quick snack. The combination of crispy bread and juicy fillings makes each bite a burst of flavor that will leave your guests wanting more.
This sandwich isn't only easy to make but also highly customizable. You can add your favorite ingredients or adjust the spice level to suit your taste. Serve it with a side of tangy tamarind or mint chutney for dipping, and watch as your guests rave about this delightful appetizer. The Bombay Sandwich is a great way to introduce people to the rich culinary traditions of India while keeping things fun and casual.
Ingredients:
- 8 slices of white or whole wheat bread
- 2 medium potatoes, boiled and mashed
- 1 cucumber, thinly sliced
- 1 tomato, thinly sliced
- 1 onion, thinly sliced
- 1/2 cup green chutney (coriander and mint)
- 1 tablespoon butter
- Salt to taste
- 1/2 teaspoon chaat masala (optional)
- Lemon wedges (for serving)
Instructions:
- Begin by preparing the green chutney if you don't have it ready. In a blender, combine fresh coriander leaves, mint leaves, green chilies (to taste), lemon juice, and salt. Blend until smooth and set aside.
- Take four slices of bread and spread a generous layer of green chutney on each slice. On two of the slices, layer the mashed potato evenly, followed by thin slices of cucumber, tomato, and onion. Sprinkle salt and chaat masala (if using) over the vegetables for added flavor.
- Top the vegetable-filled slices with the remaining slices of bread, chutney side down, creating two sandwiches. Press down gently to compact the fillings.
- Heat a grill pan or sandwich press over medium heat. Spread butter on the outer sides of each sandwich. Place the sandwiches on the grill and cook until golden brown and crispy, about 3-5 minutes per side. If using a sandwich press, follow the manufacturer's instructions for grilling.
- Once grilled, remove the sandwiches from the pan and allow them to cool slightly before cutting them into quarters. Serve immediately with lemon wedges and extra chutney on the side.
Extra Tips: To enhance the flavor of your Bombay Sandwich, consider adding slices of cheese or avocado for creaminess. You can also experiment with different types of chutneys, such as tamarind or spicy red chutney, to give it a unique twist. For a crunchier texture, add some finely chopped bell peppers or lettuce between the vegetable layers. Enjoy this delicious sandwich at your next gathering!
Masala Peanuts

Title: Masala Peanuts
Prep Time: 10 minutes
Cook Time: 15 minutes
Number of Servings: 4
Required Equipment List: Mixing bowl, frying pan, spatula, paper towels
Cuisine Type: Indian
Masala Peanuts are a popular Indian snack that packs a punch of flavor and crunch, making them a perfect appetizer for parties or a delightful munching option for movie nights. The combination of roasted peanuts with a blend of spices creates a savory treat that's both addictive and satisfying. This easy recipe requires minimal ingredients but delivers maximum flavor, making it a favorite among both kids and adults alike.
The beauty of Masala Peanuts lies in their versatility. You can adjust the spice levels according to your preference, making them as mild or as fiery as you like. They're often enjoyed on their own or served alongside drinks, making them an ideal choice for gatherings. With just a few simple steps, you can whip up this delicious snack in no time, impressing your guests with your culinary skills.
Ingredients:
- 2 cups raw peanuts
- 1 tablespoon oil (preferably peanut or vegetable)
- 1 teaspoon turmeric powder
- 1 teaspoon red chili powder (adjust to taste)
- 1 teaspoon chaat masala
- Salt to taste
- Fresh coriander leaves (for garnish, optional)
Instructions:
- In a mixing bowl, combine the raw peanuts with oil, turmeric powder, red chili powder, chaat masala, and salt. Mix well until all the peanuts are evenly coated with the spices.
- Heat a frying pan over medium heat. Once hot, add the spiced peanuts to the pan in a single layer. Stir occasionally to guarantee even cooking and to prevent burning.
- Roast the peanuts for about 10-12 minutes, or until they turn golden brown and crispy. Keep an eye on them, as they can burn quickly if left unattended.
- Once roasted, remove the pan from the heat and transfer the peanuts to a plate lined with paper towels to absorb any excess oil. Allow them to cool for a few minutes.
- Garnish with fresh coriander leaves if desired, and serve the Masala Peanuts warm or at room temperature as a delicious and crunchy snack.
Extra Tips: To elevate the flavor of your Masala Peanuts, consider adding a pinch of asafoetida (hing) while roasting for an aromatic touch. You can also experiment with different spices, such as cumin or black pepper, to create your own signature blend. Store any leftovers in an airtight container to keep them fresh and crunchy for a few days. Enjoy your flavorful creation!
Conclusion
So, whether you're craving the crunchy delight of samosas or the spicy goodness of paneer tikka, these appetizers are sure to please your guests. They're not just snacks; they're a burst of flavor that can turn any gathering into a celebration. Isn't it amazing how a simple bite can spark joy and create lasting memories? So, go ahead and whip up a few of these treats, and watch your party come alive with laughter and deliciousness!

