19 Cozy Winter Vegan Recipe Ideas
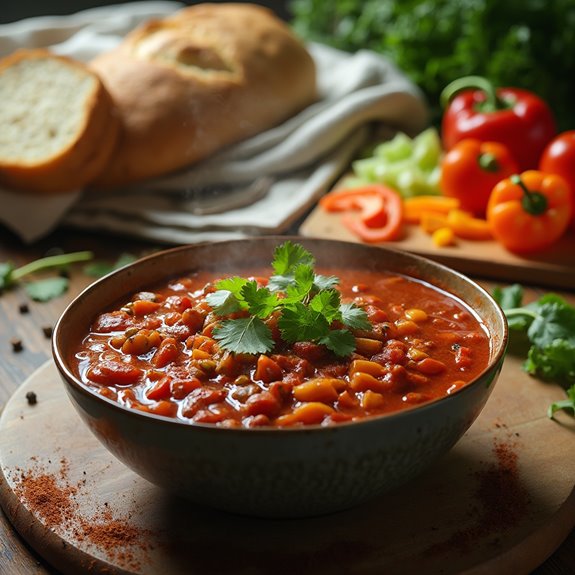
Looking for cozy winter vegan recipes? You're in luck! Try a hearty vegetable soup loaded with vibrant veggies, or warm up with creamy vegan mushroom risotto that's rich and satisfying. How about a spicy lentil chili to make your taste buds tingle? Immerse yourself in a butternut squash curry for a sweet twist, or enjoy a comforting vegan shepherd's pie perfect for chilly evenings. Don't forget dessert, like coconut rice pudding or gingerbread cookies to sweeten the season. Each recipe's not just delicious; they're also versatile and freezer-friendly. Ready to whip up something special? There's plenty more to explore!
Hearty Vegetable Soup
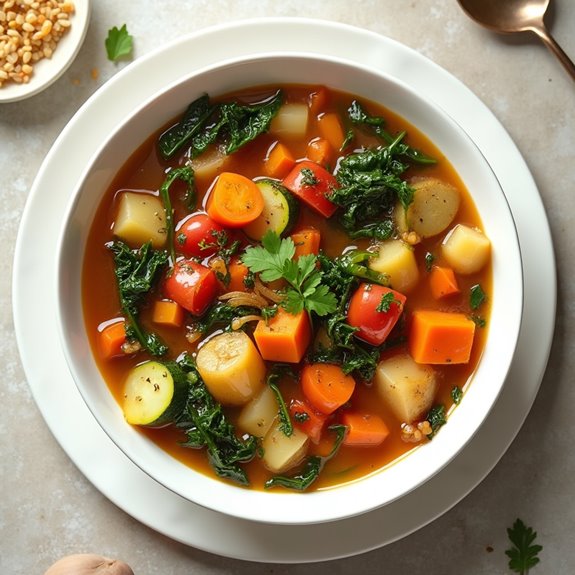
Title: Hearty Vegetable Soup
Prep Time: 15 minutes
Cook Time: 30 minutes
Number of Servings: 6
Required Equipment List: Large pot, cutting board, knife, wooden spoon, measuring cups, measuring spoons
Cuisine Type: Vegan
This Hearty Vegetable Soup is the ultimate comfort food for chilly winter days, brimming with vibrant vegetables and rich flavors. Packed with nutrients, this soup combines hearty ingredients like carrots, potatoes, and kale, making it not only satisfying but also wonderfully wholesome.
The broth is infused with aromatic herbs and spices, creating a warm and inviting dish that will nourish your body and soul during the colder months. With its versatility, this recipe is perfect for using up any leftover vegetables you have on hand.
Feel free to mix and match your favorite veggies or add in grains like quinoa or barley for an extra boost of nutrition. This soup is easy to prepare, making it a great choice for meal prepping or a quick weeknight dinner. Serve it with a slice of crusty bread for a complete and satisfying meal.
Ingredients:
- 2 tablespoons olive oil
- 1 onion, diced
- 2 cloves garlic, minced
- 3 carrots, sliced
- 2 celery stalks, sliced
- 1 bell pepper, diced
- 2 medium potatoes, diced
- 1 zucchini, diced
- 1 cup chopped kale
- 1 can (14 oz) diced tomatoes
- 4 cups vegetable broth
- 1 teaspoon dried thyme
- 1 teaspoon dried oregano
- Salt and pepper to taste
- Fresh parsley for garnish (optional)
Instructions:
- In a large pot, heat the olive oil over medium heat. Add the diced onion and sauté for about 5 minutes, or until the onion becomes translucent. Stir in the minced garlic and cook for an additional minute until fragrant.
- Add the sliced carrots, celery, and bell pepper to the pot. Sauté the vegetables for about 5-7 minutes, stirring occasionally, until they start to soften.
- Next, add the diced potatoes and zucchini to the pot, stirring well to combine. Pour in the can of diced tomatoes (with juice) and the vegetable broth. Bring the mixture to a gentle boil.
- Once boiling, reduce the heat to low and add the chopped kale, dried thyme, and dried oregano. Season with salt and pepper to taste. Cover the pot and let it simmer for about 20 minutes, or until the vegetables are tender.
- After the soup has simmered, give it a good stir and adjust the seasoning if necessary. If you prefer a thicker soup, you can mash some of the potatoes against the pot's side with a wooden spoon for a creamier texture.
- Serve the hearty vegetable soup hot, garnished with fresh parsley if desired. Enjoy with a slice of crusty bread or a side salad for a complete meal.
Extra Tips: For added flavor, consider incorporating a splash of soy sauce or a tablespoon of nutritional yeast to enhance the umami taste.
This soup can also be made in large batches and stored in the refrigerator for up to a week or frozen for up to three months, making it a perfect meal prep option. Feel free to personalize the soup by adding your favorite beans or legumes for additional protein and texture.
Creamy Vegan Mushroom Risotto
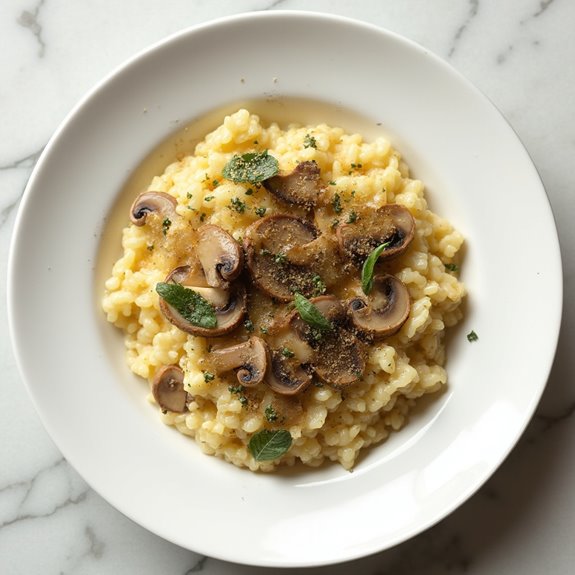
Title: Creamy Vegan Mushroom Risotto
Prep Time: 10 minutes
Cook Time: 30 minutes
Number of Servings: 4
Required Equipment List: Large saucepan, wooden spoon, measuring cups, measuring spoons, ladle
Cuisine Type: Italian
Creamy Vegan Mushroom Risotto is a comforting and luxurious dish that showcases the earthy flavors of mushrooms combined with the creaminess of plant-based ingredients. This risotto isn't only rich in texture but also packed with umami, making it a satisfying meal for both vegans and non-vegans alike.
The slow-cooking process allows the rice to absorb all the flavors, creating a dish that feels indulgent while being entirely plant-based. Using arborio rice, which is essential for achieving the signature creamy consistency, this recipe is perfect for a cozy winter dinner.
The addition of nutritional yeast gives it a cheesy flavor without any dairy, while the fresh herbs and sautéed mushrooms elevate the dish even further. Serve it as a main course or a side dish, and enjoy the warmth and satisfaction it brings on a chilly evening.
Ingredients:
- 1 cup arborio rice
- 4 cups vegetable broth
- 1 cup mushrooms, sliced (such as cremini or button)
- 1 small onion, finely chopped
- 2 cloves garlic, minced
- 1 tablespoon olive oil
- 1/4 cup nutritional yeast
- 1 tablespoon fresh thyme, chopped (or 1 teaspoon dried thyme)
- Salt and pepper to taste
- Fresh parsley for garnish (optional)
Instructions:
- In a large saucepan, heat the olive oil over medium heat. Add the chopped onion and sauté for about 3-4 minutes until translucent. Then, add the minced garlic and sliced mushrooms, cooking until the mushrooms are tender and browned, about 5-7 minutes.
- Stir in the arborio rice, ensuring that each grain is coated with the oil and mixed well with the vegetables. Toast the rice for about 1-2 minutes until slightly translucent.
- Begin adding the vegetable broth one ladle at a time, stirring frequently. Allow the liquid to absorb before adding the next ladle, which will take about 20 minutes. This gradual process helps to release the starches in the rice, creating a creamy texture.
- When the rice is al dente and has absorbed most of the broth, stir in the nutritional yeast, fresh thyme, salt, and pepper. Mix well to combine all flavors, and cook for an additional 2-3 minutes to heat through.
- Remove the risotto from heat and let it sit for a minute. Adjust the seasoning if necessary and fluff with a fork. Serve warm, garnished with fresh parsley if desired.
Extra Tips: For an extra layer of flavor, consider adding a splash of white wine after toasting the rice and before adding the broth. This will enhance the depth of the risotto.
Additionally, you can mix in your favorite vegetables such as peas or spinach towards the end of cooking for added nutrition and color. Leftover risotto can be cooled and stored in the fridge, then reheated with a splash of broth for a quick meal. Enjoy your creamy creation!
Spicy Lentil Chili
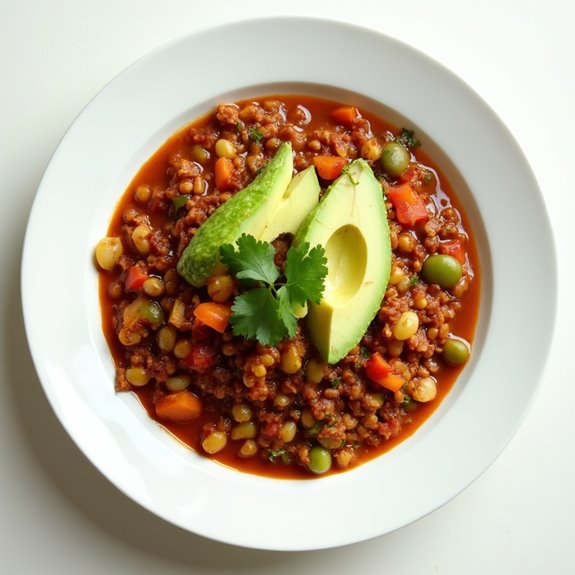
Title: Spicy Lentil Chili
Prep Time: 15 minutes
Cook Time: 30 minutes
Number of Servings: 6
Required Equipment List: Large pot, cutting board, knife, stirring spoon, measuring cups, measuring spoons
Cuisine Type: Vegan, Comfort Food
This Spicy Lentil Chili is a hearty and flavorful dish that warms you up on chilly days. Packed with protein-rich lentils, fresh vegetables, and a blend of spices, this chili isn't only satisfying but also entirely plant-based.
The combination of tomatoes and spices creates a robust base that beautifully complements the lentils, making it a perfect meal for a cozy family dinner or a gathering with friends.
Whether you're a long-time vegan or just exploring plant-based meals, this chili offers a delightful experience. With the added kick from jalapeños and a hint of smokiness from smoked paprika, it's a dish that brings comfort while leaving your taste buds excited.
Serve it topped with avocado or fresh cilantro for an extra touch of freshness and flavor.
Ingredients:
- 1 tablespoon olive oil
- 1 onion, diced
- 2 cloves garlic, minced
- 1 jalapeño, diced (adjust to taste)
- 1 bell pepper, diced
- 2 carrots, diced
- 2 celery stalks, diced
- 1 cup dried lentils (any color)
- 1 can (14 oz) diced tomatoes
- 4 cups vegetable broth
- 2 tablespoons chili powder
- 1 teaspoon ground cumin
- 1 teaspoon smoked paprika
- Salt and pepper to taste
- Fresh cilantro or avocado for garnish (optional)
Instructions:
- Heat the olive oil in a large pot over medium heat. Add the diced onion and sauté for about 5 minutes until translucent. Then add the minced garlic and diced jalapeño, cooking for an additional minute until fragrant.
- Stir in the bell pepper, carrots, and celery, cooking for another 5 minutes until the vegetables begin to soften. This will create a flavorful base for the chili.
- Add the dried lentils to the pot, followed by the diced tomatoes (including their juices), vegetable broth, chili powder, cumin, and smoked paprika. Stir well to combine all the ingredients.
- Bring the mixture to a boil, then reduce the heat to low. Cover and let it simmer for about 25-30 minutes, or until the lentils are tender. Stir occasionally to prevent sticking and guarantee even cooking.
- Taste the chili and adjust seasoning with salt and pepper as needed. If you prefer a spicier chili, you can add more diced jalapeño or a pinch of cayenne pepper at this stage.
- Once cooked, serve the chili hot, garnished with fresh cilantro or sliced avocado for a creamy contrast. Enjoy with crusty bread or over a bed of rice for a complete meal.
Extra Tips: For added depth of flavor, consider letting the chili simmer for a longer period, even up to an hour, which will enhance the taste as the ingredients meld together.
You can also make a double batch and freeze the leftovers for a quick meal later. This chili is versatile, so feel free to add in other vegetables like zucchini or corn, or even top it with some vegan cheese for extra indulgence.
Butternut Squash Curry

Title: Butternut Squash Curry
Prep Time: 15 minutes
Cook Time: 30 minutes
Number of Servings: 4
Required Equipment List: Large pot, cutting board, knife, measuring cups, measuring spoons, wooden spoon
Cuisine Type: Indian-inspired
This Butternut Squash Curry is a warm and comforting dish that embodies the flavors of winter while being completely plant-based. The creamy coconut milk melds perfectly with the sweet and nutty flavor of butternut squash, creating a rich sauce that's both satisfying and nutritious.
The addition of spices such as cumin, coriander, and turmeric not only enhances the flavor profile but also adds beautiful color to the dish, making it visually appealing as well. Perfect as a main course served over rice or quinoa, this curry is a great way to incorporate seasonal vegetables into your meals.
It's also a great option for meal prep since it stores well in the fridge and can be easily reheated. Whether you're hosting a dinner or simply enjoying a cozy night in, this Butternut Squash Curry will warm your heart and soul.
Ingredients:
- 1 medium butternut squash, peeled and chopped into cubes
- 1 can (14 ounces) coconut milk
- 1 onion, diced
- 3 cloves garlic, minced
- 1 tablespoon ginger, grated
- 1 tablespoon curry powder
- 1 teaspoon ground cumin
- 1 teaspoon ground coriander
- 1/2 teaspoon turmeric
- 2 cups vegetable broth
- 1 cup spinach, fresh or frozen
- Salt and pepper to taste
- Cooked rice or quinoa, for serving
- Fresh cilantro, for garnish
Instructions:
- In a large pot over medium heat, add a splash of oil and sauté the diced onion until it becomes translucent, about 5 minutes. Stir occasionally to prevent sticking and guarantee even cooking.
- Add the minced garlic and grated ginger to the pot, cooking for an additional 1-2 minutes until fragrant. Be careful not to let the garlic burn, as it will impart a bitter taste.
- Stir in the curry powder, ground cumin, ground coriander, and turmeric. Toast the spices for about 1 minute, which will help release their essential oils and enhance the overall flavor of the curry.
- Add the chopped butternut squash, vegetable broth, and coconut milk to the pot. Bring the mixture to a gentle boil, then reduce the heat and let it simmer uncovered for about 20 minutes, or until the squash is tender.
- Once the squash is cooked through, stir in the spinach and allow it to wilt for a few minutes. Season the curry with salt and pepper to taste, adjusting the flavors as needed.
- Serve the Butternut Squash Curry over cooked rice or quinoa, and garnish with fresh cilantro for an added burst of flavor. Enjoy your hearty and nutritious meal!
Extra Tips: To save time, you can use pre-cut butternut squash available at grocery stores. This dish also allows for flexibility, so feel free to add other vegetables like bell peppers or chickpeas for added texture and nutrition.
Serve with naan bread or a side salad for a complete meal. If you prefer a spicier curry, you can add red pepper flakes or fresh chili peppers during the cooking process. Enjoy your cozy and delicious curry!
Vegan Shepherd's Pie

Title: Vegan Shepherd's Pie
Prep Time: 20 minutes
Cook Time: 40 minutes
Number of Servings: 6
Required Equipment List: Oven-safe baking dish, skillet, mixing spoon, measuring cups, knife, cutting board
Cuisine Type: British
Vegan Shepherd's Pie is a comforting and hearty dish that captures the essence of traditional shepherd's pie while offering a plant-based twist. This recipe features a flavorful filling made from lentils and a medley of vegetables, all topped with creamy mashed potatoes. It's a perfect dish for colder months, providing warmth and satisfaction in every bite.
With its rich flavors and hearty texture, this dish is sure to become a family favorite. Not only is this Vegan Shepherd's Pie delicious, but it's also incredibly versatile. You can easily customize the filling with your favorite vegetables or add spices to cater to your taste preferences.
This dish is perfect for meal prep or a cozy family dinner, and it also freezes well, making it an ideal option for those busy weeknights when you need something quick and fulfilling.
Ingredients:
- 1 cup green or brown lentils, rinsed
- 2 cups vegetable broth
- 1 tablespoon olive oil
- 1 onion, diced
- 2 carrots, diced
- 2 celery stalks, diced
- 3 cloves garlic, minced
- 1 cup frozen peas
- 1 tablespoon tomato paste
- 1 teaspoon dried thyme
- 1 teaspoon dried oregano
- Salt and pepper to taste
- 4 large potatoes, peeled and cubed
- 1/4 cup plant-based milk
- 2 tablespoons vegan butter
Instructions:
- Preheat your oven to 400°F (200°C). In a medium-sized pot, combine the rinsed lentils and vegetable broth. Bring to a boil, then reduce the heat and let it simmer for about 20 minutes or until the lentils are tender and most of the liquid is absorbed. Drain any excess liquid if necessary.
- In a large skillet, heat the olive oil over medium heat. Add the diced onion, carrots, and celery, sautéing for about 5-7 minutes until the vegetables are softened. Stir in the minced garlic and cook for an additional minute until fragrant.
- Add the cooked lentils to the skillet along with the frozen peas, tomato paste, dried thyme, dried oregano, and salt and pepper to taste. Mix everything well and cook for another 5 minutes until heated through. Remove from heat and set aside.
- While the filling is cooling, bring a large pot of salted water to boil and add the cubed potatoes. Cook for about 15 minutes or until fork-tender. Drain the potatoes and add them back to the pot, then mash them with plant-based milk and vegan butter until creamy. Season with salt and pepper to taste.
- Spread the lentil and vegetable mixture evenly in an oven-safe baking dish. Top with the mashed potatoes, smoothing it out with a spatula. Use a fork to create texture on the surface for a crispy topping.
- Bake in the preheated oven for 20 minutes or until the top is golden brown. Let it cool for a few minutes before serving.
Extra Tips: For added depth of flavor, consider adding a splash of soy sauce or a teaspoon of smoked paprika to the lentil filling. You can also experiment with different vegetables based on what you have on hand, such as mushrooms or bell peppers.
This dish can be made ahead of time; simply assemble it and store it in the fridge before baking. When ready to eat, just pop it in the oven and bake as directed. Enjoy your comforting Vegan Shepherd's Pie!
Roasted Root Vegetable Medley
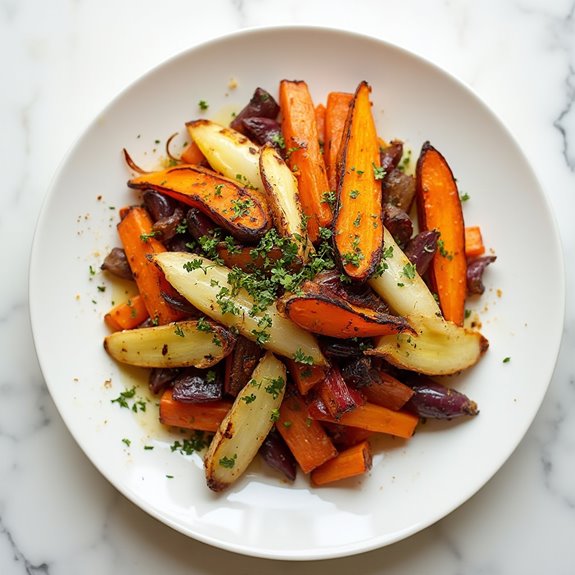
Title: Roasted Root Vegetable Medley
Prep Time: 15 minutes
Cook Time: 35 minutes
Number of Servings: 4
Required Equipment List: Baking sheet, parchment paper, mixing bowl, knife, cutting board
Cuisine Type: Mediterranean-inspired
This Roasted Root Vegetable Medley is a hearty and colorful dish that showcases the natural sweetness and earthy flavors of seasonal root vegetables. Perfect for winter, it combines a variety of vegetables such as carrots, parsnips, and sweet potatoes, all roasted to perfection.
The combination of olive oil, garlic, and fresh herbs brings out the best in these vegetables, making it a comforting side dish that pairs beautifully with any main course. Not only is this medley delicious, but it's also incredibly versatile. You can easily customize the recipe by including your favorite root vegetables or adding seasonal herbs to enhance the flavor.
This dish isn't only satisfying and nutritious but also visually appealing, making it an ideal centerpiece for festive winter gatherings or a cozy family dinner.
Ingredients:
- 2 large carrots, peeled and chopped
- 2 parsnips, peeled and chopped
- 1 large sweet potato, peeled and cubed
- 1 red onion, cut into wedges
- 3 tablespoons olive oil
- 4 cloves garlic, minced
- 1 teaspoon dried thyme
- 1 teaspoon dried rosemary
- Salt and pepper to taste
- Fresh parsley, chopped (for garnish)
Instructions:
- Preheat your oven to 425°F (220°C). Line a baking sheet with parchment paper to prevent the vegetables from sticking and to make cleanup easier.
- In a mixing bowl, combine the chopped carrots, parsnips, sweet potato, and red onion. Drizzle with olive oil, then add the minced garlic, dried thyme, dried rosemary, salt, and pepper. Toss everything together until the vegetables are evenly coated in the oil and seasonings.
- Spread the vegetable mixture in a single layer on the prepared baking sheet. Make sure there's enough space between the pieces to allow for even roasting and caramelization.
- Roast the vegetables in the preheated oven for 25-30 minutes, stirring halfway through to guarantee even cooking. The vegetables should be tender and lightly browned when finished.
- Once done, remove the baking sheet from the oven and let the vegetables cool for a few minutes. Transfer to a serving dish and garnish with chopped fresh parsley for a pop of color before serving.
Extra Tips: For an added depth of flavor, consider tossing in some cubed butternut squash or beets along with the root vegetables. Feel free to experiment with different herbs, such as oregano or sage, to suit your taste.
If you prefer a bit of heat, a pinch of red pepper flakes can be a wonderful addition. This Roasted Root Vegetable Medley can be made ahead of time and reheated, making it a great option for meal prep or festive occasions. Enjoy the warm, comforting flavors of winter!
Warm Quinoa Salad
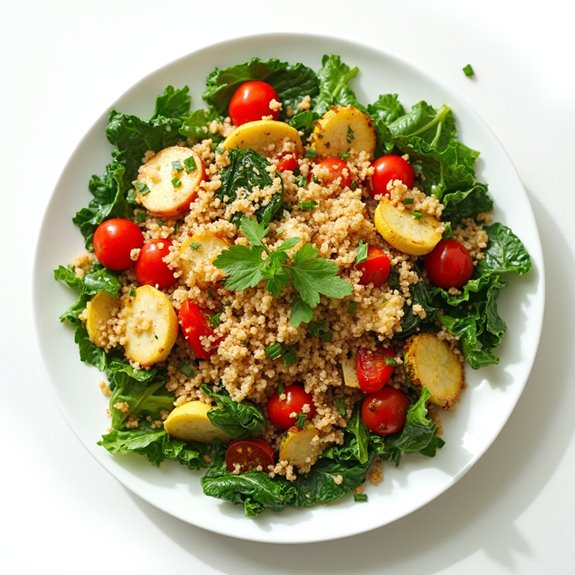
Title: Warm Quinoa Salad
Prep Time: 15 minutes
Cook Time: 25 minutes
Number of Servings: 4
Required Equipment List: Medium saucepan, large mixing bowl, spoon, measuring cups, and cutting board
Cuisine Type: American
This Warm Quinoa Salad is a nourishing and hearty dish that's perfect for chilly winter evenings. Bursting with flavor and nutrition, this salad features fluffy quinoa as a base, complemented by roasted vegetables and a zesty dressing that ties everything together beautifully. The combination of textures and flavors makes this salad not only filling but also a delightful way to enjoy a variety of seasonal vegetables.
What truly sets this salad apart is its versatility; you can easily swap out the vegetables based on what you have on hand or what's in season. It's a fantastic dish to meal prep for the week, as it holds up well in the fridge and can be enjoyed warm or cold. Whether served as a main course or a side dish, this warm quinoa salad will keep you cozy and satisfied throughout the winter months.
Ingredients:
- 1 cup quinoa
- 2 cups vegetable broth
- 1 red bell pepper, diced
- 1 zucchini, diced
- 1 cup cherry tomatoes, halved
- 1 cup kale, chopped
- 2 tablespoons olive oil
- Salt and pepper to taste
- 1 teaspoon garlic powder
- 1 tablespoon balsamic vinegar
- 1 tablespoon lemon juice
- Fresh parsley, chopped (for garnish)
Instructions:
- Begin by rinsing the quinoa under cold water in a fine-mesh strainer to remove any bitterness. In a medium saucepan, combine rinsed quinoa and vegetable broth. Bring to a boil over medium-high heat, then reduce the heat to low, cover, and simmer for about 15 minutes, or until the quinoa is fluffy and the liquid has been absorbed.
- While the quinoa is cooking, preheat your oven to 400°F (200°C). On a baking sheet, toss the diced red bell pepper, zucchini, and cherry tomatoes with olive oil, salt, pepper, and garlic powder. Spread the vegetables out in an even layer and roast in the oven for 15-20 minutes, or until they're tender and slightly caramelized.
- In a large mixing bowl, combine the cooked quinoa and roasted vegetables. Add the chopped kale, balsamic vinegar, and lemon juice, mixing everything together gently until well combined. The heat from the quinoa and vegetables will wilt the kale slightly, adding a lovely texture to the salad.
- Taste the salad and adjust the seasoning with more salt, pepper, or lemon juice as needed. Once you're satisfied with the flavor, serve the salad warm, garnished with fresh parsley for a pop of color and added freshness.
Extra Tips: To enhance the flavor of your warm quinoa salad, consider adding a handful of nuts or seeds, such as toasted walnuts or sunflower seeds, for a satisfying crunch. You can also experiment with different herbs and spices to personalize the dressing; a dash of cumin or smoked paprika can add a delightful depth of flavor.
If you have leftovers, store them in an airtight container in the fridge for up to four days, and enjoy it as a quick lunch or dinner option!
Creamy Tomato Basil Soup

Title: Creamy Tomato Basil Soup
Prep Time: 10 minutes
Cook Time: 30 minutes
Number of Servings: 4
Required Equipment List: Large pot, immersion blender or regular blender, measuring cups, measuring spoons, wooden spoon
Cuisine Type: Vegan
This Creamy Tomato Basil Soup is a comforting and delicious dish that perfectly captures the flavors of winter. Made with ripe tomatoes, fresh basil, and creamy coconut milk, this soup is both hearty and nourishing. It's an easy recipe that combines simple ingredients into a warming bowl that's ideal for chilly nights.
Pair it with crusty bread or a light salad for a complete meal that will satisfy your cravings. The beauty of this soup lies in its simplicity and the vibrant flavors that come together with minimal effort. Fresh basil adds a fragrant aroma, while the coconut milk provides a creamy texture without any dairy.
Whether you're looking for a quick lunch or a cozy dinner option, this tomato basil soup is sure to become a favorite in your household.
Ingredients:
- 2 tablespoons olive oil
- 1 onion, chopped
- 3 cloves garlic, minced
- 1 can (28 ounces) crushed tomatoes
- 2 cups vegetable broth
- 1 can (13.5 ounces) coconut milk
- 1 cup fresh basil leaves, packed
- Salt and pepper to taste
- Croutons or fresh basil for garnish (optional)
Instructions:
- In a large pot, heat the olive oil over medium heat. Add the chopped onion and sauté for about 5 minutes, or until the onion becomes soft and translucent. Stir in the minced garlic and cook for an additional minute, being careful not to burn it.
- Pour in the crushed tomatoes and vegetable broth, stirring to combine. Bring the mixture to a gentle boil, then reduce the heat to low and let it simmer uncovered for 15 minutes. This allows the flavors to meld together beautifully.
- After simmering, add the coconut milk and fresh basil leaves to the pot. Stir well and allow the soup to heat through for another 5 minutes. The basil will infuse the soup with its fresh flavor.
- Using an immersion blender, carefully blend the soup until smooth and creamy. If you don't have an immersion blender, you can transfer the soup to a regular blender in batches. Be cautious with hot liquids and allow steam to escape.
- Season the soup with salt and pepper to taste. If desired, serve the soup hot, garnished with croutons or extra basil leaves for a touch of color and texture.
Extra Tips: For added depth of flavor, consider roasting fresh tomatoes before blending them into the soup. This can enhance the sweetness and richness of the dish. If you prefer a spicier kick, add a pinch of red pepper flakes when sautéing the onions.
This creamy tomato basil soup can be made in advance and stored in the refrigerator for up to three days, allowing the flavors to deepen even further.
Vegan Stuffed Peppers

Title: Vegan Stuffed Peppers
Prep Time: 15 minutes
Cook Time: 30 minutes
Number of Servings: 4
Required Equipment List: Baking dish, mixing bowl, oven, knife, cutting board
Cuisine Type: Mediterranean-inspired
Vegan Stuffed Peppers are a hearty and nutritious dish that brings a burst of color to your table. This recipe features bell peppers filled with a savory mixture of quinoa, black beans, corn, and spices, creating a satisfying meal that's both filling and packed with plant-based protein.
The combination of flavors is complemented by fresh herbs and a hint of lime, making it a delightful option for lunch or dinner. Not only are these stuffed peppers visually appealing, but they're also incredibly versatile. You can customize the filling with your favorite grains, vegetables, or spices, guaranteeing that each time you make them, they can be a unique culinary experience.
Perfect for meal prep or as a comforting dish on a chilly evening, these Vegan Stuffed Peppers are sure to become a family favorite.
Ingredients:
- 4 large bell peppers (any color)
- 1 cup cooked quinoa
- 1 can (15 oz) black beans, drained and rinsed
- 1 cup corn (fresh, frozen, or canned)
- 1 teaspoon cumin
- 1 teaspoon chili powder
- 1/2 teaspoon garlic powder
- Salt and pepper to taste
- 1 lime, juiced
- Fresh cilantro, chopped (for garnish)
Instructions:
- Preheat your oven to 375°F (190°C). While the oven is heating, prepare the bell peppers by cutting the tops off and removing the seeds and membranes. Place them upright in a baking dish.
- In a mixing bowl, combine the cooked quinoa, black beans, corn, cumin, chili powder, garlic powder, lime juice, salt, and pepper. Mix well until all ingredients are evenly distributed.
- Spoon the quinoa mixture into each bell pepper, packing it down gently to affirm they're filled to the top. If there's any leftover filling, it can be placed around the peppers in the baking dish.
- Cover the baking dish with aluminum foil and bake in the preheated oven for 25 minutes. This will help steam the peppers and ascertain they're tender.
- After 25 minutes, remove the foil and bake for an additional 5 minutes to allow the tops to get slightly crispy. Once done, remove the peppers from the oven and let them cool for a few minutes.
- Serve the stuffed peppers warm, garnished with fresh cilantro for added flavor and a pop of color.
Extra Tips: To enhance the flavor of the filling, consider sautéing some onions and garlic in a skillet before adding them to the quinoa mixture. You can also add diced tomatoes or other vegetables for extra texture and nutrition.
If you prefer a spicier kick, incorporate some diced jalapeños or a dash of hot sauce in the filling. These stuffed peppers are delicious on their own or served with a side salad for a complete meal. Enjoy your healthy and satisfying dish!
Sweet Potato and Black Bean Tacos
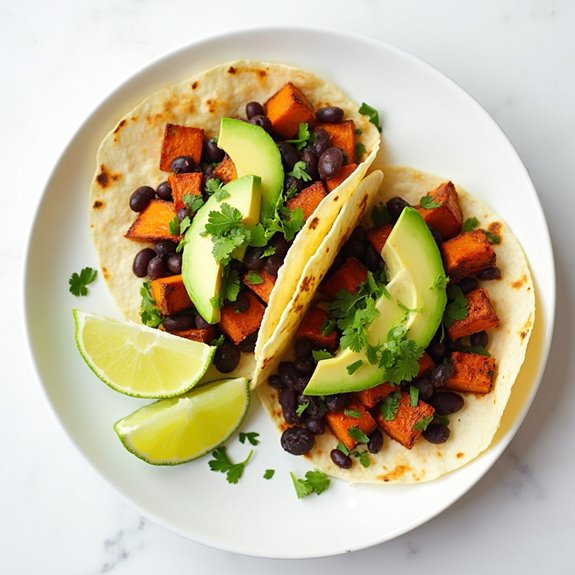
Title: Sweet Potato and Black Bean Tacos
Prep Time: 15 minutes
Cook Time: 20 minutes
Number of Servings: 4
Required Equipment List: Baking sheet, mixing bowl, skillet, spatula, fork
Cuisine Type: Mexican-inspired
These Sweet Potato and Black Bean Tacos are a delicious and satisfying way to warm up during the chilly winter months. The combination of roasted sweet potatoes and hearty black beans creates a filling and nutritious filling that's both comforting and packed with flavor.
Topped with fresh cilantro, avocado, and a zesty lime crema, these tacos aren't only visually appealing but also a delightful explosion of tastes and textures in every bite. Perfect for a casual dinner or a festive gathering, these tacos are easy to prepare and can be customized to suit your taste.
The sweet potatoes bring a natural sweetness that pairs beautifully with the rich black beans, while the toppings add a revitalizing crunch and vibrant flavor. Whether you're vegan, vegetarian, or simply looking to incorporate more plant-based meals into your diet, these tacos are sure to become a favorite in your household.
Ingredients:
- 2 medium sweet potatoes, peeled and diced
- 1 can (15 oz) black beans, drained and rinsed
- 1 tablespoon olive oil
- 1 teaspoon chili powder
- 1 teaspoon cumin
- Salt and pepper to taste
- 8 small corn tortillas
- 1 avocado, sliced
- Fresh cilantro, chopped (for garnish)
- Lime wedges (for serving)
Instructions:
- Preheat your oven to 425°F (220°C). Line a baking sheet with parchment paper and spread the diced sweet potatoes evenly on it. Drizzle with olive oil, chili powder, cumin, salt, and pepper, tossing to coat the sweet potatoes evenly in the seasoning.
- Roast the sweet potatoes in the preheated oven for 15-20 minutes, or until they're tender and slightly caramelized. Stir halfway through to guarantee even cooking.
- While the sweet potatoes are roasting, heat a skillet over medium heat. In the heated skillet, add the black beans and cook for about 5 minutes until warmed through. Season with a pinch of salt and pepper, and stir occasionally to prevent sticking.
- Once the sweet potatoes are done, combine them with the black beans in the skillet.
- Warm the corn tortillas in a dry skillet or microwave for a few seconds until pliable. Assemble the tacos by filling each tortilla with the sweet potato and black bean mixture. Top with sliced avocado and chopped cilantro.
- Serve the tacos with lime wedges on the side for squeezing over the top just before eating. This adds a bright, zesty flavor that enhances the overall taste of the tacos.
Extra Tips: For added texture and flavor, consider adding a spoonful of your favorite salsa or a drizzle of hot sauce to each taco. If you're looking for a creamy element, a simple lime crema made from blended cashews, lime juice, and a pinch of salt can elevate the dish.
You can also experiment with different toppings like diced tomatoes, shredded lettuce, or pickled red onions for a personal touch. Enjoy your delicious and healthy tacos!
Cauliflower and Chickpea Stew

Title: Cauliflower and Chickpea Stew
Prep Time: 15 minutes
Cook Time: 30 minutes
Number of Servings: 4
Required Equipment List: Large pot, cutting board, knife, wooden spoon, measuring cups, and spoons
Cuisine Type: Mediterranean
This Cauliflower and Chickpea Stew is a hearty and nourishing dish that's perfect for warming you up during the cold winter months. Packed with protein-rich chickpeas and tender cauliflower, this stew isn't only delicious but also incredibly nutritious.
The combination of spices, tomatoes, and vegetables creates a rich flavor profile that will delight your taste buds, making it a fantastic meal for both vegetarians and meat-eaters alike. The stew is simple to prepare and can be easily customized with your favorite vegetables or spices.
It's an ideal make-ahead meal, as the flavors deepen and improve the longer it sits, making it perfect for meal prep or cozy family dinners. Serve it with crusty bread or over a bed of fluffy rice for a satisfying and comforting meal during the chilly winter months.
Ingredients:
- 1 medium onion, chopped
- 3 cloves garlic, minced
- 1 tablespoon olive oil
- 1 teaspoon ground cumin
- 1 teaspoon ground coriander
- 1/2 teaspoon smoked paprika
- 1 medium cauliflower, cut into florets
- 1 can (15 oz) chickpeas, drained and rinsed
- 1 can (14 oz) diced tomatoes
- 2 cups vegetable broth
- 2 cups spinach (or kale)
- Salt and pepper to taste
- Fresh cilantro or parsley for garnish (optional)
Instructions:
- In a large pot, heat the olive oil over medium heat. Add the chopped onion and sauté for about 5 minutes, or until translucent. Stir in the minced garlic and cook for an additional minute until fragrant.
- Add the ground cumin, ground coriander, and smoked paprika to the pot. Stir well to coat the onions and garlic, allowing the spices to toast slightly for about 1 minute.
- Incorporate the cauliflower florets into the pot and stir to combine. Cook for about 5 minutes, allowing the cauliflower to soften a bit before adding the chickpeas, diced tomatoes, and vegetable broth.
- Bring the mixture to a gentle boil, then reduce the heat to low and let it simmer uncovered for about 20 minutes. This will allow the cauliflower to become tender and the flavors to meld together.
- Once the cauliflower is tender, stir in the spinach (or kale) and cook for an additional 3-5 minutes until wilted. Season with salt and pepper to taste. Remove from heat.
- Serve the stew warm, garnished with fresh cilantro or parsley if desired. It pairs wonderfully with crusty bread or over rice.
Extra Tips: For added depth of flavor, consider roasting the cauliflower florets in the oven with a little olive oil and salt before adding them to the stew. This will enhance their natural sweetness and add a lovely caramelized flavor.
You can also adjust the spice level by adding a pinch of red pepper flakes for heat. If you have leftovers, the stew keeps well in the fridge for about 3-4 days and can also be frozen for later enjoyment.
Maple-Glazed Brussels Sprouts
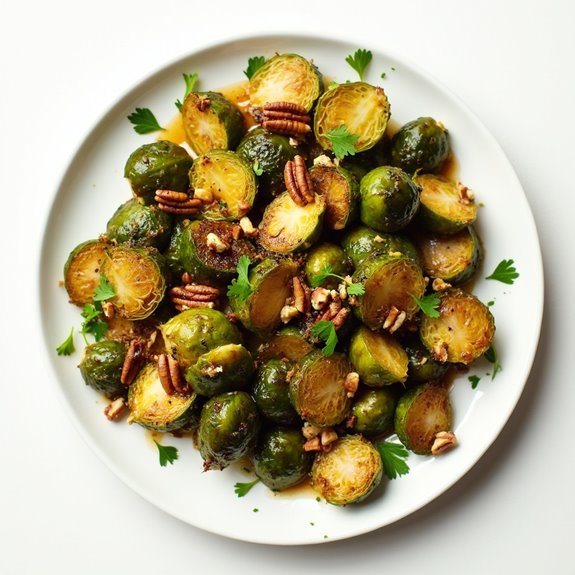
Title: Maple-Glazed Brussels Sprouts
Prep Time: 10 minutes
Cook Time: 25 minutes
Number of Servings: 4
Required Equipment List: Baking sheet, mixing bowl, spatula, oven
Cuisine Type: American
Maple-Glazed Brussels Sprouts are a delightful dish that combines the natural earthiness of Brussels sprouts with the sweet, rich flavor of maple syrup. Roasting the Brussels sprouts until they're crispy on the outside and tender on the inside enhances their flavor, while the maple glaze adds a touch of sweetness that elevates the dish to new heights. This recipe is perfect as a side dish for holiday gatherings or a comforting winter meal.
The beauty of this dish lies in its simplicity and the balance of flavors. The slight bitterness of the Brussels sprouts pairs beautifully with the sweetness of the maple syrup, creating a harmonious taste that will please both vegans and non-vegans alike. This dish isn't only delicious but also packed with nutrients, making it a healthy addition to your winter recipes.
Ingredients:
- 1 pound Brussels sprouts, trimmed and halved
- 2 tablespoons olive oil
- 1/4 cup maple syrup
- 1 teaspoon salt
- 1/2 teaspoon black pepper
- 1/2 teaspoon garlic powder
- 1/4 cup chopped pecans (optional)
- Fresh parsley for garnish (optional)
Instructions:
- Preheat your oven to 400°F (200°C). Line a baking sheet with parchment paper to prevent the Brussels sprouts from sticking and to make cleanup easier.
- In a mixing bowl, combine the halved Brussels sprouts with olive oil, maple syrup, salt, black pepper, and garlic powder. Toss the mixture well to guarantee that all the sprouts are coated evenly.
- Spread the Brussels sprouts in a single layer on the prepared baking sheet. Make sure they aren't overcrowded, as this will help them roast evenly and become crispy.
- Roast the Brussels sprouts in the preheated oven for about 20-25 minutes, stirring halfway through for even cooking. They should be golden brown and tender when done.
- If using, sprinkle the chopped pecans over the Brussels sprouts during the last 5 minutes of roasting for added crunch and flavor.
- Remove the baking sheet from the oven and let the Brussels sprouts cool slightly before garnishing with fresh parsley. Serve warm as a delightful side dish.
Extra Tips: For an extra burst of flavor, consider adding a splash of balsamic vinegar to the maple glaze before tossing the Brussels sprouts. If you want to experiment with different flavors, you can also add a pinch of red pepper flakes for a hint of heat or some dried cranberries for a sweet and tart contrast.
These maple-glazed Brussels sprouts can be made ahead of time and reheated in the oven, making them a convenient option for busy weeknights or holiday meals. Enjoy!
Vegan Pumpkin Bread

Title: Vegan Pumpkin Bread
Prep Time: 15 minutes
Cook Time: 60 minutes
Number of Servings: 12
Required Equipment List: Mixing bowls, loaf pan, whisk, measuring cups, measuring spoons, spatula, oven
Cuisine Type: American
Vegan Pumpkin Bread is a deliciously moist and flavorful treat that embodies the essence of fall with its warm spices and pumpkin goodness. This recipe isn't only plant-based but also easy to make, making it perfect for breakfast, snacks, or dessert.
The combination of pumpkin puree, warm spices like cinnamon and nutmeg, and a hint of vanilla creates a comforting aroma that fills your kitchen and invites everyone to gather around.
This bread is incredibly versatile; you can enjoy it plain, slathered with vegan butter, or topped with nut butter for added richness. With wholesome ingredients, including whole wheat flour and maple syrup, it offers a nutritious twist on traditional pumpkin bread.
Whether you're baking for a crowd or just for yourself, this vegan pumpkin bread is sure to become a seasonal favorite.
Ingredients:
- 1 cup pumpkin puree
- 1/2 cup maple syrup
- 1/4 cup vegetable oil
- 1/4 cup almond milk (or any plant-based milk)
- 1 teaspoon vanilla extract
- 1 1/2 cups whole wheat flour
- 1 teaspoon baking soda
- 1/2 teaspoon baking powder
- 1 teaspoon cinnamon
- 1/2 teaspoon nutmeg
- 1/4 teaspoon salt
- 1/2 cup walnuts or pecans (optional)
Instructions:
- Preheat your oven to 350°F (175°C). Grease a loaf pan or line it with parchment paper for easy removal after baking. This guarantees that your pumpkin bread comes out perfectly shaped and intact.
- In a large mixing bowl, whisk together the pumpkin puree, maple syrup, vegetable oil, almond milk, and vanilla extract until smooth and well combined. This mixture serves as the base for your bread and adds moisture and sweetness.
- In another bowl, mix the whole wheat flour, baking soda, baking powder, cinnamon, nutmeg, and salt. Stir well to guarantee the spices and leavening agents are evenly distributed throughout the flour.
- Gradually add the dry ingredients to the wet mixture, folding gently with a spatula until just combined. Be careful not to overmix, as this can result in a denser bread. If using, fold in the walnuts or pecans at this stage for added texture.
- Pour the batter into the prepared loaf pan and smooth the top with a spatula. Bake in the preheated oven for 50-60 minutes or until a toothpick inserted into the center comes out clean. Keep an eye on it towards the end of the baking time to prevent over-browning.
- Once baked, remove the pumpkin bread from the oven and let it cool in the pan for about 10 minutes. Then, transfer it to a wire rack to cool completely before slicing. This helps the bread set and makes for cleaner slices.
Extra Tips: For an extra layer of flavor, consider adding chocolate chips or dried cranberries to the batter. You can also substitute half of the whole wheat flour with almond flour for a slightly different texture.
If you want to make mini loaves, simply adjust the baking time and use smaller loaf pans. This pumpkin bread can be stored in an airtight container at room temperature for a few days or frozen for longer storage. Enjoy your delightful vegan treat!
Cinnamon Apple Oatmeal
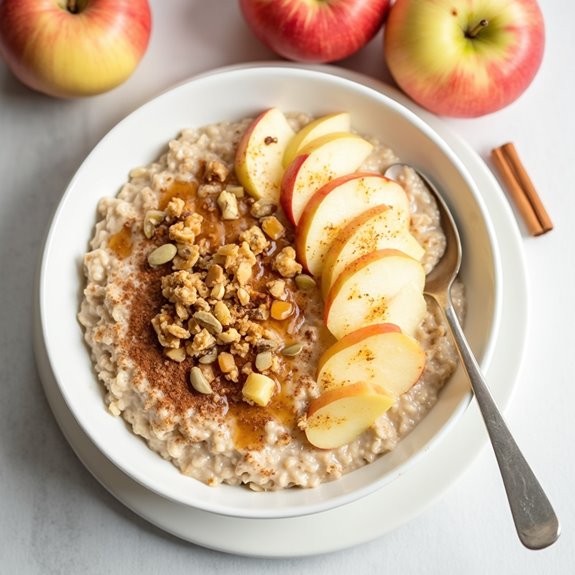
Title: Cinnamon Apple Oatmeal
Prep Time: 10 minutes
Cook Time: 15 minutes
Number of Servings: 4
Required Equipment List: Medium saucepan, measuring cups, measuring spoons, stirring spoon, bowls
Cuisine Type: American
Cinnamon Apple Oatmeal is the perfect warm and comforting breakfast to enjoy during the chilly winter months. This recipe combines hearty rolled oats with the sweet and tart flavors of fresh apples, all enhanced by aromatic cinnamon for a delightful start to your day.
It's not only delicious but also packed with nutrients, making it a wholesome choice for breakfast or a midday snack. This oatmeal is easily customizable; you can add your favorite plant-based milk for creaminess or top it with nuts and seeds for added texture.
The smell of cinnamon and apples cooking together will fill your kitchen with warmth, inviting everyone to the breakfast table. Plus, it's quick to prepare, making it a fantastic option for busy mornings.
Ingredients:
- 1 cup rolled oats
- 2 cups water or plant-based milk
- 1 medium apple, diced
- 1 teaspoon cinnamon
- 2 tablespoons maple syrup (or to taste)
- 1/4 teaspoon salt
- Chopped nuts or seeds (for topping, optional)
- Fresh fruit for garnish (optional)
Instructions:
- In a medium saucepan, combine the rolled oats, water or plant-based milk, diced apple, cinnamon, and salt. Stir the mixture well to combine all the ingredients before placing it on the stove.
- Bring the mixture to a boil over medium-high heat, stirring occasionally to prevent the oats from sticking to the bottom of the pan. Once boiling, reduce the heat to low.
- Cover the saucepan and let the oatmeal simmer for about 10-12 minutes, or until the oats are cooked through and have absorbed most of the liquid. Stir occasionally to reach your desired consistency.
- Once cooked, remove the saucepan from the heat. Stir in the maple syrup, adjusting the sweetness to your preference. If you like your oatmeal creamier, you can add a splash more of plant-based milk at this stage.
- Serve the oatmeal warm in bowls, and top with your choice of chopped nuts or seeds for added crunch. You can also garnish with fresh fruit for a pop of color and flavor.
Extra Tips: For an extra layer of flavor, consider adding a splash of vanilla extract while the oatmeal cooks. If you're looking for more protein, stir in a spoonful of nut butter just before serving.
You can also prepare the oatmeal in advance and reheat it throughout the week for a quick breakfast option. Enjoy your nourishing bowl of Cinnamon Apple Oatmeal!
Chocolate Avocado Mousse

Title: Chocolate Avocado Mousse
Prep Time: 10 minutes
Cook Time: 0 minutes
Number of Servings: 4
Required Equipment List: Blender or food processor, mixing bowl, serving cups
Cuisine Type: Vegan Dessert
This Chocolate Avocado Mousse is a rich and indulgent dessert that combines the creaminess of ripe avocados with the deep flavor of cocoa powder. This vegan mousse isn't only delicious but also packed with healthy fats and nutrients, making it a guilt-free treat that satisfies your chocolate cravings.
With no cooking required, it's an incredibly simple recipe that can be whipped up in just a few minutes, perfect for entertaining or a cozy night in. The avocados lend a velvety texture to the mousse, while the maple syrup adds just the right amount of sweetness. A touch of vanilla and a pinch of salt enhance the flavor, making this dessert a standout.
You can serve it in individual cups and top it with fresh berries or coconut whipped cream for an elegant presentation that will impress your guests.
Ingredients:
- 2 ripe avocados
- 1/2 cup unsweetened cocoa powder
- 1/3 cup pure maple syrup
- 1 teaspoon vanilla extract
- A pinch of salt
- 1/4 cup almond milk (or any non-dairy milk)
- Fresh berries (for garnish, optional)
Instructions:
- Begin by cutting the ripe avocados in half and removing the pits. Scoop the flesh into a blender or food processor. The avocados should be soft and creamy, which will help achieve a smooth mousse texture.
- Add the unsweetened cocoa powder, pure maple syrup, vanilla extract, and a pinch of salt to the blender with the avocado. These ingredients will create the rich chocolate flavor base for the mousse.
- Pour in the almond milk to help blend the ingredients smoothly. If you prefer a thicker mousse, you can adjust the amount of almond milk to your desired consistency.
- Blend everything together on high speed until the mixture is completely smooth and creamy. This step may take a minute or two, so be patient and scrape down the sides of the blender as needed to guarantee everything is well incorporated.
- Once blended, taste the mousse and adjust sweetness if necessary by adding more maple syrup. Once satisfied with the flavor, transfer the mousse into individual serving cups or bowls.
- Chill the mousse in the refrigerator for at least 30 minutes to allow the flavors to meld and the texture to firm up slightly before serving.
Extra Tips: For a decadent touch, you can fold in some dark chocolate chips or sprinkle them on top before serving.
If you want to enhance the flavor even more, consider adding a dash of espresso powder to amplify the chocolate taste. This mousse is versatile and can be topped with a variety of garnishes like sliced bananas, chopped nuts, or a dollop of coconut cream to elevate your dessert experience. Enjoy your deliciously healthy chocolate treat!
Coconut Rice Pudding
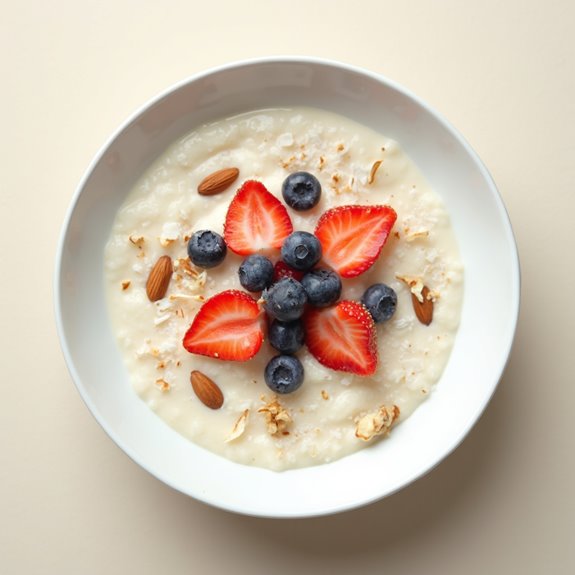
Title: Creamy Coconut Rice Pudding
Prep Time: 15 minutes
Cook Time: 30 minutes
Number of Servings: 4
Required Equipment List: Medium saucepan, measuring cups, measuring spoons, wooden spoon, serving bowls
Cuisine Type: Vegan Dessert
Creamy Coconut Rice Pudding is a comforting and indulgent dessert that's perfect for cozy winter evenings. This dish combines the rich creaminess of coconut milk with the subtle sweetness of sugar and the delightful texture of rice, creating a warm and satisfying treat.
With a hint of vanilla and a sprinkle of cinnamon, every bite feels like a warm hug, making it a perfect way to unwind after a long day. This vegan dessert isn't only delicious but also incredibly easy to prepare. By using simple pantry staples, you can whip up a batch of this rice pudding in no time.
Serve it warm or chilled, topped with fresh fruit, nuts, or a drizzle of maple syrup for an extra touch of sweetness. Whether enjoyed as a late-night snack or a festive holiday dessert, this creamy coconut rice pudding is sure to please everyone at the table.
Ingredients:
- 1 cup short-grain rice
- 1 can (13.5 ounces) coconut milk
- 2 cups almond milk (or any plant-based milk)
- 1/2 cup sugar
- 1 teaspoon vanilla extract
- 1/2 teaspoon ground cinnamon
- Pinch of salt
- Fresh fruit, nuts, or shredded coconut for topping (optional)
Instructions:
- Rinse the short-grain rice under cold water in a fine-mesh strainer until the water runs clear. This helps to remove excess starch and guarantees the rice cooks evenly and maintains its texture.
- In a medium saucepan, combine the rinsed rice, coconut milk, almond milk, sugar, and salt. Stir the mixture well to dissolve the sugar and evenly distribute the rice.
- Place the saucepan over medium heat and bring the mixture to a gentle boil, stirring occasionally to prevent the rice from sticking to the bottom of the pan. Once boiling, reduce the heat to low.
- Cover the saucepan with a lid and let the rice simmer for about 25 minutes, stirring occasionally. The rice should absorb most of the liquid and become tender and creamy. If the pudding looks too thick, you can add a splash more of almond milk.
- Once the rice is cooked, remove the saucepan from heat and stir in the vanilla extract and ground cinnamon. Allow the pudding to cool slightly before serving.
- Spoon the rice pudding into serving bowls and top with fresh fruit, nuts, or shredded coconut if desired. Enjoy it warm or refrigerate for a chilled version later.
Extra Tips: For a richer flavor, consider using full-fat coconut milk instead of light, as it will enhance the creaminess of the pudding. You can also experiment with different spices such as nutmeg or cardamom for a unique twist.
If you prefer a sweeter pudding, feel free to adjust the amount of sugar to your taste. This rice pudding can be made ahead of time and stored in the refrigerator for several days, making it a convenient dessert option.
Gingerbread Cookies

Title: Gingerbread Cookies
Prep Time: 15 minutes
Cook Time: 10 minutes
Number of Servings: 24 cookies
Required Equipment List: Mixing bowl, baking sheet, parchment paper, whisk, rolling pin, cookie cutters
Cuisine Type: American
These delightful Gingerbread Cookies are a holiday classic that brings warmth and cheer to any winter gathering. With a perfect blend of spices like ginger, cinnamon, and nutmeg, these cookies offer a comforting taste of the season. Their rich flavor and soft texture make them a favorite among both kids and adults, and decorating them can be a fun family activity that adds a personal touch to your festivities.
Making gingerbread cookies from scratch isn't only easy, but it also fills your home with a delightful aroma that embodies the essence of winter. You can cut them into various shapes, from traditional gingerbread men to festive stars, and decorate them with icing and sprinkles to add a touch of creativity. These cookies are perfect for sharing with friends, enjoying with a warm cup of tea, or gifting during the holiday season.
Ingredients:
- 3 cups all-purpose flour
- 1 teaspoon baking soda
- 1 tablespoon ground ginger
- 1 tablespoon ground cinnamon
- 1/2 teaspoon ground nutmeg
- 1/4 teaspoon ground cloves
- 1/2 teaspoon salt
- 1 cup brown sugar, packed
- 1/2 cup molasses
- 1/2 cup vegetable oil
- 1 teaspoon vanilla extract
- 1/4 cup powdered sugar (for decoration, optional)
- Royal icing (for decoration, optional)
Instructions:
- In a mixing bowl, whisk together the flour, baking soda, ginger, cinnamon, nutmeg, cloves, and salt until well combined. This mixture forms the base of your cookie dough, ensuring even distribution of the spices.
- In another large bowl, mix the brown sugar, molasses, vegetable oil, and vanilla extract until smooth and well blended. This wet mixture adds sweetness and moisture to the cookies, creating a rich flavor.
- Gradually add the dry mixture to the wet mixture, stirring until a dough forms. If the dough is too sticky, you can add a bit more flour, but be careful not to overwork it. The dough should be slightly firm but still pliable.
- Wrap the dough in plastic wrap and refrigerate for at least 1 hour. Chilling the dough helps it to firm up, making it easier to roll out and cut into shapes.
- Preheat your oven to 350°F (175°C) and line baking sheets with parchment paper. On a lightly floured surface, roll out the chilled dough to about 1/4 inch thick. Use cookie cutters to cut out your desired shapes and place them on the prepared baking sheets.
- Bake the cookies in the preheated oven for 8-10 minutes, or until the edges are lightly golden. Allow them to cool on the baking sheet for a few minutes before transferring to a wire rack to cool completely.
- Once cooled, decorate the cookies with royal icing and powdered sugar as desired. Let the icing set before serving or storing.
Extra Tips: When rolling out the dough, if it becomes sticky, dust it lightly with more flour to prevent it from sticking to the surface or rolling pin. You can also experiment with adding chopped nuts or dried fruits to the dough for added texture and flavor. If you prefer a softer cookie, bake them for a shorter time; for a crunchier cookie, let them bake a little longer. Enjoy your delicious gingerbread cookies as a festive treat this winter!
Vegan Hot Chocolate

Title: Vegan Hot Chocolate
Prep Time: 5 minutes
Cook Time: 10 minutes
Number of Servings: 2
Required Equipment List: Small saucepan, whisk, measuring cups, mugs
Cuisine Type: American
Vegan Hot Chocolate is the perfect cozy drink to warm you up on chilly winter nights. This rich and creamy beverage is made using simple plant-based ingredients that deliver all the indulgence of traditional hot chocolate without any dairy. The combination of cocoa powder, almond milk, and a touch of sweetness creates a deliciously satisfying drink that can be enjoyed by everyone, regardless of dietary preferences.
This recipe is incredibly easy to make and can be customized to your taste. You can add a pinch of cinnamon for warmth, a dash of vanilla extract for depth, or even a splash of peppermint extract for a festive twist. Top it off with vegan whipped cream or marshmallows for an extra touch of decadence. This Vegan Hot Chocolate is sure to become a go-to winter favorite!
Ingredients:
- 2 cups unsweetened almond milk (or any plant-based milk)
- 2 tablespoons cocoa powder
- 2 tablespoons maple syrup (or agave syrup)
- 1/2 teaspoon vanilla extract
- Pinch of salt
- Optional toppings: vegan whipped cream, dairy-free marshmallows, chocolate shavings, or a sprinkle of cinnamon
Instructions:
- In a small saucepan, combine the almond milk, cocoa powder, maple syrup, vanilla extract, and a pinch of salt. Whisk the ingredients together until the cocoa powder is fully dissolved and the mixture is smooth.
- Place the saucepan over medium heat and continue to whisk the mixture as it heats up. Be careful not to let it boil; you just want to warm it until it's hot but not steaming.
- Once the hot chocolate is warmed through, taste and adjust the sweetness if desired by adding more maple syrup. If you like a richer chocolate flavor, you can add an extra tablespoon of cocoa powder.
- Remove the saucepan from heat and pour the hot chocolate into mugs. If desired, top with vegan whipped cream, marshmallows, or any other toppings you prefer.
- Serve immediately and enjoy your cozy Vegan Hot Chocolate!
Extra Tips: For an extra creamy texture, you can blend the hot chocolate in a blender for a few seconds after heating. This will incorporate air and create a frothy finish.
Feel free to experiment with different plant-based milks like coconut or oat milk for varying flavors and creaminess. If you're a fan of spice, adding a pinch of cayenne pepper or nutmeg can give your hot chocolate a delightful kick!
Spiced Pear Crisp
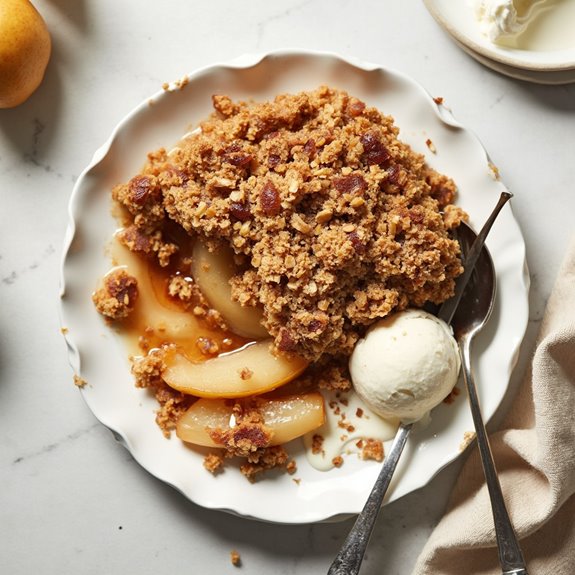
Title: Spiced Pear Crisp
Prep Time: 15 minutes
Cook Time: 30 minutes
Number of Servings: 6
Required Equipment List: Oven, baking dish, mixing bowl, measuring cups, measuring spoons, fork
Cuisine Type: American
This Spiced Pear Crisp is the perfect dessert to warm up your winter evenings, combining tender, juicy pears with a delightful blend of spices and a crunchy oat topping. The natural sweetness of the pears is enhanced by cinnamon and nutmeg, creating a comforting flavor that evokes the essence of the season.
Topped with a golden, crumbly oat mixture, this crisp isn't only delicious but also easy to prepare, making it a great option for both family gatherings and cozy nights in. Serve this delightful dessert warm, perhaps with a scoop of dairy-free vanilla ice cream or a dollop of coconut whipped cream to elevate the experience.
The crisp's combination of textures—soft, spiced pears contrasted with the crunchy topping—will leave everyone asking for seconds. Enjoy the sweet aroma that fills your kitchen as it bakes, reminding you that winter is the perfect time for indulgent, homemade treats.
Ingredients:
- 6 ripe pears, peeled and sliced
- 1 tablespoon lemon juice
- 1/2 cup brown sugar
- 1 teaspoon ground cinnamon
- 1/4 teaspoon ground nutmeg
- 1/4 teaspoon salt
- 1 cup rolled oats
- 1/2 cup all-purpose flour
- 1/2 cup vegan butter, melted
- 1/4 cup chopped walnuts or pecans (optional)
Instructions:
- Preheat your oven to 350°F (175°C). Grease a baking dish with a little oil or vegan butter to prevent sticking and set aside.
- In a mixing bowl, combine the sliced pears, lemon juice, brown sugar, cinnamon, nutmeg, and salt. Toss until the pears are well coated in the mixture, then spread them evenly in the prepared baking dish.
- In a separate bowl, combine the rolled oats, flour, melted vegan butter, and chopped nuts (if using). Mix well until the ingredients are fully combined and crumbly.
- Evenly sprinkle the oat mixture over the spiced pears in the baking dish, making sure to cover the fruit completely.
- Bake in the preheated oven for about 30 minutes, or until the topping is golden brown and the pears are bubbly. Keep an eye on it towards the end to guarantee it doesn't over-brown.
- Once baked, remove the crisp from the oven and let it cool for a few minutes before serving. This will allow the juices to settle and make it easier to scoop.
Extra Tips: For an extra layer of flavor, try adding a splash of vanilla extract or a pinch of ginger to the pear mixture. If you prefer a gluten-free version, substitute the all-purpose flour with a gluten-free flour blend.
This Spiced Pear Crisp is best enjoyed warm, but if you have leftovers, it can be stored in the refrigerator for a few days and reheated in the oven or microwave for a quick treat. Enjoy your cozy dessert!
Conclusion
As winter wraps around you like a warm blanket, these cozy vegan recipes invite you to gather 'round the hearth of your kitchen. Each dish is a little spark, lighting up the chilly days and making your taste buds dance with joy. So, why not let your culinary creativity shine? Immerse yourself in these recipes, and let the flavors tell stories that warm the heart. After all, isn't there something magical about sharing good food in the frosty air?

