23 Quick and Easy Caribbean Appetizer Recipes
You're in for a treat with these 23 quick and easy Caribbean appetizer recipes! Want to impress your friends at the next gathering? Get started with zesty plantain chips, savory jerk chicken skewers, or a revitalizing spicy shrimp ceviche. Each dish is packed with vibrant flavors that'll make your taste buds dance. Ever tried coconut shrimp bites or Caribbean fish tacos? They're sure to be a hit! And don't worry, these recipes are simple and don't take much time. Ready to elevate your appetizer game? Stick around, and you'll uncover a whole world of delicious possibilities!
Zesty Plantain Chips
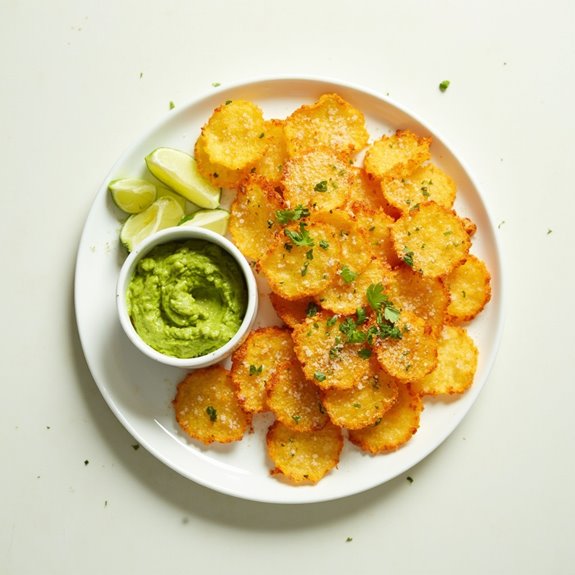
Title: Zesty Plantain Chips
Prep Time: 10 minutes
Cook Time: 20 minutes
Number of Servings: 4
Required Equipment List: Baking sheet, parchment paper, sharp knife, cutting board, frying pan (for frying), paper towels
Cuisine Type: Caribbean
Zesty Plantain Chips are a delicious and crunchy snack that brings the vibrant flavors of the Caribbean right to your kitchen. Made from ripe plantains, this recipe transforms the humble fruit into a crispy treat that's perfect for munching on its own or serving alongside your favorite dips.
The addition of lime and spices elevates the flavor, making these chips an irresistible addition to any appetizer spread or party platter. This recipe isn't only easy to prepare but also allows for customization based on your taste preferences.
Whether you prefer them spicy or simply seasoned with salt, these plantain chips are a fantastic way to enjoy a tropical twist. Serve them warm or at room temperature, and watch as they quickly become a favorite among family and friends.
Ingredients:
- 2 ripe plantains
- Vegetable oil (for frying)
- Salt to taste
- 1 lime (zested and juiced)
- 1/2 teaspoon cayenne pepper (optional)
- 1/2 teaspoon garlic powder (optional)
Instructions:
- Begin by peeling the ripe plantains. Cut off both ends of the plantain and use a sharp knife to make a slit down the length of the skin, then carefully remove the peel. Slice the plantains into thin rounds, about 1/8 inch thick, using a sharp knife.
- In a large frying pan, heat about 1/2 inch of vegetable oil over medium heat. To check if the oil is hot enough, you can drop a small piece of plantain into the oil; if it sizzles, the oil is ready.
- Once the oil is hot, carefully add the plantain slices in batches to avoid overcrowding the pan. Fry each side for about 2-3 minutes or until they turn golden brown and crispy.
- Using a slotted spoon, remove the fried plantain chips from the oil and place them on a paper towel-lined baking sheet to drain any excess oil. While they're still hot, sprinkle with salt, lime zest, and any optional spices you prefer, such as cayenne pepper or garlic powder.
- Allow the plantain chips to cool slightly before serving. They can be enjoyed warm or at room temperature, and can be paired with dips like guacamole, salsa, or a spicy aioli for an extra zing.
Extra Tips: For the best results, choose plantains that are just ripe, with a slight yellow color. If you want to bake the plantain chips instead of frying them, toss the slices in a little oil and spread them out on a baking sheet lined with parchment paper.
Bake at 400°F (200°C) for about 15-20 minutes, flipping halfway through, until they're crispy and golden. Enjoy experimenting with different seasonings to find your perfect flavor combination!
Savory Jerk Chicken Skewers
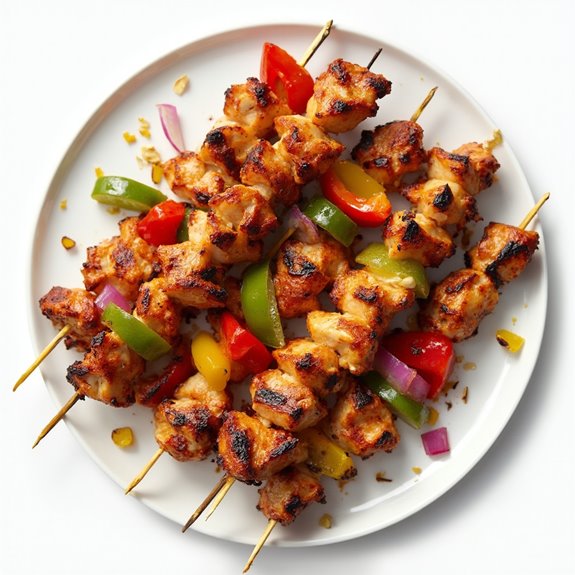
Title: Savory Jerk Chicken Skewers
Prep Time: 20 minutes
Cook Time: 15 minutes
Number of Servings: 4
Required Equipment List: Skewers, grill or grill pan, mixing bowl, measuring spoons, knife
Cuisine Type: Caribbean
Savory Jerk Chicken Skewers are a vibrant and flavorful appetizer that brings a taste of the Caribbean right to your table. Marinated in a spicy jerk seasoning blend, these chicken skewers are perfect for grilling, offering a smoky char that enhances their bold flavors. The combination of spices, including allspice, thyme, and scotch bonnet peppers, creates a tantalizing heat that's balanced by the natural sweetness of the chicken.
These skewers aren't only easy to prepare but also make for an impressive dish for gatherings or casual summer barbecues. The beauty of these jerk chicken skewers lies in their versatility; you can serve them with a variety of dipping sauces or alongside a fresh salad. Additionally, they can be made ahead of time and stored in the refrigerator, making them a convenient option for entertaining.
Whether enjoyed as a starter or as part of a main course, these skewers are sure to become a favorite at any gathering.
Ingredients:
- 1 pound boneless, skinless chicken thighs
- 2 tablespoons jerk seasoning
- 2 tablespoons olive oil
- 1 tablespoon lime juice
- 1 teaspoon garlic powder
- 1 teaspoon onion powder
- Salt and pepper to taste
- Wooden or metal skewers (if using wooden skewers, soak them in water for 30 minutes prior to use)
Instructions:
- Start by cutting the chicken thighs into 1-inch pieces and place them in a mixing bowl. This will guarantee that they cook evenly on the skewers and can absorb the marinade well.
- In a separate bowl, mix together the jerk seasoning, olive oil, lime juice, garlic powder, onion powder, salt, and pepper. This marinade will infuse the chicken with a rich, spicy flavor.
- Pour the marinade over the chicken pieces, making sure to coat them evenly. Cover the bowl with plastic wrap and let it marinate in the refrigerator for at least 30 minutes, or up to overnight for a deeper flavor.
- Preheat your grill or grill pan over medium-high heat. Once it's hot, thread the marinated chicken pieces onto the skewers, leaving a little space between each piece to allow for even cooking.
- Place the skewers on the grill and cook for about 10-15 minutes, turning occasionally, until the chicken is cooked through and has nice grill marks. The internal temperature of the chicken should reach 165°F (75°C).
- Once cooked, remove the skewers from the grill and let them rest for a few minutes. This will help the juices redistribute, keeping the chicken moist and flavorful.
Extra Tips: For an extra kick, consider adding some diced bell peppers or red onions onto the skewers for additional flavor and color. If you like it spicy, you can increase the amount of jerk seasoning or include some sliced scotch bonnet peppers in the marinade.
Serve the skewers with a cooling dip, like a yogurt or sour cream sauce, to balance the heat. Enjoy your flavorful Caribbean-inspired dish!
Spicy Shrimp Ceviche
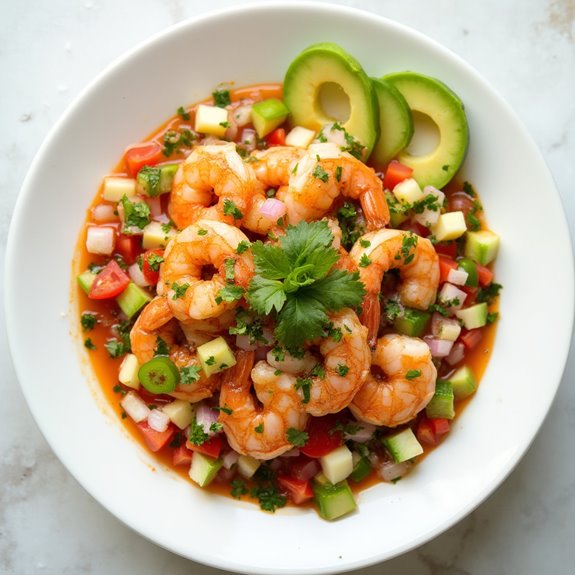
Title: Spicy Shrimp Ceviche
Prep Time: 20 minutes
Cook Time: 0 minutes
Number of Servings: 4
Required Equipment List: Mixing bowl, knife, cutting board, serving dish, spoon
Cuisine Type: Caribbean
Spicy Shrimp Ceviche is a revitalizing and zesty appetizer that embodies the vibrant flavors of the Caribbean. This dish features fresh shrimp that are "cooked" in a tangy marinade of lime juice, which not only adds brightness but also tenderizes the shrimp without any heat.
The combination of fresh herbs, spices, and crisp vegetables creates a dish that's as beautiful as it's delicious, making it a perfect starter for a summer gathering or a beachside barbecue. The key to a great ceviche lies in the quality of the shrimp and the balance of flavors.
The addition of diced jalapeños gives this dish its signature kick, while the crunch of cucumbers and the sweetness of tomatoes provide a revitalizing contrast. Served chilled, this Spicy Shrimp Ceviche is sure to impress your guests and leave them wanting more.
Ingredients:
- 1 pound shrimp, peeled and deveined
- 1 cup fresh lime juice
- 1 medium red onion, finely chopped
- 1 medium cucumber, diced
- 1 medium tomato, diced
- 1-2 jalapeños, seeded and minced
- 1/4 cup fresh cilantro, chopped
- Salt and pepper, to taste
- Avocado slices (for serving, optional)
Instructions:
- Start by rinsing the shrimp under cold water and patting them dry with paper towels. Then, chop them into small bite-sized pieces. Place the chopped shrimp in a mixing bowl and pour the fresh lime juice over them, ensuring they're completely submerged. This will "cook" the shrimp in the acidic marinade.
- Cover the bowl with plastic wrap and let it sit in the refrigerator for about 15-20 minutes, or until the shrimp turn opaque. This process allows the shrimp to absorb the lime juice and flavors while they marinate.
- While the shrimp are marinating, prepare the vegetables. Finely chop the red onion, dice the cucumber and tomato, and seed and mince the jalapeños. Add all the chopped vegetables to a separate mixing bowl and toss them together.
- Once the shrimp have marinated and turned opaque, drain any excess lime juice if desired. Combine the marinated shrimp with the vegetable mixture and add the chopped cilantro. Season with salt and pepper to taste, mixing everything together gently.
- Serve the Spicy Shrimp Ceviche in a chilled serving dish, garnished with avocado slices if desired. You can also serve it with tortilla chips or lettuce leaves for a delightful crunch.
Extra Tips: For an added depth of flavor, consider adding a splash of your favorite hot sauce to the ceviche for an extra kick. If you prefer a milder version, adjust the amount of jalapeños according to your taste.
This ceviche is best enjoyed fresh, but it can be stored in the refrigerator for a few hours if needed. Just be mindful that the shrimp may continue to "cook" in the lime juice, so it's best served soon after preparation. Enjoy your revitalizing Caribbean treat!
Caribbean Fish Tacos
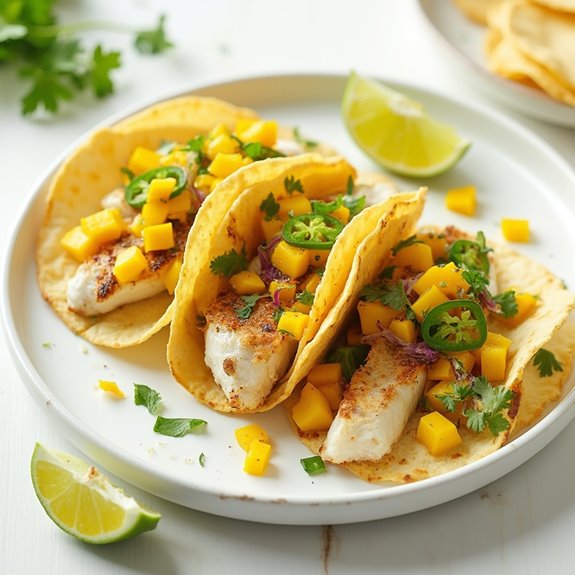
Title: Caribbean Fish Tacos
Prep Time: 20 minutes
Cook Time: 15 minutes
Number of Servings: 4
Required Equipment List: Grill pan or skillet, mixing bowl, spatula, serving platter
Cuisine Type: Caribbean
Caribbean Fish Tacos are a vibrant and flavorful dish that brings the taste of the tropics right to your table. Fresh fish, marinated with zesty lime juice and spices, is grilled to perfection and then nestled in warm tortillas. Topped with a revitalizing mango salsa and drizzled with a creamy sauce, these tacos aren't only delicious but also visually appealing, making them perfect for summer gatherings or casual weeknight dinners.
The combination of flaky fish with the sweetness of mango and a hint of heat from jalapeños creates a delightful balance of flavors and textures. The warm tortillas provide the perfect vessel for holding all the tasty fillings, while the toppings can be adjusted to suit your preference. Whether you're a taco aficionado or new to Mexican cuisine, these Caribbean Fish Tacos are sure to be a hit.
Ingredients:
- 1 pound white fish fillets (such as tilapia or cod)
- Juice of 2 limes
- 1 teaspoon ground cumin
- 1 teaspoon paprika
- Salt and pepper to taste
- 8 small corn tortillas
- 1 cup diced mango
- 1/2 cup diced red onion
- 1/4 cup chopped cilantro
- 1 jalapeño, seeded and minced
- 1/2 cup sour cream
- 1 tablespoon honey
Instructions:
- In a mixing bowl, combine the lime juice, cumin, paprika, salt, and pepper. Add the fish fillets and coat them well with the marinade. Allow the fish to marinate for about 15 minutes while you prepare the toppings.
- In another bowl, mix together the diced mango, red onion, chopped cilantro, and minced jalapeño. This will be your fresh mango salsa. Set it aside to allow the flavors to meld.
- Heat a grill pan or skillet over medium-high heat. Once hot, add the marinated fish. Cook for about 3-4 minutes per side, or until the fish is cooked through and flakes easily with a fork.
- While the fish is cooking, warm the corn tortillas in a separate skillet for about 30 seconds on each side, or until they're pliable and slightly toasted.
- Once the fish is done, remove it from the heat and flake it into large pieces. To assemble the tacos, place some fish on each tortilla, top with the mango salsa, and finish with a drizzle of the honey sour cream (mix together sour cream and honey in a small bowl).
Extra Tips: For added flavor, consider grilling the tortillas directly on the grill for a smokier taste. You can also swap out the fish for shrimp or grilled chicken if you prefer. If you like a bit more heat, add a sprinkle of chili powder to the fish before grilling or top the tacos with sliced jalapeños. Serve with lime wedges on the side for an extra citrus kick! Enjoy your delicious Caribbean Fish Tacos!
Coconut Shrimp Bites
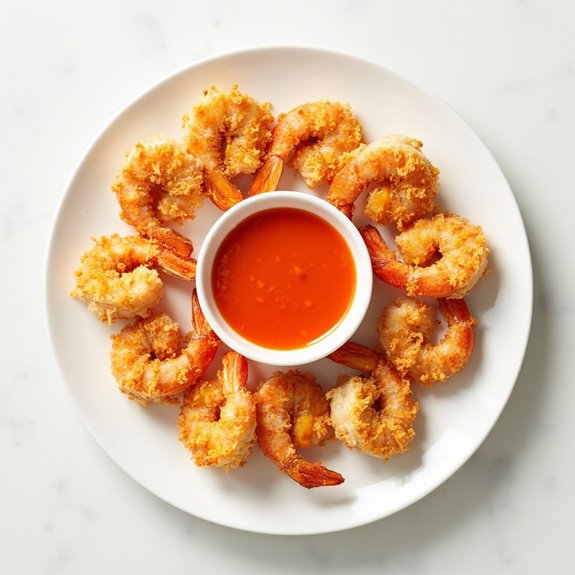
Title: Coconut Shrimp Bites
Prep Time: 20 minutes
Cook Time: 10 minutes
Number of Servings: 4
Required Equipment List: Mixing bowl, baking sheet, parchment paper, frying pan, tongs
Cuisine Type: Caribbean
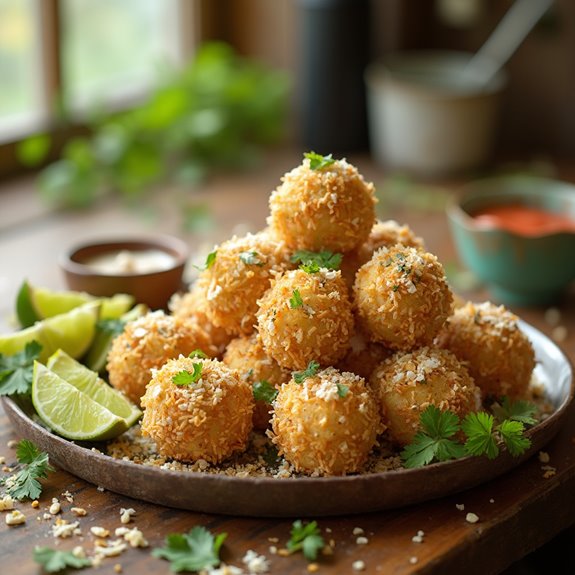
Coconut Shrimp Bites are a delightful and tropical appetizer that brings a taste of the Caribbean to your table. These bite-sized morsels feature tender shrimp coated in a crispy coconut and panko breadcrumb mixture, providing a satisfying crunch with each bite.
Paired with a sweet and tangy dipping sauce, these shrimp bites are perfect for entertaining guests or enjoying as a fun family snack. The combination of coconut and shrimp creates a deliciously addictive flavor that's sure to impress.
These bites aren't only easy to make but also quick to cook, making them an ideal choice for last-minute gatherings. Whether served at a party or enjoyed on a cozy night in, Coconut Shrimp Bites are certain to be a hit with everyone.
Ingredients:
- 1 pound large shrimp, peeled and deveined
- 1 cup shredded coconut
- 1 cup panko breadcrumbs
- 2 eggs, beaten
- 1/2 cup all-purpose flour
- 1/2 teaspoon garlic powder
- 1/2 teaspoon salt
- 1/4 teaspoon black pepper
- Oil for frying
- Sweet chili sauce (for dipping)
Instructions:
- Begin by setting up a breading station. In one bowl, place the all-purpose flour mixed with garlic powder, salt, and pepper. In a second bowl, beat the eggs, and in a third bowl, combine the shredded coconut and panko breadcrumbs.
- Dip each shrimp first into the flour mixture, making certain it's fully coated. Shake off any excess flour, then dip it into the beaten eggs, allowing any excess to drip off. Finally, coat the shrimp in the coconut and panko mixture, pressing gently to make sure the coating adheres well.
- Heat oil in a frying pan over medium heat. Once hot, carefully add the breaded shrimp in batches, avoiding overcrowding the pan. Fry for about 2-3 minutes on each side, or until they're golden brown and crispy.
- Using tongs, remove the cooked shrimp from the oil and place them on a baking sheet lined with parchment paper to drain any excess oil. Repeat the process until all shrimp are cooked.
- Serve the Coconut Shrimp Bites warm with sweet chili sauce for dipping. Arrange them on a platter for a beautiful presentation.
Extra Tips: To enhance the flavor of your Coconut Shrimp Bites, consider marinating the shrimp in a bit of lime juice and garlic for 30 minutes before breading. This adds extra depth to the dish.
Additionally, for a healthier alternative, you can bake the shrimp instead of frying them; simply arrange them on a baking sheet and bake at 400°F (200°C) for about 12-15 minutes, or until crispy and cooked through. Enjoy your delicious appetizer!
Mango Salsa With Tortilla Chips
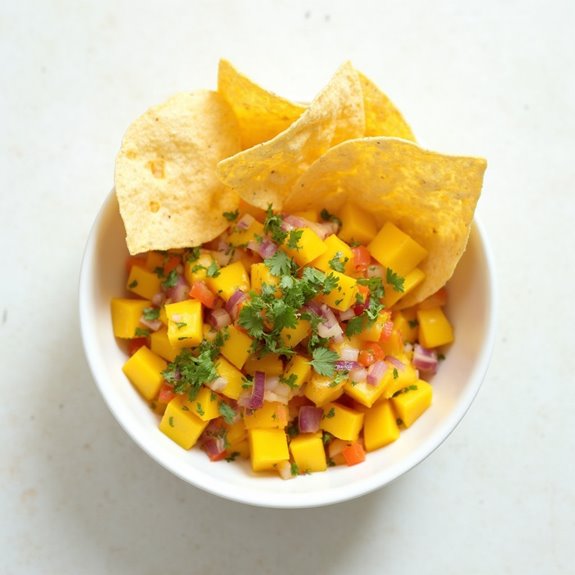
Title: Mango Salsa With Tortilla Chips
Prep Time: 15 minutes
Cook Time: 0 minutes
Number of Servings: 6
Required Equipment List: Mixing bowl, knife, cutting board, serving dish
Cuisine Type: Caribbean
Mango Salsa with Tortilla Chips is a revitalizing and vibrant appetizer that brings the tropical flavors of the Caribbean right to your table. This dish combines the sweetness of ripe mangoes with the zing of lime juice, the heat of jalapeño, and the freshness of cilantro, making it an ideal accompaniment for crunchy tortilla chips.
Perfect for parties, barbecues, or simply as a snack, this salsa packs a punch of flavor and is incredibly easy to prepare. The beauty of this mango salsa lies in its versatility. Serve it alongside grilled meats, use it as a topping for fish tacos, or enjoy it straight from the bowl with your favorite tortilla chips.
The bright colors and bold flavors will have everyone coming back for more, making this dish a crowd-pleaser at any gathering. Plus, it's a light and healthy option that's packed with vitamins and nutrients.
Ingredients:
- 2 ripe mangoes, diced
- 1 small red onion, finely chopped
- 1 jalapeño, seeded and minced
- 1/4 cup fresh cilantro, chopped
- Juice of 2 limes
- Salt to taste
- Tortilla chips for serving
Instructions:
- Begin by preparing the mangoes. Cut the mangoes around the pit and dice the flesh into small cubes. This will enhance the texture of the salsa, allowing for a delightful burst of flavor in every bite.
- In a mixing bowl, combine the diced mango, finely chopped red onion, minced jalapeño, and chopped cilantro. Confirm that all ingredients are evenly distributed for a balanced flavor profile.
- Squeeze the juice of two limes over the mixture. The acidity from the lime juice not only adds flavor but also helps to keep the mangoes fresh and vibrant in color.
- Season the salsa with salt to taste. Start with a small pinch and adjust according to your preference, as the salt will bring out the natural sweetness of the mangoes.
- Gently stir the salsa to combine all ingredients, being careful not to mash the mango pieces. Allow the salsa to sit for at least 10 minutes to let the flavors meld together before serving.
Extra Tips: For an extra layer of flavor, consider adding diced red bell pepper or a splash of orange juice to the salsa. If you prefer a milder salsa, you can reduce the amount of jalapeño or omit it entirely.
This mango salsa can be made a few hours ahead of time and stored in the refrigerator, making it a convenient option for entertaining. Just give it a quick stir before serving and enjoy with crispy tortilla chips!
Pineapple and Ham Bites

Title: Pineapple and Ham Bites
Prep Time: 10 minutes
Cook Time: 15 minutes
Number of Servings: 6
Required Equipment List: Baking sheet, parchment paper, oven, toothpicks
Cuisine Type: Caribbean-inspired
Pineapple and Ham Bites are a delightful and easy-to-make appetizer that combines the sweetness of pineapple with the savory taste of ham. These bite-sized morsels are perfect for parties, gatherings, or as a fun snack any time of the day.
The combination of flavors offers a tropical twist that's sure to impress your guests and leave them wanting more. This dish isn't only quick to prepare but also versatile in presentation. You can use fresh pineapple, canned pineapple, or even grilled pineapple for added flavor.
The addition of cheese enhances the richness of the bites, making them a crowd-pleaser. Serve them warm or at room temperature for a delightful treat that embodies the vibrant flavors of the Caribbean.
Ingredients:
- 1 can (20 oz) pineapple chunks, drained
- 12 slices of ham, cut into halves
- 12 cubes of cheddar cheese
- 12 toothpicks
- 1 tablespoon honey (optional)
- Fresh parsley (for garnish, optional)
Instructions:
- Preheat your oven to 400°F (200°C) and line a baking sheet with parchment paper. This will help prevent sticking and make for an easier cleanup after baking.
- Take a pineapple chunk and wrap it with a half slice of ham, securing it with a toothpick. Repeat this process until all the pineapple and ham are used.
- Place the wrapped pineapple and ham bites on the prepared baking sheet, ensuring they're spaced evenly apart. If desired, drizzle a little honey over each bite to enhance the sweetness.
- Bake in the preheated oven for about 10-15 minutes, or until the ham is slightly crispy and the pineapple is warmed through. Keep an eye on them to prevent burning.
- Once baked, remove from the oven and let cool slightly. If desired, garnish with fresh parsley before serving for a pop of color.
Extra Tips: For an added kick, consider sprinkling a bit of cayenne pepper or smoked paprika over the bites before baking. You can also experiment with different types of cheese, such as gouda or pepper jack, to elevate the flavor profile.
These bites can be prepared in advance and simply heated in the oven right before serving, making them an ideal appetizer for entertaining. Enjoy your culinary creation!
Callaloo Puff Pastry
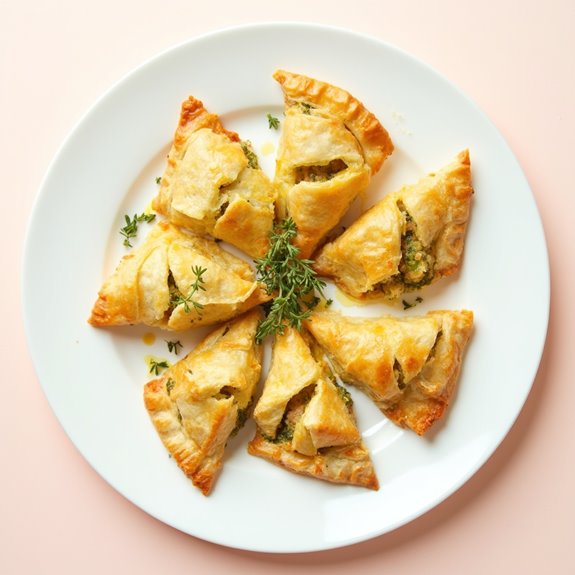
Title: Callaloo Puff Pastry
Prep Time: 20 minutes
Cook Time: 25 minutes
Number of Servings: 6
Required Equipment List: Mixing bowl, rolling pin, baking sheet, parchment paper, oven
Cuisine Type: Caribbean
Callaloo Puff Pastry is a delicious Caribbean appetizer that combines the rich flavors of callaloo, a leafy green vegetable similar to spinach, with the flaky texture of puff pastry. This dish is perfect for gatherings or as a light snack, offering a unique taste of the Caribbean that's both satisfying and easy to prepare.
The vibrant filling, made with sautéed callaloo, onions, and spices, is enveloped in golden puff pastry, creating a delightful contrast of textures. This recipe highlights the versatility of callaloo, which is packed with nutrients and flavor. The puff pastry hugs the savory filling, making each bite a delightful experience.
Whether you're hosting a party or simply looking for a tasty treat, these Callaloo Puff Pastries are sure to be a hit. Serve them warm with a side of your favorite dipping sauce for an added touch of flavor.
Ingredients:
- 1 package puff pastry (2 sheets)
- 2 cups fresh callaloo (or spinach)
- 1 small onion, finely chopped
- 2 cloves garlic, minced
- 1 tablespoon olive oil
- 1/2 teaspoon thyme
- 1/4 teaspoon cayenne pepper (optional)
- Salt and pepper to taste
- 1 egg (for egg wash)
Instructions:
- Preheat your oven to 400°F (200°C). Line a baking sheet with parchment paper to prevent sticking and guarantee easy cleanup.
- In a skillet, heat the olive oil over medium heat. Add the chopped onion and garlic, sautéing until the onion becomes translucent and fragrant, about 3-4 minutes.
- Add the callaloo to the skillet, along with thyme, cayenne pepper (if using), salt, and pepper. Cook for another 5-7 minutes, stirring occasionally until the callaloo is wilted and tender. Remove from heat and let the mixture cool slightly.
- On a lightly floured surface, roll out one sheet of puff pastry to about 1/8 inch thick. Cut the pastry into squares, approximately 4×4 inches each. Repeat with the second sheet of pastry.
- Place a spoonful of the callaloo mixture in the center of each pastry square. Fold the squares diagonally to form triangles and press the edges to seal. Use a fork to crimp the edges for an extra decorative touch.
- Beat the egg in a small bowl and brush it over the tops of the pastries to give them a golden finish during baking. Place the pastries on the prepared baking sheet.
- Bake in the preheated oven for 20-25 minutes, or until the pastries are puffed and golden brown. Remove from the oven and let them cool slightly before serving.
Extra Tips: For a variation, you can add cheese, such as feta or cheddar, to the filling for extra creaminess. If you have leftover filling, consider using it as a topping for salads or mixing it into scrambled eggs.
These pastries can also be made ahead of time and frozen before baking; simply bake them straight from the freezer, increasing the baking time by a few minutes. Enjoy your flavorful Callaloo Puff Pastries!
Miniature Beef Patties
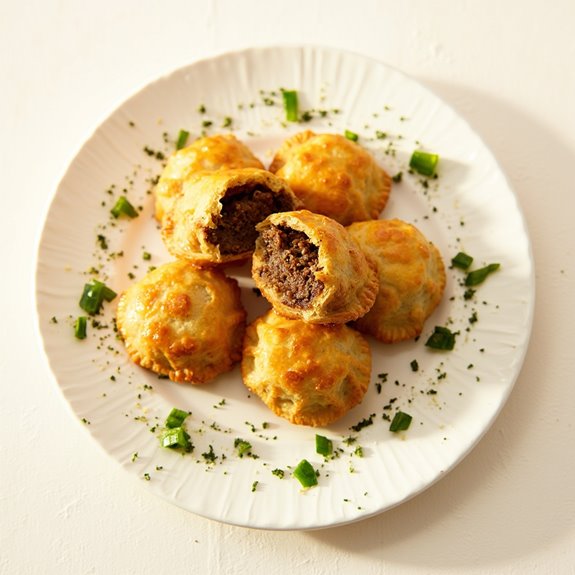
Title: Miniature Beef Patties
Prep Time: 20 minutes
Cook Time: 25 minutes
Number of Servings: 12 patties
Required Equipment List: Mixing bowl, skillet, baking sheet, parchment paper, spatula
Cuisine Type: Caribbean
Miniature Beef Patties are a popular Caribbean snack that brings together the flavors of spiced ground beef encased in a flaky pastry. These delightful bites are perfect for parties, gatherings, or as a delicious appetizer to enjoy with family and friends.
The combination of tender meat seasoned with Caribbean spices and the buttery pastry creates a mouthwatering experience that will have everyone reaching for more. Making these beef patties is simpler than you might think. The filling can be prepared in advance, and the pastry dough can be made from scratch or purchased pre-made for added convenience.
Once baked, these miniature patties turn golden brown and flaky, making them an irresistible treat that captures the essence of Caribbean cuisine.
Ingredients:
- 1 pound ground beef
- 1 small onion, finely chopped
- 2 cloves garlic, minced
- 1 teaspoon thyme
- 1 teaspoon allspice
- 1 teaspoon paprika
- 1/2 teaspoon salt
- 1/4 teaspoon black pepper
- 1 tablespoon soy sauce
- 1 tablespoon Worcestershire sauce
- 1 package puff pastry (thawed) or homemade pastry dough
- 1 egg (beaten, for egg wash)
Instructions:
- In a skillet over medium heat, add the ground beef, chopped onion, and minced garlic. Cook until the meat is browned and the onions are translucent, about 5-7 minutes. Drain any excess fat from the skillet.
- Stir in the thyme, allspice, paprika, salt, pepper, soy sauce, and Worcestershire sauce into the beef mixture. Cook for an additional 2-3 minutes to allow the flavors to meld together. Remove from heat and let it cool slightly.
- Preheat your oven to 400°F (200°C). If using puff pastry, roll it out on a lightly floured surface to about 1/8 inch thick. Cut the dough into circles using a cookie cutter or the rim of a glass, approximately 4 inches in diameter.
- Place a tablespoon of the beef filling in the center of each dough circle. Fold the dough over to create a half-moon shape and press the edges together to seal. Use a fork to crimp the edges for a decorative touch.
- Arrange the filled patties on a baking sheet lined with parchment paper. Brush the tops with the beaten egg to give them a beautiful golden color while baking.
- Bake in the preheated oven for 20-25 minutes or until the patties are puffed and golden brown. Remove from the oven and let them cool slightly before serving.
Extra Tips: For added flavor, consider incorporating finely chopped bell peppers or jalapeños into the beef filling for some extra heat. You can also experiment with different spices or herbs to customize the taste to your liking.
If you have leftover filling, it can be used in other dishes like tacos or served over rice. Enjoy your delicious miniature beef patties!
Sweet and Spicy Mango Chutney
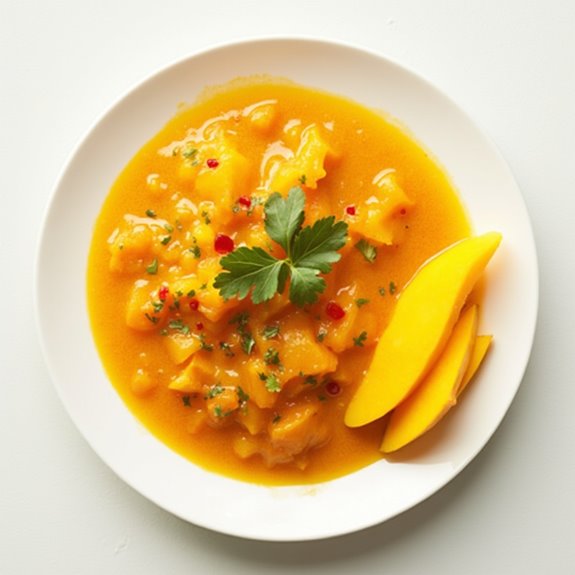
Title: Sweet and Spicy Mango Chutney
Prep Time: 15 minutes
Cook Time: 30 minutes
Number of Servings: 12
Required Equipment List: Medium saucepan, cutting board, knife, stirring spoon, jar for storage
Cuisine Type: Caribbean
Sweet and Spicy Mango Chutney is a vibrant and flavorful condiment that perfectly balances the sweetness of ripe mangoes with the heat of spices and peppers. This delightful chutney is a staple in Caribbean cuisine, often served alongside grilled meats, fish, or as a topping for sandwiches and wraps.
The bright flavors and beautiful color of the chutney make it an exciting addition to any appetizer spread or picnic basket. Making your own mango chutney is easier than you might think, and it allows you to customize the heat level to suit your taste.
With just a few ingredients and a bit of simmering time, you can create a delicious homemade chutney that will elevate your dishes. Whether you're serving it at a gathering or enjoying it as a personal treat, this sweet and spicy mango chutney is sure to impress.
Ingredients:
- 2 ripe mangoes, peeled and diced
- 1 small onion, finely chopped
- 1 red bell pepper, diced
- 1/2 cup brown sugar
- 1/2 cup apple cider vinegar
- 1 teaspoon grated ginger
- 1 teaspoon ground cumin
- 1/2 teaspoon ground cinnamon
- 1/4 teaspoon cayenne pepper (adjust to taste)
- Salt to taste
Instructions:
- Begin by preparing your ingredients. Peel and dice the ripe mangoes, finely chop the onion, and dice the red bell pepper. Set them aside in a bowl for easy access during cooking.
- In a medium saucepan, combine the diced mangoes, chopped onion, and diced red bell pepper. Add the brown sugar, apple cider vinegar, grated ginger, ground cumin, ground cinnamon, cayenne pepper, and a pinch of salt. Stir the mixture until well combined.
- Place the saucepan over medium heat and bring the mixture to a simmer. Allow it to cook for about 20-25 minutes, stirring occasionally to prevent sticking. The chutney will thicken and the mangoes will break down, creating a chunky sauce.
- Once the chutney has reached your desired consistency, remove it from the heat and let it cool for a few minutes. Taste and adjust seasoning if needed, adding more salt or cayenne for extra heat.
- Transfer the chutney to a clean jar and let it cool completely before sealing. Store it in the refrigerator for up to two weeks, allowing the flavors to meld together for an even more delicious taste.
Extra Tips: For an added depth of flavor, consider adding a splash of orange juice or a tablespoon of raisins during the cooking process. If you enjoy a smoky flavor, try incorporating a dash of smoked paprika.
This chutney can also be served warm or at room temperature, making it versatile for any occasion. Enjoy this sweet and spicy delight with your favorite dishes!
Grilled Vegetable Skewers
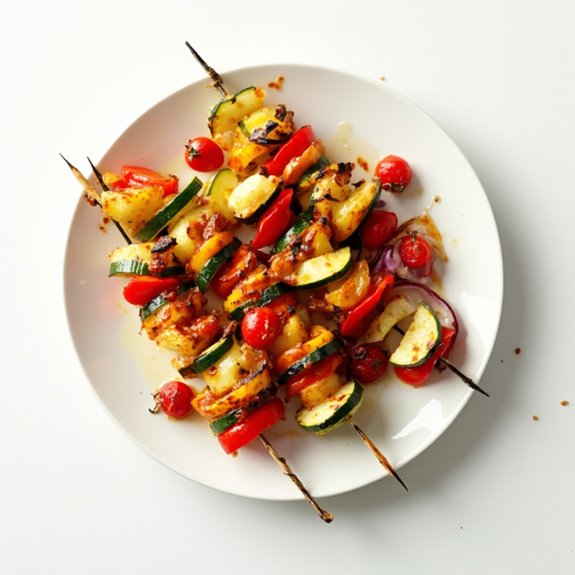
Title: Grilled Vegetable Skewers
Prep Time: 15 minutes
Cook Time: 10 minutes
Number of Servings: 4
Required Equipment List: Skewers, grill or grill pan, cutting board, knife, mixing bowl
Cuisine Type: Caribbean
Grilled Vegetable Skewers are a vibrant and delicious way to enjoy fresh produce while embracing the flavors of the Caribbean. This recipe includes a colorful medley of vegetables such as bell peppers, zucchini, and red onions, all seasoned with a tangy marinade that enhances their natural sweetness.
The grilling process not only adds a smoky flavor but also brings out the beautiful colors of each vegetable, making them visually appealing and perfect for serving at summer barbecues or family gatherings.
These skewers aren't only easy to prepare but also versatile, allowing you to mix and match your favorite vegetables or even add proteins such as shrimp or chicken for a heartier option. They can be served as a stand-alone appetizer or as a side dish alongside grilled meats.
With their fresh and zesty flavors, Grilled Vegetable Skewers are sure to be a hit at any outdoor feast.
Ingredients:
- 1 bell pepper (red, yellow, or green), cut into chunks
- 1 zucchini, sliced into rounds
- 1 red onion, cut into wedges
- 1 cup cherry tomatoes
- 1/4 cup olive oil
- 2 tablespoons balsamic vinegar
- 2 cloves garlic, minced
- Salt and pepper to taste
- Skewers (wooden or metal)
Instructions:
- If using wooden skewers, soak them in water for at least 30 minutes to prevent burning on the grill. This step will guarantee that your skewers hold together during cooking and enhances their durability.
- In a mixing bowl, combine the olive oil, balsamic vinegar, minced garlic, salt, and pepper. Whisk together until fully combined. This marinade will add flavor to the vegetables and help them grill beautifully.
- Add the chopped bell pepper, zucchini slices, red onion wedges, and cherry tomatoes into the bowl with the marinade. Toss the vegetables until they're well coated with the mixture, allowing them to soak up the flavors for about 10 minutes.
- Preheat your grill or grill pan over medium-high heat. Once hot, thread the marinated vegetables onto the skewers, alternating between different types for a colorful presentation.
- Place the skewers on the grill and cook for about 10 minutes, turning occasionally, until the vegetables are tender and have nice grill marks. Keep an eye on them to prevent charring, especially the cherry tomatoes.
- Once cooked, remove the skewers from the grill and let them cool briefly. Serve warm as an appetizer or side dish, and enjoy the burst of flavors that the grilled vegetables bring.
Extra Tips: To enhance the flavor even further, consider adding herbs such as rosemary or thyme to the marinade. If you're looking to add a bit of spice, red pepper flakes can be mixed in for a kick.
These skewers can also be made ahead of time and stored in the refrigerator until ready to grill, making them an excellent option for meal prep or easy entertaining. Enjoy your delicious and healthy Grilled Vegetable Skewers!
Black Bean and Corn Salsa
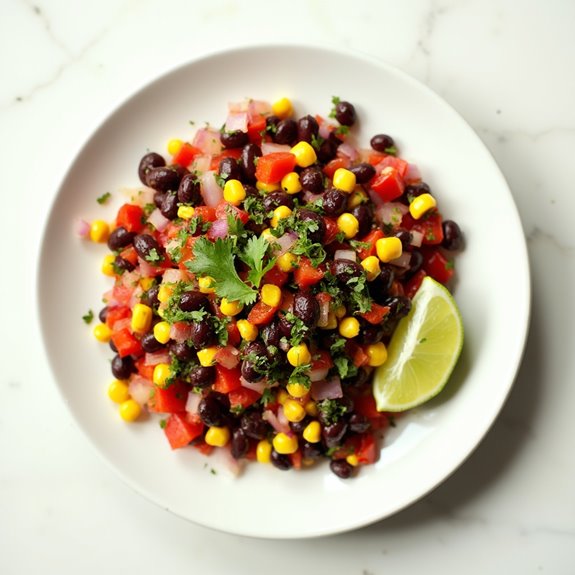
Title: Black Bean and Corn Salsa
Prep Time: 10 minutes
Cook Time: 0 minutes
Number of Servings: 6
Required Equipment List: Mixing bowl, spoon, measuring cups and spoons
Cuisine Type: Caribbean
Black Bean and Corn Salsa is a vibrant and invigorating dish that embodies the spirit of Caribbean cuisine. This no-cook salsa combines the earthy flavor of black beans with the sweetness of corn, creating a delightful contrast that's perfect for pairing with tortilla chips or serving over grilled meats.
The addition of fresh herbs, lime juice, and spices enhances the natural flavors, making it a perfect appetizer or snack for any gathering. Not only is this salsa quick and easy to prepare, but it's also packed with nutrients, making it a healthy choice that everyone will enjoy.
Ideal for summer barbecues, picnics, or a casual night in, this Black Bean and Corn Salsa is sure to become a go-to recipe in your culinary repertoire. With just a few simple ingredients, you can create a dish that's both delicious and visually appealing.
Ingredients:
- 1 can (15 oz) black beans, drained and rinsed
- 1 cup corn (fresh, frozen, or canned)
- 1 medium red bell pepper, diced
- 1/4 cup red onion, finely chopped
- 1/4 cup fresh cilantro, chopped
- 2 tablespoons lime juice
- 1 teaspoon ground cumin
- Salt and pepper to taste
Instructions:
- In a large mixing bowl, combine the drained black beans and corn. If using frozen corn, verify it's thawed and drained. This will provide a good base for your salsa.
- Add the diced red bell pepper and finely chopped red onion to the bowl. These ingredients add crunch and a hint of sweetness to the mix, enhancing the overall flavor profile.
- Stir in the chopped cilantro, lime juice, and ground cumin. The cilantro adds a fresh herbaceous note, while the lime juice provides acidity to balance the dish.
- Season the salsa with salt and pepper to taste, mixing well to verify all ingredients are evenly coated in the spices and lime juice.
- Allow the salsa to rest for about 10 minutes before serving. This resting time helps the flavors meld together, making every bite deliciously cohesive.
Extra Tips: For an extra kick, consider adding diced jalapeños or a sprinkle of chili powder to the salsa. This dish is highly versatile, so feel free to customize it by adding other ingredients like avocado or mango for a sweet twist.
Serve with tortilla chips, or use it as a topping for tacos, burritos, or grilled chicken. Enjoy your fresh and zesty Black Bean and Corn Salsa!
Stuffed Avocado Halves
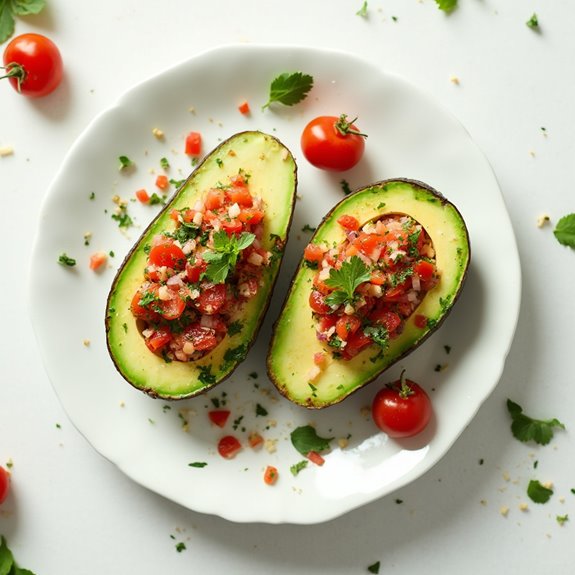
Title: Stuffed Avocado Halves
Prep Time: 10 minutes
Cook Time: 0 minutes
Number of Servings: 4
Required Equipment List: Mixing bowl, spoon, knife, serving plates
Cuisine Type: Caribbean
Stuffed Avocado Halves are a revitalizing and nutritious appetizer that perfectly captures the vibrant flavors of the Caribbean. This dish features creamy avocado halves filled with a zesty mixture of fresh ingredients, making it a delightful addition to any gathering or meal.
The combination of ripe avocados, sweet tomatoes, tangy lime juice, and spicy jalapeños creates a harmonious balance of flavors that's sure to impress. This no-cook recipe is as simple as it's delicious, allowing the natural creaminess of the avocado to shine through.
It's perfect for warm-weather entertaining and can be easily customized with your favorite protein or additional vegetables. Whether served as a starter or a light lunch, these stuffed avocado halves are both visually appealing and satisfying to eat.
Ingredients:
- 2 ripe avocados
- 1 cup cherry tomatoes, diced
- 1/4 cup red onion, finely chopped
- 1/4 cup cilantro, chopped
- 1 jalapeño, seeded and diced
- Juice of 1 lime
- Salt and pepper to taste
Instructions:
- Start by cutting the avocados in half lengthwise and removing the pit. Gently scoop out a small amount of the flesh from the center of each half to create more space for the filling. Set the avocado halves aside.
- In a mixing bowl, combine the diced cherry tomatoes, red onion, cilantro, jalapeño, and lime juice. Stir the mixture well to guarantee that all ingredients are evenly distributed.
- Season the tomato mixture with salt and pepper to taste. Adjust the seasoning as necessary, keeping in mind that the flavors will be enhanced once combined with the creamy avocado.
- Carefully spoon the tomato mixture into each avocado half, filling them generously. Make sure to mound the filling a bit for an attractive presentation.
- Arrange the stuffed avocado halves on serving plates and serve immediately. Enjoy them fresh to fully appreciate the vibrant flavors and creamy texture.
Extra Tips: To prevent the avocado from browning, you can brush the flesh lightly with lime juice before adding the filling. If you want to add protein to the dish, consider mixing in some cooked shrimp or crab meat for an elevated touch.
For a milder flavor, you can omit the jalapeño or reduce the amount used. These stuffed avocados are best enjoyed immediately, but if you have leftovers, store them in an airtight container in the refrigerator for up to a few hours.
Rum-Glazed Chicken Wings
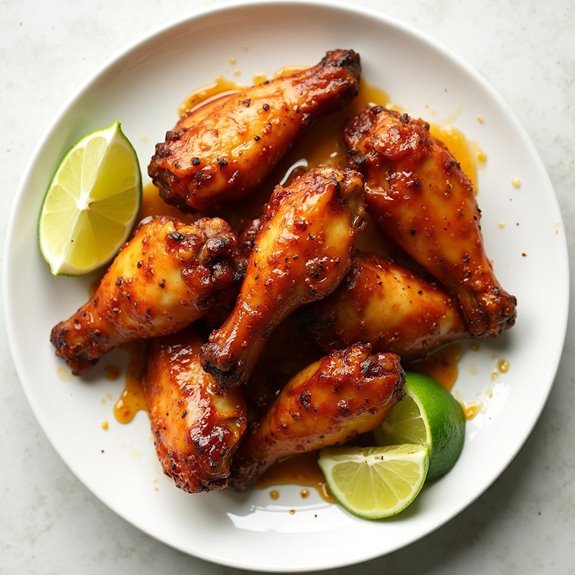
Title: Rum-Glazed Chicken Wings
Prep Time: 15 minutes
Cook Time: 30 minutes
Number of Servings: 4
Required Equipment List: Baking sheet, mixing bowl, measuring cups, oven
Cuisine Type: Caribbean
These Rum-Glazed Chicken Wings are a delectable appetizer that perfectly encapsulates the vibrant flavors of the Caribbean. Marinated in a savory rum-based glaze, these wings are sweet, sticky, and utterly irresistible. The combination of rum, brown sugar, and tropical spices creates a deliciously complex flavor that will transport you straight to a beachside paradise.
Whether you're hosting a party or enjoying a casual night in, these wings are sure to be a hit with family and friends. The preparation is simple and can be done ahead of time, allowing the wings to soak up all the delicious flavors of the marinade. Once baked to perfection, they become crispy on the outside while remaining juicy on the inside.
Serve them with a side of cooling dipping sauce, and you have a perfect appetizer that showcases the essence of Caribbean cuisine.
Ingredients:
- 2 pounds chicken wings
- 1/4 cup dark rum
- 1/4 cup brown sugar
- 2 tablespoons soy sauce
- 2 tablespoons lime juice
- 1 tablespoon Dijon mustard
- 1 teaspoon garlic powder
- 1 teaspoon onion powder
- 1/2 teaspoon cayenne pepper (adjust to taste)
- Salt and pepper to taste
- Fresh lime wedges (for serving)
Instructions:
- In a mixing bowl, combine the dark rum, brown sugar, soy sauce, lime juice, Dijon mustard, garlic powder, onion powder, cayenne pepper, salt, and pepper. Whisk together until the sugar is dissolved and the ingredients are well combined.
- Add the chicken wings to the bowl and toss them in the marinade until they're evenly coated. Cover the bowl with plastic wrap and refrigerate for at least 1 hour, or preferably overnight, to allow the flavors to meld.
- Preheat your oven to 400°F (200°C). Line a baking sheet with aluminum foil for easy cleanup, and place a wire rack on top of the baking sheet to allow the wings to cook evenly and get crispy.
- Remove the wings from the marinade and shake off any excess liquid. Arrange the wings in a single layer on the wire rack, making sure they aren't crowded.
- Bake the wings in the preheated oven for 25-30 minutes, turning them halfway through, until they're golden brown and crispy. For an extra caramelized finish, you can broil them for an additional 2-3 minutes at the end.
- Once cooked, remove the wings from the oven and let them rest for a few minutes. Serve them warm with fresh lime wedges on the side for squeezing over the top.
Extra Tips: For an added depth of flavor, consider adding chopped fresh herbs like cilantro or parsley to the marinade. If you prefer a spicier kick, increase the cayenne pepper or add a dash of hot sauce.
These wings pair wonderfully with a cooling dip made from sour cream, lime juice, and a sprinkle of salt. Enjoy your Caribbean-inspired feast!
Baked Sweet Potato Fries
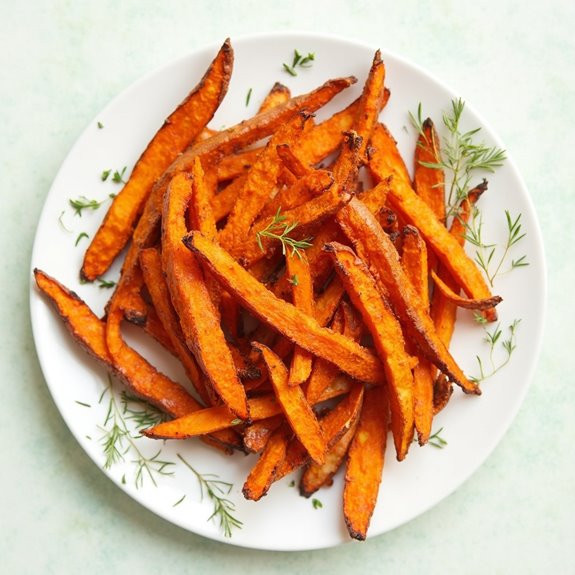
Title: Baked Sweet Potato Fries
Prep Time: 10 minutes
Cook Time: 25 minutes
Number of Servings: 4
Required Equipment List: Baking sheet, parchment paper, knife, mixing bowl, oven
Cuisine Type: Caribbean-inspired
Baked Sweet Potato Fries are a delicious and healthier alternative to traditional French fries, bursting with flavor and a hint of sweetness. This Caribbean-inspired version infuses the natural sweetness of sweet potatoes with spices that elevate the dish, making them perfect as an appetizer or a side dish.
With their crispy exterior and soft interior, these fries are sure to be a hit among both kids and adults alike! Not only are these fries easy to make, but they also provide a nutritious boost, packed with vitamins and minerals. By baking instead of frying, you're also cutting down on unnecessary oil, making these fries a guilt-free indulgence.
Serve them alongside a tangy dipping sauce or enjoy them plain; either way, these Baked Sweet Potato Fries will add a vibrant touch to your meal.
Ingredients:
- 2 large sweet potatoes
- 2 tablespoons olive oil
- 1 teaspoon paprika
- 1 teaspoon garlic powder
- 1/2 teaspoon salt
- 1/2 teaspoon black pepper
- 1/2 teaspoon cayenne pepper (optional for heat)
- Fresh herbs for garnish (optional)
Instructions:
- Preheat your oven to 425°F (220°C) and line a baking sheet with parchment paper to prevent sticking and guarantee even cooking.
- Peel the sweet potatoes and cut them into thin, even-sized fries, about 1/4 inch thick. This will help them cook evenly and become crispy.
- In a mixing bowl, combine the cut sweet potatoes with olive oil, paprika, garlic powder, salt, black pepper, and cayenne pepper if using. Toss until all the fries are well coated with the oil and spices.
- Spread the seasoned sweet potato fries in a single layer on the prepared baking sheet, ensuring they aren't overcrowded. This will allow for even baking and crispiness.
- Bake in the preheated oven for 20-25 minutes, flipping the fries halfway through the cooking process to guarantee they cook evenly and develop a golden-brown color.
- Once the fries are crispy and cooked through, remove them from the oven and let them cool slightly. Garnish with fresh herbs if desired before serving.
Extra Tips: For extra crunch, consider soaking the cut sweet potatoes in water for 30 minutes before seasoning and baking. This helps to remove excess starch.
Additionally, you can experiment with different spices, such as cumin or cinnamon, to customize the flavor to your liking. Serve these fries with a yogurt-based dip or a spicy mayo for a delightful flavor combination. Enjoy your tasty and healthy snack!
Crab Cakes With Lime Aioli
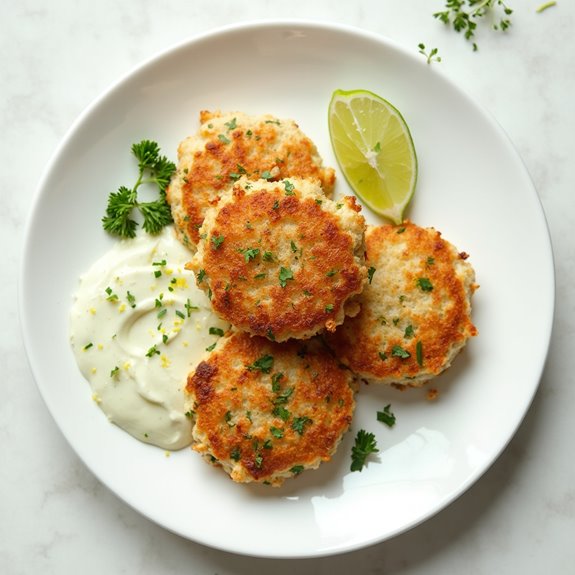
Title: Crab Cakes With Lime Aioli
Prep Time: 20 minutes
Cook Time: 15 minutes
Number of Servings: 4
Required Equipment List: Mixing bowl, frying pan, baking sheet, parchment paper, food processor (optional)
Cuisine Type: Caribbean
Crab Cakes with Lime Aioli are a delicious and vibrant dish that brings the flavors of the Caribbean right to your table. These tender, flavorful crab cakes are made with fresh crab meat, seasoned breadcrumbs, and aromatic spices, creating a perfect balance of taste and texture.
The accompanying lime aioli adds a creamy, zesty kick that elevates the dish, making it an ideal appetizer for any gathering or a delightful addition to a seafood feast. This recipe is simple yet impressive, making it a favorite among seafood lovers.
The crab cakes are quick to prepare and cook, ensuring that you can enjoy this gourmet dish without spending hours in the kitchen. Whether served as a starter, at a summer barbecue, or during a festive celebration, these crab cakes are sure to be a hit.
Pair them with a crisp salad or your favorite dipping sauce for a complete meal that captures the essence of island dining.
Ingredients:
- 1 pound fresh crab meat, picked over for shells
- 1/2 cup breadcrumbs
- 1/4 cup mayonnaise
- 1 egg, beaten
- 2 tablespoons Dijon mustard
- 1 tablespoon Worcestershire sauce
- 1 teaspoon Old Bay seasoning
- 1/2 teaspoon salt
- 1/4 teaspoon black pepper
- 2 tablespoons chopped fresh parsley
- 1 tablespoon lemon juice
- 1/4 cup vegetable oil (for frying)
For Lime Aioli:
- 1/2 cup mayonnaise
- Zest of 1 lime
- 1 tablespoon lime juice
- 1 clove garlic, minced
- Salt and pepper to taste
Instructions:
- In a large mixing bowl, combine the fresh crab meat, breadcrumbs, mayonnaise, beaten egg, Dijon mustard, Worcestershire sauce, Old Bay seasoning, salt, black pepper, parsley, and lemon juice. Gently mix until everything is well combined, being careful not to break up the crab meat too much.
- Form the crab mixture into patties, about 2-3 inches in diameter and 1 inch thick. Place the formed patties on a baking sheet lined with parchment paper and refrigerate for at least 15 minutes to help them set.
- While the crab cakes are chilling, prepare the lime aioli. In a small bowl, whisk together the mayonnaise, lime zest, lime juice, minced garlic, salt, and pepper until smooth. Adjust seasoning to taste and set aside.
- Heat the vegetable oil in a frying pan over medium heat. Once the oil is hot, carefully add the crab cakes to the pan, cooking in batches if necessary to avoid overcrowding. Fry for about 4-5 minutes on each side or until golden brown and cooked through.
- Once the crab cakes are cooked, remove them from the pan and drain on paper towels to absorb any excess oil. Serve warm with a generous dollop of lime aioli on the side.
Extra Tips: For added flavor, you can experiment with different herbs and spices in the crab mixture, such as cilantro or cayenne pepper for a bit of heat.
If you want to make the crab cakes ahead of time, you can refrigerate the uncooked patties for up to a day before frying. Additionally, feel free to serve these crab cakes with a side of fresh greens or a tangy slaw to balance the richness of the dish. Enjoy your culinary adventure in the Caribbean!
Tropical Fruit Salad
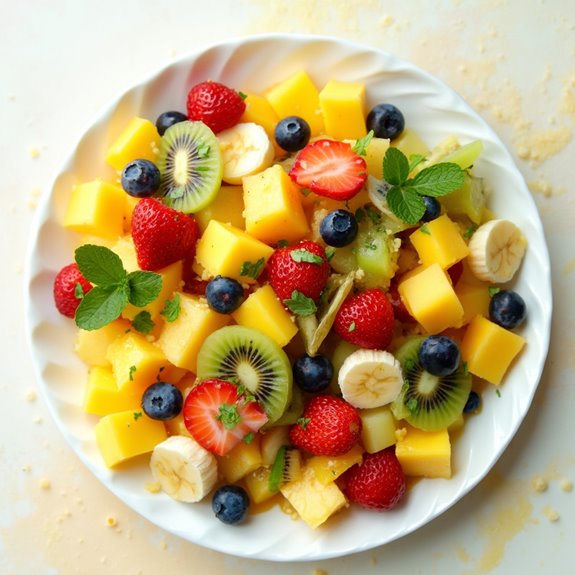
Title: Tropical Fruit Salad
Prep Time: 15 minutes
Cook Time: 0 minutes
Number of Servings: 6
Required Equipment List: Mixing bowl, knife, cutting board, serving dish
Cuisine Type: Caribbean
This Tropical Fruit Salad is a vibrant and revitalizing dish that embodies the essence of the Caribbean. Bursting with colors and flavors, this salad combines a variety of tropical fruits that aren't only delicious but also packed with nutrients. Perfect for a light snack, a revitalizing side dish, or a delightful dessert, this salad is a crowd-pleaser for any occasion.
The versatility of this recipe allows you to mix and match fruits based on availability and personal preference, making it a go-to recipe all year round. The dressing, made from lime juice and a hint of honey, enhances the natural sweetness of the fruits while adding a zesty kick.
Serve this Tropical Fruit Salad at your next barbecue, picnic, or family gathering, and watch as it disappears quickly from the table. This dish not only provides a burst of flavor but also a tropical escape, transporting you straight to the sandy beaches of the Caribbean with every bite.
Ingredients:
- 1 mango, diced
- 1 pineapple, diced
- 2 kiwis, peeled and sliced
- 1 cup strawberries, hulled and halved
- 1 banana, sliced
- 1 cup blueberries
- 1/4 cup fresh mint leaves, chopped
- Juice of 2 limes
- 1 tablespoon honey (optional)
Instructions:
- Begin by preparing all of your fruits. Dice the mango and pineapple into bite-sized pieces, slice the kiwis, hull and halve the strawberries, and slice the banana. Rinse the blueberries under cold water and set aside.
- In a large mixing bowl, combine all of the prepared fruits: mango, pineapple, kiwi, strawberries, banana, and blueberries. Gently toss the fruits together to guarantee an even distribution without mashing them.
- In a small bowl, whisk together the lime juice and honey (if using) until well combined. This dressing adds a zesty and sweet flavor that complements the fruits beautifully.
- Drizzle the lime dressing over the mixed fruit and add the chopped mint leaves. Gently toss the salad again to coat the fruits evenly with the dressing and mint.
- Transfer the Tropical Fruit Salad to a serving dish. For an added touch, garnish with a few whole mint leaves on top before serving.
Extra Tips: For the best flavor, choose ripe fruits and make sure to adjust the sweetness of the dressing to your taste. You can also add other tropical fruits such as papaya or passion fruit, depending on what's in season.
This salad is best served fresh, but if you need to prepare it ahead of time, consider mixing the fruits and dressing separately and combining them just before serving to prevent the fruits from becoming mushy. Enjoy this delightful dish as a revitalizing treat any time of the year!
Curried Chickpeas on Toast
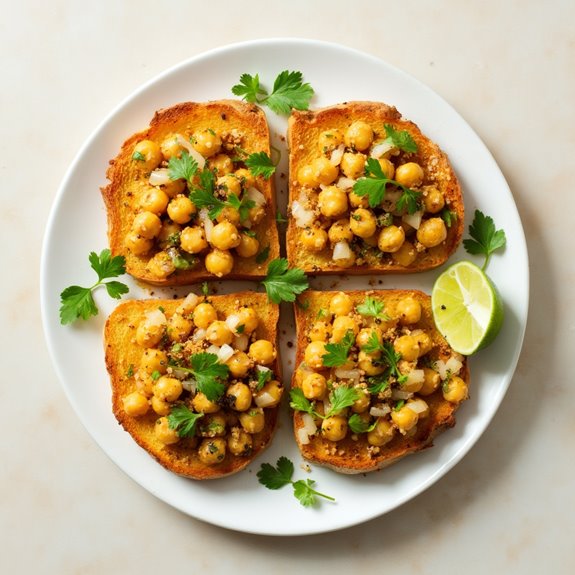
Title: Curried Chickpeas on Toast
Prep Time: 10 minutes
Cook Time: 15 minutes
Number of Servings: 4
Required Equipment List: Skillet, mixing bowl, spoon, toaster
Cuisine Type: Caribbean-inspired
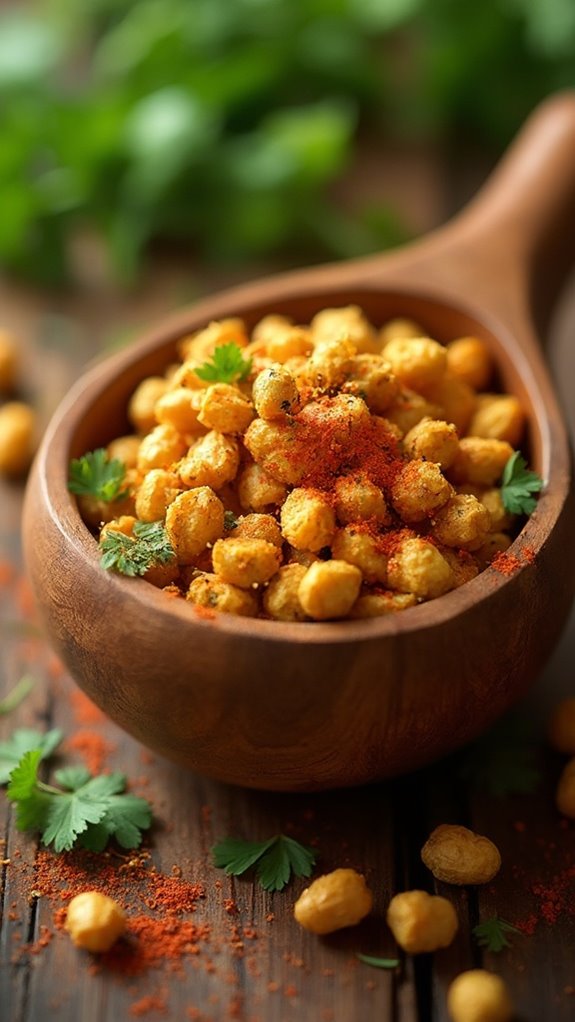
Curried Chickpeas on Toast is a vibrant and flavorful dish that beautifully combines the comforting texture of chickpeas with the aromatic spices of curry. This easy-to-make recipe is perfect as an appetizer or a light meal, offering a delicious and nutritious option.
The chickpeas are sautéed with onions, garlic, and a blend of spices, then served on crispy toasted bread, making it a delightful option for gatherings or a cozy night in. This dish not only showcases the essence of Caribbean cuisine but also highlights the versatility of chickpeas, which are packed with protein and fiber.
The addition of fresh herbs and a squeeze of lime juice elevates the flavors, providing a revitalizing finish. It's a perfect choice for vegetarians and can easily be adjusted to suit personal taste preferences. Enjoy the warm, comforting flavors of this dish that will surely leave your guests asking for the recipe!
Ingredients:
- 1 can (15 oz) chickpeas, drained and rinsed
- 1 tablespoon olive oil
- 1 small onion, diced
- 2 cloves garlic, minced
- 1 tablespoon curry powder
- 1 teaspoon ground cumin
- 1/2 teaspoon turmeric
- Salt and pepper to taste
- 1 tablespoon fresh cilantro, chopped (for garnish)
- 4 slices of bread (your choice)
- Lime wedges (for serving)
Instructions:
- In a skillet, heat the olive oil over medium heat. Add the diced onion and sauté until it becomes translucent, about 3-4 minutes. This will form the flavor base for your chickpeas.
- Stir in the minced garlic and cook for an additional minute, being careful not to burn it. The garlic will add a wonderful aroma to the dish and complement the spices.
- Add the drained chickpeas to the skillet along with the curry powder, ground cumin, turmeric, salt, and pepper. Stir well to coat the chickpeas in the spices and cook for about 5-7 minutes, allowing the flavors to meld and the chickpeas to warm through.
- While the chickpeas are cooking, toast the slices of bread until golden brown and crispy. This will provide a sturdy base to hold the flavorful chickpeas.
- Once the chickpeas are ready, remove them from heat and spoon the mixture generously over the toasted bread. Garnish with fresh cilantro and serve with lime wedges for an added burst of flavor.
Extra Tips: To add a bit of heat, consider incorporating some chopped chili peppers or a dash of hot sauce into the chickpea mixture. If you prefer a creamier texture, you can mash some of the chickpeas before adding them to the toast.
This dish can be easily customized with your favorite toppings, such as avocado slices or a dollop of yogurt, to enhance the flavor even further. Enjoy your delicious and vibrant Curried Chickpeas on Toast!
Roasted Garlic Hummus
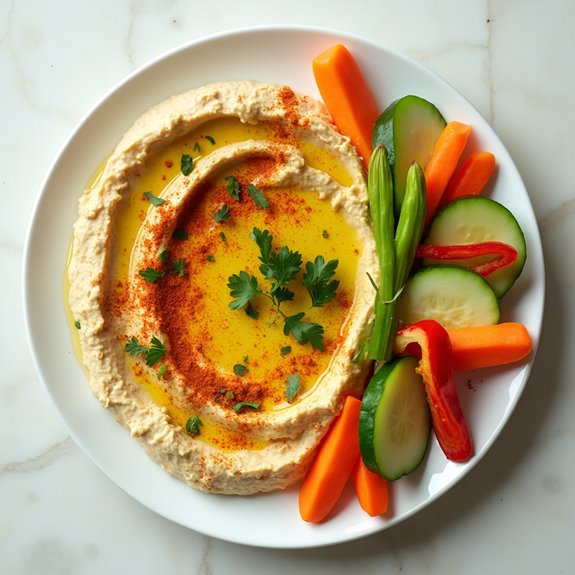
Title: Roasted Garlic Hummus
Prep Time: 10 minutes
Cook Time: 30 minutes
Number of Servings: 6
Required Equipment List: Oven, baking sheet, food processor, measuring cups, measuring spoons, spatula
Cuisine Type: Middle Eastern
Roasted Garlic Hummus is a creamy, flavorful dip that showcases the rich, nutty taste of roasted garlic blended with chickpeas and tahini. The process of roasting the garlic mellows its sharpness, resulting in a sweet and buttery flavor that transforms this classic Middle Eastern dish into an irresistible appetizer.
This hummus is perfect for serving with pita bread, fresh vegetables, or as a spread on sandwiches and wraps, making it a versatile addition to any meal or gathering. Not only is this hummus delicious, but it's also packed with nutrients, making it a healthy choice for snacking.
The combination of chickpeas, tahini, and olive oil provides a satisfying source of protein and healthy fats, while garlic adds numerous health benefits. This recipe is quick to prepare and can be made ahead of time, allowing the flavors to meld together beautifully.
Whether you're hosting a party or simply craving a tasty snack, this Roasted Garlic Hummus is sure to please everyone at the table.
Ingredients:
- 1 head of garlic
- 1 can (15 oz) chickpeas, drained and rinsed
- 1/4 cup tahini
- 2 tablespoons olive oil, plus more for drizzling
- 2 tablespoons lemon juice
- 1/2 teaspoon ground cumin
- Salt and pepper to taste
- Water, as needed
- Paprika (for garnish)
- Fresh parsley (for garnish, optional)
Instructions:
- Preheat your oven to 400°F (200°C). Cut the top off the head of garlic to expose the cloves and drizzle with olive oil. Wrap it in aluminum foil and place it on a baking sheet. Roast in the oven for about 30 minutes, or until the cloves are soft and golden brown.
- Once the garlic is roasted, remove it from the oven and allow it to cool slightly. Squeeze the roasted garlic cloves out of their skins and into the bowl of a food processor.
- Add the chickpeas, tahini, olive oil, lemon juice, cumin, salt, and pepper to the food processor. Blend until smooth, scraping down the sides as needed. If the mixture is too thick, add water a tablespoon at a time until you reach your desired consistency.
- Taste the hummus and adjust the seasoning, adding more salt, lemon juice, or cumin if desired. Once the hummus is smooth and flavorful, transfer it to a serving bowl.
- Drizzle a little extra olive oil over the top of the hummus and sprinkle with paprika and chopped parsley for garnish. Serve with pita bread, vegetable sticks, or your favorite dipping items.
Extra Tips: To enhance the flavor of your hummus even further, consider adding a pinch of cayenne pepper for a bit of heat or a tablespoon of roasted red peppers for a smoky twist.
Hummus can be stored in an airtight container in the refrigerator for up to a week, making it an excellent make-ahead option. When serving, allow it to come to room temperature for the best flavor. Enjoy your homemade Roasted Garlic Hummus!
Fried Plantain Cups
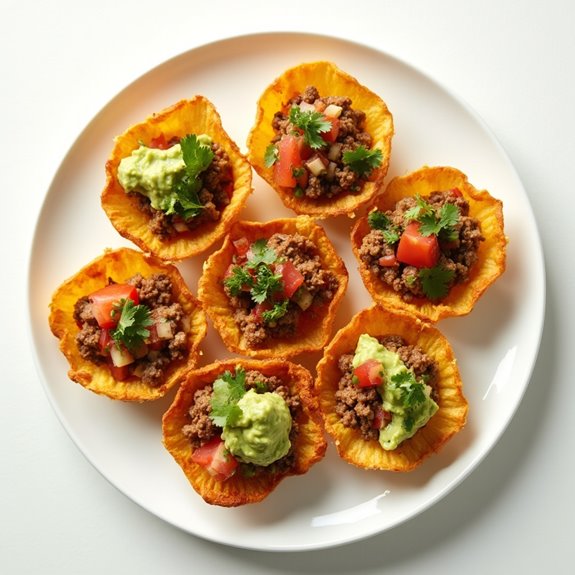
Title: Fried Plantain Cups
Prep Time: 15 minutes
Cook Time: 15 minutes
Number of Servings: 4
Required Equipment List: Frying pan, sharp knife, cutting board, slotted spoon, paper towels
Cuisine Type: Caribbean
Fried Plantain Cups are a delicious and versatile appetizer that showcases the rich flavors of the Caribbean. Plantains, which are similar to bananas but starchier, are sliced and fried until golden brown, then shaped into cups that can be filled with a variety of ingredients.
These cups offer a delightful crunch and a hint of sweetness, making them perfect for serving with savory fillings like seasoned meats, fresh salsas, or creamy dips. This recipe isn't only easy to make but also allows for creativity in choosing your fillings.
Whether you opt for a spicy bean mixture, a zesty shrimp salad, or simply a dollop of guacamole, these plantain cups are sure to impress your guests at any gathering. With their vibrant color and appealing shape, they're as pleasing to the eye as they're to the palate.
Ingredients:
- 2 ripe plantains
- Vegetable oil (for frying)
- Salt (to taste)
- Optional fillings: seasoned ground beef, black beans, salsa, guacamole, or cheese
Instructions:
- Start by peeling the ripe plantains. Cut off the ends and make a vertical slit along the skin to help remove it. Once peeled, slice the plantains into 1-inch thick rounds.
- Heat about 1 inch of vegetable oil in a frying pan over medium heat. To test if the oil is hot enough, drop in a small piece of plantain; it should sizzle immediately.
- Carefully add the sliced plantains to the hot oil in batches, ensuring not to overcrowd the pan. Fry them for about 2-3 minutes on each side, or until they're golden brown and slightly crispy.
- Using a slotted spoon, remove the fried plantains from the oil and place them on a plate lined with paper towels to absorb any excess oil. While they're still warm, gently press the center of each slice with the back of a spoon to create a cup shape.
- Once all the plantains are shaped into cups, sprinkle them with salt to taste. Allow them to cool slightly before filling them with your desired fillings, such as seasoned ground beef, salsa, or guacamole.
Extra Tips: To make the plantain cups extra crispy, consider frying them twice—first, as slices to achieve a golden color and second, after shaping them into cups.
You can also experiment with different spice blends to season your fillings, giving each cup a unique flavor profile. These plantain cups can be made ahead of time and filled just before serving for a stress-free appetizer option. Enjoy the tropical taste of the Caribbean right at your table!
Spiced Coconut Cashews
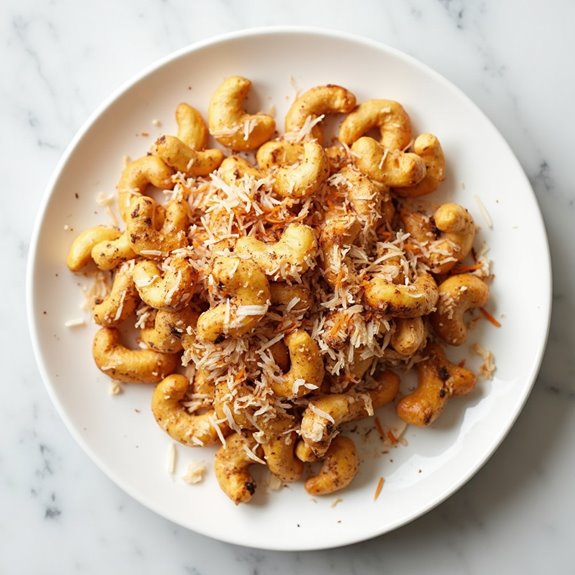
Title: Spiced Coconut Cashews
Prep Time: 10 minutes
Cook Time: 20 minutes
Number of Servings: 6
Required Equipment List: Baking sheet, mixing bowl, oven, spatula
Cuisine Type: Caribbean
These Spiced Coconut Cashews are a delightful snack that combines the rich, tropical flavor of coconut with the satisfying crunch of cashews. Perfect for entertaining or as a tasty treat for yourself, this recipe is easy to prepare and brings a touch of the Caribbean to your kitchen.
The blend of spices adds warmth and depth to the nuts, making them irresistible and perfect for nibbling on at any time of the day. Once roasted, these cashews boast a golden hue and a delightful crunch, enhanced by the sweetness of coconut flakes and the warmth of spices.
They can be enjoyed on their own or served as part of a larger appetizer spread. Whether you're hosting a party, enjoying a movie night, or just craving something savory, these Spiced Coconut Cashews are sure to please everyone.
Ingredients:
- 2 cups raw cashews
- 1 cup unsweetened shredded coconut
- 2 tablespoons coconut oil, melted
- 1 tablespoon brown sugar
- 1 teaspoon ground cumin
- 1 teaspoon smoked paprika
- 1/2 teaspoon cayenne pepper (adjust to taste)
- 1/2 teaspoon salt
Instructions:
- Preheat your oven to 350°F (175°C). Line a baking sheet with parchment paper to prevent the cashews from sticking and to guarantee easy cleanup after roasting.
- In a mixing bowl, combine the raw cashews, shredded coconut, melted coconut oil, brown sugar, cumin, smoked paprika, cayenne pepper, and salt. Stir well to guarantee all ingredients are evenly coated and the spices are distributed throughout the mixture.
- Spread the cashew and coconut mixture evenly on the prepared baking sheet, making sure to keep them in a single layer for even roasting.
- Bake in the preheated oven for 15-20 minutes, stirring halfway through to guarantee even browning. Keep an eye on the cashews, as they can burn quickly; they should be golden brown and fragrant when done.
- Once roasted, remove the baking sheet from the oven and let the cashews cool completely. They'll continue to harden as they cool down.
- Transfer the cooled Spiced Coconut Cashews to a serving bowl and enjoy! They can be stored in an airtight container for up to one week, but they're best enjoyed fresh.
Extra Tips: For an extra flavor kick, consider adding a sprinkle of lime zest or a touch of fresh lime juice before serving. You can also experiment with different spices, such as cinnamon or nutmeg, to create your own unique twist on this recipe.
If you prefer a sweeter version, increase the amount of brown sugar or add a drizzle of honey before roasting. These cashews make a great topping for salads or a crunchy addition to yogurt bowls, adding both flavor and texture. Enjoy your homemade snack!
Ahi Poke Bowls
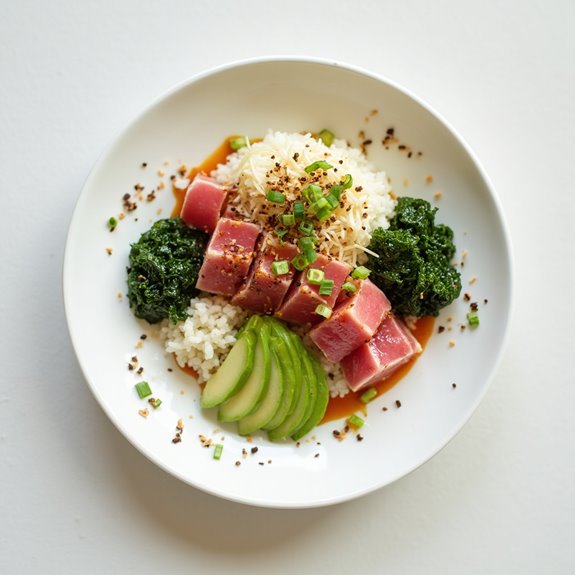
Title: Ahi Poke Bowls
Prep Time: 15 minutes
Cook Time: 0 minutes
Number of Servings: 2
Required Equipment List: Mixing bowl, sharp knife, cutting board, serving bowls
Cuisine Type: Hawaiian
Ahi Poke Bowls are a light and invigorating dish that beautifully captures the essence of Hawaiian cuisine. This dish features fresh, sushi-grade ahi tuna, which is cubed and marinated in a mixture of soy sauce, sesame oil, and green onions, creating a simple yet flavorful base.
Served over a bed of sushi rice and topped with a colorful array of fresh vegetables, avocado, and seaweed, Ahi Poke Bowls aren't only visually appealing but also packed with nutrients, making them a perfect meal for warm weather or a healthy lunch option.
The versatility of Ahi Poke Bowls allows you to customize them according to your taste preferences. You can add various toppings such as pickled ginger, radishes, or even mango for a tropical twist.
This dish is quick to assemble, which makes it ideal for busy weeknights or when entertaining guests. With its vibrant flavors and beautiful presentation, Ahi Poke Bowls are sure to impress and satisfy anyone who enjoys fresh seafood.
Ingredients:
- 8 ounces sushi-grade ahi tuna, diced
- 2 tablespoons soy sauce
- 1 tablespoon sesame oil
- 2 green onions, thinly sliced
- 1 cup sushi rice, cooked and cooled
- 1 avocado, sliced
- 1/2 cucumber, thinly sliced
- 1/4 cup seaweed salad
- Sesame seeds for garnish
- Pickled ginger (optional)
Instructions:
- Start by preparing the sushi rice according to package instructions. Once cooked, allow it to cool to room temperature before using. This can be done in advance to save time when assembling your poke bowls.
- In a mixing bowl, combine the diced ahi tuna, soy sauce, sesame oil, and sliced green onions. Gently toss the mixture to make sure the tuna is evenly coated. Allow it to marinate for about 5 minutes to enhance the flavors.
- While the tuna is marinating, prepare your serving bowls by placing a generous scoop of the cooled sushi rice at the bottom of each bowl. This will serve as the base for your poke bowl.
- Once the tuna has marinated, evenly distribute the tuna mixture over the sushi rice in both bowls. Arrange the sliced avocado and cucumber on top for a fresh contrast in textures and flavors.
- Add a scoop of seaweed salad to each bowl as a garnish, and sprinkle sesame seeds on top for added crunch. If desired, include a few slices of pickled ginger on the side for an extra flavor kick.
Extra Tips: When selecting ahi tuna, make sure to purchase sushi-grade fish from a reputable source to guarantee freshness and safety. If you can't find ahi tuna, you can substitute it with salmon or another type of sashimi-grade fish.
Feel free to experiment with different toppings and sauces, like spicy mayo or wasabi, to add your personal touch to the dish. Enjoy your delightful Ahi Poke Bowls!
Coconut-Lime Rice Balls
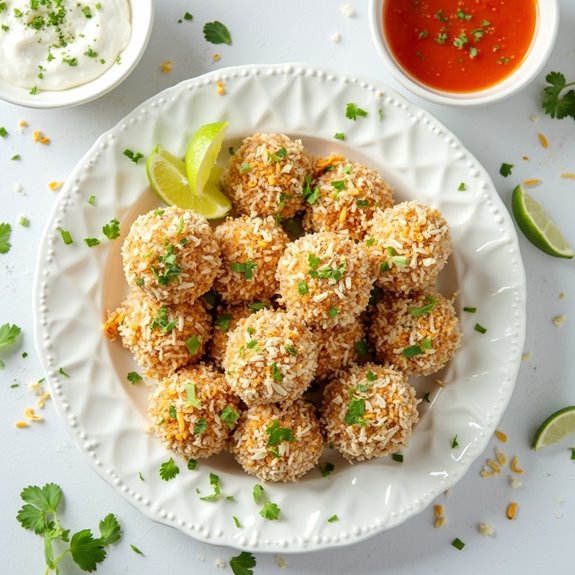
Title: Coconut-Lime Rice Balls
Prep Time: 15 minutes
Cook Time: 30 minutes
Number of Servings: 6
Required Equipment List: Medium saucepan, mixing bowl, spoon, baking sheet, parchment paper
Cuisine Type: Caribbean
Coconut-Lime Rice Balls are a delicious and unique appetizer that captures the essence of the Caribbean. These flavorful bites are made from creamy coconut rice mixed with zesty lime and rolled into bite-sized balls, providing a delightful combination of textures and tastes.
Perfect for parties, these rice balls are easy to make and will surely impress your guests with their tropical flair. The use of coconut milk in the rice adds a rich creaminess, while the fresh lime juice and zest give a rejuvenating kick.
These rice balls can be served warm or at room temperature, making them a versatile option for any gathering. Pair them with a tangy dipping sauce for an extra burst of flavor and watch as they disappear from the platter!
Ingredients:
- 1 cup jasmine rice
- 1 cup coconut milk
- 1/2 cup water
- 1 tablespoon sugar
- 1/2 teaspoon salt
- Zest of 1 lime
- 2 tablespoons lime juice
- 1/2 cup shredded coconut
- 1/2 cup breadcrumbs
- Oil for frying (optional)
Instructions:
- Begin by rinsing the jasmine rice under cold water in a fine-mesh strainer until the water runs clear. This removes excess starch and helps the rice to cook fluffy.
- In a medium saucepan, combine the rinsed rice, coconut milk, water, sugar, and salt. Stir well, then bring to a boil over medium-high heat. Once boiling, reduce the heat to low, cover, and let it simmer for about 15 minutes, or until the rice is tender and the liquid is absorbed.
- Remove the saucepan from heat and let it sit, covered, for an additional 5 minutes. After this resting period, fluff the rice with a fork and allow it to cool slightly.
- Once the rice is cool enough to handle, transfer it to a mixing bowl. Add the lime zest and lime juice, then mix well to combine. Begin forming the mixture into small balls, about the size of a golf ball.
- Roll each rice ball in shredded coconut, then in breadcrumbs to create a crispy outer layer. If desired, you can also pan-fry the rice balls in oil until golden brown, about 3-4 minutes on each side.
- Place the rice balls on a baking sheet lined with parchment paper and keep them warm in a preheated oven at 200°F (93°C) until ready to serve.
Extra Tips: For an extra flavor boost, feel free to add chopped fresh herbs like cilantro or green onions into the rice mixture before forming the balls.
If you prefer a healthier option, skip the frying step and bake the rice balls in the oven at 375°F (190°C) for about 15-20 minutes until golden. Serve with a sweet chili sauce or a tangy yogurt dip for a delicious contrast to the coconut-lime flavor!
Conclusion
With these 23 quick and easy Caribbean appetizer recipes, you're all set to spice up your next gathering! Think of your party as a dance floor—each dish brings its own rhythm, creating a lively atmosphere where flavors mingle just like friends. So, why not take a chance and try something new? Your guests will be delighted, and you'll feel like a culinary superstar. Grab your ingredients, and let the taste of the Caribbean shine at your table!

