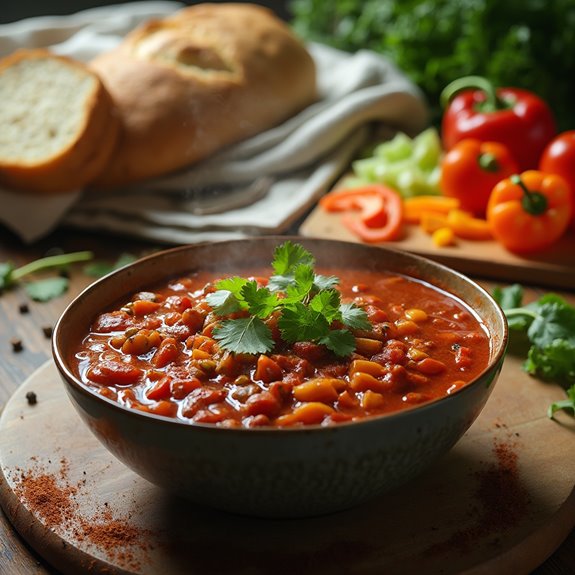
21 Winter Comfort Food Recipe Ideas
When winter rolls in, a bowl of warmth can make all the difference, right? Think classic chicken noodle soup, creamy potato leek soup, or a hearty beef and barley stew to warm your bones. You can't forget about slow cooker chili, perfect for chilly nights! For something a bit indulgent, how about cheesy broccoli casserole? And for dessert, cozy up with apple crisp or homemade gingerbread cookies. Those treats are the icing on the cake—literally! So, why settle for ordinary when you can elevate meals during the winter season? Stick around to discover even more comforting delights!
Classic Chicken Noodle Soup

Title: Classic Chicken Noodle Soup
Prep Time: 15 minutes
Cook Time: 30 minutes
Number of Servings: 6
Required Equipment List: Large pot, cutting board, knife, measuring cups, measuring spoons, wooden spoon
Cuisine Type: American
Classic Chicken Noodle Soup is the ultimate comfort food, perfect for chilly winter days when you need something warm and hearty. This timeless dish combines tender chicken, wholesome vegetables, and egg noodles in a flavorful broth that soothes the soul.
It's not only delicious but also incredibly easy to make, allowing you to enjoy a homemade taste without spending all day in the kitchen. This recipe is versatile; you can use leftover chicken or a whole rotisserie chicken to save time.
The broth is infused with aromatic herbs and spices, making every spoonful comforting and satisfying. Whether you're feeling under the weather or simply craving a bowl of something warm, this Classic Chicken Noodle Soup is sure to become a staple in your home.
Ingredients:
- 1 tablespoon olive oil
- 1 medium onion, diced
- 2 carrots, sliced
- 2 celery stalks, sliced
- 3 cloves garlic, minced
- 8 cups chicken broth
- 2 cups cooked chicken, shredded
- 1 teaspoon dried thyme
- 1 teaspoon dried oregano
- 1 bay leaf
- 3 cups egg noodles
- Salt and pepper to taste
- Fresh parsley for garnish (optional)
Instructions:
- In a large pot, heat the olive oil over medium heat. Add the diced onion, sliced carrots, and sliced celery, sautéing for about 5 minutes until the vegetables start to soften. Stir in the minced garlic and cook for an additional minute until fragrant.
- Pour in the chicken broth and add the shredded chicken, dried thyme, dried oregano, and bay leaf. Bring the mixture to a boil, then reduce the heat to a simmer and let it cook uncovered for 10 minutes to allow the flavors to meld.
- After 10 minutes, add the egg noodles to the pot and continue to simmer for another 10-12 minutes, or until the noodles are tender. Stir occasionally to prevent the noodles from sticking to the bottom of the pot.
- Once the noodles are cooked, season the soup with salt and pepper to taste. Remove the bay leaf before serving. Ladle the soup into bowls, and garnish with fresh parsley if desired.
- Serve the soup hot with crusty bread or crackers on the side for a complete meal.
Extra Tips: For a richer flavor, consider using homemade chicken broth if you have it on hand. You can also customize this soup by adding other vegetables such as peas or corn, or even a squeeze of lemon juice for a bit of brightness.
If you prefer a thicker soup, you can reduce the amount of broth or add a cornstarch slurry to achieve your desired consistency. Enjoy your comforting bowl of classic chicken noodle soup!
Creamy Potato Leek Soup

Title: Creamy Potato Leek Soup
Prep Time: 15 minutes
Cook Time: 30 minutes
Number of Servings: 4
Required Equipment List: Large pot, cutting board, knife, immersion blender (or regular blender), measuring cups, stirring spoon
Cuisine Type: French
Creamy Potato Leek Soup is a comforting and delicious dish that warms you from the inside out during the chilly winter months. This rich and velvety soup combines the subtle sweetness of leeks with the earthy flavors of potatoes, creating a perfect harmony of taste and texture.
Finished with a touch of cream, this soup isn't only satisfying but also elegant enough to serve at a dinner party or a cozy night in. The beauty of this recipe lies in its simplicity; it requires minimal ingredients and can be prepared in just under an hour.
It's versatile too—feel free to add herbs like thyme or parsley for an extra layer of flavor. Whether served as a starter or a main course with crusty bread, this Creamy Potato Leek Soup is sure to be a hit with family and friends.
Ingredients:
- 3 large leeks, cleaned and sliced
- 4 medium potatoes, peeled and diced
- 4 cups vegetable broth
- 1 cup heavy cream
- 2 tablespoons butter
- Salt and pepper to taste
- Chopped chives (for garnish, optional)
Instructions:
- In a large pot, melt the butter over medium heat. Add the sliced leeks and sauté them for about 5-7 minutes until they're soft and translucent, making sure to stir occasionally to prevent browning.
- Once the leeks are tender, add the diced potatoes to the pot, followed by the vegetable broth. Bring the mixture to a boil, then reduce the heat to low, cover, and let it simmer for about 20 minutes or until the potatoes are fork-tender.
- After the potatoes are cooked, remove the pot from heat. Using an immersion blender, puree the soup until it reaches a smooth and creamy consistency. If you don't have an immersion blender, you can carefully transfer the soup in batches to a regular blender.
- Return the blended soup to the pot and stir in the heavy cream. Heat the soup over low heat until warmed through. Season with salt and pepper to taste, adjusting as necessary.
- Once heated, ladle the soup into bowls and garnish with chopped chives if desired. Serve immediately with crusty bread or a side salad for a complete meal.
Extra Tips: For an added depth of flavor, sauté some garlic along with the leeks or add a splash of white wine before adding the broth.
If you prefer a lighter version, you can substitute half of the heavy cream with milk or use a non-dairy cream alternative. This soup can also be made ahead of time and stored in the refrigerator, where the flavors will continue to develop. Just reheat gently before serving!
Beef and Barley Stew
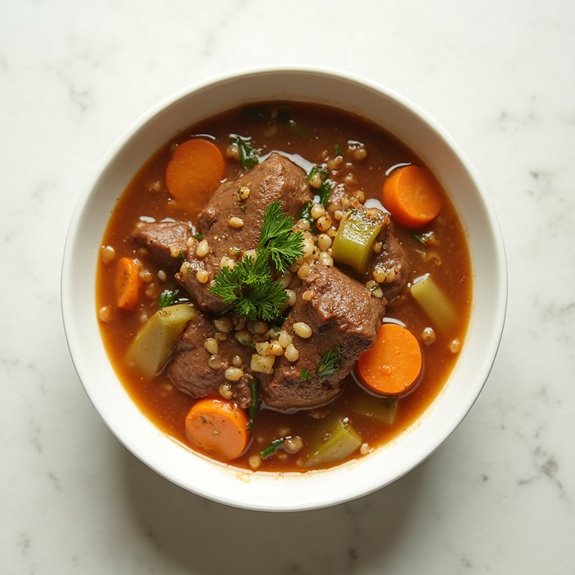
Title: Beef and Barley Stew
Prep Time: 15 minutes
Cook Time: 120 minutes
Number of Servings: 6
Required Equipment List: Large pot or Dutch oven, cutting board, sharp knife, wooden spoon, measuring cups and spoons
Cuisine Type: Comfort Food
Beef and Barley Stew is the epitome of comforting winter food, perfect for warming up chilly evenings. This hearty stew combines tender chunks of beef, wholesome barley, and a medley of vegetables simmered together in a rich broth, creating a dish that's both nourishing and satisfying.
The addition of herbs and spices enhances the flavors, making it a delightful meal for family gatherings or cozy nights at home. What makes this stew truly special is its versatility; you can incorporate a variety of vegetables or adjust seasonings to suit your taste.
The barley adds a delightful chewiness, soaking up all the flavors of the broth while providing a healthy dose of fiber. This dish is best enjoyed with crusty bread to soak up every last drop, making it a beloved staple during the colder months.
Ingredients:
- 2 pounds beef stew meat, cut into 1-inch cubes
- 1 cup pearl barley
- 4 cups beef broth
- 2 cups water
- 2 medium onions, diced
- 3 carrots, sliced
- 3 stalks celery, diced
- 4 cloves garlic, minced
- 2 tablespoons tomato paste
- 1 tablespoon Worcestershire sauce
- 1 teaspoon dried thyme
- 1 teaspoon dried rosemary
- Salt and pepper to taste
- 2 tablespoons olive oil
- Fresh parsley for garnish (optional)
Instructions:
- In a large pot or Dutch oven, heat the olive oil over medium-high heat. Once hot, add the cubed beef stew meat and sear on all sides until browned. This step adds depth of flavor to the stew. Remove the beef from the pot and set it aside.
- In the same pot, add the diced onions, carrots, and celery. Sauté the vegetables for about 5-7 minutes, or until they begin to soften. Stir in the minced garlic and cook for an additional minute until fragrant.
- Return the browned beef to the pot and add the tomato paste, Worcestershire sauce, dried thyme, and dried rosemary. Stir well to coat the meat and vegetables evenly with the flavors.
- Pour in the beef broth and water, then bring the mixture to a boil. Once boiling, reduce the heat to low, cover the pot, and let it simmer for about 1.5 hours. This slow cooking will tenderize the beef and allow the flavors to meld beautifully.
- After 1.5 hours, add the pearl barley to the pot, stirring it into the stew. Cover again and continue to simmer for another 30-40 minutes, or until the barley is tender and has absorbed some of the broth.
- Once the stew is ready, taste and adjust the seasoning with salt and pepper as needed. Serve hot, garnished with fresh parsley if desired, and enjoy with crusty bread.
Extra Tips: For added richness, you can replace some of the water with red wine, which will enhance the flavor profile of the stew. If you prefer a thicker stew, you can blend a small portion of the barley and broth mixture and stir it back in.
Leftovers can be refrigerated for a few days and the flavors will continue to improve, making this stew perfect for meal prep or batch cooking!
Slow Cooker Chili

Title: Slow Cooker Chili
Prep Time: 15 minutes
Cook Time: 6 hours
Number of Servings: 8
Required Equipment List: Slow cooker, cutting board, knife, measuring cups, measuring spoons
Cuisine Type: American
This Slow Cooker Chili is the ultimate comfort food for those chilly days when you crave something hearty and satisfying. Packed with beans, ground meat, and a rich blend of spices, this chili simmers slowly to develop deep, robust flavors. Simply throw all the ingredients into your slow cooker in the morning, and by dinner time, you'll have a delicious meal that warms you from the inside out.
Serve it with cornbread or over rice for a complete and filling dish. One of the best features of this recipe is its versatility. You can customize it with your favorite beans, add extra vegetables, or adjust the spice level to suit your taste. Whether you're feeding a crowd or meal prepping for the week, this Slow Cooker Chili is a fantastic choice that will keep everyone satisfied and coming back for more.
Plus, it's a great way to incorporate healthy ingredients into your diet without compromising on flavor.
Ingredients:
- 1 pound ground beef (or turkey)
- 1 can (15 oz) kidney beans, drained and rinsed
- 1 can (15 oz) black beans, drained and rinsed
- 1 can (15 oz) diced tomatoes with green chilies
- 1 can (6 oz) tomato paste
- 1 medium onion, diced
- 2 cloves garlic, minced
- 1 tablespoon chili powder
- 1 teaspoon cumin
- 1 teaspoon paprika
- 1/2 teaspoon salt
- 1/2 teaspoon black pepper
- 1 cup bell peppers, diced (optional)
- Shredded cheese and sour cream for serving (optional)
Instructions:
- In a skillet over medium heat, brown the ground beef (or turkey) until fully cooked, breaking it apart with a spatula as it cooks. Drain any excess fat, then transfer the meat to the slow cooker.
- Add the kidney beans, black beans, diced tomatoes with green chilies, tomato paste, diced onion, minced garlic, chili powder, cumin, paprika, salt, and black pepper to the slow cooker. If using, add the diced bell peppers as well.
- Stir all the ingredients together until well combined. Make sure the tomato paste is evenly distributed throughout the mixture to enhance the flavor of the chili.
- Cover the slow cooker with its lid and set it to cook on low for 6 hours. If you're short on time, you can cook it on high for 3 hours, but the flavors develop best with the longer cooking time.
- Once the cooking time is up, stir the chili and taste it to adjust the seasoning if necessary. Serve the chili hot, topped with shredded cheese and a dollop of sour cream if desired.
Extra Tips: For added depth of flavor, consider sautéing the onions and garlic in the skillet before adding them to the slow cooker. You can also experiment with different types of beans or add a splash of hot sauce for extra heat.
Leftovers store well in the refrigerator and can also be frozen for a quick meal later on. This chili tastes even better the next day, as the flavors continue to meld together!
Cheesy Broccoli Casserole

Title: Cheesy Broccoli Casserole
Prep Time: 15 minutes
Cook Time: 30 minutes
Number of Servings: 6
Required Equipment List: Baking dish, mixing bowl, saucepan, whisk, oven
Cuisine Type: American
Cheesy Broccoli Casserole is the ultimate comfort food that combines the nutritious benefits of broccoli with the indulgence of creamy cheese sauce and a crispy topping. This dish is perfect for chilly winter nights when you crave something warm and satisfying.
Its rich flavors and creamy texture make it a crowd-pleaser, whether as a side dish or a main course, and it's an excellent way to incorporate more vegetables into your meal.
This casserole isn't only delicious but also incredibly easy to prepare. With just a few simple ingredients, you can whip up a dish that's both hearty and wholesome.
The combination of tender broccoli, gooey cheese, and a crunchy topping creates a delightful contrast that will have everyone coming back for seconds. Plus, it's a great make-ahead option for busy weeknights or family gatherings.
Ingredients:
- 4 cups fresh broccoli florets
- 1 cup shredded cheddar cheese
- 1/2 cup cream of mushroom soup
- 1/2 cup sour cream
- 1/2 cup milk
- 1/2 teaspoon garlic powder
- 1/2 teaspoon onion powder
- 1 cup crushed crackers (like Ritz or saltines)
- 2 tablespoons melted butter
- Salt and pepper to taste
Instructions:
1. Preheat your oven to 350°F (175°C). Grease a baking dish with cooking spray or butter to prevent sticking. This will help guarantee that your casserole comes out easily once it's cooked.
2. In a large saucepan, bring water to a boil and add the broccoli florets. Blanch the broccoli for about 2-3 minutes until bright green and slightly tender. Drain and set aside to cool.
This process helps to preserve the vibrant color and flavor of the broccoli.
3. In a mixing bowl, combine the cream of mushroom soup, sour cream, milk, garlic powder, onion powder, salt, and pepper. Whisk until smooth.
This creamy mixture will become the base of your casserole and will bind all the ingredients together.
4. Add the blanched broccoli and half of the shredded cheddar cheese to the soup mixture. Stir gently to combine, ensuring that the broccoli is well-coated with the creamy sauce.
Then pour the mixture into the prepared baking dish, spreading it evenly.
5. In a separate bowl, mix the crushed crackers with melted butter until well combined. Sprinkle the buttery cracker mixture over the top of the casserole, followed by the remaining cheddar cheese.
This topping will create a deliciously crispy layer once baked.
6. Bake the casserole in the preheated oven for 25-30 minutes, or until the cheese is bubbly and the topping is golden brown. Keep an eye on it to prevent over-browning.
Once done, remove it from the oven and let it cool for a few minutes before serving.
Extra Tips: For an extra flavor boost, consider adding cooked chicken or ham to the casserole for a heartier meal.
You can also experiment with different types of cheese, such as mozzarella or gouda, for a unique twist. If you prefer a bit of heat, add a pinch of red pepper flakes to the creamy mixture.
This casserole can be made in advance and stored in the refrigerator, making it a convenient option for busy days. Enjoy your cheesy delight!
Baked Macaroni and Cheese

Title: Baked Macaroni and Cheese
Prep Time: 15 minutes
Cook Time: 30 minutes
Number of Servings: 6
Required Equipment List: Large pot, colander, baking dish, mixing bowl, whisk, oven
Cuisine Type: American
Baked Macaroni and Cheese is a classic comfort food that brings warmth and nostalgia to any table. With its creamy cheese sauce enveloping perfectly cooked pasta, this dish is a favorite among both kids and adults alike.
Baked to perfection, the top becomes golden and crispy while the inside remains rich and gooey, making it an ideal choice for family gatherings or a cozy night in. This recipe isn't only easy to prepare but also allows for customization with various cheeses and add-ins.
Whether you prefer sharp cheddar, creamy Gruyère, or even a sprinkle of crispy bacon, the possibilities are endless. Serve this dish alongside a fresh green salad or some roasted vegetables for a complete meal that's sure to satisfy.
Ingredients:
- 8 ounces elbow macaroni
- 2 tablespoons butter
- 2 tablespoons all-purpose flour
- 2 cups milk
- 2 cups shredded sharp cheddar cheese
- 1 cup shredded mozzarella cheese
- 1 teaspoon garlic powder
- 1 teaspoon onion powder
- Salt and pepper to taste
- 1/2 cup breadcrumbs (optional, for topping)
Instructions:
- Preheat your oven to 350°F (175°C). Bring a large pot of salted water to a boil and add the elbow macaroni. Cook according to package instructions until al dente, then drain in a colander and set aside.
- In the same pot, melt the butter over medium heat. Once melted, whisk in the flour and cook for about 1 minute until bubbly, creating a roux. Gradually pour in the milk while whisking continuously to prevent lumps from forming.
- Continue to cook the mixture, stirring frequently, until it thickens and begins to bubble. This should take about 5-7 minutes. Once thickened, add the garlic powder, onion powder, and salt and pepper to taste.
- Remove the pot from heat and stir in the shredded cheddar and mozzarella cheeses until fully melted and smooth. Combine the cooked macaroni with the cheese sauce, ensuring that all the pasta is well coated.
- Transfer the macaroni and cheese mixture into a greased baking dish. If desired, sprinkle breadcrumbs evenly over the top for an extra crunchy texture.
- Bake in the preheated oven for 20-25 minutes, or until the top is golden brown and bubbly. Allow it to cool for a few minutes before serving.
Extra Tips: For an even creamier mac and cheese, consider adding a splash of heavy cream to the cheese sauce. You can also experiment with different cheese blends for unique flavors—try adding some pepper jack for a bit of spice or Parmesan for a salty kick.
If you're feeling adventurous, mix in some cooked vegetables like broccoli or spinach for added nutrition. Serve hot and enjoy your homemade comfort food!
Shepherd's Pie
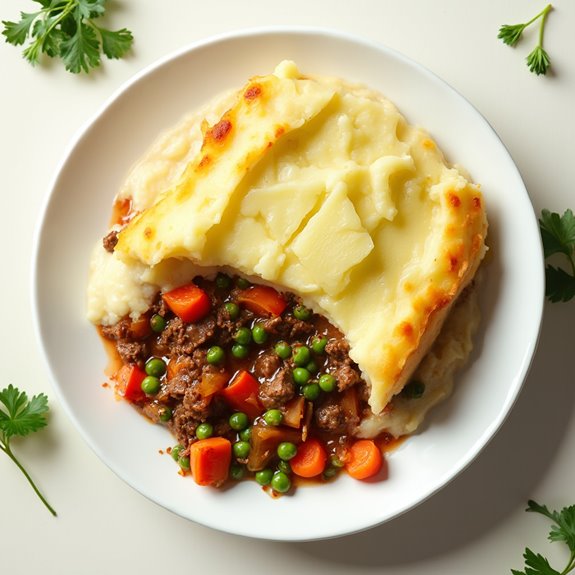
Title: Shepherd's Pie
Prep Time: 20 minutes
Cook Time: 45 minutes
Number of Servings: 6
Required Equipment List: Oven, large skillet, baking dish, spoon, measuring cups, mixing bowl
Cuisine Type: British
Shepherd's Pie is a classic comfort food that has been warming hearts and bellies for generations. This dish features a savory filling of ground lamb (or beef) mixed with vegetables and a rich gravy, all topped with a creamy layer of mashed potatoes. Baked until golden and bubbling, Shepherd's Pie isn't only delicious but also a hearty way to use up leftover meat and veggies, making it a practical choice for home cooks.
This delightful dish is perfect for chilly winter nights when you crave something hearty and satisfying. The combination of tender meat, flavorful vegetables, and fluffy mashed potatoes creates a well-balanced meal that's sure to please the entire family. Whether served on its own or with a side of crusty bread, Shepherd's Pie is a comforting reminder of home-cooked goodness that will leave you wanting more.
Ingredients:
- 1 pound ground lamb (or beef)
- 1 onion, chopped
- 2 carrots, diced
- 2 cloves garlic, minced
- 1 cup frozen peas
- 2 tablespoons tomato paste
- 1 tablespoon Worcestershire sauce
- 1 cup beef broth
- 4 cups mashed potatoes
- 1 tablespoon olive oil
- Salt and pepper to taste
- Fresh parsley (for garnish, optional)
Instructions:
- Preheat your oven to 400°F (200°C). In a large skillet over medium heat, add olive oil and sauté the chopped onion and diced carrots until they begin to soften, about 5 minutes. Add minced garlic and cook for an additional minute until fragrant.
- Increase the heat to medium-high and add the ground lamb (or beef) to the skillet. Cook until the meat is browned, breaking it apart with a spoon as it cooks. Drain any excess fat if necessary.
- Stir in the tomato paste, Worcestershire sauce, and beef broth. Bring the mixture to a gentle simmer, then add in the frozen peas. Season with salt and pepper to taste. Let the filling cook for about 5-7 minutes, allowing the flavors to meld together.
- Transfer the meat and vegetable mixture into a baking dish, spreading it out evenly. Carefully spoon the mashed potatoes over the top, smoothing it out with a spatula to create an even layer. You can also use a fork to create a decorative pattern on the surface.
- Bake the Shepherd's Pie in the preheated oven for 25-30 minutes or until the top is golden brown and the filling is bubbling around the edges. If you like a crispier top, you can broil it for an additional 2-3 minutes but watch it closely to avoid burning.
- Once cooked, remove the dish from the oven and let it cool for a few minutes. Garnish with fresh parsley if desired, then serve warm and enjoy your homemade Shepherd's Pie!
Extra Tips: For a creamier topping, consider mixing a little cream or butter into your mashed potatoes before spreading them over the filling. You can also customize your Shepherd's Pie by adding other vegetables like corn or green beans to the filling.
If you want to make the dish ahead of time, you can prepare the filling and mashed potatoes separately, then assemble and bake when ready to serve. This dish also freezes well, making it a great option for meal prep!
Vegetarian Lasagna
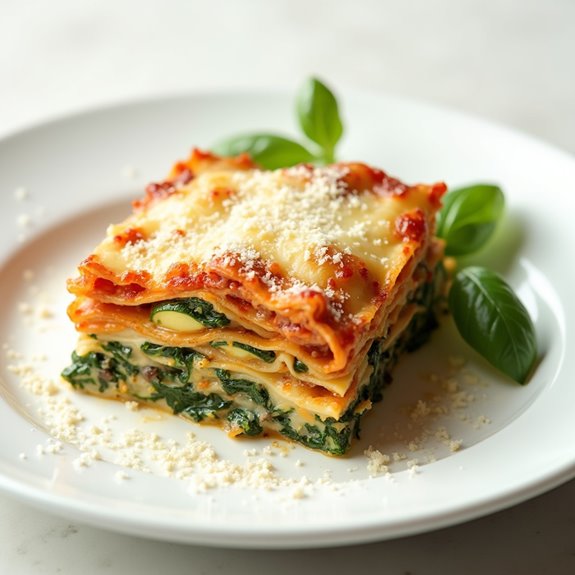
Title: Vegetarian Lasagna
Prep Time: 30 minutes
Cook Time: 45 minutes
Number of Servings: 6
Required Equipment List: 9×13 inch baking dish, saucepan, mixing bowl, oven, aluminum foil
Cuisine Type: Italian
This Vegetarian Lasagna is a comforting and hearty dish that brings together layers of creamy ricotta, fresh vegetables, and rich marinara sauce, all baked to perfection. It's a fantastic option for both vegetarians and meat-lovers alike, offering a satisfying meal that can be enjoyed any time of year.
The combination of textures from the gooey cheese, tender noodles, and vibrant veggies makes each bite a delightful experience. What sets this lasagna apart is its generous filling of sautéed spinach, mushrooms, and zucchini, which not only add flavor but also boost the nutritional value of the dish.
Easily adaptable, you can swap in your favorite vegetables or add in some herbs to customize it to your taste. This Vegetarian Lasagna is perfect for family dinners, meal prep, or even for impressing guests at your next gathering.
Ingredients:
- 9 lasagna noodles
- 2 cups marinara sauce
- 1 cup ricotta cheese
- 2 cups shredded mozzarella cheese
- 1 cup grated Parmesan cheese
- 2 cups fresh spinach, chopped
- 1 cup mushrooms, sliced
- 1 medium zucchini, sliced
- 1 tablespoon olive oil
- 1 teaspoon dried oregano
- Salt and pepper to taste
Instructions:
- Preheat your oven to 375°F (190°C). Bring a large pot of salted water to a boil and cook the lasagna noodles according to package instructions until al dente. Drain and set aside.
- In a large skillet, heat the olive oil over medium heat. Add the sliced mushrooms and zucchini, cooking for about 5-7 minutes until softened. Stir in the chopped spinach and cook until wilted.
- Season the mixture with oregano, salt, and pepper to taste, then remove from heat.
- In a mixing bowl, combine the ricotta cheese with half of the grated Parmesan cheese. Stir until well combined and set aside.
- In a 9×13 inch baking dish, spread a thin layer of marinara sauce on the bottom. Layer 3 lasagna noodles on top, followed by half of the ricotta mixture, half of the sautéed vegetables, and a third of the mozzarella cheese.
- Repeat the layers, finishing with the remaining noodles on top and covering with the remaining marinara sauce, mozzarella, and Parmesan cheese.
- Cover the baking dish with aluminum foil and bake in the preheated oven for 25 minutes. After 25 minutes, remove the foil and bake for an additional 15-20 minutes, or until the cheese is bubbly and golden brown.
- Once baked, remove the lasagna from the oven and let it cool for about 10 minutes before slicing and serving. This resting period will help the layers set and make for easier serving.
Extra Tips: For added flavor, consider mixing some fresh herbs, such as basil or parsley, into the ricotta cheese. If you want to make it even heartier, feel free to add layers of cooked lentils or beans for extra protein.
Leftover lasagna can be stored in the refrigerator for up to 3 days, making it a great option for meal prep or quick lunches. Enjoy your delicious vegetarian comfort food!
Stuffed Bell Peppers

Title: Stuffed Bell Peppers
Prep Time: 15 minutes
Cook Time: 30 minutes
Number of Servings: 4
Required Equipment List: Baking dish, mixing bowl, knife, cutting board, oven
Cuisine Type: American
Stuffed bell peppers are a hearty, flavorful dish that brings warmth and comfort during the chilly winter months. This recipe features vibrant bell peppers filled with a savory mixture of ground meat, rice, and spices, making it a complete meal in one colorful package. The combination of flavors melds beautifully as the peppers roast, resulting in a dish that's both comforting and visually appealing.
This versatile recipe can easily be customized to suit your taste preferences. You can opt for ground beef, turkey, or even a vegetarian option using beans or lentils. The addition of different herbs and spices allows you to experiment with flavors, making these stuffed bell peppers a go-to recipe for any occasion. Serve them with a side salad or some crusty bread for a satisfying meal that the whole family will enjoy.
Ingredients:
- 4 large bell peppers (any color)
- 1 pound ground meat (beef, turkey, or chicken)
- 1 cup cooked rice
- 1 small onion, diced
- 2 cloves garlic, minced
- 1 can (14.5 oz) diced tomatoes, drained
- 1 teaspoon Italian seasoning
- Salt and pepper to taste
- 1 cup shredded cheese (cheddar or mozzarella)
- Olive oil for cooking
Instructions:
- Preheat your oven to 375°F (190°C). While the oven heats up, prepare the bell peppers by cutting the tops off and removing the seeds and membranes. Lightly brush the outside of the peppers with olive oil and place them upright in a baking dish.
- In a large skillet over medium heat, add a drizzle of olive oil and sauté the diced onion and minced garlic until they're fragrant and translucent, about 3-4 minutes. Then, add the ground meat to the skillet, breaking it up with a spoon, and cook until browned and fully cooked through.
- Once the meat is cooked, stir in the cooked rice, drained diced tomatoes, Italian seasoning, salt, and pepper. Mix everything together until well combined and heated through. Remove the skillet from the heat.
- Carefully spoon the meat and rice mixture into each bell pepper until they're filled to the top. Press down gently to make sure the filling is packed in. Once filled, sprinkle shredded cheese over the top of each pepper.
- Cover the baking dish with aluminum foil and bake in the preheated oven for 25 minutes. After 25 minutes, remove the foil and bake for an additional 5-10 minutes, or until the cheese is melted and bubbly.
- After baking, let the stuffed peppers cool for a few minutes before serving. Enjoy them warm as a complete meal or as a delightful side dish.
Extra Tips: To enhance the flavor of your stuffed peppers, consider adding some chopped fresh herbs like parsley or basil to the filling before baking. For a bit of heat, you can include diced jalapeños or a sprinkle of crushed red pepper flakes.
If you have leftover filling, it can be used as a topping for baked potatoes or mixed into a salad for a tasty lunch option. Enjoy your stuffed bell peppers with a drizzle of hot sauce or a dollop of sour cream for extra richness!
Homemade Chicken Pot Pie

Title: Homemade Chicken Pot Pie
Prep Time: 30 minutes
Cook Time: 45 minutes
Number of Servings: 6
Required Equipment List: Oven, large skillet, mixing bowl, rolling pin, pie dish, knife, cutting board
Cuisine Type: American
Homemade Chicken Pot Pie is the quintessential comfort food that warms the soul during chilly winter evenings. This dish features a savory filling of tender chicken and a medley of vegetables enveloped in a creamy sauce, all encased in a flaky, golden crust. It's a delightful way to use leftover chicken or rotisserie chicken, and the homemade crust adds an extra touch of love to this classic recipe.
Each bite is a perfect balance of flavors and textures, making it a family favorite. The beauty of Chicken Pot Pie lies in its versatility; you can customize the filling with your favorite vegetables or even add herbs for an aromatic twist. While preparing the pie may seem intimidating at first, this recipe breaks down the steps to make it manageable and enjoyable.
Once you take that first slice and see the delicious filling oozing out, you'll know that the effort was worth it. Serve this dish with a simple side salad, and you have a complete meal that will please everyone at the table.
Ingredients:
- 2 cups cooked chicken, shredded
- 1 cup carrots, diced
- 1 cup peas
- 1 cup potatoes, diced
- 1/2 cup onion, chopped
- 1/3 cup butter
- 1/3 cup all-purpose flour
- 1 3/4 cups chicken broth
- 2/3 cup milk
- 1 teaspoon salt
- 1/2 teaspoon black pepper
- 1 teaspoon thyme
- 1 teaspoon garlic powder
- 1 package refrigerated pie crusts (or homemade crust)
Instructions:
- Preheat your oven to 425°F (220°C). In a large skillet over medium heat, melt the butter and sauté the chopped onion until translucent. Add the diced carrots and potatoes, cooking for about 5-7 minutes until they begin to soften.
- Stir in the flour, salt, pepper, thyme, and garlic powder, mixing well to coat the vegetables. Gradually pour in the chicken broth and milk, stirring continuously until the mixture thickens and becomes bubbly. Add the shredded chicken and peas, mixing until everything is well combined. Remove from heat and let it cool slightly.
- Roll out one pie crust and fit it into a 9-inch pie dish. Pour the chicken and vegetable filling into the pie crust, spreading it evenly. Roll out the second pie crust and place it over the filling. Seal and flute the edges, then cut a few slits in the top crust to allow steam to escape.
- Bake the pot pie in the preheated oven for 30-35 minutes or until the crust is golden brown. Check the pie halfway through; if the edges brown too quickly, cover them with foil.
- Once baked, remove the pie from the oven and let it cool for about 10 minutes before slicing. This will help the filling set and make for easier serving.
Extra Tips: For an extra layer of flavor, consider adding a splash of white wine to the filling while it simmers. You can also mix in different vegetables like corn or green beans based on what you have on hand.
If you prefer a homemade crust, use a basic pie dough recipe, allowing it to chill before rolling out. This Chicken Pot Pie is best enjoyed fresh, but leftovers can be stored in the refrigerator for up to 3 days—just reheat before serving. Enjoy your delicious creation!
Classic Meatloaf
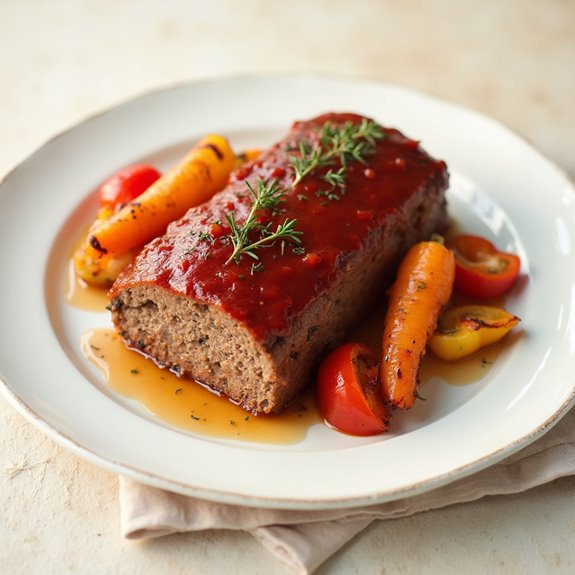
Title: Classic Meatloaf
Prep Time: 15 minutes
Cook Time: 60 minutes
Number of Servings: 6
Required Equipment List: Loaf pan, mixing bowl, measuring cups, measuring spoons, oven
Cuisine Type: American
Classic Meatloaf is a beloved comfort food that brings warmth and nostalgia to the dinner table. This hearty dish is perfect for family gatherings or cozy weeknight meals, featuring a delicious blend of ground beef, breadcrumbs, and aromatic seasonings. The savory flavor is enhanced by a tangy glaze, giving it a delightful finish that contrasts beautifully with the tender meat inside.
This recipe isn't only easy to prepare but also allows for customization with your favorite spices and ingredients. What makes this meatloaf a classic is its simplicity and the way it embodies home-cooked goodness. It's an excellent way to use pantry staples, and the leftovers make for delicious sandwiches the next day.
With its comforting aroma wafting through your kitchen, this meatloaf will surely become a family favorite that warms the heart and satisfies the appetite.
Ingredients:
- 1 ½ pounds ground beef
- 1 cup breadcrumbs
- 1 small onion, finely chopped
- 2 cloves garlic, minced
- 1 large egg
- 1 cup milk
- 2 tablespoons Worcestershire sauce
- 1 teaspoon salt
- ½ teaspoon black pepper
- 1 teaspoon dried thyme
- ½ cup ketchup (for glaze)
- 2 tablespoons brown sugar (for glaze)
- 1 tablespoon mustard (for glaze)
Instructions:
- Preheat your oven to 350°F (175°C) and lightly grease a loaf pan. This will guarantee that your meatloaf cooks evenly and is easy to remove once it's done baking.
- In a large mixing bowl, combine the ground beef, breadcrumbs, chopped onion, minced garlic, egg, milk, Worcestershire sauce, salt, black pepper, and dried thyme. Mix everything together gently with your hands or a spoon until just combined, being careful not to overmix, as this can make the meatloaf tough.
- Transfer the meat mixture into the prepared loaf pan and shape it into a loaf. Smooth the top and make sure it's even on all sides. This will help it cook evenly and maintain its shape during baking.
- In a separate small bowl, mix together the ketchup, brown sugar, and mustard to create the glaze. Spread half of the glaze over the top of the meatloaf, reserving the other half for later.
- Bake the meatloaf in the preheated oven for 50 minutes. After this time, remove it from the oven and spread the remaining glaze over the top. Return the meatloaf to the oven and bake for an additional 10 minutes, or until the internal temperature reaches 160°F (70°C).
- Once cooked, remove the meatloaf from the oven and let it rest for about 10 minutes before slicing. This resting time allows the juices to redistribute, keeping the meatloaf moist and flavorful.
Extra Tips: For added flavor, consider incorporating chopped bell peppers or diced carrots into the meat mixture. You can also experiment with different types of ground meat, such as turkey or pork, for a lighter version.
To keep your meatloaf from drying out, cover it with aluminum foil during the first half of the baking process, and remove it during the last 20 minutes for a nice glaze. Enjoy your comforting meatloaf with mashed potatoes or a fresh side salad!
Stovetop Stuffing
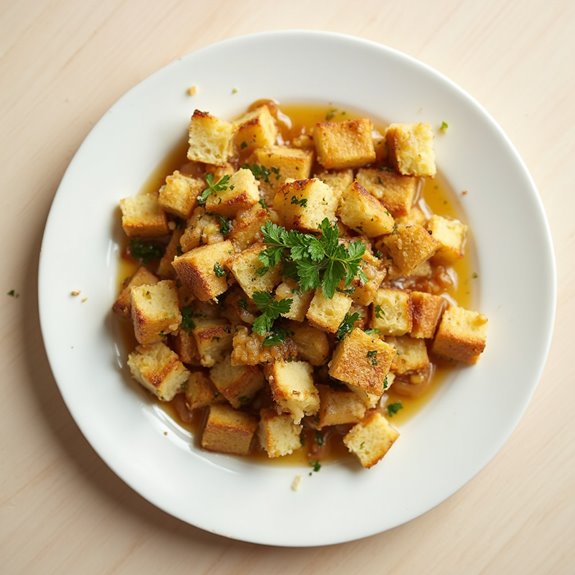
Title: Savory Stovetop Stuffing
Prep Time: 10 minutes
Cook Time: 15 minutes
Number of Servings: 6
Required Equipment List: Medium saucepan, mixing spoon, measuring cups, measuring spoons
Cuisine Type: American
Savory Stovetop Stuffing is a comforting and flavorful dish that makes a perfect accompaniment to any holiday meal or family gathering. This recipe brings together a medley of herbs, vegetables, and bread to create a savory stuffing that absorbs all the delicious flavors of the broth.
It's simple, quick to prepare, and can easily be customized with your favorite add-ins, making it a versatile choice for any occasion. This stovetop stuffing is made using store-bought bread cubes, which cuts down on prep time while still delivering a homemade taste.
The combination of sautéed onions, celery, and a blend of aromatic herbs guarantees that each bite is bursting with flavor. Whether you serve it alongside turkey, chicken, or as a stand-alone side, this stuffing will surely be a crowd-pleaser.
Ingredients:
- 1 package (12 ounces) bread stuffing mix
- 1/2 cup unsalted butter
- 1 cup onion, chopped
- 1 cup celery, chopped
- 2 cups chicken or vegetable broth
- 1 teaspoon dried sage
- 1 teaspoon dried thyme
- Salt and pepper to taste
- Fresh parsley for garnish (optional)
Instructions:
- In a medium saucepan, melt the unsalted butter over medium heat. Once melted, add the chopped onions and celery to the pan. Sauté for about 5-7 minutes, or until the vegetables are softened and the onions become translucent.
- Stir in the dried sage, thyme, salt, and pepper, allowing the spices to bloom for about a minute before adding the broth. Pour in the chicken or vegetable broth and bring the mixture to a gentle boil.
- Once boiling, remove the saucepan from heat and add the bread stuffing mix to the pot. Stir everything together until the bread is evenly moistened with the broth and vegetable mixture.
- Cover the saucepan with a lid and let it sit for about 5 minutes. This resting period allows the bread to absorb the flavors and moisture, creating a fluffy texture.
- After resting, fluff the stuffing with a fork to separate the bread cubes. If desired, garnish with freshly chopped parsley before serving to add a pop of color and freshness.
Extra Tips: For added depth of flavor, consider incorporating additional ingredients such as diced apples, cranberries, or chopped nuts into the stuffing mix.
You can also experiment with different types of bread, like sourdough or whole wheat, to enhance the texture and flavor. If you prefer a bit of crunch, toast the bread cubes in the oven for a few minutes before mixing them with the broth. Enjoy your delicious stovetop stuffing as a hearty side dish!
Sweet Potato Casserole
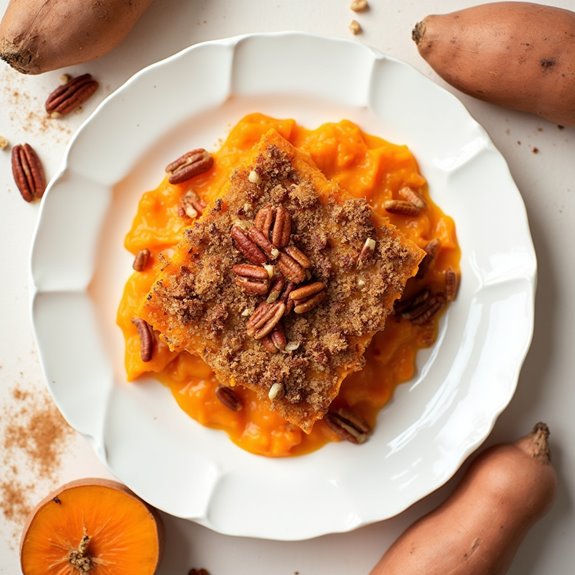
Title: Sweet Potato Casserole
Prep Time: 20 minutes
Cook Time: 30 minutes
Number of Servings: 8
Required Equipment List: 9×13 inch baking dish, mixing bowl, potato masher, oven
Cuisine Type: American
Sweet Potato Casserole is a classic comfort food that brings warmth and nostalgia to any winter gathering. Creamy, mashed sweet potatoes are sweetened with brown sugar and spiced with cinnamon and nutmeg, creating a rich, velvety texture that's simply irresistible.
Topped with a crunchy pecan streusel, this dish isn't only visually appealing but also offers a delightful contrast in textures that will have everyone coming back for seconds. This dish is perfect for holiday feasts, family dinners, or any occasion where you want to impress your guests with a homemade treat.
The sweet, earthy flavor of the sweet potatoes combined with the buttery, crunchy topping creates a harmonious balance that complements savory main dishes beautifully. Plus, it can be prepared ahead of time, making it a convenient option for busy cooks during the festive season.
Ingredients:
- 4 large sweet potatoes, peeled and cubed
- 1/2 cup brown sugar
- 1/4 cup milk
- 1/4 cup butter, melted
- 1 teaspoon vanilla extract
- 1/2 teaspoon cinnamon
- 1/4 teaspoon nutmeg
- 1/4 teaspoon salt
- 1 cup pecans, chopped
- 1/2 cup granulated sugar
- 1/4 cup all-purpose flour
Instructions:
- Preheat your oven to 350°F (175°C). Begin by bringing a large pot of salted water to a boil. Add the cubed sweet potatoes and cook until they're tender, about 15-20 minutes. Drain and let them cool slightly.
- In a mixing bowl, mash the cooked sweet potatoes until smooth. Add the brown sugar, milk, melted butter, vanilla extract, cinnamon, nutmeg, and salt. Mix until well combined and creamy. Spread the sweet potato mixture evenly into a greased 9×13 inch baking dish.
- In a separate bowl, prepare the pecan topping by combining the chopped pecans, granulated sugar, and flour. Drizzle in a little melted butter and mix until the mixture is crumbly. Sprinkle the pecan topping evenly over the sweet potato mixture in the baking dish.
- Bake in the preheated oven for 25-30 minutes, or until the topping is golden brown and the casserole is heated through. If the topping browns too quickly, cover it loosely with aluminum foil to prevent burning.
- Once baked, remove the casserole from the oven and let it cool for a few minutes before serving. This allows the flavors to meld together and makes it easier to scoop out portions.
Extra Tips: For added flavor, consider mixing in some mini marshmallows with the pecan topping for a sweet twist. You can also experiment with spices by adding ginger or allspice to the sweet potato mixture. If you're short on time, you can microwave the sweet potatoes instead of boiling them.
This Sweet Potato Casserole is sure to be a hit at any gathering, and leftovers (if there are any!) can be easily reheated for a delicious treat the next day. Enjoy!
Spaghetti Carbonara
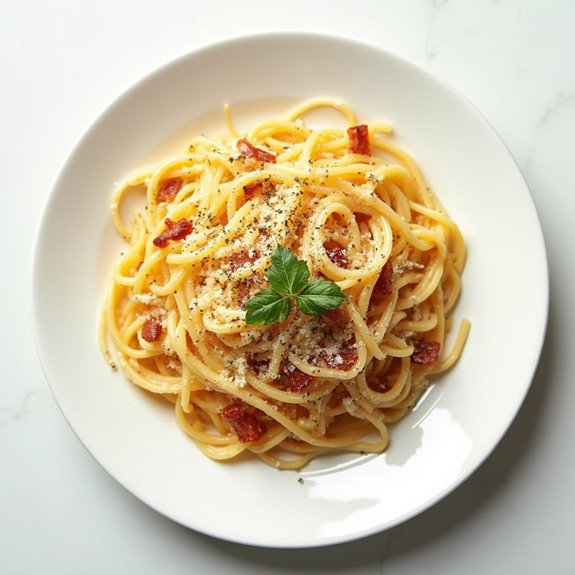
Title: Spaghetti Carbonara
Prep Time: 10 minutes
Cook Time: 20 minutes
Number of Servings: 4
Required Equipment List: Large pot, skillet, whisk, mixing bowl, pasta strainer
Cuisine Type: Italian
Spaghetti Carbonara is a classic Italian dish that embodies comfort with its creamy texture and rich flavors. This dish is traditionally made with just a few simple ingredients, showcasing the beauty of Italian cooking, where quality matters more than complexity.
The combination of crispy pancetta, al dente spaghetti, and a luscious sauce made from eggs and cheese creates a dish that's both indulgent and satisfying, perfect for a cozy dinner at home.
What makes Carbonara particularly special is the technique used to create the sauce, which relies on the heat of the freshly cooked pasta to cook the eggs and melt the cheese, resulting in a silky sauce that clings to each strand of spaghetti.
This recipe isn't only quick to prepare but also offers a deliciously authentic taste of Italy that you can enjoy any night of the week.
Ingredients:
- 12 ounces spaghetti
- 4 ounces pancetta or guanciale, diced
- 2 large eggs
- 1 cup grated Pecorino Romano cheese
- 2 cloves garlic, minced
- Salt and black pepper to taste
- Fresh parsley, chopped (for garnish, optional)
Instructions:
- In a large pot, bring salted water to a boil and cook the spaghetti according to package instructions until al dente. Reserve about 1 cup of the pasta water before draining the spaghetti.
- While the pasta is cooking, heat a skillet over medium heat and add the diced pancetta or guanciale. Cook until crispy, about 4-5 minutes. Add the minced garlic and sauté for an additional minute until fragrant. Remove from heat and set aside.
- In a mixing bowl, whisk together the eggs and grated Pecorino Romano cheese until well combined. Season with a pinch of salt and a generous amount of black pepper.
- Once the spaghetti is cooked and drained, add it directly to the skillet with the pancetta and garlic. Toss to combine, allowing the residual heat to slightly cool the pasta.
- Quickly pour the egg and cheese mixture over the pasta, tossing vigorously to create a creamy sauce. If the sauce is too thick, add a little reserved pasta water, a tablespoon at a time, until the desired consistency is reached.
- Serve the spaghetti carbonara immediately, garnished with additional cheese, black pepper, and chopped parsley if desired.
Extra Tips: For an authentic flavor, use guanciale instead of pancetta if you can find it, as it adds a unique richness to the dish.
Be sure to work quickly when combining the pasta with the egg mixture to prevent the eggs from scrambling. It's also important to reserve some pasta water, as it helps to achieve the perfect sauce consistency.
Enjoy your delicious homemade Carbonara with a simple green salad or some crusty bread for a complete meal!
Pumpkin Risotto

Title: Pumpkin Risotto
Prep Time: 10 minutes
Cook Time: 30 minutes
Number of Servings: 4
Required Equipment List: Medium saucepan, stirring spoon, measuring cups, measuring spoons, ladle
Cuisine Type: Italian
Pumpkin Risotto is a warm, comforting dish that embodies the essence of fall with its rich flavors and creamy texture. The combination of Arborio rice slowly cooked in vegetable broth, combined with pureed pumpkin, creates a luxurious risotto that's both satisfying and nourishing.
Enhanced with aromatic spices and finished with a sprinkle of Parmesan, this dish is perfect for chilly evenings or festive gatherings. This recipe isn't only delicious but also versatile as you can easily adjust the flavors to your liking.
Whether you prefer a hint of nutmeg or a touch of sage, the base of pumpkin and creamy rice allows for endless customization. Serve it as a main course or as a side dish alongside roasted meats for a complete meal that celebrates the bounty of the harvest season.
Ingredients:
- 1 cup Arborio rice
- 4 cups vegetable broth
- 1 cup pureed pumpkin (canned or fresh)
- 1 small onion, finely chopped
- 2 cloves garlic, minced
- 1/2 cup white wine (optional)
- 1/2 cup grated Parmesan cheese
- 2 tablespoons olive oil
- 1 teaspoon dried thyme
- Salt and pepper to taste
- Fresh parsley, chopped (for garnish)
Instructions:
- In a medium saucepan, heat the vegetable broth over medium heat until it simmers. Keep it warm on low heat as you prepare the risotto.
- In another large saucepan, heat the olive oil over medium heat. Add the chopped onion and sauté until it becomes translucent, about 5 minutes. Stir in the minced garlic and cook for an additional minute until fragrant.
- Add the Arborio rice to the onion and garlic mixture, stirring continuously for about 2-3 minutes until the rice is lightly toasted and coated in oil.
- If using, pour in the white wine and stir until it's mostly absorbed by the rice. This will add depth to the flavor of your risotto.
- Begin adding the warm vegetable broth to the rice one ladleful at a time, stirring frequently. Wait until the liquid is mostly absorbed before adding the next ladleful. Continue this process for about 20 minutes, or until the rice is creamy and al dente.
- Once the rice is cooked, stir in the pureed pumpkin, grated Parmesan cheese, dried thyme, and season with salt and pepper to taste. Mix well until everything is heated through and creamy.
- Remove the risotto from heat and let it rest for a minute before serving. Garnish with fresh chopped parsley for an added touch of color and freshness.
Extra Tips: To enhance the flavor of your Pumpkin Risotto, consider adding a pinch of nutmeg or cinnamon for warmth. If you prefer a creamier texture, you can stir in a tablespoon of butter right before serving.
This dish pairs beautifully with a side salad or crusty bread, making it perfect for a cozy dinner at home. Enjoy the comforting taste of autumn with this hearty and flavorful risotto!
Bread Pudding
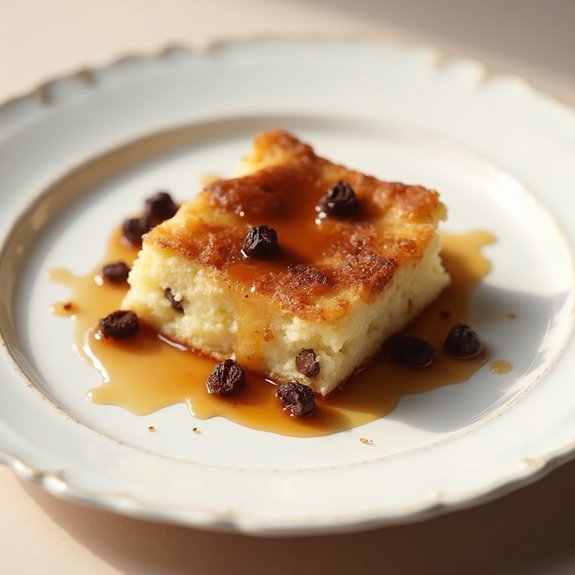
Title: Bread Pudding
Prep Time: 15 minutes
Cook Time: 45 minutes
Number of Servings: 6
Required Equipment List: 9×13 inch baking dish, mixing bowl, whisk, oven
Cuisine Type: American
Bread pudding is a classic comfort food dessert that combines stale bread with a rich, custardy mixture to create a warm and satisfying dish perfect for chilly days. This recipe takes simple ingredients such as bread, eggs, milk, and sugar and elevates them with the addition of spices and optional mix-ins like raisins or chocolate chips, ensuring every bite is full of flavor.
With its soft texture and golden-brown top, this bread pudding is sure to be a hit at your next gathering or family dinner. Not only is bread pudding delicious, but it's also a fantastic way to use up leftover bread, making it an economical choice.
The beauty of this dessert lies in its versatility; you can customize it with your favorite flavors, whether that's a hint of vanilla, a sprinkle of cinnamon, or even a splash of bourbon for an adult twist. Serve it warm with a drizzle of cream or a scoop of vanilla ice cream for an indulgent treat that everyone will love.
Ingredients:
- 6 cups day-old bread, cubed
- 4 large eggs
- 2 cups milk
- 1 cup granulated sugar
- 1 teaspoon vanilla extract
- 1 teaspoon ground cinnamon
- 1/2 teaspoon salt
- 1 cup raisins or chocolate chips (optional)
- 2 tablespoons butter, melted (for greasing)
Instructions:
- Preheat your oven to 350°F (175°C). Grease a 9×13 inch baking dish with melted butter to prevent the bread pudding from sticking.
- In a large mixing bowl, whisk together the eggs, milk, sugar, vanilla extract, ground cinnamon, and salt until well combined. This custard mixture will give the bread pudding its rich flavor and texture.
- Add the cubed bread to the egg mixture, gently folding it in until all the bread is soaked. If you're using raisins or chocolate chips, fold them into the mixture at this stage.
- Pour the soaked bread mixture into the prepared baking dish, spreading it evenly. Use a spatula to press down any bread pieces that aren't submerged in the custard for even cooking.
- Bake the bread pudding in the preheated oven for 40-45 minutes or until the top is golden brown and a knife inserted in the center comes out clean. The baking time may vary depending on your oven, so keep an eye on it towards the end.
- Once baked, remove the bread pudding from the oven and let it cool for about 10 minutes before serving. This will allow it to set up a bit, making it easier to slice.
Extra Tips: To enhance the flavors of your bread pudding, consider adding a splash of bourbon or rum to the custard mixture for an adult version. You can also experiment with different types of bread, such as brioche or challah, for a richer taste.
If you want to make it extra indulgent, serve the bread pudding with a drizzle of warm caramel sauce or a dusting of powdered sugar on top. Enjoy this comforting dessert with family and friends!
Hot Chocolate Bar
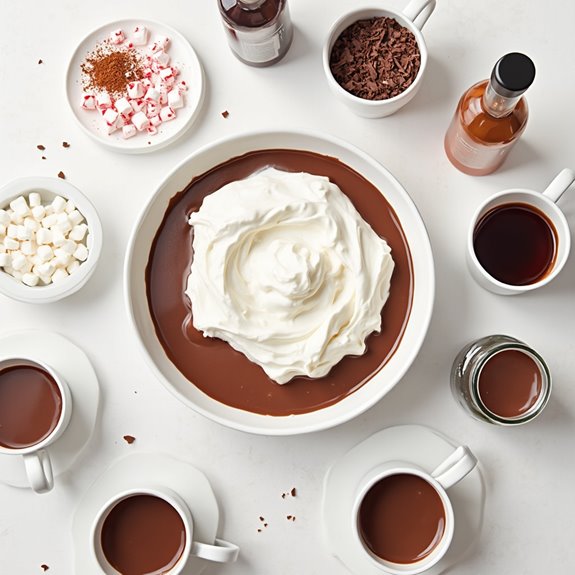
Title: Hot Chocolate Bar
Prep Time: 10 minutes
Cook Time: 15 minutes
Number of Servings: 8
Required Equipment List: Large pot, whisk, measuring cups, mugs, various toppings containers
Cuisine Type: American
Creating a Hot Chocolate Bar is a fun and interactive way to enjoy the classic winter beverage with family and friends. This recipe provides a rich and creamy base for hot chocolate that can be customized with a variety of delicious toppings, allowing everyone to create their own perfect cup.
Whether you're hosting a cozy gathering or simply indulging on a chilly evening, this hot chocolate bar is sure to warm hearts and fill bellies.
The beauty of a hot chocolate bar lies in its versatility. With a selection of toppings like whipped cream, marshmallows, and flavored syrups, guests can craft their own unique hot chocolate creations. This recipe not only provides a delightful drink but also encourages creativity and interaction, making it a perfect addition to holiday parties or winter celebrations.
Ingredients:
- 4 cups milk (whole or your choice)
- 1 cup heavy cream
- 1 cup semi-sweet chocolate chips
- 1/2 cup unsweetened cocoa powder
- 1/2 cup sugar
- 1 teaspoon vanilla extract
- 1/4 teaspoon salt
- Whipped cream (for topping)
- Mini marshmallows (for topping)
- Crushed peppermint (for topping)
- Chocolate shavings (for topping)
- Flavored syrups (e.g., caramel, hazelnut)
- Cinnamon or nutmeg (for garnish)
Instructions:
- In a large pot over medium heat, combine the milk and heavy cream. Stir gently until the mixture is warm but not boiling, about 5 minutes. Be careful not to let it scorch on the bottom.
- Once the milk mixture is warm, whisk in the semi-sweet chocolate chips, cocoa powder, sugar, vanilla extract, and salt. Continue to whisk until the chocolate is fully melted and the mixture is smooth and creamy, about 5-7 minutes.
- Taste the hot chocolate and adjust the sweetness if desired by adding more sugar to your liking. Keep the pot on low heat to maintain warmth while you set up your hot chocolate bar.
- Prepare a table or counter space for your hot chocolate bar. Set out mugs and containers filled with various toppings, such as whipped cream, mini marshmallows, crushed peppermint, chocolate shavings, and flavored syrups.
- To serve, ladle the hot chocolate into mugs and let guests customize their drinks with their choice of toppings. A sprinkle of cinnamon or nutmeg makes for a lovely finishing touch.
Extra Tips: For a richer flavor, consider using a mix of different types of chocolate, such as dark chocolate or white chocolate, in your hot chocolate base.
You can also make this drink ahead of time and reheat it gently before serving. If you want to add a little extra flair, try setting up a themed hot chocolate bar for different holidays, like a peppermint hot chocolate bar for Christmas or a s'mores hot chocolate bar for summer gatherings. Enjoy your delicious creations!
Apple Crisp
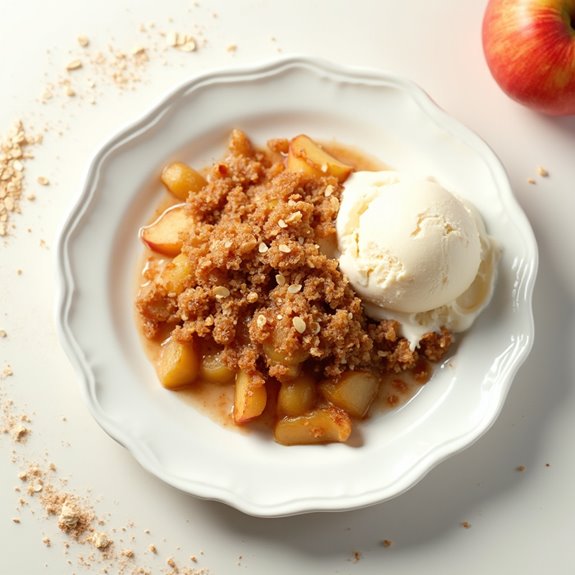
Title: Apple Crisp
Prep Time: 20 minutes
Cook Time: 45 minutes
Number of Servings: 8
Required Equipment List: Oven, baking dish, mixing bowl, knife, cutting board, measuring cups, measuring spoons
Cuisine Type: American
Apple Crisp is a quintessential comfort food that perfectly captures the essence of fall. This warm, gooey dessert features tender, cinnamon-spiced apples topped with a buttery, crumbly oat mixture that turns golden brown in the oven. The combination of sweet and tart apples creates a delightful contrast, while the crisp topping adds a satisfying crunch.
Whether served warm with a scoop of vanilla ice cream or enjoyed on its own, this classic dish is sure to warm your heart and satisfy your sweet tooth. The beauty of apple crisp lies in its simplicity and versatility. You can use a variety of apples, such as Granny Smith for tartness or Honeycrisp for sweetness, depending on your preference.
It's an excellent way to use up apples from your orchard or farmer's market visit. This dish is perfect for gatherings, holiday celebrations, or cozy family dinners, making it a go-to recipe that everyone will love.
Ingredients:
- 6 cups peeled and sliced apples (such as Granny Smith or Honeycrisp)
- 1 cup granulated sugar
- 1 tablespoon lemon juice
- 1 teaspoon ground cinnamon
- 1 cup rolled oats
- 1 cup all-purpose flour
- 1/2 cup brown sugar, packed
- 1/2 cup unsalted butter, melted
- 1/4 teaspoon salt
Instructions:
- Preheat your oven to 350°F (175°C). Grease a 9×13-inch baking dish with butter or non-stick spray to prevent the apple crisp from sticking.
- In a mixing bowl, combine the sliced apples, granulated sugar, lemon juice, and ground cinnamon. Toss everything together until the apples are well coated. Spread the apple mixture evenly in the prepared baking dish.
- In another bowl, combine the rolled oats, flour, brown sugar, melted butter, and salt. Stir until the ingredients are fully mixed and crumbly. This mixture will form the crisp topping that will enhance the apples' flavor.
- Evenly sprinkle the oat topping over the apple mixture in the baking dish, making sure to cover all the apples. This will help create a deliciously crunchy layer on top as it bakes.
- Bake in the preheated oven for 40-45 minutes, or until the apples are tender and the topping is golden brown and crisp. Keep an eye on it to avoid burning the topping.
- Once baked, remove the apple crisp from the oven and let it cool for a few minutes before serving. This allows the juices to settle and makes it easier to scoop.
Extra Tips: For a twist on the classic recipe, consider adding chopped nuts (such as pecans or walnuts) to the oat topping for added crunch and flavor. You can also experiment with spices, like nutmeg or ginger, for a different flavor profile.
Serving the apple crisp with vanilla ice cream or whipped cream can elevate the dessert to new heights and provide a delightful contrast to the warm, spiced apples. Enjoy your delicious creation!
Gingerbread Cookies

Title: Gingerbread Cookies
Prep Time: 20 minutes
Cook Time: 10 minutes
Number of Servings: 24 cookies
Required Equipment List: Mixing bowl, measuring cups, measuring spoons, rolling pin, cookie cutters, baking sheet, parchment paper
Cuisine Type: American
Gingerbread cookies are a beloved holiday treat that fill your home with the warm and inviting scents of ginger, cinnamon, and nutmeg. This classic recipe creates soft, flavorful cookies that are perfect for decorating or enjoying on their own. The combination of molasses and spices gives these cookies their distinctive taste, making them a delightful addition to any festive gathering or a cozy winter afternoon.
Not only are these cookies delicious, but they also offer a fun opportunity for creativity, especially when it comes to decorating. Use royal icing, colored sugar, or candy decorations to bring your gingerbread creations to life. Whether you're baking them for holiday gifting, as a family activity, or simply to satisfy your sweet tooth, these gingerbread cookies are sure to become a cherished tradition.
Ingredients:
- 3 cups all-purpose flour
- 1 teaspoon baking soda
- 2 teaspoons ground ginger
- 1 teaspoon ground cinnamon
- 1/2 teaspoon ground nutmeg
- 1/2 teaspoon salt
- 1/2 cup unsalted butter, softened
- 1/2 cup brown sugar, packed
- 1/2 cup molasses
- 1 egg
Instructions:
- In a mixing bowl, whisk together the flour, baking soda, ginger, cinnamon, nutmeg, and salt. This will guarantee that all the dry ingredients are well combined and evenly distributed before incorporating them into the wet ingredients.
- In a separate bowl, cream the softened butter and brown sugar together until light and fluffy. This process helps to incorporate air into the mixture, resulting in a softer cookie texture. Add the molasses and the egg, mixing until well combined.
- Gradually add the dry ingredient mixture to the wet ingredients, stirring until a smooth dough forms. If the dough is too sticky, you can add a little more flour until it reaches a workable consistency.
- Divide the dough into two halves, flatten each into a disc, wrap in plastic wrap, and refrigerate for at least 1 hour. Chilling the dough makes it easier to roll out and helps the cookies maintain their shape during baking.
- Preheat your oven to 350°F (175°C) and line baking sheets with parchment paper. On a lightly floured surface, roll out one disc of dough to about 1/4 inch thick. Use cookie cutters to cut out shapes and place them on the prepared baking sheets, leaving space between each cookie.
- Bake the cookies in the preheated oven for 8-10 minutes, or until the edges are firm but the centers are still soft. Allow them to cool on the baking sheet for a few minutes before transferring to a wire rack to cool completely.
Extra Tips: To enhance the flavor of your gingerbread cookies, consider adding a teaspoon of vanilla extract to the wet ingredients. If you prefer a spicier cookie, feel free to increase the amount of ginger or cinnamon. For decorating, royal icing works wonderfully, and you can get creative with sprinkles or edible glitter to make your cookies festive and fun. Enjoy your baking and happy holidays!
Peppermint Bark

Title: Peppermint Bark
Prep Time: 15 minutes
Cook Time: 10 minutes
Number of Servings: 16
Required Equipment List: Baking sheet, parchment paper, microwave-safe bowl, spatula, whisk
Cuisine Type: American
Peppermint Bark is a festive holiday treat that combines the rich flavors of chocolate with the invigorating taste of peppermint. This easy-to-make confection is perfect for sharing during the winter months, whether as a gift, a party favor, or a delightful addition to your holiday dessert table.
The layers of dark and white chocolate create a beautiful contrast, while the crushed peppermint candies add a delightful crunch and burst of flavor that will leave you wanting more. This recipe isn't only simple but also allows for some creativity. You can experiment with different types of chocolate or add more peppermint flavor by adjusting the amount of crushed candies.
This Peppermint Bark is sure to become a beloved holiday tradition in your home, as it's both visually stunning and deliciously satisfying.
Ingredients:
- 8 ounces dark chocolate, chopped
- 8 ounces white chocolate, chopped
- 1 teaspoon peppermint extract
- 1/2 cup crushed peppermint candies (plus extra for topping)
Instructions:
- Begin by lining a baking sheet with parchment paper. This will prevent the chocolate from sticking and make it easy to lift the bark once it's set. Set the prepared baking sheet aside while you melt the chocolate.
- In a microwave-safe bowl, combine the chopped dark chocolate and heat in the microwave in 30-second intervals, stirring in between, until fully melted and smooth. Be cautious not to overheat the chocolate, as it can burn easily.
- Once melted, pour the dark chocolate onto the prepared baking sheet and spread it into an even layer using a spatula. Place the baking sheet in the refrigerator for about 10 minutes to allow the dark chocolate to set.
- While the dark chocolate is setting, melt the white chocolate using the same method as before. Once fully melted, stir in the peppermint extract for an invigorating flavor boost.
- Remove the baking sheet from the refrigerator and pour the melted white chocolate over the set dark chocolate layer. Use a spatula to spread it evenly, creating a smooth top layer. Immediately sprinkle the crushed peppermint candies over the white chocolate before it sets.
- Return the baking sheet to the refrigerator for an additional 30 minutes or until the bark is completely hardened. Once set, break the bark into pieces of desired size and store in an airtight container.
Extra Tips: For an added touch, consider drizzling some melted dark or white chocolate over the top before sprinkling the crushed candies. This will create a beautiful marbled effect.
You can also experiment by adding different toppings such as chopped nuts or dried fruit for a unique variation. Store the Peppermint Bark in a cool place or in the refrigerator to keep it from melting, and enjoy this delightful treat throughout the holiday season!
Mulled Wine

Title: Mulled Wine
Prep Time: 10 minutes
Cook Time: 30 minutes
Number of Servings: 6
Required Equipment List: Medium saucepan, wooden spoon, measuring cups, heatproof mugs
Cuisine Type: European
Mulled Wine is a warm, spiced beverage that embodies the cozy spirit of winter. Traditionally enjoyed during the holiday season, this aromatic drink combines red wine with a medley of spices like cinnamon, cloves, and nutmeg, along with the sweetness of citrus fruits.
The gentle simmering of these ingredients releases their flavors, creating a fragrant and comforting drink that's perfect for gatherings or a cozy night in. This recipe is incredibly versatile, allowing you to adjust the sweetness and spices to suit your taste.
Whether you're hosting a holiday party or simply want to enjoy a comforting drink after a long day, Mulled Wine is sure to warm you up and set the perfect ambiance. With minimal effort and ingredients, you can create this delightful beverage that will have everyone asking for the recipe.
Ingredients:
- 1 bottle (750ml) red wine
- 1 orange, sliced
- 1 lemon, sliced
- 1/4 cup honey or sugar (adjust to taste)
- 3 cinnamon sticks
- 5 whole cloves
- 2 star anise
- 1/4 teaspoon grated nutmeg
- Optional: 1/4 cup brandy (for an extra kick)
Instructions:
- In a medium saucepan, combine the red wine, sliced orange, sliced lemon, honey or sugar, and all the spices: cinnamon sticks, cloves, star anise, and grated nutmeg. Stir gently to combine.
- Place the saucepan over medium heat and slowly bring the mixture to a simmer. Avoid boiling, as this will evaporate the alcohol and alter the flavors.
- Once the mixture is simmering, reduce the heat to low and let it steep for about 20-30 minutes. This allows the flavors to meld together beautifully.
- After steeping, taste the mulled wine and adjust the sweetness if necessary, adding more honey or sugar as desired. If using brandy, stir it in at this stage for an added depth of flavor.
- Strain the mulled wine through a fine-mesh sieve into heatproof mugs to remove the spices and fruit slices.
- Serve warm, garnished with additional orange or lemon slices, and enjoy the comforting warmth of your homemade Mulled Wine.
Extra Tips: For a unique twist, consider adding other spices such as ginger or cardamom to the mix. You can also customize the sweetness by using different types of sweeteners, like maple syrup or agave nectar.
If you're looking for a non-alcoholic version, replace the wine with a mix of grape juice and sparkling water for a festive mocktail. Enjoy your cozy evening with this delightful drink!
Conclusion
So, whether you're stirring up a pot of classic chicken noodle soup or baking gingerbread cookies, remember that "the way to a person's heart is through their stomach." These winter comfort food recipes aren't just about filling your belly; they're about sharing warmth and joy with loved ones. As you cozy up with these delicious dishes, think about the memories you're creating. What will you whip up first? Let's make this winter one to remember!

